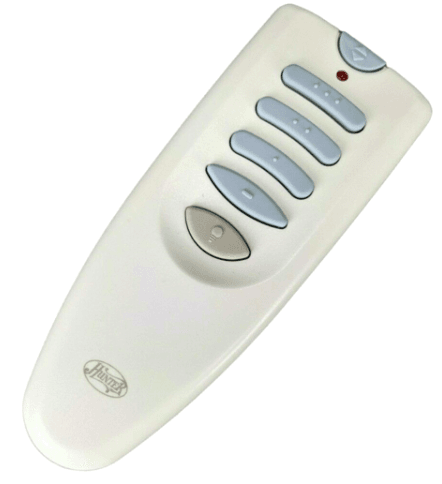
Hunter 85095 RF Integrated Ceiling Fan Remote Control
Setting The Code
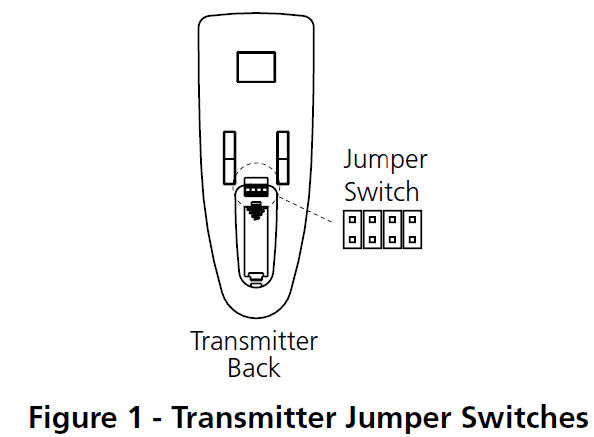
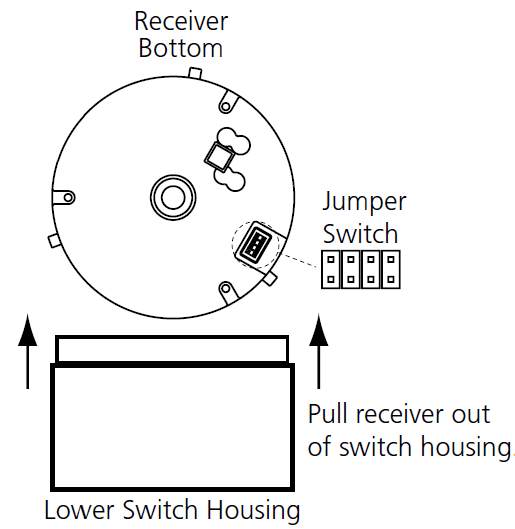
- When two or more fans are located near each other, you may desire to have each of them set to a different code, so that the operation of one fan will not affect another. This is accomplished by changing the position of any one or more of a group of 3 jumpers grouped together in the transmitter. The receiver located in the switch housing has the same set of 3 jumpers which must also be changed to match the transmitter settings.
- These jumpers are very small and can best be operated by using a small pair of pliers or tweezers. In the transmitter, the jumpers are readily accessible from the battery compartment. The switches in the receiver are located at the bottom of the receiver device in the switch housing. See Figures 1 and 2. To set the jumpers in the receiver, remove the receiver from the switch housing and set the jumpers in the same positions as the jumpers in the transmitter. See Figure 2.
Replace the receiver, making sure the mounting holes at the top of the switch housing line up with the matching slots in the top of the receiver.

Assembling The Switch Housing
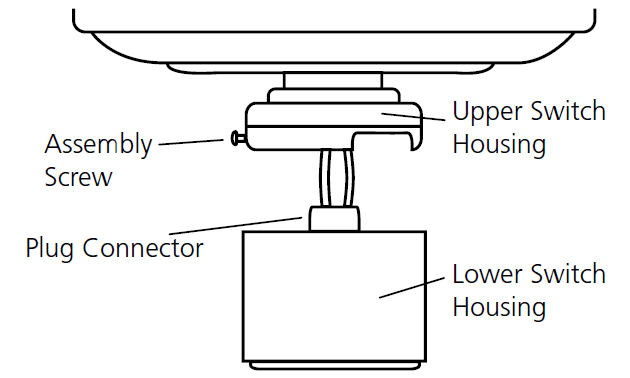
- Assemble the lower switch housing to the upper housing. See Figure 3. First, insert the plug from the upper housing into the plug receptacle in the receiver module.
- NOTE: The plug is polarized and will only go together one way. Make sure you have correctly aligned the plug and receptacle. Next, line up the lower switch housing with the upper housing and assemble with the (3) screws and lock washers provided. See Figure 3.

- If the two pieces are difficult to assemble, check the alignment of the (3) slots in the top of the receiver module and the mounting holes in the lower switch housing. They should align together. Tighten the (3) assembly screws.
- CAUTION: Make sure the screws are snug, otherwise the assembly could separate during operation.
Mounting the Remote Holder
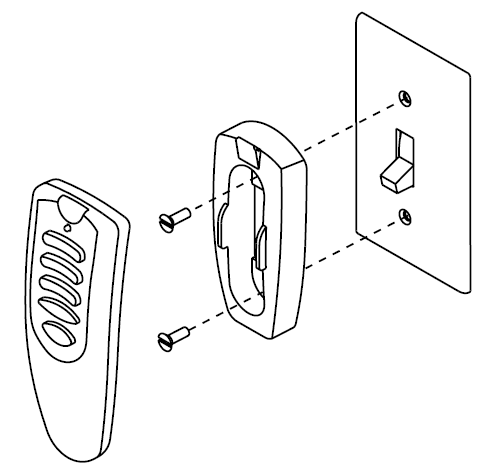
- A holder is supplied with the transmitter which can be mounted to an existing toggle switch wall plate. The holder will help prevent misplacement of your transmitter by providing a permanent receptacle. See Figure 4. If desired, the holder can be mounted to a convenient location on a wall.

Operating The Remote Control
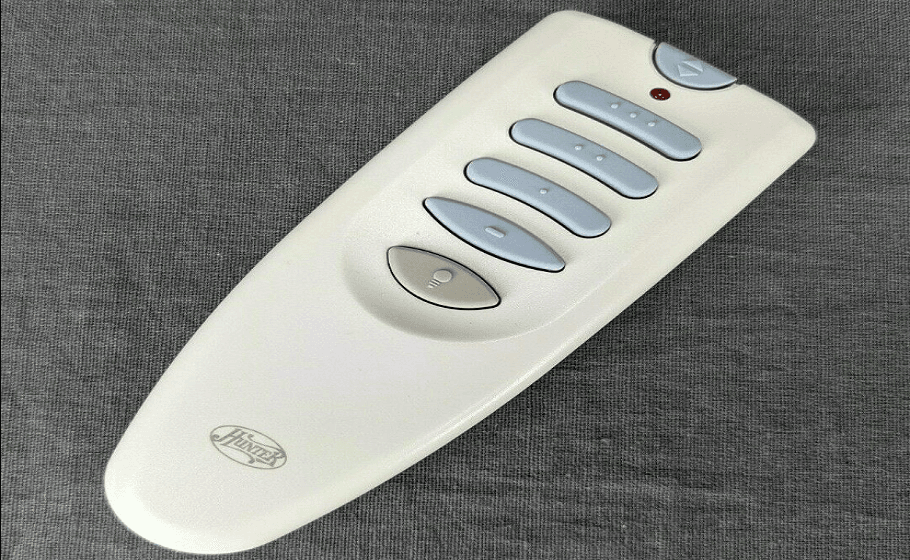
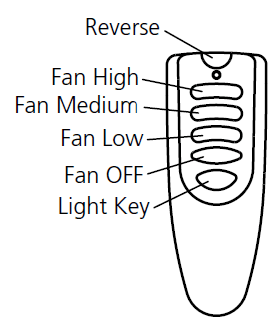
- The hand-held transmitter has individual buttons for control of the light, for controlling the fan speeds, for turning the fan off, and for reversing. See Figure 5.
- Pressing the “LIGHT” button will turn the light on to full brightness. Holding the button will cause the light to dim slowly—release the button at the desired brightness to hold the selected brightness level. Pushing the button again will turn the light off.
- The fan may be started by pressing the HIGH, MEDIUM, or LOW speed buttons. For best operation, allow the fan to start on HIGH, then select the desired speed. Press the fan OFF button to turn the ceiling fan off. Press the REVERSE button to change the fan’s direction while the fan is running.

- NOTE: Replace the 12-volt battery with type 23 A, MN-21, or equivalent. You have completed the installation of the integrated remote control. Refer back to the “Installing Light Fixture” section in the Installation / Owner’s manual provided with your Hunter fan for proper instructions
Troubleshooting
| Symptom | Possible Causes | Solution |
| 1. No functions operate. | Main Power not restored. | Replace fuse. Turn ON the circuit breaker. Turn ON the wall switch. |
| The transmitter and receiver jumper switches do not match. | Set the transmitter and receiver to the same jumper switch setting. | |
| The battery is too weak. | Replace with a new, alkaline battery. | |
| 2. Operates only at close range. | The battery is too weak. | Replace with a new, alkaline battery. |
| 3. Inconsistent operation. | RF interference. | Turn OFF the wall switch for 5 seconds, then turn it back ON. |
| Continuing RF interference. | Change jumper switch settings to a different code in both the Transmitter and Receiver. | |
| 4. Fan will not reverse. | The fan is not running. | Select a fan speed button to start the fan, then press the reverse button. |
For more manuals by Hunter visit, ManualsLibraryy
Hunter 85095 RF Integrated Ceiling Fan Remote Control-FAQs
Can a Hunter fan work without a remote?
Yes, Hunter fans with pull chains can operate without a remote. They are also compatible with a handheld remote or a wall control switch for added convenience.
Can I control my Hunter fan with my phone?
Yes! By creating an account on the SIMPLEconnect app and pairing it with your fan, you can use your phone to control fan speed, on/off functions, and light dimming, whether you’re home or away.
How do I change the settings on my ceiling fan?
Most ceiling fans have a direction switch on the side of the fan base. Adjusting this setting helps control airflow for better cooling in summer and heat circulation in winter, saving on energy costs.
How do I pair my ceiling fan with a remote?
1. Turn off the power to the fan using the wall switch for 5-10 seconds, then turn it back on.
2. Within 3 minutes, press and release the PAIR button on the back of the remote.
3. If previously unpaired, the remote and fan should now sync.
How do I reset my ceiling fan remote?
Press and hold the reset button on the remote for 5-10 seconds to complete the reset process.
How does a remote-controlled ceiling fan work?
A remote-controlled ceiling fan uses a transmitter and receiver system. The remote sends signals to the receiver inside the fan, controlling functions like speed, direction, and lighting.
Can I make a ceiling light remote-controlled?
Yes! You can install a battery-powered puck light or a remote-compatible fixture. Attach it to the ceiling with adhesive or mounting hardware, ensuring the sensor faces the remote for easy operation.
Can a ceiling fan run without a wall switch?
Yes, a ceiling fan can operate without a wall switch by connecting directly to a power source. In this setup, you would use the pull chains or a remote control to turn the fan and light on or off.

