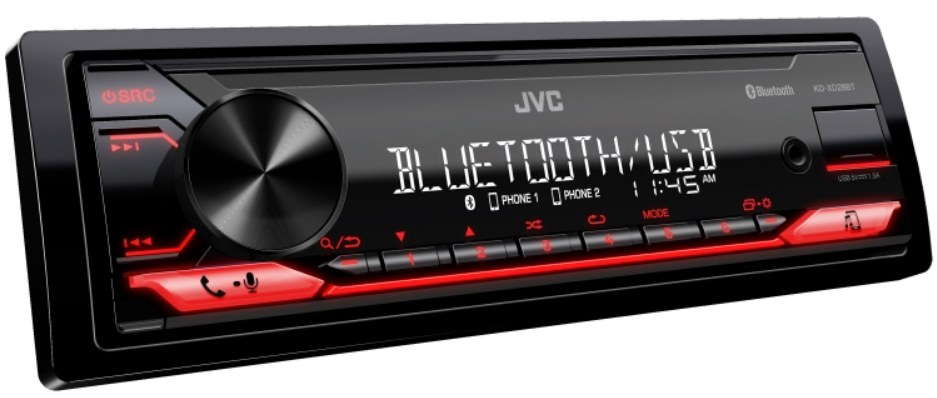
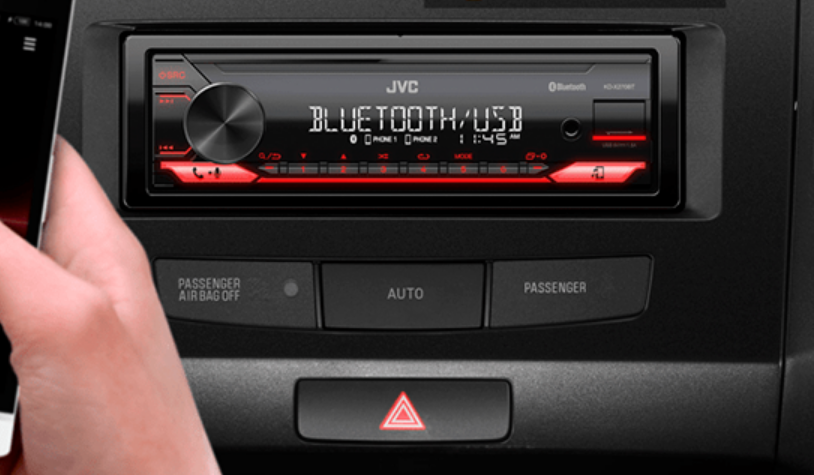
JVC KD-S28 CD Receiver
How to attach/detach the control panel
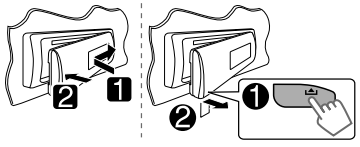
How to reset your unit
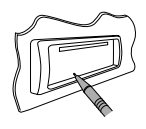
How to forcibly eject a disc

- Be careful not to drop the disc when it ejects.
- If this does not work, reset your unit.
Maintenance
Cleaning the unit
Wipe off the dirt on the panel with a dry silicone or a soft cloth. Failure to observe this precaution may result in damage to the unit.
Cleaning the connector
Wipe off dirt on the connector of the unit and the panel. Use a cotton swab or cloth.
Canceling the display demonstration
Display demonstration will be activated automatically if no operation is done for about 20 seconds.
- Turn on the power.


- Select Demo off


- Finish the procedure.

Setting the clock
- Turn on the power


- Select Clock

- Select Clock set

- Adjust the hour.

- Adjust the minute.

- Finish the procedure.

Preparing the remote controller
When you use the remote controller for the first time, pull out the insulation sheet. If the effectiveness of the remote controller decreases, replace the battery.
Replacing the lithium coin battery
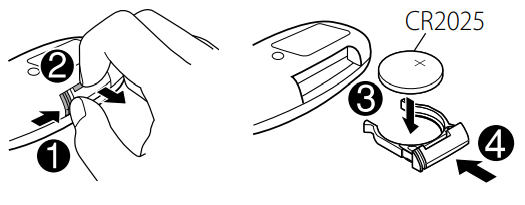
Warning (to prevent accidents and damage):
- Do not install any battery other than CR2025 or its equivalent.
- Do not leave the remote controller in a place (such as the dashboard) exposed to direct sunlight for a long time.
- Store the battery in a place where children cannot reach.
- Do not recharge, short, disassemble, heat the battery, or dispose of it in a fire.
- Do not leave the battery with other metallic materials.
- Do not poke the battery with tweezers or similar tools.
- Wrap the battery with tape and insulate it when throwing away or saving it.
About discs
This unit can only play the CDs with: 
Discs that cannot be used:
- Discs that are not round.
- Discs with coloring on the recording surface or discs that are dirty.
- You cannot play a Recordable/ReWritable disc that has not been finalized. (For the finalization process, refer to your disc writing software and your disc recorder instruction manual.)
- A 3-inch CD cannot be used. Attempting to insert using an adapter can cause a malfunction
Handling discs:
- Do not touch the recording surface of the disc.
- Do not stick tape, etc., on the disc, or use a disc with tape stuck on it.
- Do not use any accessories for the disc.
- Clean from the center of the disc and move outward.
- Clean the disc with a dry silicon or soft cloth. Do not use any solvents.
- When removing discs from this unit, pull them out horizontally.
- Remove the rims from the center hole and disc edge before inserting a disc
Basic operations
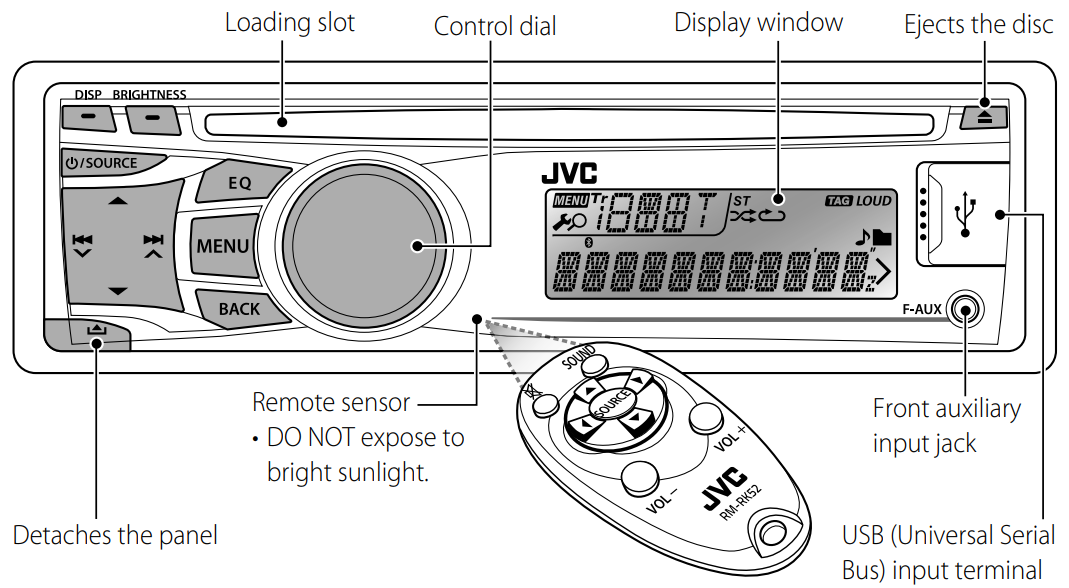
When you press or hold the following button(s)…
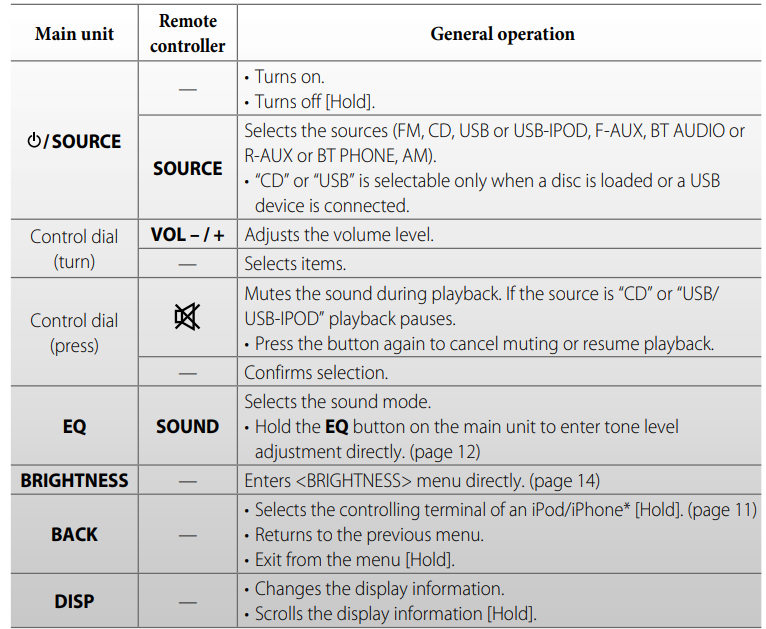
Listening to the radio

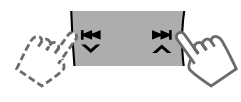
- [Press] Searches for stations automatically.
- [Hold] Searches for stations manually. “M” flashes, then press the button repeatedly.
Improving the FM reception
Automatic presetting (FM)— SSM (Strong-station Sequential Memory)
You can preset up to 18 stations for FM. While listening to a station…

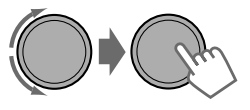
 SSM” flashes and local stations with the strongest signal are searched and stored automatically.
Manual presetting (FM/AM)
You can preset up to 18 stations for FM and 6 stations for AM.
Selecting a preset station
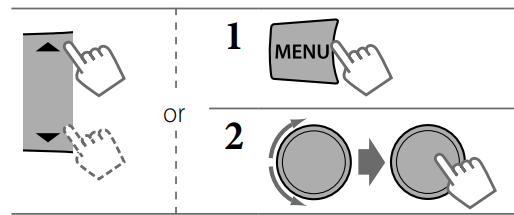
Changing the display information

Listening to a disc
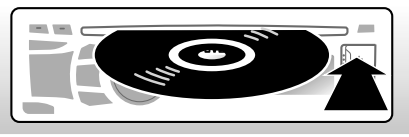
Playback starts automatically. All tracks will be played repeatedly until you change the source or eject the disc.
Stopping playback and ejecting the disc
 If the ejected disc is not removed within 15 seconds, it is automatically inserted into the loading slot
Basic operations
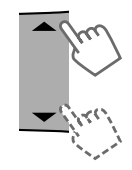
Select the folder of the MP3/WMA.

[Press] Selects track. [Hold] Fast-forward or reverse the track.
Connecting the other external components
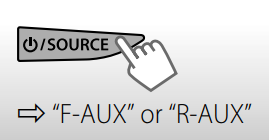
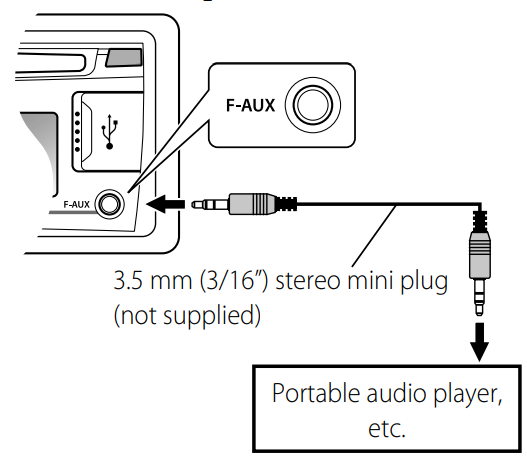
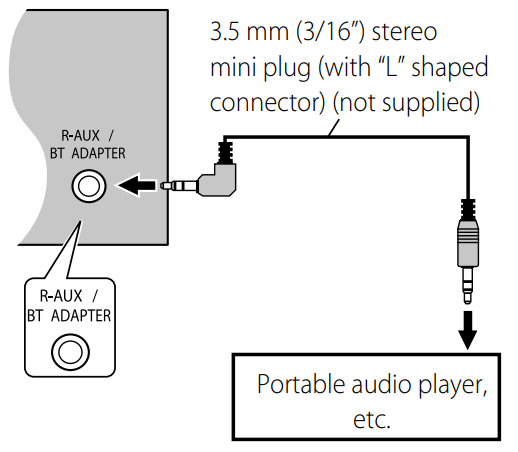
You can connect an external component to the auxiliary input jack on the control panel (F-AUX) and/or on the rear side of the unit (R-AUX). Summary of using the external components through the auxiliary input jacks:

On the control panel (F-AUX):
On the rear panel (R-AUX):
Listening to the other external components

- Turn on the connected component and start playing the source.
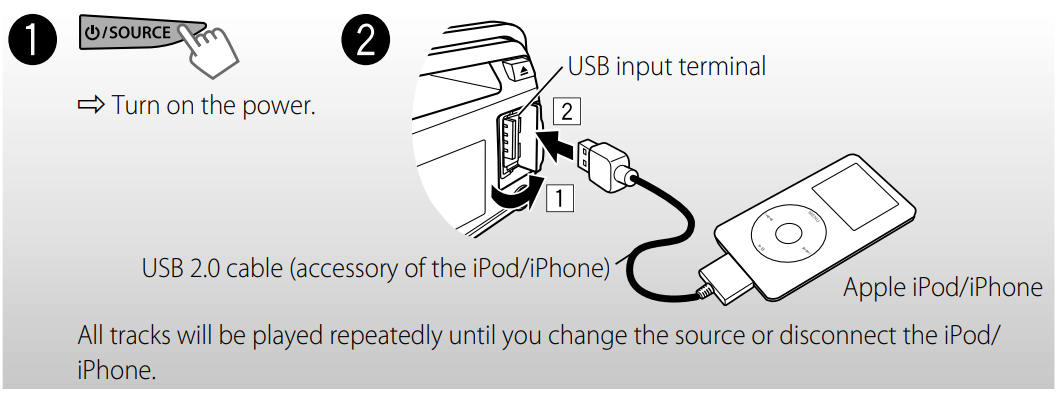
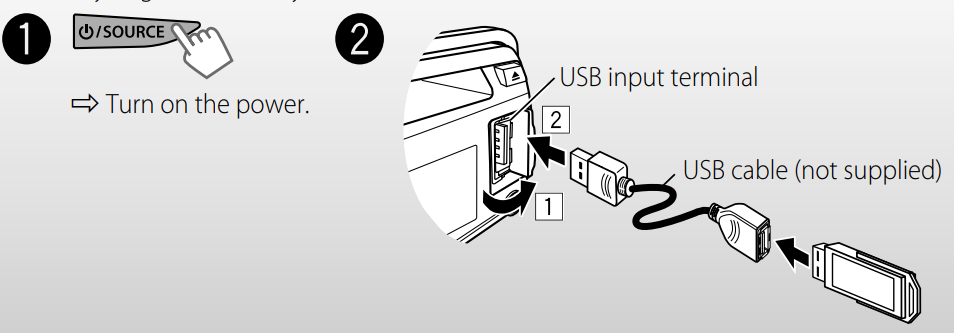
Listening to a USB device
You can operate the USB device in the same way you operate files on a disc. (page 8)
- This unit can play MP3/WMA files stored in a USB mass storage class device (such as a USB memory, Digital Audio Player, etc.).
Cautions:
- Make sure all important data has been backed up.
- You cannot connect a computer or portable HDD to the USB input terminal of the unit.
- Avoid using the USB device if it might hinder your driving safety.
- Electrostatic shock at connecting a USB device may cause abnormal playback of the device. In this case, disconnect the USB device, then reset this unit and the USB device.
- Do not leave a USB device in the car, exposed to direct sunlight or high temperatures, to avoid deformation or damage to the device.
- This unit may not play back files from a USB
device properly when using a USB extension
cord. - USB devices equipped with special functions, such as data security functions, cannot be used with the unit.
- When connecting a USB cable, use the USB 2.0 cable.
- Do not use a USB device with 2 or more partitions.
- Depending on the shape of the USB devices and connection ports, some USB devices may not be attached properly, or the connection might be loose.
- This unit cannot recognize a USB device whose rating is other than 5 V and exceeds 500 mA.
- Do not pull out and attach the USB device repeatedly while “READING” is shown on the display.
- This unit may not recognize a memory card inserted into the USB card reader.
- Connect only one USB device to the unit at a time. Do not use a USB hub.
- Operation and power supply may not work as intended for some USB devices.
- The maximum number of characters for:
- – Folder names: 63 characters
- – File names: 63 characters
- – MP3 Tag: 60 characters
- – WMA Tag: 60 characters
- This unit can recognize a total of 65,025 files,
255 folders (255 files per folder, including folders without unsupported files), and 8 hierarchies.
Listening to an iPod/iPhone
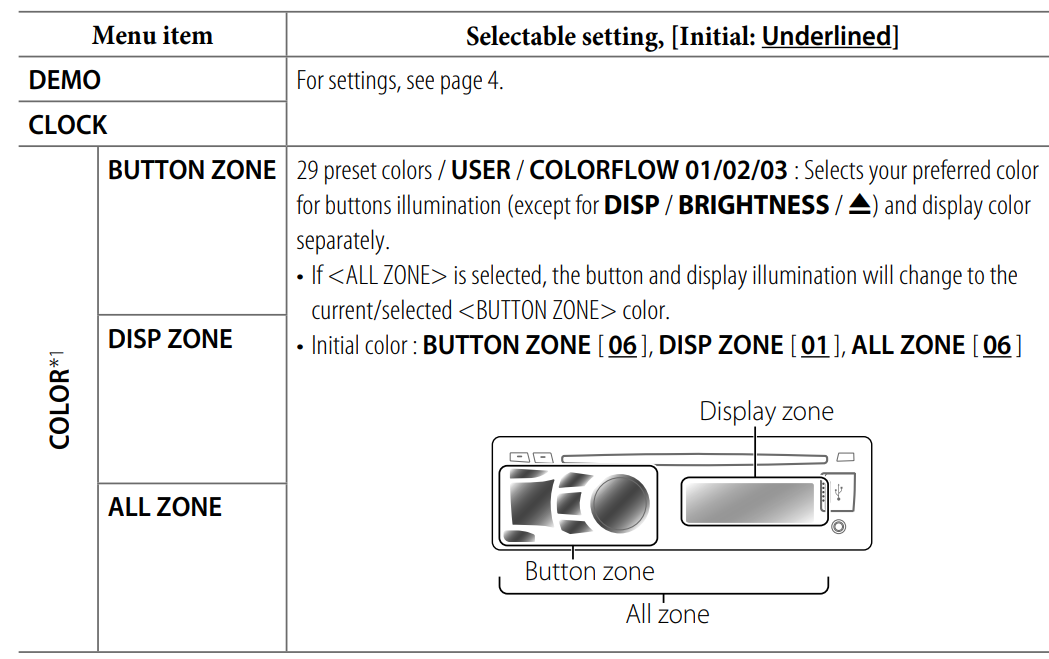
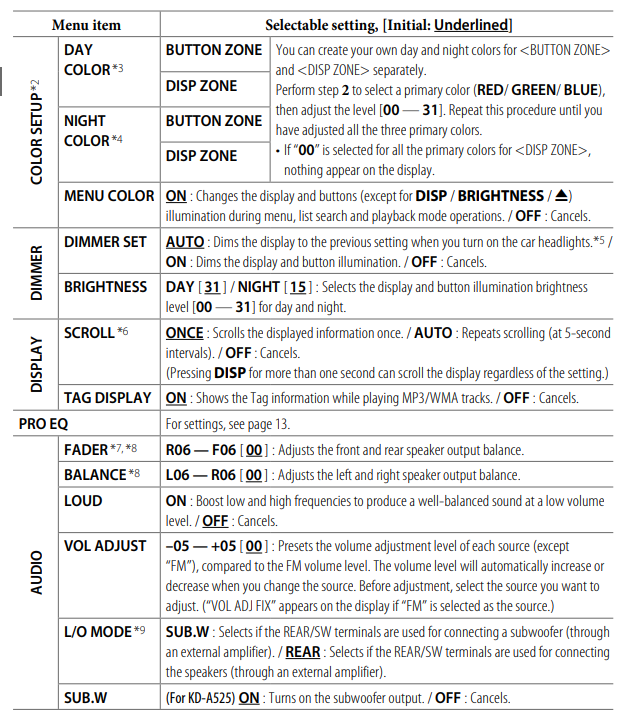
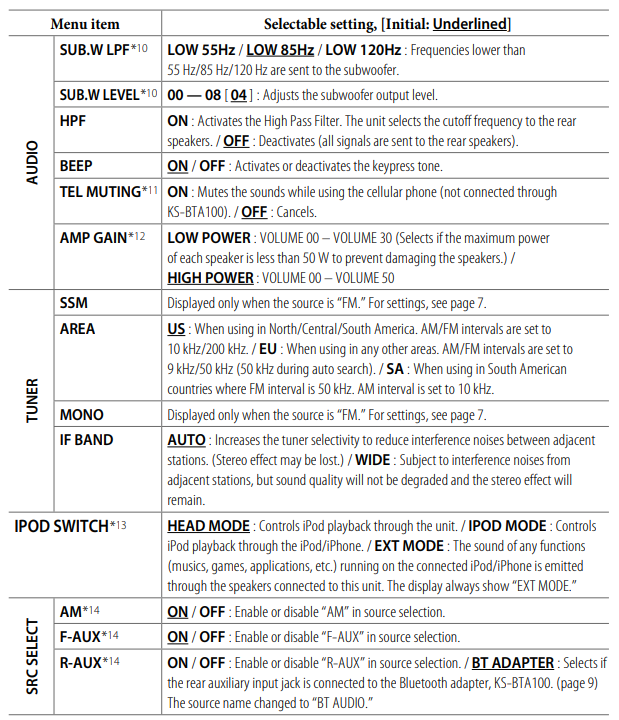
Menu operations
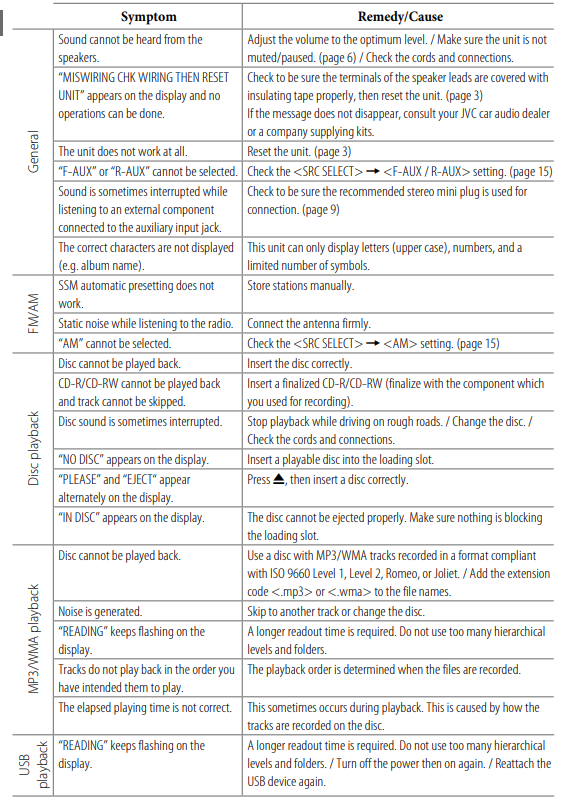
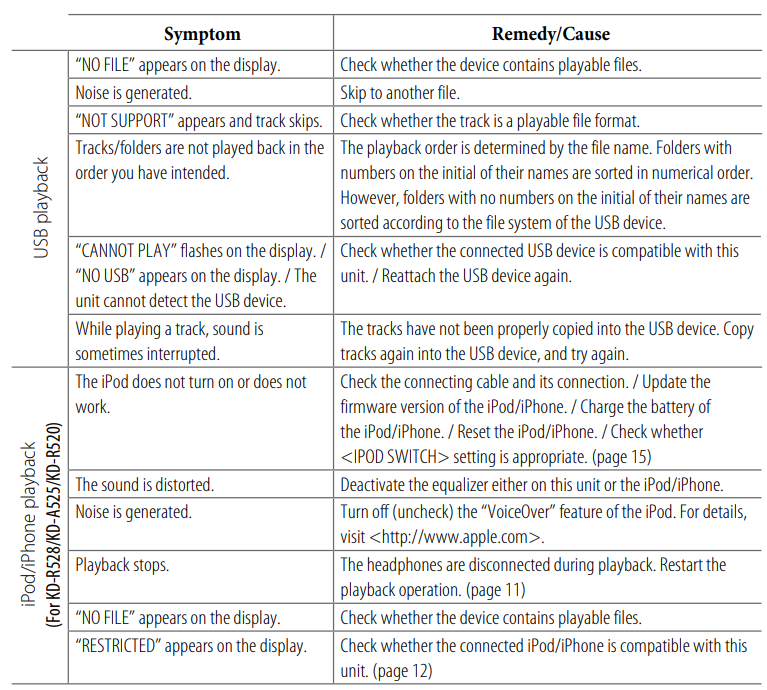
Troubleshooting
Specifications
AUDIO AMPLIFIER SECTION
- Power Output: 20 W RMS × 4 Channels at 4 Ω and ≤ 1% THD+N
- Signal-to-Noise Ratio: 80 dBA (reference: 1 W into 4 Ω)
- Load Impedance: 4 Ω (4 Ω to 8 Ω allowance)
- Frequency Response: 40 Hz to 20,000 Hz Line-Out or Subwoofer-Out Level/
- Impedance: 2.5 V/20 kΩ load (full scale)
- Output Impedance: 1 kΩ
- Other Terminal: USB input terminal, Front auxiliary input jack, Rear auxiliary/Bluetooth adapter input jack, Antenna terminal
CD PLAYER SECTION
- Type: Compact disc player
- Signal Detection System: Non-contact optical pickup (semiconductor laser)
- Number of Channels: 2 channels (stereo)
- Frequency Response: 5 Hz to 20,000 Hz
- Signal-to-Noise Ratio: 98 dB
- Wow and Flutter: Less than measurable limit MP3 Decoding Format (MPEG1/2 Audio
- Layer 3): Max. Bit Rate: 320 kbps WMA (Windows Media® Audio) Decoding
- Format: Max. Bit Rate: 192 kbps
USB SECTION
- USB Standard: USB 1.1, USB 2.0
- Data Transfer Rate (Full Speed): Max. 12 Mbps
- Compatible Device: Mass Storage Class
- Compatible File System: FAT 32/16/12
- Playable Audio Format: MP3/WMA
- Max. Current: DC 5 V 500 mA
FOR MORE MANUALS BY JVC, VISIT MANUALSLIBRARYY
JVC KD-S28 Cd Receiver-FAQs
How do I reset my JVC KD-S28 to factory settings?
Press and hold SEL (Select) and Power (Standby/On/ATT) for several seconds.
Note: This will erase all presets and settings.
Why is my JVC stereo not turning on?
Check the car’s fuse box for a blown fuse.
Ensure the wiring harness is properly connected.
Test the ignition wire for power when the car is on.
How do I manually open a stuck CD tray?
Locate the small pinhole near the eject button.
Insert a paperclip and gently push to release the tray.
How do I delete a paired Bluetooth device?
Go to Bluetooth Settings > Pairing > Device Delete.
Select the device and confirm deletion.
Why is my JVC stereo showing “No Signal”?
Check if the input source is correct (e.g., Bluetooth, AUX, USB).
Ensure cables are securely connected.
Restart the stereo if needed.
What is the best equalizer setting for car audio?
Bass (60Hz-250Hz): +3dB to +6dB
Midrange (1kHz-4kHz): 0dB to +2dB
Treble (8kHz-16kHz): +1dB to +3dB
How do I update my JVC stereo’s firmware?
Visit the JVC support website and download the latest firmware.
Transfer it to a USB drive and plug it into the stereo.
How do I turn off demo mode?
Press and hold the MENU button for 5+ seconds until demo mode deactivates.



 SSM” flashes and local stations with the strongest signal are searched and stored automatically.