Petlibro PLAF005 Granary Automatic Pet Feeder

IN THE BOX
Automatic Pet Feeder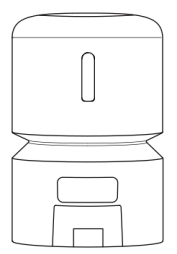
Food Bowl with Holder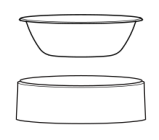
Power Adapter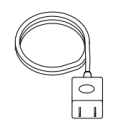
User Guide Kit
Desiccant Bag
PRODUCT OVERVIEW
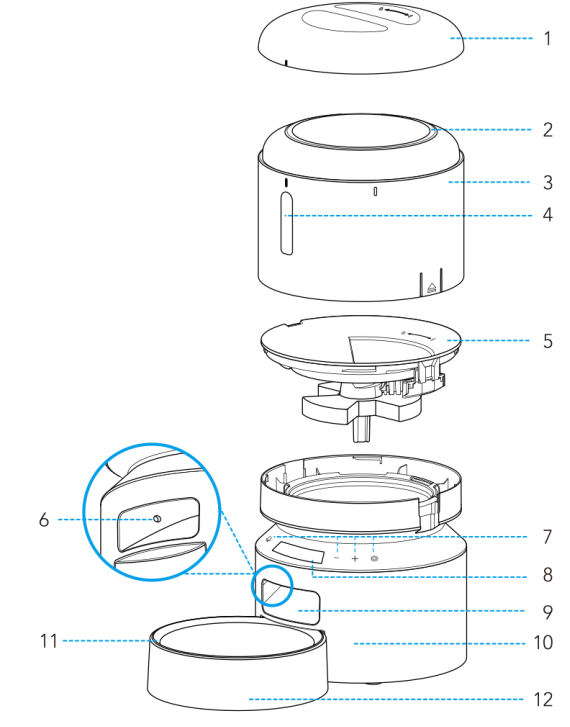
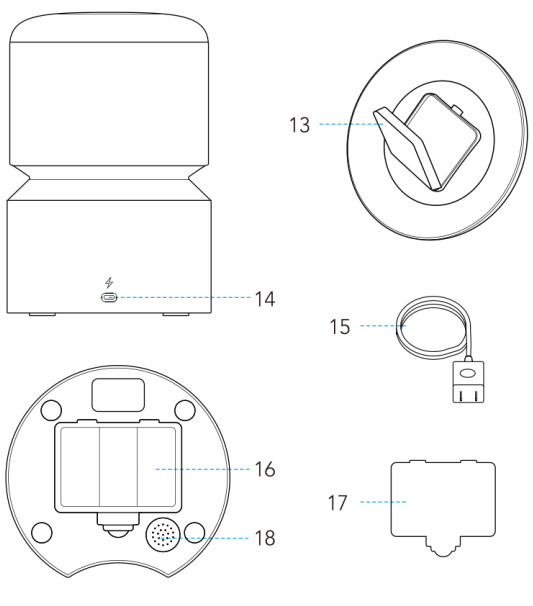
- Lid
- Seal Strip
- Food Tank 1
- Transparent Window
- Tank Base
- Anti-Clog Detector 2
- Control Panel
- Display Panel 3
- Food Outlet 4
- Feeder Base
- Stainless Steel Bowl
- Bowl Holder
- Desiccant Box
- Power Jack
- Power Adaptor
- Battery Compartment
- Compartment Lid
- Speaker
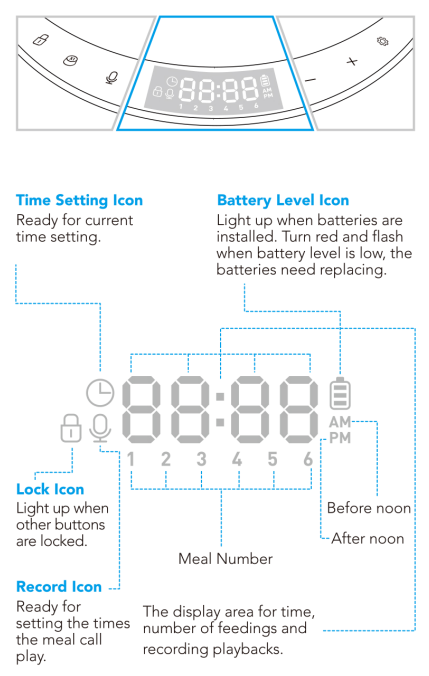
BUTTONS AND DISPLAY OVERVIEW

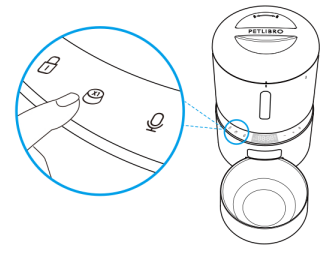
Unlock Button![]() : Press and hold for 3s to unlock other buttons and the screen.
: Press and hold for 3s to unlock other buttons and the screen.
Number Decrease Button![]() (Unlocked Status)Press to switch between meal numbers. (Setting Status) Press to decrease the number.
(Unlocked Status)Press to switch between meal numbers. (Setting Status) Press to decrease the number.
Manual Feeding Button![]() Press 1-5 times to dispense 1-5 portions of food.
Press 1-5 times to dispense 1-5 portions of food.
Number Increase Button![]() (Unlocked Status)Press to switch between meal numbers. (Setting Status)Press to increase the number.
(Unlocked Status)Press to switch between meal numbers. (Setting Status)Press to increase the number.
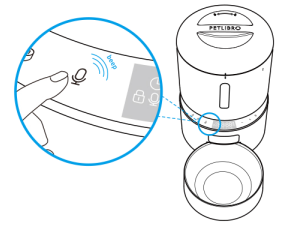
Record Button![]() once, and a beep is heard. Record your message (max 10s), then press again to save, and a double beep is heard.
once, and a beep is heard. Record your message (max 10s), then press again to save, and a double beep is heard.
Setting Button![]() (Setting Status) Press to confirm and enter the next step. Press and hold for 3s to return to the locked interface.
(Setting Status) Press to confirm and enter the next step. Press and hold for 3s to return to the locked interface.
HOW TO USE
Assembly and Preparation for Setting
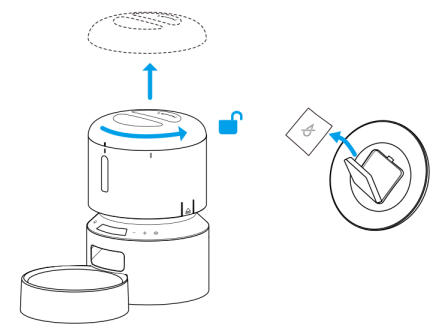
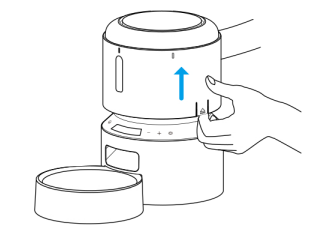
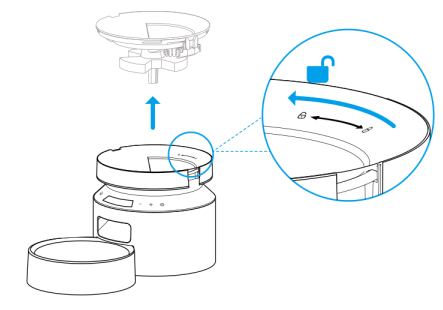
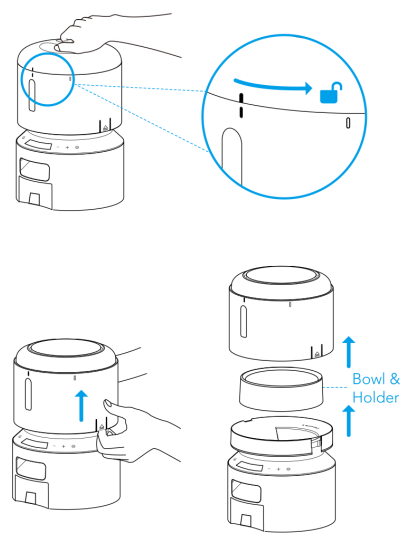
- Take out the food bowl inside the food tank. Twist the lid anticlockwise to remove the lid. Pull up along the notches on either side to remove the food tank.

- Place the desiccant bag into the inner box under the lid.

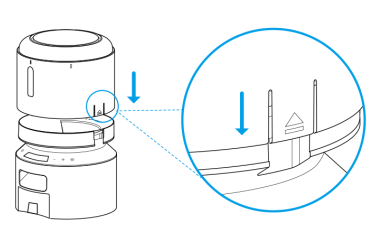
- Install the food tank. Align the food tank with the notches on both sides of the tank base.

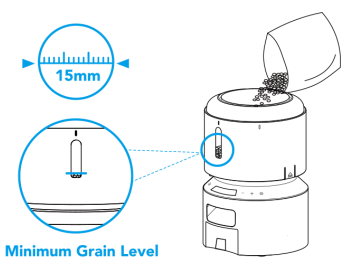
- Add dry pet food to the food tank. To prevent uneven food dispensing, please add enough pet food to the visible level. Recommended kibble size: 2-15mm/0.07-0.6 inch in diameter. Do not use canned, wet, or moist food.

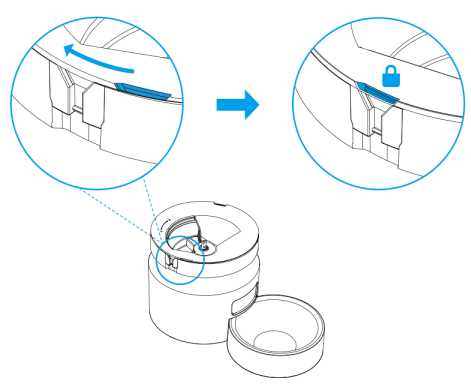
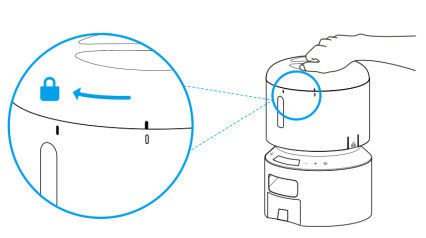
- Put the lid back on. To snap into place, turn the lid clockwise from the right,
rotating the sign to the left, rotating sign.
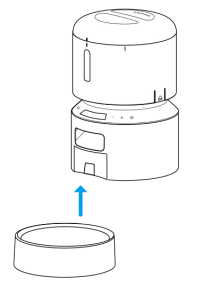
- Install the Food Bowl. Attach the bowl to the designated notches underneath the feeder base.

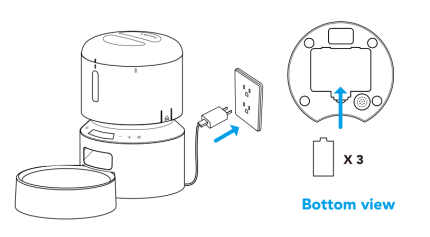
- Connect Power

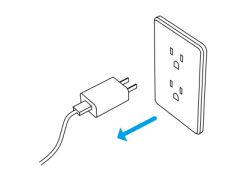
- Plug the 5V power adapter into a power socket and the USB cable into the USB port on the back of the feeder.
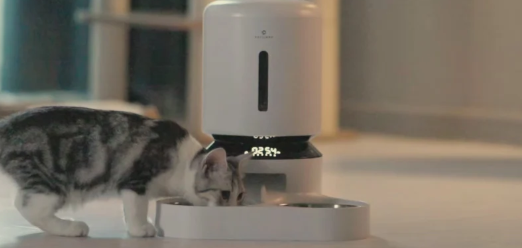
- The LED display will light up automatically to indicate the feeder is on.
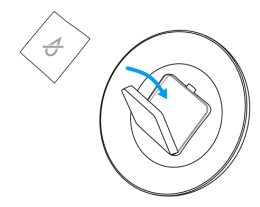
- Open the battery compartment at the bottom of the feeder. Install three alkaline D batteries (not included) in case of a power outage. Make sure the batteries match the positive and negative poles with the markings in the
compartment. - After the batteries are installed, the battery icon will light up on the screen; when the icon turns red and flashes, it means the battery level is low and the batteries need replacing.
Program Setting
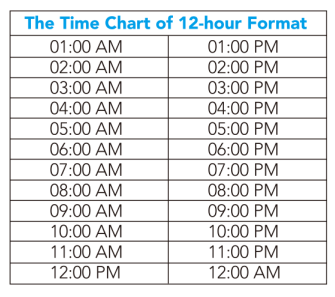
- Set the Current Time: Please pay attention to the 12-hour AM/PM format. Time
will change from AM to PM automatically according to your settings.
- Press and hold the Unlock Button for 3 seconds to unlock other buttons and the screen. The Current Time Setting icon on the screen flashes, indicating it has entered setting mode.

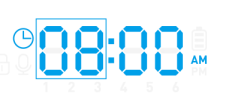
- Press the Setting Button the hour digits flash.

- Use the Increase/Decrease button +/-to set the current hour, and then press the Setting Button to save and move to the minutes setting.
- The tens digits of minute flashes, press the Increase/- Decrease button +/- to set the tens digit first, and press the Setting Button to save, then set the single
digit and press the Setting Button to save. The current time setting is complete.
- Press and hold the Unlock Button for 3 seconds to unlock other buttons and the screen. The Current Time Setting icon on the screen flashes, indicating it has entered setting mode.
- Set the Time and Portion of Meals. Set the time of the first meal
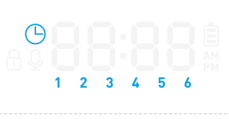
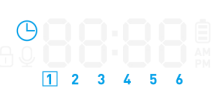
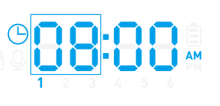
- After the current time is set, the feeder enters feeding plan setting mode. The icon 1 will flash, indicating it’s ready for the settings of the first meal.

- Press the Setting Button to set the feeding time of the first meal. The hour digits will flash.

- Press the Increase/Decrease button +/- to set the hour. Press the Settings button to save and move to the minutes setting. The tens digits of minute flashes, press the Increase/Decrease button +/- to set the tens digit first, and press the Setting Button to save, then set the single digit and press the Setting Button to save.
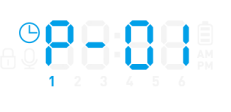
 Set the portion of the first meal. Once the first meal time is set and saved, the feeder enters portion setting mode. The screen will display P-XХ, standing for portions.
- Press the Increase/Decrease button +/- to set the portions (Max 50), set the tens digit first, and press the Setting Button to save, then set the single digit and press the Setting Button to save.

- Repeat the steps above to set the time and portion of other meals if needed. The feeder supports up to 6 scheduled meals per day.

- Press the Increase/Decrease button +/- to set the portions (Max 50), set the tens digit first, and press the Setting Button to save, then set the single digit and press the Setting Button to save.
- After the current time is set, the feeder enters feeding plan setting mode. The icon 1 will flash, indicating it’s ready for the settings of the first meal.
- Record a Meal Call
- In the unlocked state, press the Record Button once, and a beep is heard.
- Speak and record your message (The maximum recording time is 10 seconds). Press the Record Button again to end, two beeps will be heard indicating the recording is saved.
- The recording will automatically play once for you to check the voice you just recorded.

- Set the Times for the Meal Call Play. The times the meal call play can be set from 0-5. If the time is set as zero, the meal call will not play at the corresponding meal.
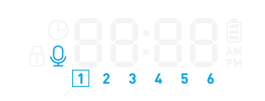
- In the unlocked state, press and hold the Record Button for 3s, the record icon is on, and the meal icon 1 keeps flashing.
- Press the Increase/Decrease button +/- to choose the number of meals you want to set, then press the Setting Button once to save.

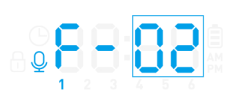
- The screen will display F-XX, standing for playback times. Press the Increase/Decrease button +/- to set the times the meal call plays, then press the Setting Button to save.

- Repeat the steps above to set the number of times the meal call plays for other meals.
- Manually Feeding Your Pet: In the unlocked state, press the manual feeding button once, and the feeder dispenses one portion of food. You can press the manual feeding button at most 5 times, and the feeder will dispense 5 portions of food.

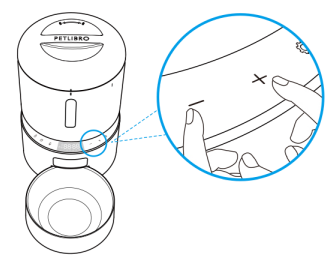
- Clear All Settings: Press and hold the Increase/Decrease buttons +/ simultaneously for 6 seconds until the machine emits three beeps, all icons on the screen light up, indicating the resetting is complete.
CLEAN AND CARE
It’s recommended to clean the feeder regularly for the health of the pets. The washable parts are as follows: lid, food tank, tank base, stainless steel bowl, and bowl holder. Clean other parts with a dry cloth.
Clean the tank lid, food tank, and tank base
Before removing the food tank, be sure that the food tank is empty in case of food spilling all over.
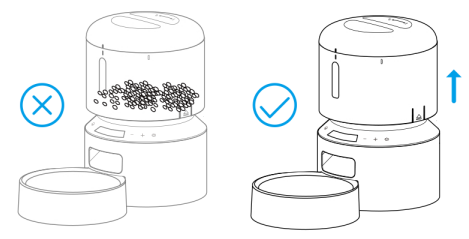
- Disconnect power before cleaning.

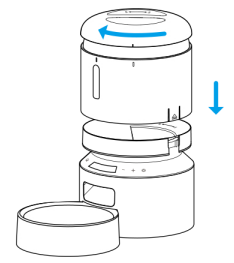
- Twist anticlockwise to remove the lid and take out the desiccant bag from the inner box under the lid.

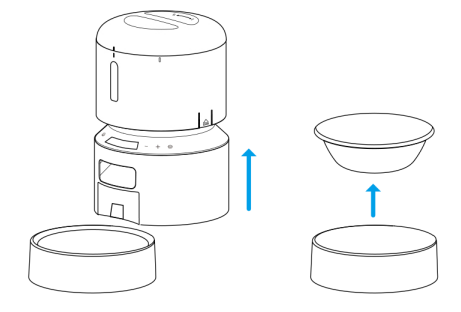
- Pull up along the notches to remove the tank.

- Twist anticlockwise to remove the tank base.

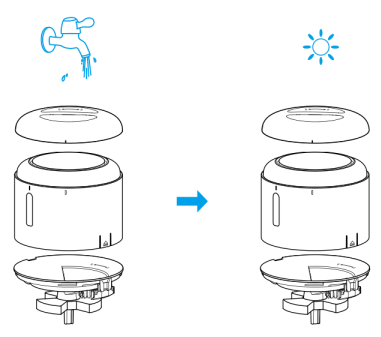
- Thoroughly rinse and air dry the lid, tank, and tank base

- Refit them to the machine. Turn the tank base clockwise until it snaps into place

- Then install the tank and lid.
Clean the Food Bowl
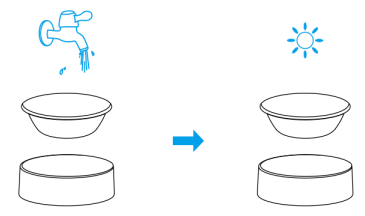
- Press down the food bowl with the holder to remove it.

- Rinse and air-dry them thoroughly before refitting them to the machine.
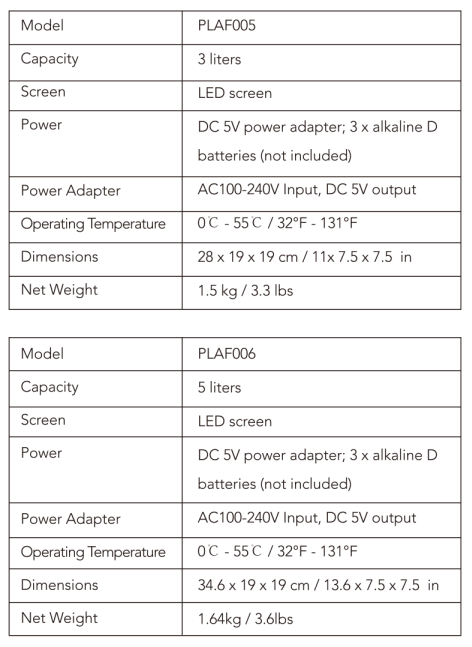
SPECIFICATIONS
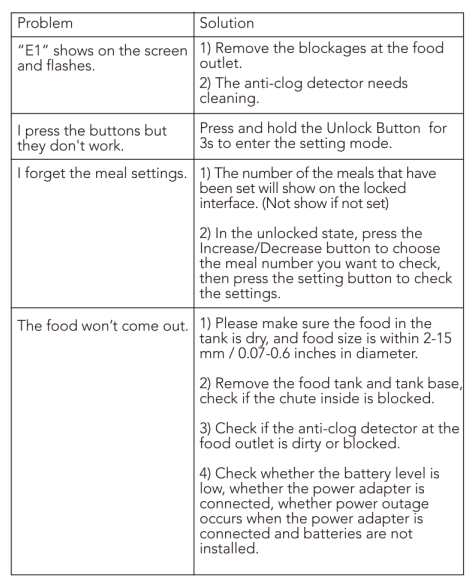
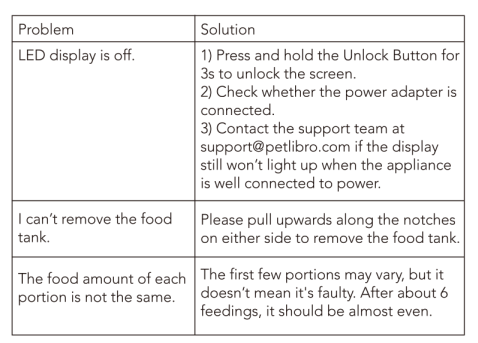
TROUBLESHOOTING
FOR MORE MANUALS BY PETLIBRO, VISIT MANUALSLIBRARYY
Petlibro PLAF005 Granary Automatic Pet Feeder-FAQs
How do I set up the Petlibro Granary Feeder?
Download the Petlibro app, plug in the feeder, and follow the on-screen steps to program meal times and portion sizes.
How does the automatic feeder work?
The feeder stores food and dispenses preset portions at scheduled times, ensuring your pet gets consistent meals.
How do I connect the Granary Feeder to Wi-Fi?
Make sure your phone is on a 2.4 GHz network. In the app, tap Add Device, select the feeder, and follow the pairing instructions.
Does the Petlibro Feeder still dispense if offline?
Yes. Even if the app is disconnected, the feeder will continue to follow the scheduled meal plan as long as it has power.
How accurate is the feeder?
The Petlibro Granary Feeder is highly accurate in dispensing both small and large kibble sizes.
Can I use wet food in the feeder?
This model is mainly designed for dry food. Petlibro also offers models with refrigerated trays for wet food.
Does the Petlibro have a camera?
Some versions include a built-in HD camera with night vision, allowing you to monitor your pet’s feeding.
How long does the battery last?
When powered by 3 D-cell batteries, the feeder can last up to 180 days without needing a replacement.


 Set the portion of the first meal. Once the first meal time is set and saved, the feeder enters portion setting mode. The screen will display P-XХ, standing for portions.