Petlibro PLCT003 Infinity Cat Tree
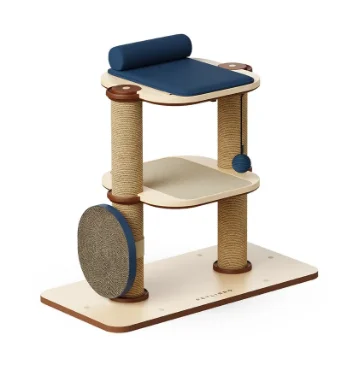
IN THE BOX
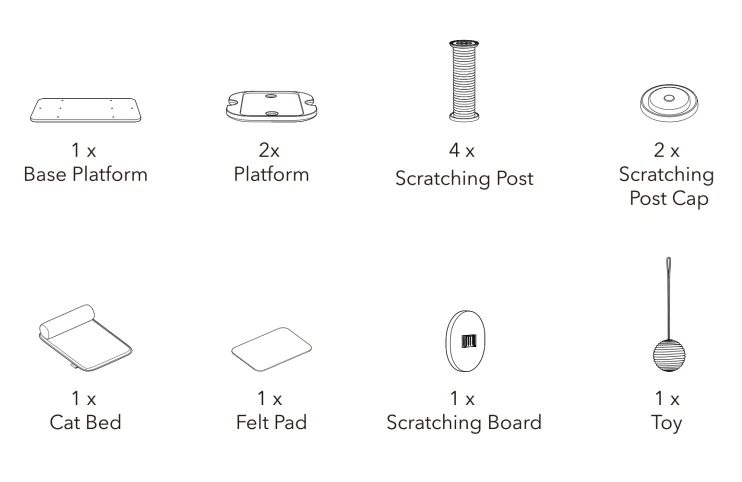
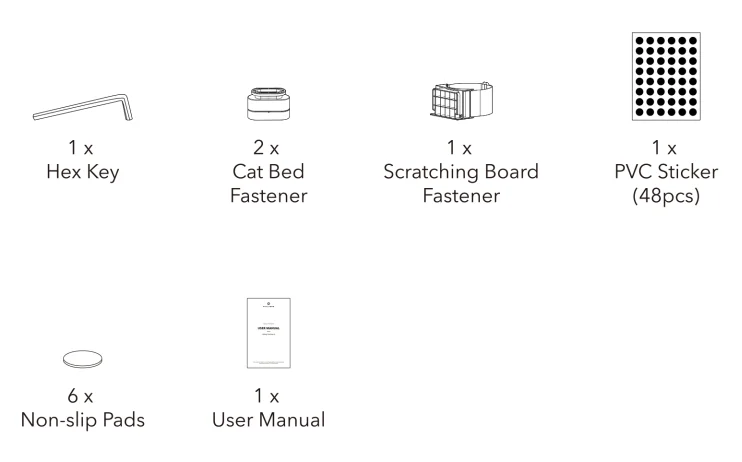
Notes
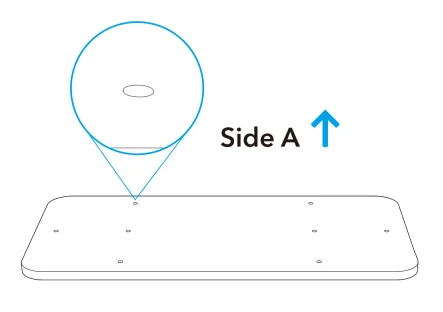
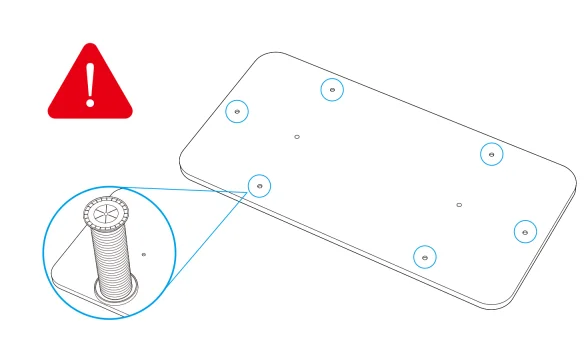
- Make sure the A side of the base platform is facing upwards.

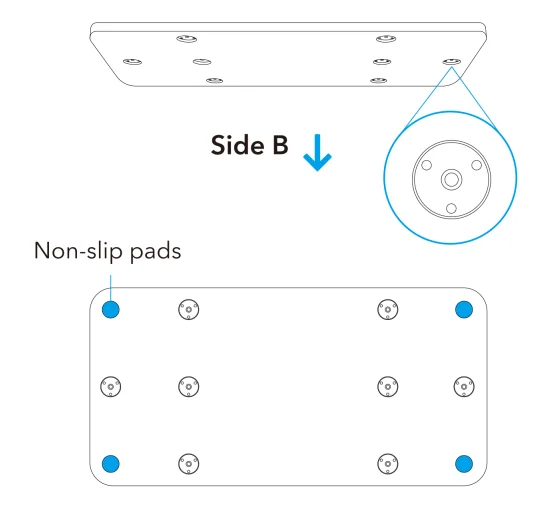
- Please install the non-slip pads on the B side of the base platform, as shown in the diagram.

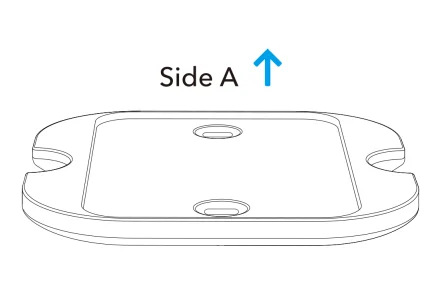
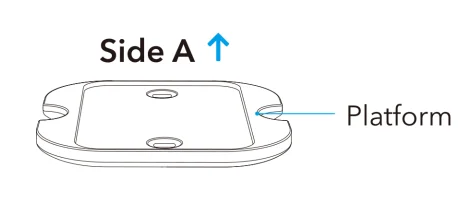
- Make sure the A side of the platform is facing upwards.

- The height of your cat tree after installation should not exceed 4 layers.
WARNING & CAUTIONS
- Place the cat tree indoors, away from direct sunlight or damp areas.
- Keep all tools and instructions in a safe place for future reference.
- This cat tree is intended for cat use only. Please keep children away.
- Keep all small parts away from children and pets to avoid choking hazards.
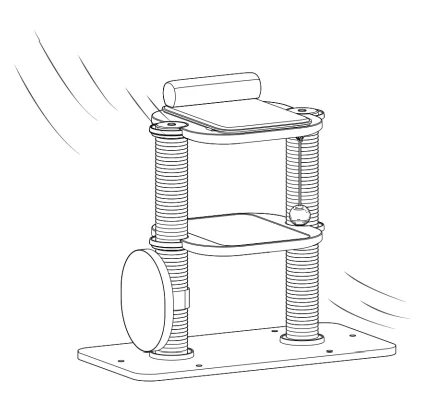
- Do not climb, rock, shake, step on, or hang on the cat tree.
- Place the cat tree on a flat, level surface for stability.
- Check the cat tree often for loose screws or parts that may need re-tightening.
- Do not place heavy items on the cat tree.
- Do not sit or stand on the cat tree.
- Inspect the cat tree for damage and discard it if any part gets worn or damaged.
- Failure to follow the installation instructions in this manual may cause the cat tree to fall over and cause injury.
Notes
- Do not install the scratching post in one of the side holes on the base platform.

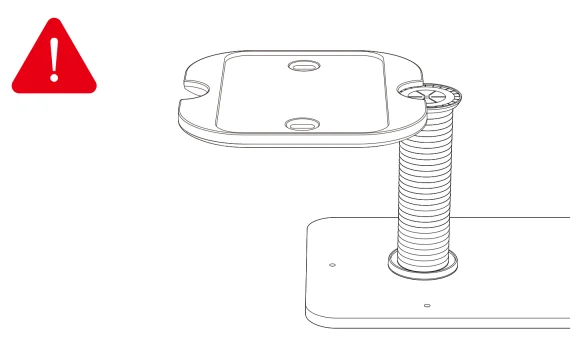
- Do not attach the platform to one scratching post only.

KEY INSTALLATION METHODS
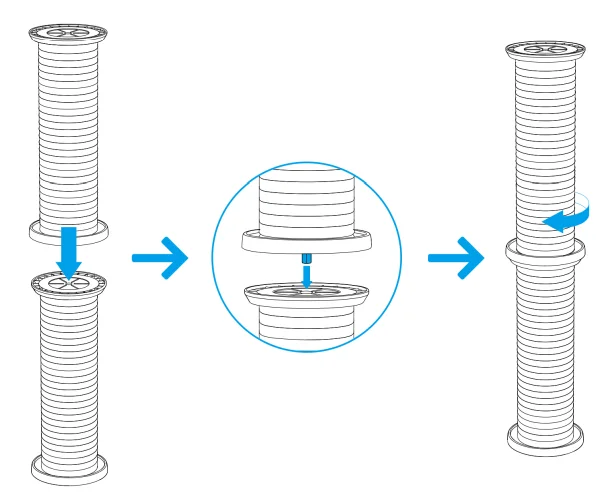
Scratching post + scratching post
Insert the screw of one scratching post into the screw hole of another scratching post, and rotate one of the scratching posts to tighten.
Scratching post + platform
Notes
- Make sure the A side of the platform is facing upwards.

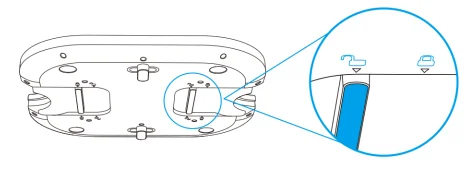
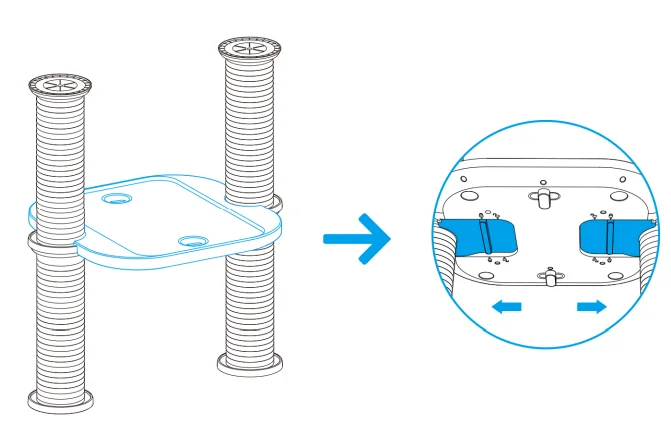
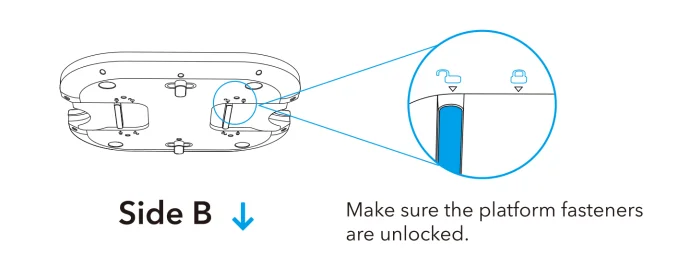
- Make sure the platform fasteners are unlocked before installation.

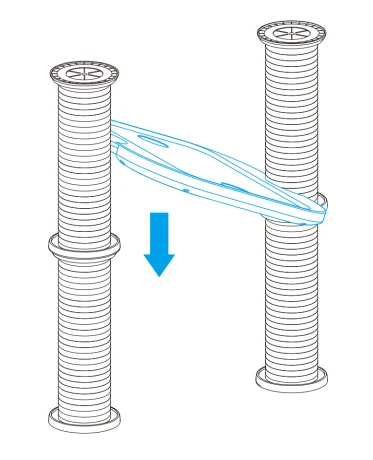
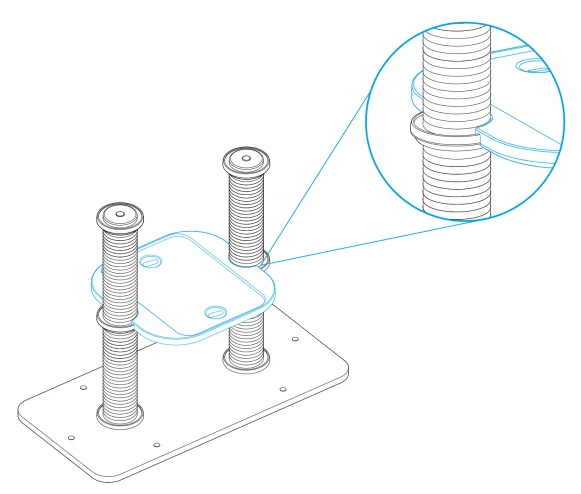
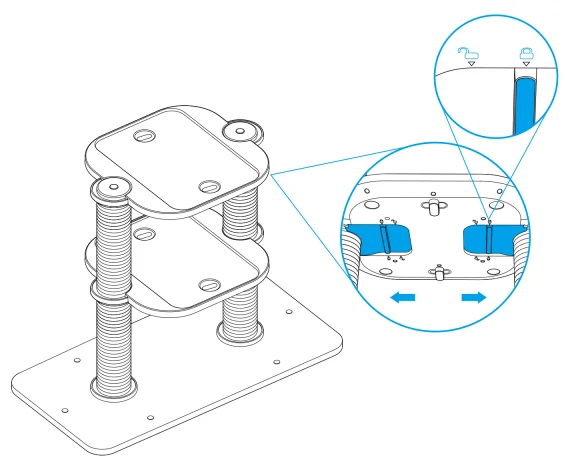
- Align the cutouts of the platform with the connecting parts (grooves) of two scratching posts, and attach the platform to the scratching posts.

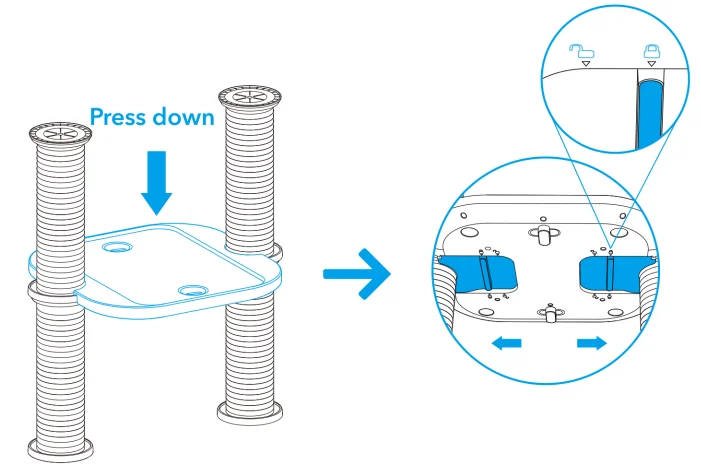
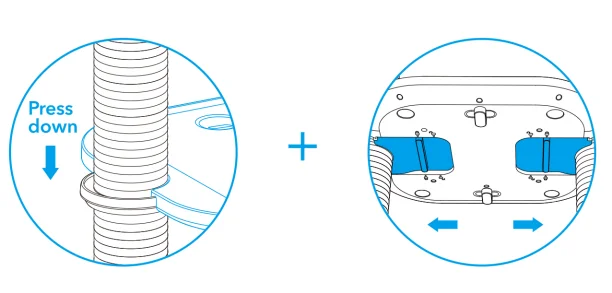
- Push the bottom platform fasteners towards the posts until the fasteners cannot be moved.

- If you can’t push the platform fasteners, try pressing around the cutouts on the platform while pushing the fasteners.

INSTALLATION STEPS
Base platform + scratching post
Insert the screw of the scratching post into one of the base platform screw holes (not the side holes) and rotate the scratching post to tighten.
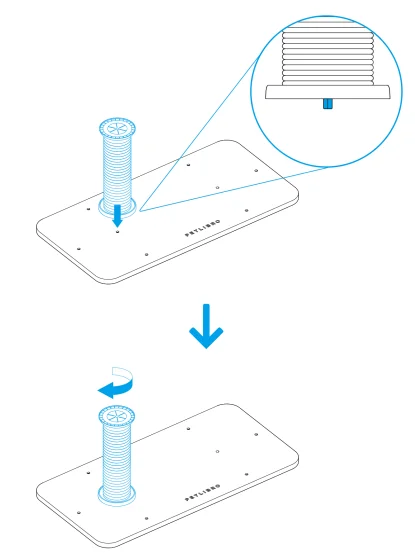
Scratching post+ scratching post+ scratching post cap
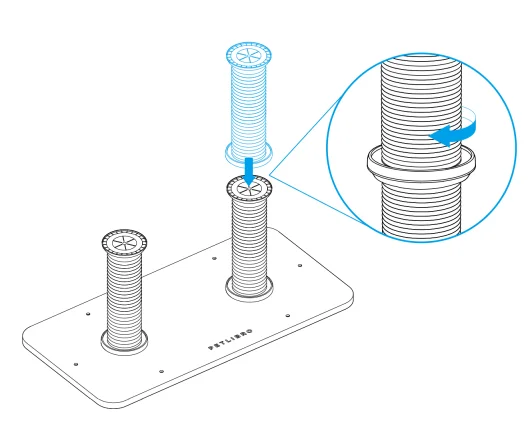
Scratching post + scratching post
Insert the screw of one scratching post into the screw hole of another scratching post, and rotate one of the scratching posts to tighten.
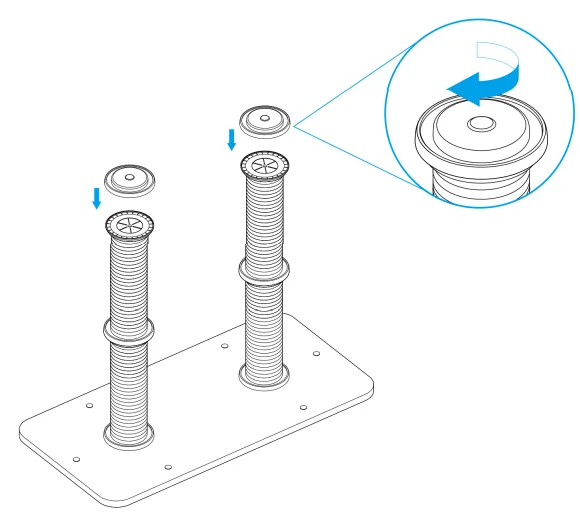
Scratching post + scratching post cap
Insert the screw of the scratching post cap into the screw hole of the scratching post and rotate the cap to tighten.
Scratching post + platform
- Align the cutouts of the platform with the connecting parts (grooves) of two scratching posts, and attach the platform to the scratching posts.


- Push the bottom platform fasteners towards the posts until the fasteners cannot be moved.


- If you can’t push the platform fasteners, try pressing around the cutouts on the platform while pushing the fasteners.

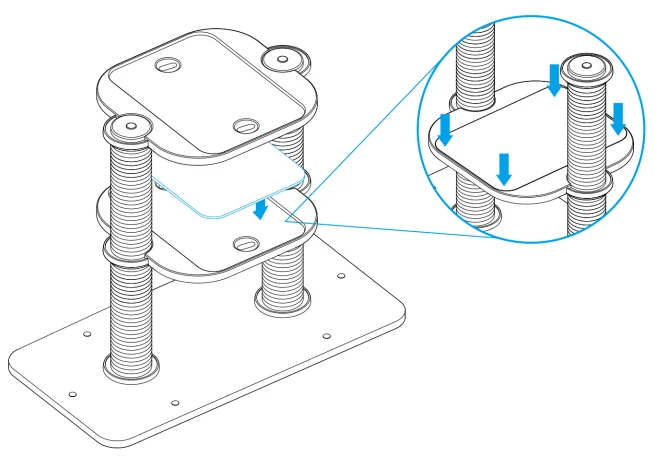
Felt pad + platform
Place the pad on the platform and press it down to make sure the platform surface is level.
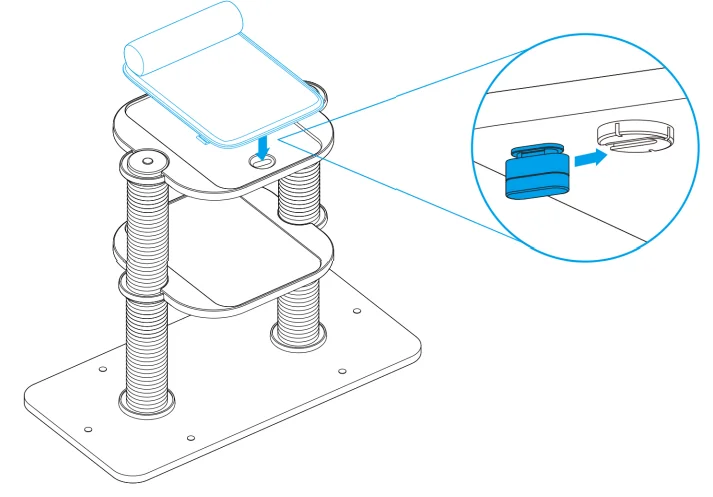
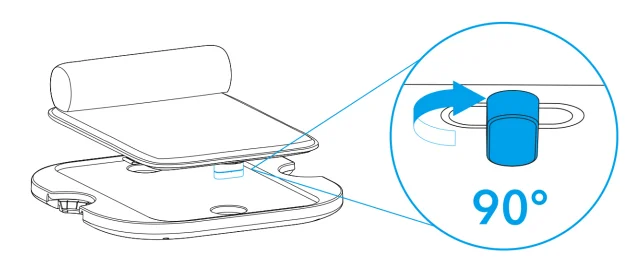
Cat bed + platform
- Slide to install the cat bed fasteners into the cat bed.
- Insert the fasteners under the bed into the holes on the platform.

- Rotate the fasteners 90 degrees.

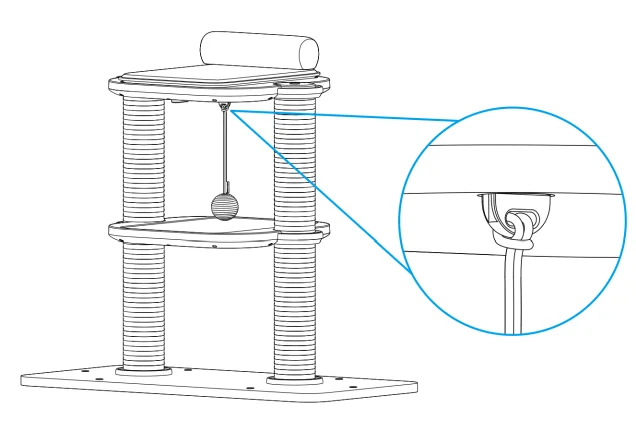
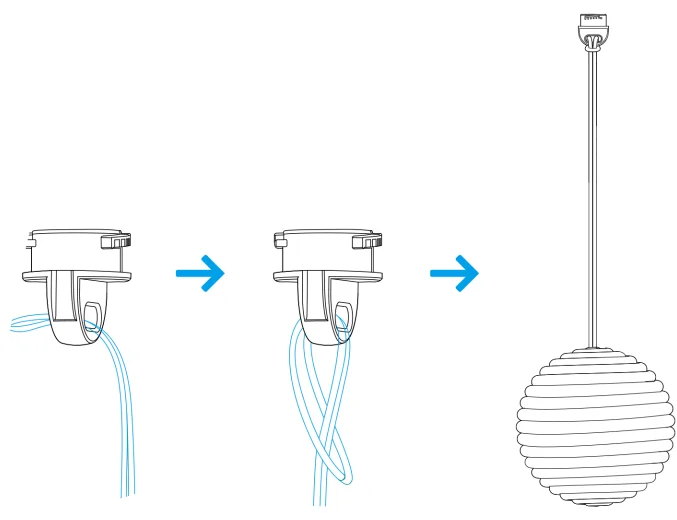
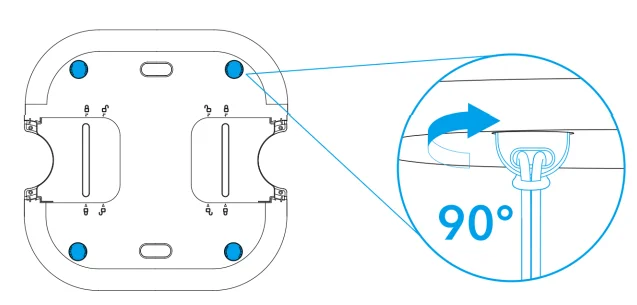
Toy + platform
- Insert the fastener of the toy into a corner hole on the B side of the platform.


- Rotate the fastener 90 degrees.

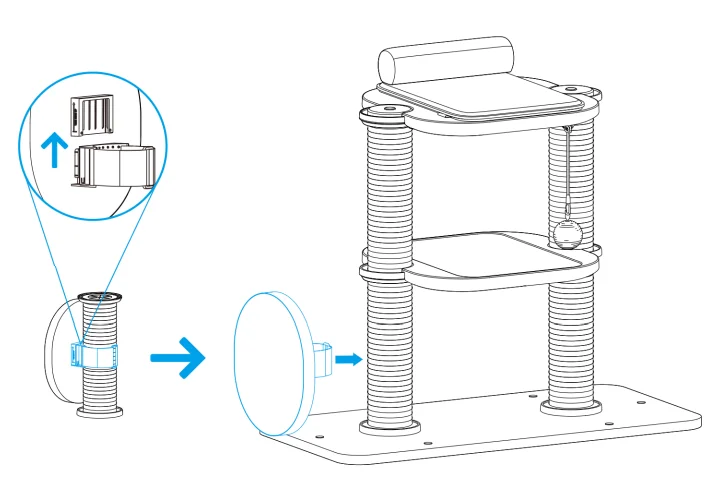
Scratching post + scratching board
- Slide to install the scratching board fastener to the back of the scratching board.

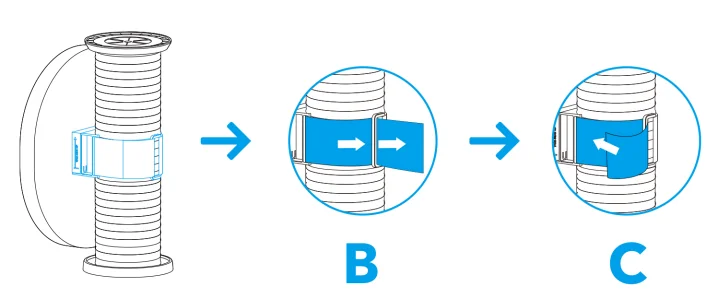
- Align the fastener of the scratching board to the scratching post, and thread the strap with Velcro through the buckle.
- Secure the strap.

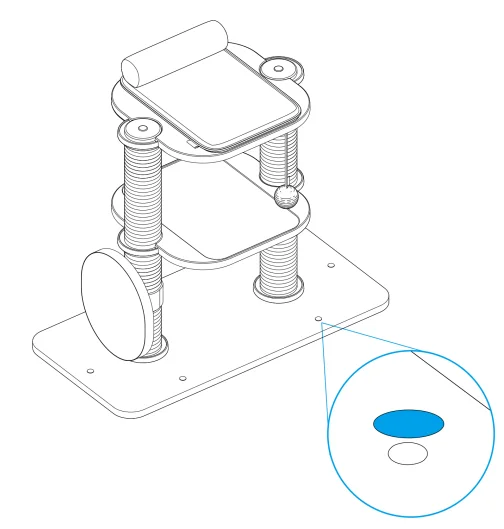
Base platform + screw hole sticker
After installation, apply PVC stickers to the unused holes on the base platform.
CARE AND MAINTENANCE
Cleaning the felt pad
- Do not use a washing machine.
- Do not use a brush to clean the pad.
- Do not place the pad in a dryer.
- Keep away from direct sunlight.
- Do not use a hairdryer to dry the pad.
- Do not use bleach for cleaning.
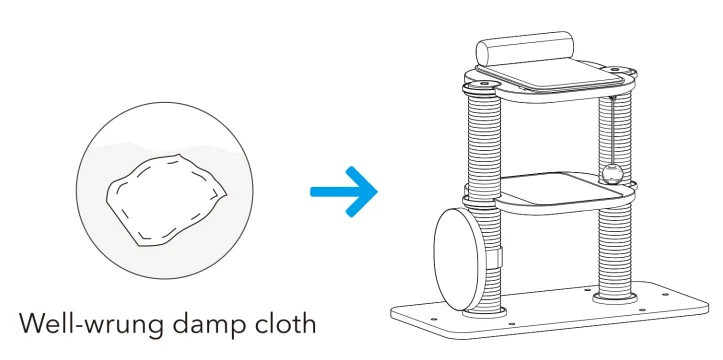
Cleaning the platform, scratching board, and scratching post
- To remove hair and dust, use a vacuum cleaner.
- Do not wash with water.
- Dampen a soft cloth with soapy water.
- Spot clean the stains and soiled areas with the cloth.

- Air-dry the wet areas completely.

SPECIFICATIONS

WARRANTY
- 12-month warranty
- For guidance on product use, please contact our customer service team via email: [email protected].
For more manuals by Petlibro, visit ManualsLibraryy
Petlibro PLCT003 Infinity Cat Tree- FAQs
How does the Petlibro automatic feeder work?
It keeps food fresh and opens at scheduled times to serve meals. After feeding, it closes to preserve freshness. You can also feed manually via the app.
How do I connect my Petlibro feeder to Wi-Fi?
Open the Petlibro app, tap Add Device, select your feeder model, and follow the on-screen steps. Make sure the Wi-Fi light is blinking before pairing.
How much food can the Petlibro feeder hold?
It has a capacity of about 7.4 ounces, making it suitable for cats, dogs, or small pets. Always check the model’s capacity before filling.
Can I control the feeder remotely?
Yes. Once connected to the app, you can schedule, adjust, or manually feed your pet from anywhere using your smartphone.
Will the feeder still dispense food if it’s offline?
Yes. Even if the Wi-Fi disconnects, it will continue to follow the preset feeding schedule as long as it has power or batteries.
Does the Petlibro feeder use batteries?
Yes. It runs on 3 D-cell batteries (not included) or can be plugged into a wall outlet, giving you flexible placement options.
Does the feeder have a camera?
Some Petlibro models include a built-in HD camera with night vision, two-way audio, and meal call recording so you can interact with your pet.
How do I reset my Petlibro feeder?
Press and hold the Setting and OK buttons together for 3 seconds until you hear a beep. The feeder will then be reset for setup again.

