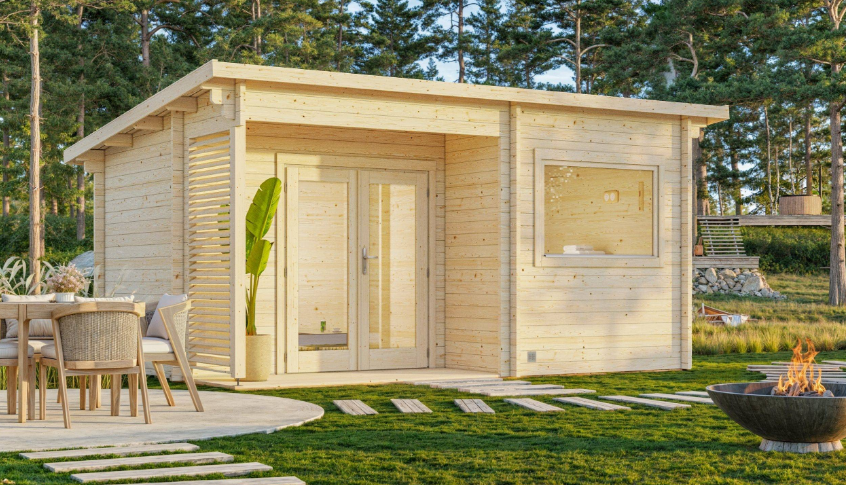
Bsaunas Halden XS Square Log Sauna
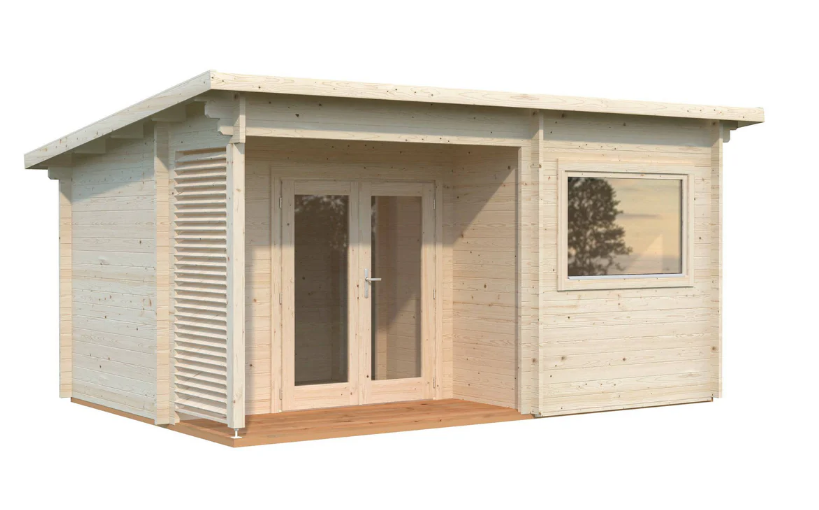
HOUSE: HALDEN XS 40
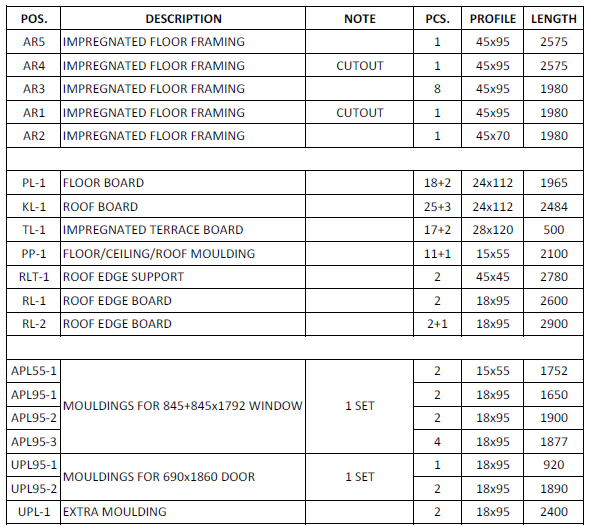
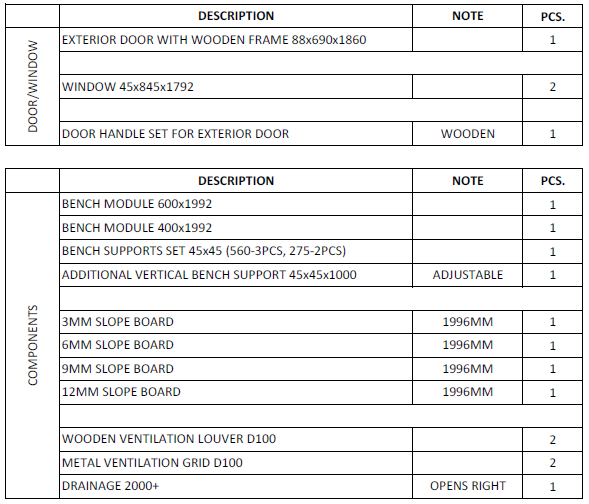
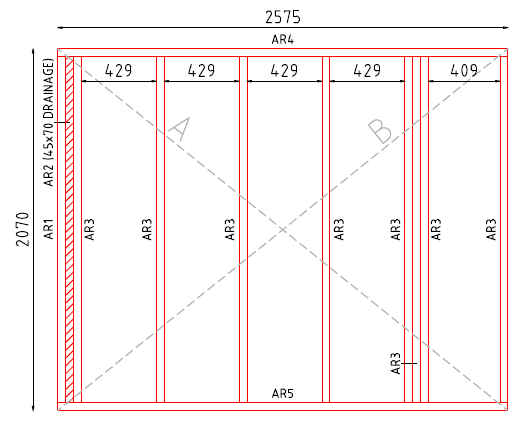
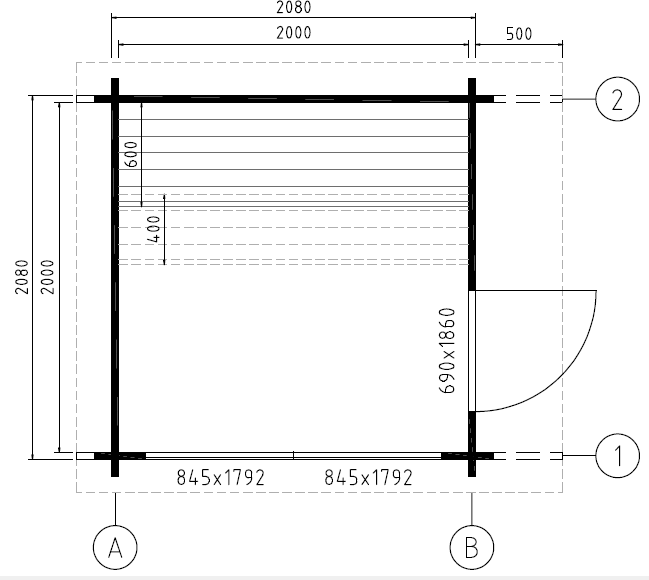
BASE PLAN
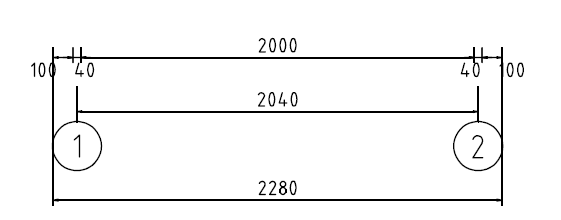
FLOOR FRAMING 45×95
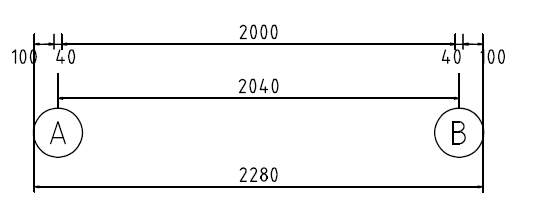
- NB! Check diagonals, remember that A=B=3304.

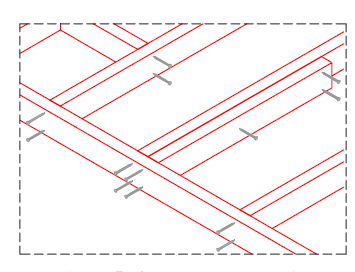
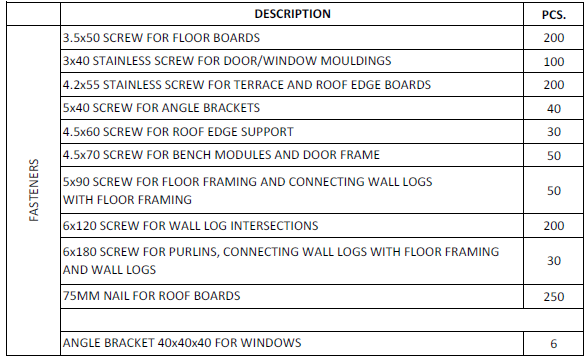
- Use two 5×90 screws to fasten joist ends with crossing joists. Fix with parallel joists when there are no crossing joists.

FASTENING WALL LOGS
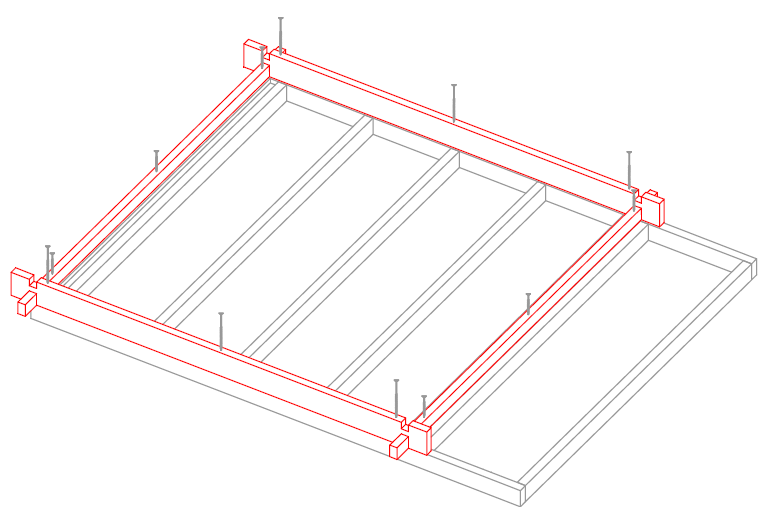
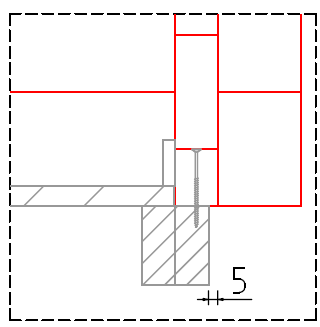
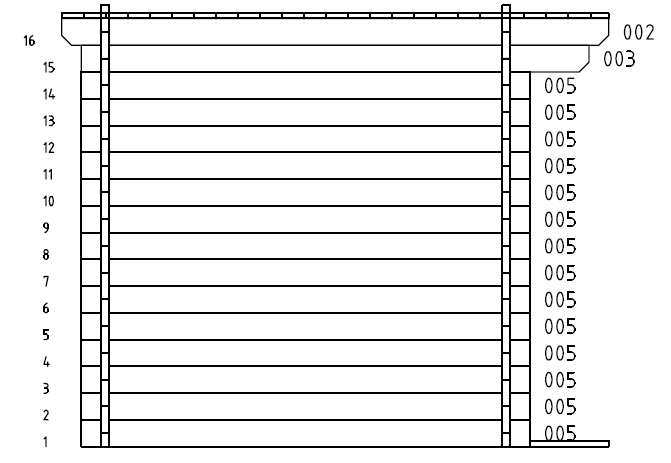
- Fasten the first row to the floor framing. Use 5×90 screws for half logs (fix those first) and 6×180 screws for full logs. It is recommended to predrill holes. If necessary, use a rubber hammer and hit the block to secure the logs tightly on top of each other.

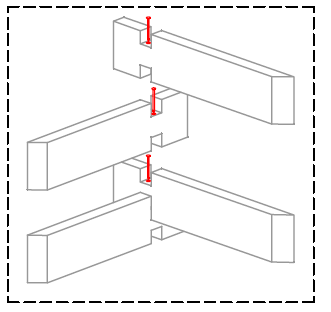
- Use 6×120 screws in each intersection. Try to alternate the placement of drill holes so screws don’t end up on top of each other. It is recommended to predrill the holes.

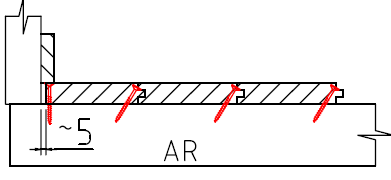
- Framing should be 5mm inside from outer wall.

WALL A
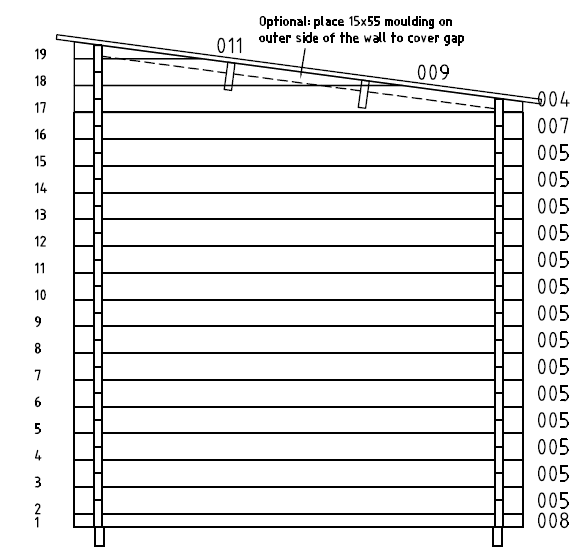
WALL B
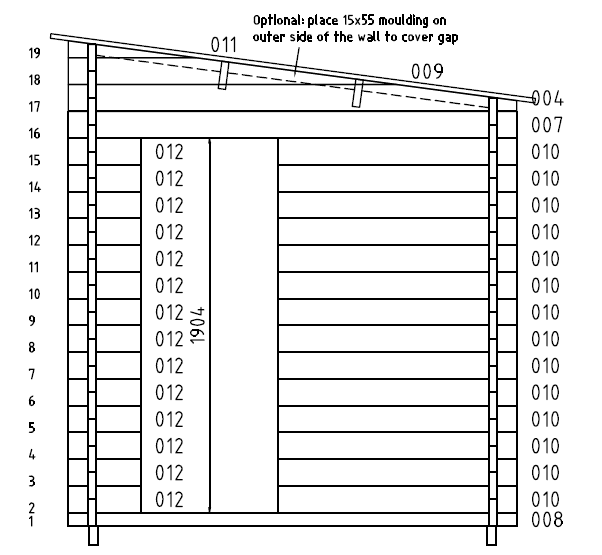
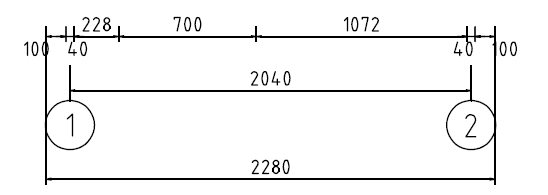
WALL 1
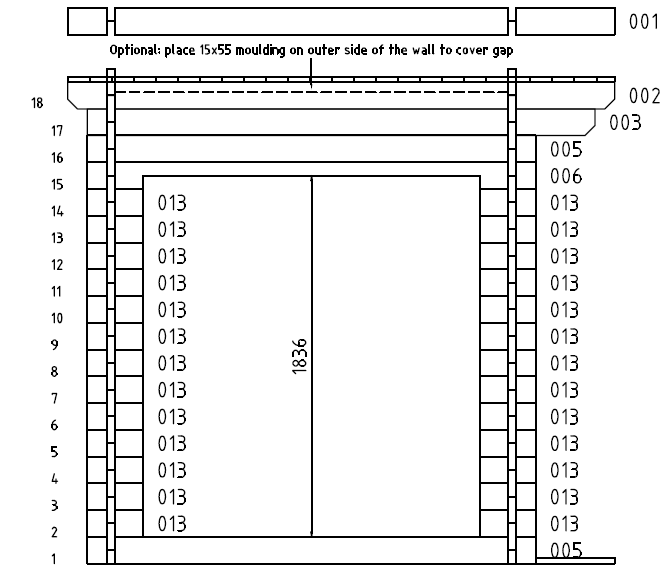
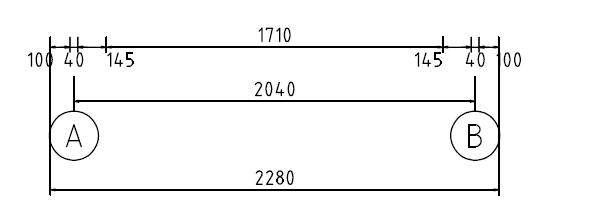
WALL 2
FLOOR BOARDS
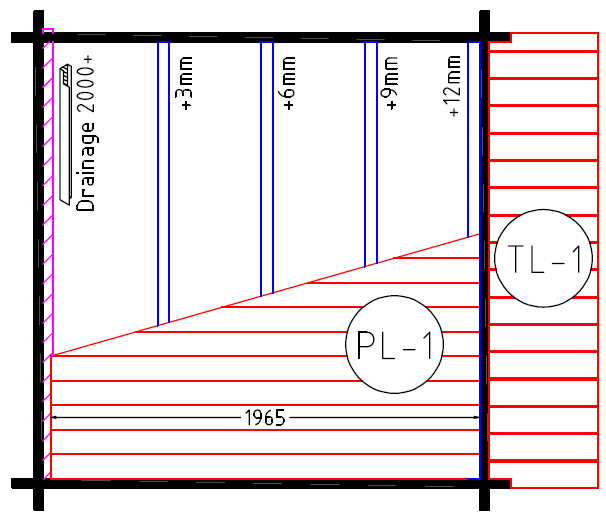
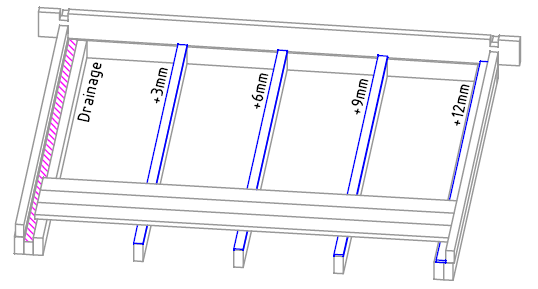
- Add slope boards and drainage details before fixing floor boards.

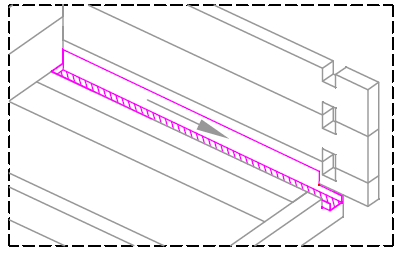
- When placing drainage, fix the closed end temporarily \~5mm higher than the opened end to guarantee a slope towards the outer wall for water. After placing floor boards, fix them permanently with floor mouldings.

- Fasten floor boards with screws from the tongue side of the board. First board should be placed \~5mm from the wall, and when cutting the last board, make sure there is a 5mm gap as well. Leave \~2mm gap between the floor board (cross-cut sides) and walls. Lastly, fix mouldings in place.

- Fasten terrace boards with two screws in each connection.

ROOF BOARDS
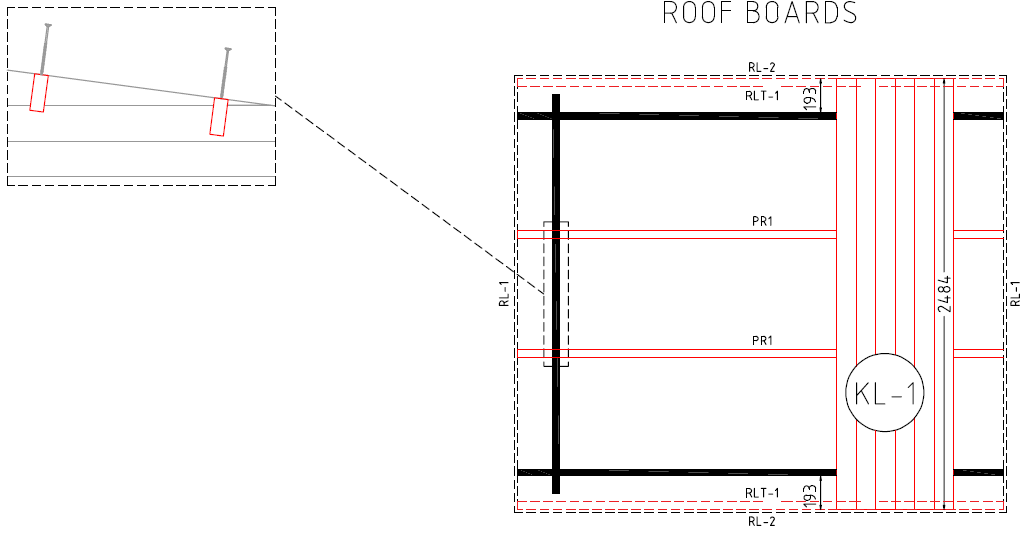
- Fix purlins with 6×180 screws (predrill holes).

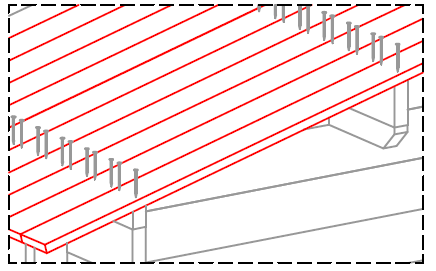
- Fix roof boards with 75mm nails (2pcs for each connection).

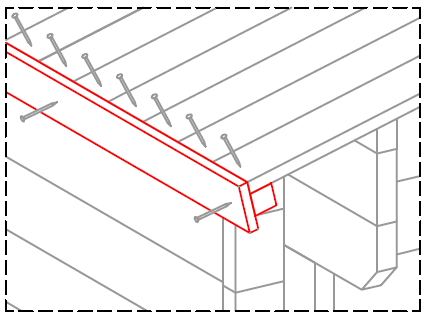
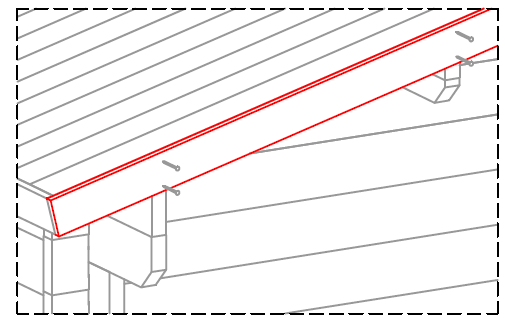
- Fasten the roof edge support 1 and the board. Use 4,5×60 screws (one for every other board ending) to fix edge support; for edge boards, use 4,2×55 screws.

- Cut gable edge boards to length and fix with 4,2×55 screws.

FASTENING DOORS/WINDOWS
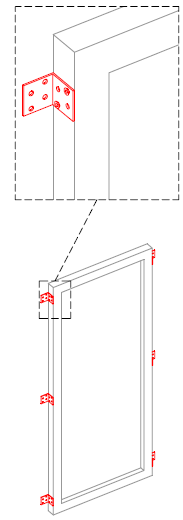
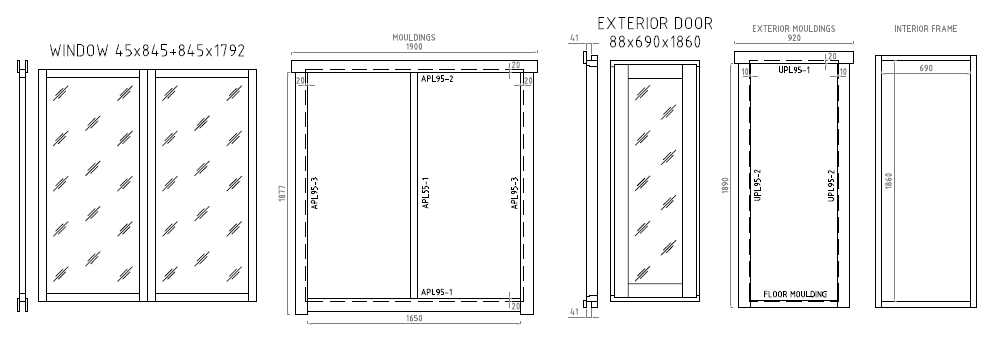
- Fasten 40x40x40 angle brackets to window jambs (3pcs for each side) with two 5×40 screws. Make sure that brackets are 3mm inside from the outer surface of the jamb, so there will be enough room for screw heads when mounting windows to walls and fixing mouldings.

- Lift the window in place and fasten the angle brackets to the wall with 5×40 screws (2pcs for each bracket).

- Fasten mouldings with 3×40 screws. Mouldings should cover about 20mm of the frame.

- Lift the door in place and fix it to the wall by screwing 4.5×70 screws through the wall to the frame.

- Fasten mouldings with 3×40 screws. Moulding coverage is about 20mm on the upper moulding and 10mm on the sides. There are no mouldings on the side of the frame.

DOOR/WINDOW MOULDINGS
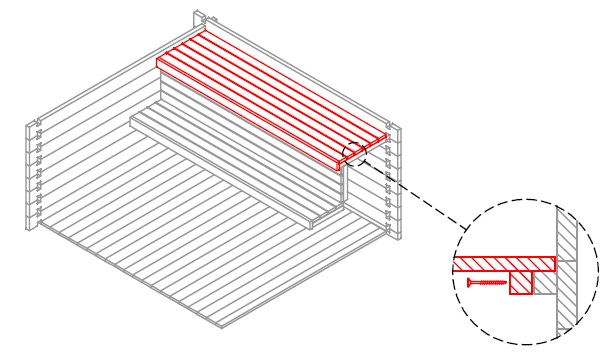
FASTENING BENCH MODULES
This is an overall manual for bench modules. You can skip some of the steps depending on the set (for example, if there is no bench skirt). Precise heights for bench supports and benches can be found on the next page.
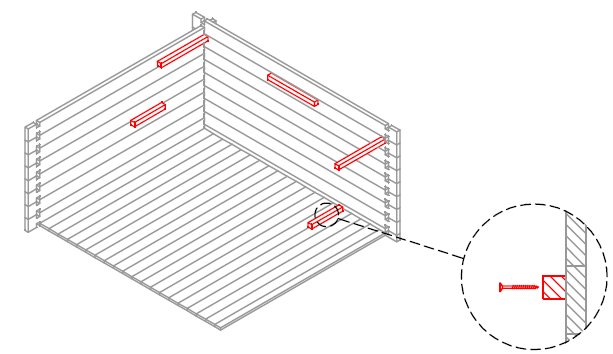
- Fasten the bench supports with screws to the wall. Use glue between the wall and the support for a stronger connection.

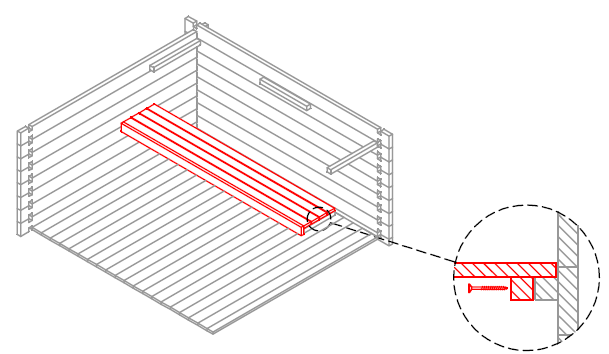
- Lift modules in place and fix them to the supports on the walls. Do not install the upper module in case there is a bench skirt in the set.

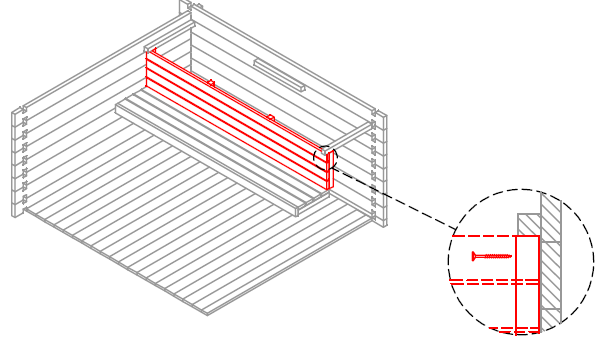
- Lift the bench skirt in place, attach it to the wall from the sides and to the lower bench in the middle. There should be an 8mm gap between the lower bench and the bench skirt.

- Place the upper module and fix it in place as described in step two.

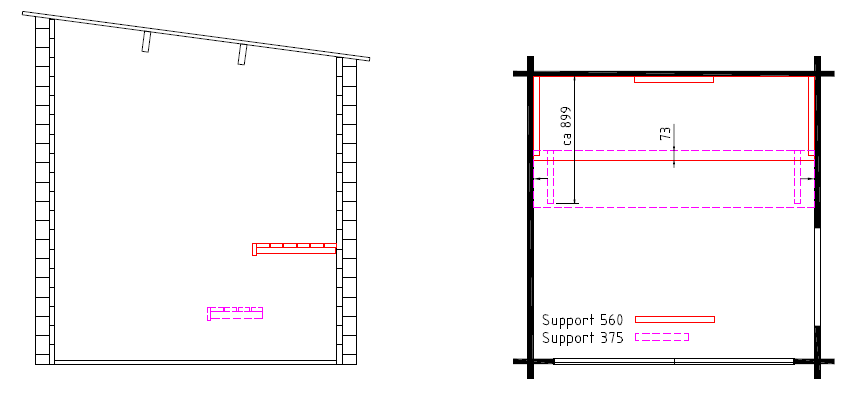
CROSS-SECTION OF SAUNA ROOM AND HEIGHT OF BENCH MODULES
Use 4.5×70 screws to fasten bench supports to walls and to fix benches to already fixed supports. Lower module position is approximate (can be placed according to your own preference).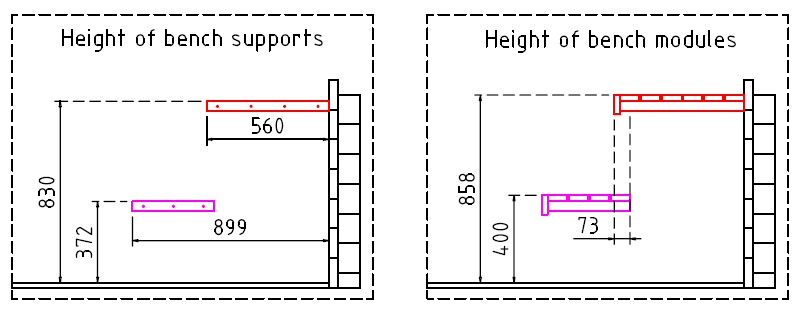
For More Manuals By Bsaunas, Visit ManualsLibraryy.
Bsaunas Halden XS Square Log Sauna-FAQs
Q1. How do I use an electric sauna for the first time?
Set the thermostat to your desired temperature, allow the sauna to preheat, then enter once it reaches the correct heat level. Start with shorter sessions (10–15 minutes) to let your body adjust.
Q2. How long does it take for a sauna to heat up?
A traditional wood-burning sauna usually takes 60–90 minutes to heat, while an electric sauna can warm up in 30–45 minutes, depending on size and temperature settings.
Q3. What is the normal sauna temperature?
The safe and comfortable range is 140–200°F (60–93°C). Beginners may prefer around 150–170°F, while experienced users may enjoy higher heat.
Q4. What is the “200 Rule” for saunas?
This guideline suggests that the combined number of temperature (in °F) and humidity should not exceed 200. For example, at 180°F, humidity should stay around 20%.
Q5. Can I pour water on an electric sauna heater?
Yes. When installed properly, electric heaters are designed to handle water on the rocks, creating steam for extra humidity.
Q6. How long should I stay in a sauna?
The recommended session is 5–20 minutes. Experienced users may stay up to 30 minutes if they are well-hydrated and comfortable.
Q7. Is it safe to drink water in a sauna?
Absolutely. Since saunas cause heavy sweating, it’s important to drink water before, during, and after each session to avoid dehydration.
Q8. What conditions make sauna use unsafe?
People with unstable heart disease, recent heart attacks, or uncontrolled high/low blood pressure should avoid saunas. Always consult your doctor if you have medical concerns.
Q9. Can I bring my phone into a sauna?
It’s not recommended. The high heat and humidity can damage electronics.

