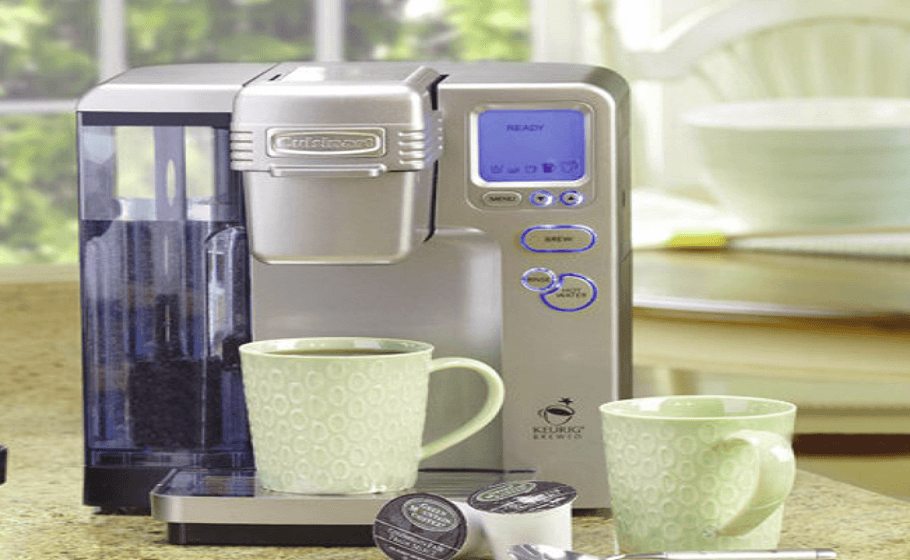
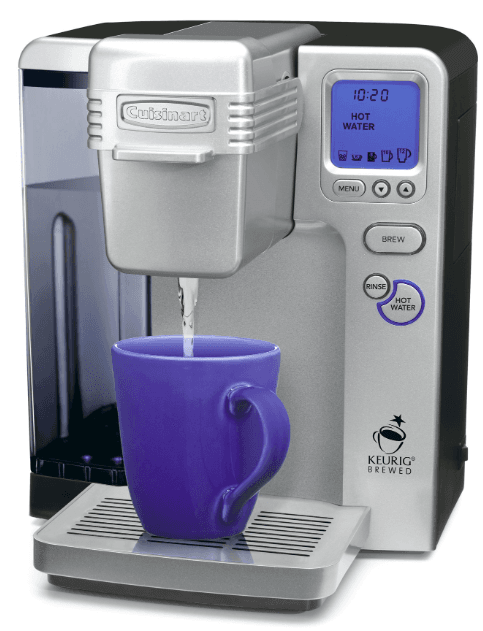
Cuisinart SS-700 Single Serve Brewing System
IMPORTANT SAFEGUARDS
When using electrical appliances, basic safety precautions should always be followed to reduce the risk of fire, electric shock, and/or injury to persons, including the
following:
- READ ALL INSTRUCTIONS.
- Do not touch hot surfaces. Use handles and knobs.
- To protect against electric shock, do not place a cord, plug, or base unit in water or other liquids.
- Close supervision is necessary when any appliance is used by or near children.
- Always unplug from the outlet when not in use and before cleaning. Allow to cool before putting on or taking off parts and before cleaning the appliance.
- Do not operate any appliance with a damaged cord or plug or after the appliance malfunctions or has been dropped or damaged in any manner. Return the appliance to the nearest Cuisinart Repair Center for examination, repair, or electrical or mechanical adjustment.
The Quest for the Perfect Cup of Coffee
- Element 1:
- WATER
- Any hot beverage is made up primarily of water. Often overlooked, the quality of the water is as important as the quality of the coffee, tea, or cocoa. A good rule of thumb is that if your water doesn’t taste good from the tap, it won’t taste any better in your beverage. That’s why the Cuisinart® Single Serve Brewing System has added a charcoal water filter that removes chlorine, bad tastes, and odors, for the purest cup every time.
- Element 2:
- COFFEE
- While the bulk of the liquid is water, all of the flavors should be from coffee, tea, or cocoa. To achieve the same great quality you receive at coffee bars, you need to use the same quality ingredients. By using the K-Cup®, brought to you by some of the most premium brands on the market, you can be assured that you’re getting the finest, freshest gourmet product with every cup you brew. If you choose to use your coffee in the included My K-Cup®, make sure all your ingredients are at their freshest.
- Element 3:
- GRIND
- The grind of coffee and cocoa, or the refinement of your tea leaves is critical for proper flavor extraction. With the pre-measured, pre-ground ingredients
found in every K-Cup®, you can rest easy knowing that it’ll brew perfectly each and every time, locking in maximum flavor and freshness
Features and Benefits
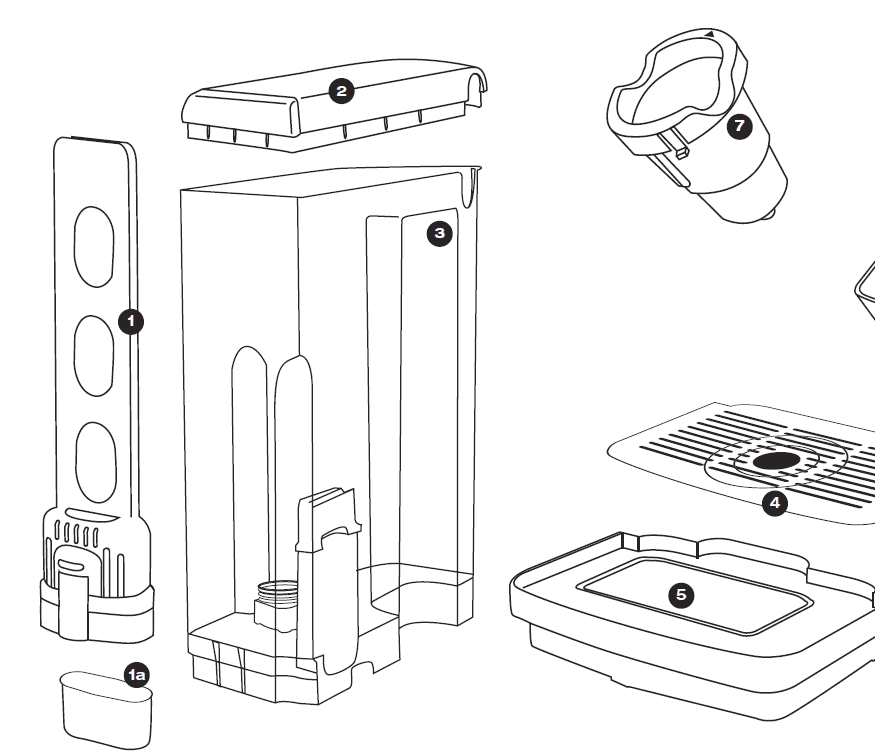
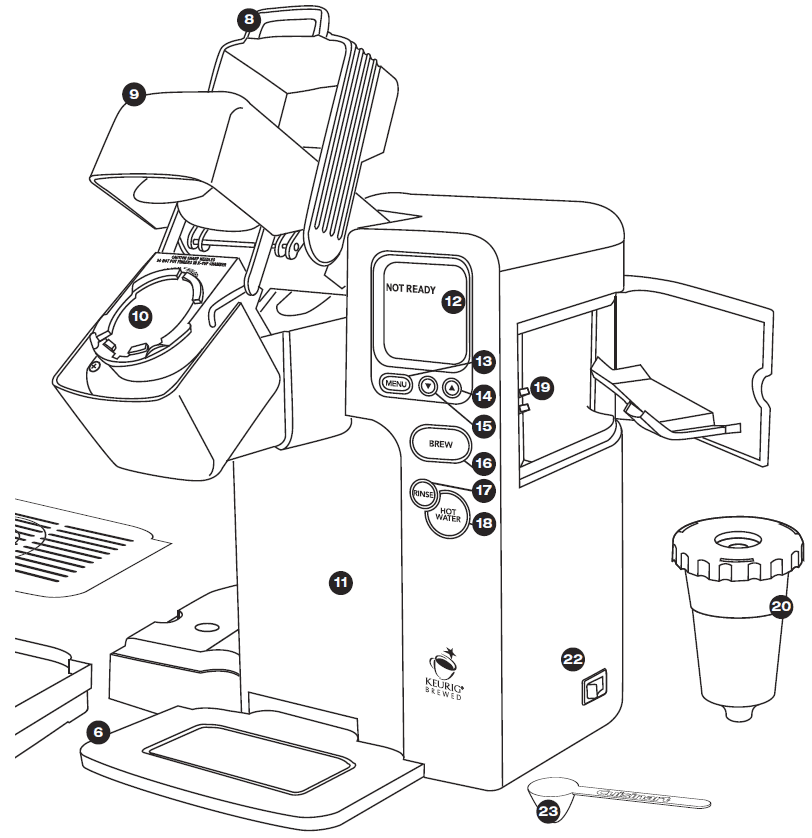
- Charcoal Filter Holder
- 1a. Charcoal Water Filter
- Water Reservoir Lid
- Removes for easy filling.
- Removable 80-oz.
- Water Reservoir
- Offers extra-large capacity, eliminating the need for frequent refills.
- Removable Drip Tray Plate
- Allows extra space for travel mugs.
- Drip Tray
- Drip Tray Base
- Removable K-Cup® Holder
- Handle
- Easy grip prevents slips.
- Brewing Head
- Brewing Chamber
- Holds My K-Cup® or the K-Cup® Holder.
- Housing

- Control Panel
- Menu Button
- Up Button ( )
- Down Button ( )
- Brew Button
- Rinse Button
- Hot Water Button
- My K-Cup® Compartment
- Conveniently stores My K-Cup®.
- My K-Cup® Reusable
- Coffee Filter
- Power Cord (not shown)
- Power Switch (located rear side of Brewer)
- Coffee Scoop
Set-Up & First Brew
- IMPORTANT: Do not attempt to use your Cuisinart® Single Serve Brewing System until it has been set up for its first use as outlined below.
Setting Up Your Brewer
- Unwrap the cord and plug the Brewer into a grounded outlet. Make sure to remove packing tape, a clear plastic sticker from the control panel, and a sticker from the water reservoir. Also, be sure to remove the polybag from the My K-Cup® located in the compartment on the right side of the brewer.
- Place a large cup or mug (10 oz. minimum) on the drip tray.
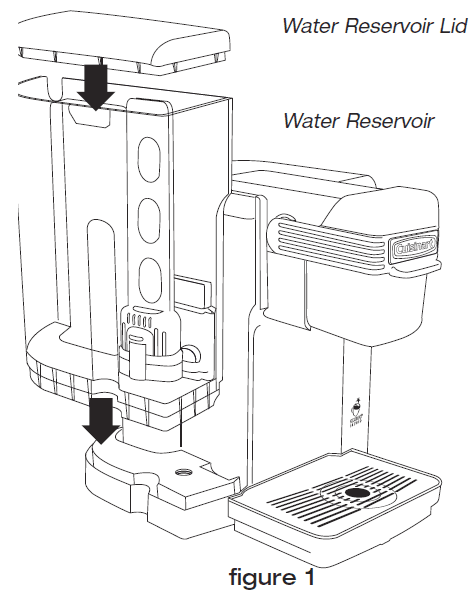
- Remove the lid from the reservoir, then lift the reservoir straight up and away from the Brewer. Wash the reservoir with warm soapy water.
- Fill the reservoir with water to the max fill line and return with a lid to the unit (see Figure 1).

- Press the power switch located on the rear right side of the Brewer. The switch is spring-loaded and will return to its original position automatically.
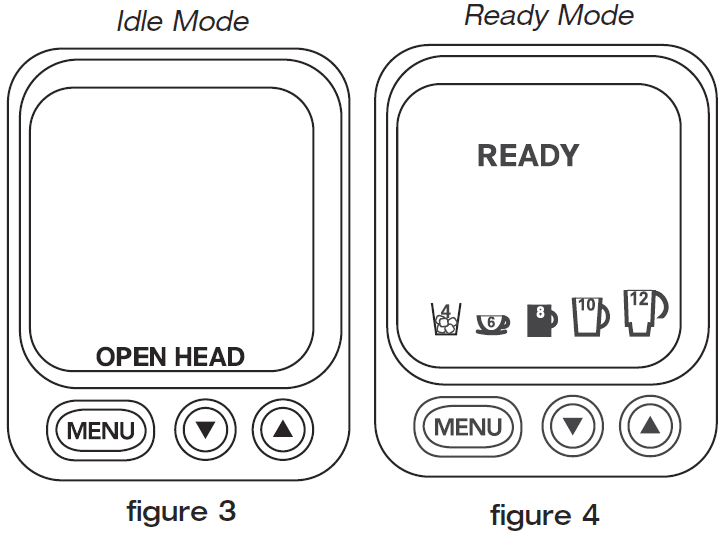
- When the control panel displays OPEN HEAD (see Figure 3), open and close the brewing chamber. READY and brew size icons will be displayed with the default size shown as a solid mug (see Figure 4).

- To make sure your mug is in place, press the Brew button to start a cleansing cycle (the unit will dispense approximately 8 oz. of water). The control panel will
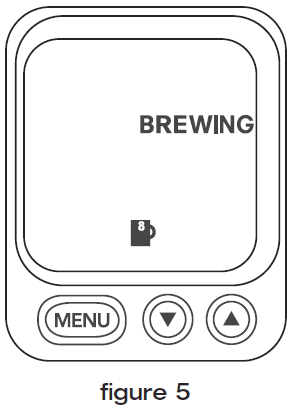
display BREWING, as well as the factory default brew size (see Figure 5). When a cycle is complete, dispose of the hot water.
Charcoal Water Filter
- Your coffeemaker comes with a charcoal water filter that eliminates chlorine, bad taste, and odors from tap water.

Inserting the Water Filter
- Remove the filter and filter holder from the polybags.
- Soak the filter, fully immersed in cold tap water, for 15 minutes.
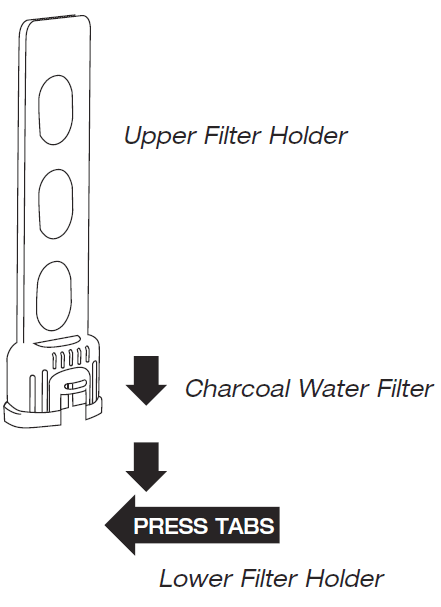
- Remove the lower portion of the filter holder by pressing the tabs on the sides and pulling them apart. Rinse with fresh water.
- Insert the charcoal filter into the upper filter holder, then attach the lower portion by pressing on tabs and pushing until it locks into place (see Figure 6).
- Flush the filter by running fresh water through the lower portion of the filter holder.
- Allow the filter to drain completely.
- Place the assembled water filter holder into the water reservoir, pushing it down to fit into place (see Figure 7).
Brewing
- The control panel will display OPEN HEAD while in idle mode.
- Place a cup or mug on the drip tray. The drip tray can be removed to accommodate travel mugs.
- Lift the handle. The brewing chamber will open toward you.
- Select a K-Cup® Portion Pack®.
- Note: Do not remove the foil lid or puncture the K-Cup®.
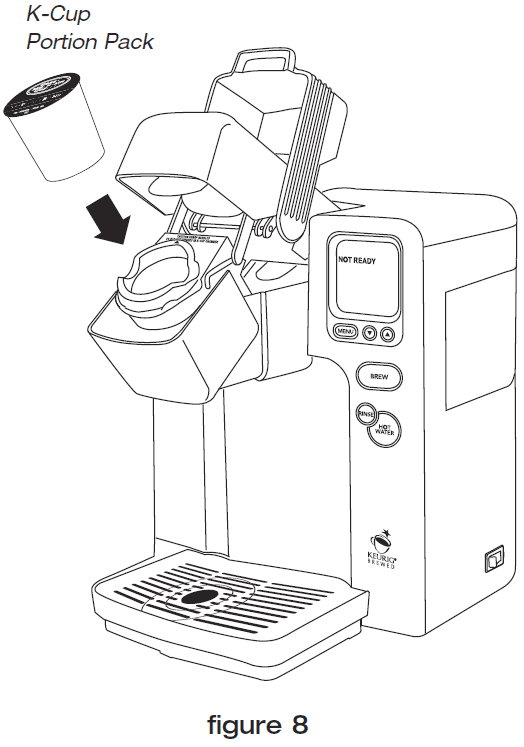
- Place a K-Cup® in the brewing chamber (see Figure 8).

Hot Water/Rinse
- Your Brewer is equipped to dispense hot water to make hot chocolate, tea, soup, and more. Your Brewer is also equipped with a Rinse cycle to flush out residual
flavors. The Rinse cycle will dispense about 4 oz. of hot water. - Note: We suggest running the Rinse cycle before using hot water to flush out any residual coffee, tea, or hot cocoa flavor.
To Rinse:
- Place a cup or mug on the drip tray. If you’ve just completed a Rinse or Hot Water cycle, proceed to step 4.
- Lift the handle. The brewing chamber will open towards you; check to make sure there is no K-Cup® inserted.
- Lower the handle to close the brewing chamber. When closed completely, the control panel will indicate READY.
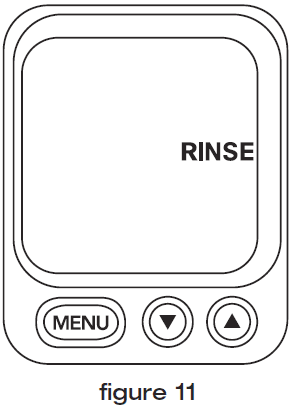
- Press Rinse. During the Rinse cycle, only the Rinse button will be lit. The control panel will display the word RINSE (see Figure 11).

- Following the Rinse cycle, your Brewer will automatically fill and heat in preparation for the next cycle. Once the heat cycle is completed, the RINSE and
HOT WATER buttons will remain lit for one minute. While the buttons are lit, you can perform another Rinse cycle or dispense Hot Water without opening the brew chamber. - Note: To BREW directly after a Rinse cycle open the brewing head, insert a K-Cup, and brew as normal.
- Following the Rinse cycle, your Brewer will automatically fill and heat in preparation for the next cycle. Once the heat cycle is completed, the RINSE and
To make Hot Water:
- Place a cup or mug on the drip tray. If you’ve just completed a Rinse or Hot water cycle proceed to step 4.
- Lift the handle. The brewing chamber will open towards you; check to make sure there is no K-Cup® inserted.
- Lower the handle to close the brewing chamber. When closed completely, the control panel will indicate READY.
- All brew-size icons will be displayed with your default size shown as a solid mug. To choose a different size, use the buttons
Brewing with the My K-Cup® Reusable Coffee Filter
The Cuisinart® Single Serve Brewing System comes with a My K-Cup® reusable coffee filter, which allows you to use your own ground coffee. The dishwasher-safe, My K-Cup® conveniently stores in the easy open compartment.
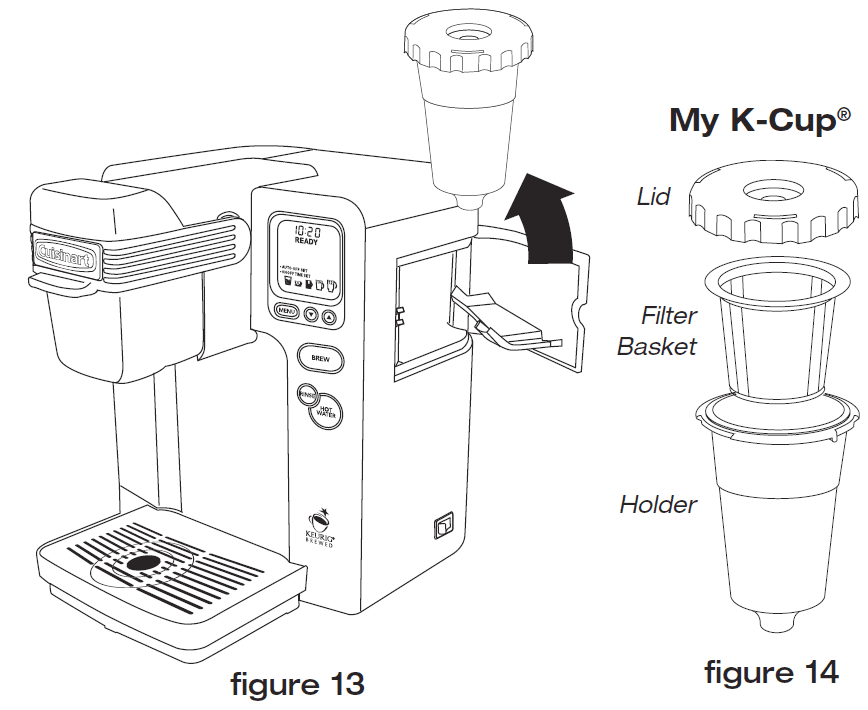
- Open the storage compartment located on the right side of the Brewer by pressing the finger indent. Remove the My K-Cup® (see Figure 13).

- Disassemble the My K-Cup® by turning the lid from the holder in a counterclockwise direction. Remove the filter basket from the holder (see Figure 14).
- Wash the My K-Cup® lid, filter basket, and holder in warm soapy water prior to use, making sure to rinse and dry thoroughly. All My K-Cup® parts are
dishwasher safe. - Insert the filter basket into the holder.
- Fill the filter basket with ground coffee making sure not to fill past the top of the mesh. Adjust the amount to your personal preference. Do not tamp the grinds. Ensure no grinds are remaining on the upper rim of the filter basket. Turn the lid clockwise to seal.
- Raise the handle and the brew chamber will open toward you.
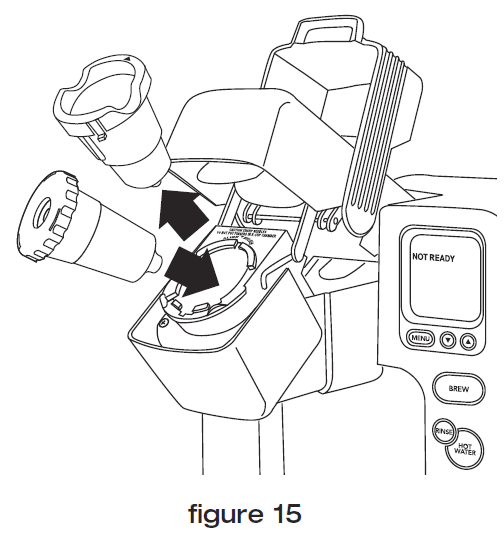
- Remove the K-Cup® holder from the brewing chamber by pulling it toward you. (If you would like, store the K-Cup® holder in the My K-Cup® storage
compartment.) - Drop the assembled My K-Cup® into the brewing chamber. (No need to snap it into place). See Figure 15.

Adding Water
- The Control Panel will indicate when the water level in your reservoir is low or if the Reservoir has been removed by displaying the words “ADD WATER”. The blue light in the Reservoir will also blink when water needs to be added. When “ADD WATER” is displayed, the Brewer will not allow you to brew.
The Water Reservoir can be filled in two ways:
- Lift off the Reservoir Lid and pour the water directly into the Reservoir while it is still attached to the Brewer, then replace the Lid.
- Remove the Reservoir from Brewer by first removing the Lid from the Reservoir then lifting the Reservoir straight up and away from Brewer. Fill with water, place the Reservoir back on the Brewer, and replace the Lid.
Programming
Setting the Clock
- Setting the clock is optional. When the clock is set, the time will appear on the control panel. Note: You must set the clock if you plan on using the ONOFF TIME SET programming feature.
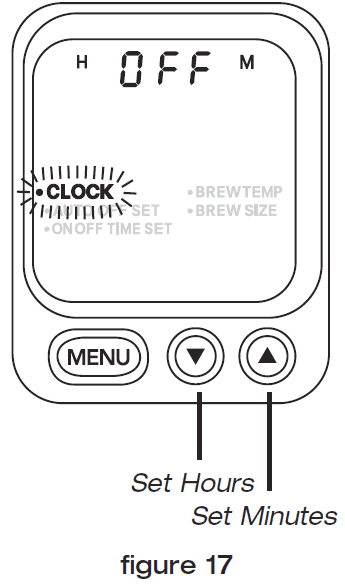
- Press the Menu button. Programming options will appear on the control panel with CLOCK flashing. The word OFF will appear at the top of the control panel
to indicate that the clock is not set (see Figure 17).
- Press or hold the button to scroll through the hours until you have reached the appropriate hour. Be sure the PM indicator is on if a PM time is desired.
- Press or hold the button to scroll through the minutes until you have reached the desired minutes.
- When you have reached the correct time, press the Menu button to set the time. Continue pressing Menu to scroll through the remaining programming
functions to exit the programming mode. - The correct time should now be displayed on top of the control panel (see Figure 18)
Programming On/Off Features
The Brewer provides three ways for you to enjoy gourmet coffee, tea, or hot cocoa on your own schedule. It will take the Brewer approximately 3½ minutes to warm up from room temperature.
- Leave it on all the time.
- The Brewer can be left on all the time so that it is always ready to brew a fresh cup of gourmet coffee, tea or hot cocoa. To turn the Brewer off at any time, simply press the power switch located on the right side of the Brewer.
- Note: Although the clock remains on if set, you cannot brew a cup of coffee, tea, or hot cocoa if the brewer is off. Press the power switch to restore
power to the Brewer. You will have to wait for the water to heat up before the Brewer is ready to brew.
- Set the Brewer to AUTO OFF.
- This will automatically shut the Brewer off after a specified period of time from the last brew.
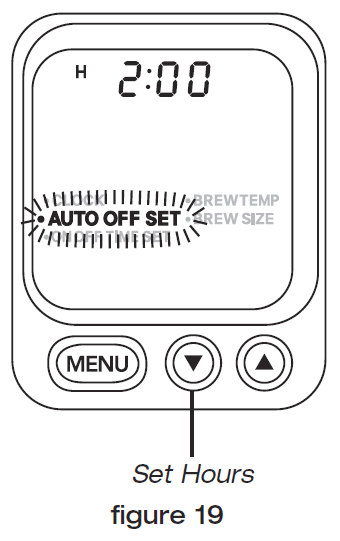
- a. Press the Menu button until AUTO OFF SET flashes (see Figure 19).

- b. Press or hold the button to advance one hour at a time, up to 9 hours.
- c. After setting the desired AUTO OFF TIME, press the Menu button to set the AUTO OFF TIME. Continue pressing Menu to scroll through the remaining programming functions to exit the programming mode.
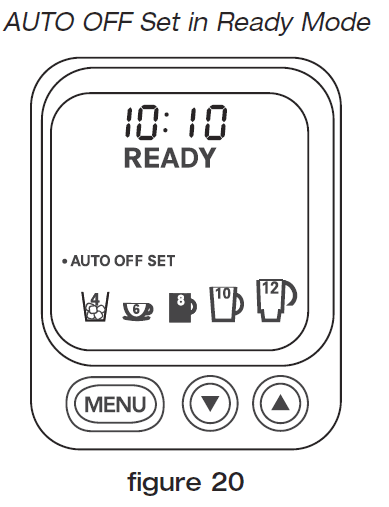
- d. AUTO OFFSET will be displayed on the control panel, indicating that it has been successfully set (see Figure 20).

- e. To turn off the AUTO OFF feature, Press the Menu button until AUTO OFF SET flashes. Press the button to advance one hour at a time until
OFF appears. Press the Menu button to scroll through the remaining programming functions to exit the programming mode
Programming Your Brew Size
The Brewer’s default brew size preset is 8 oz. The default brew size lets you choose the brew size most often used. To change the default brew size to your desired brew size:
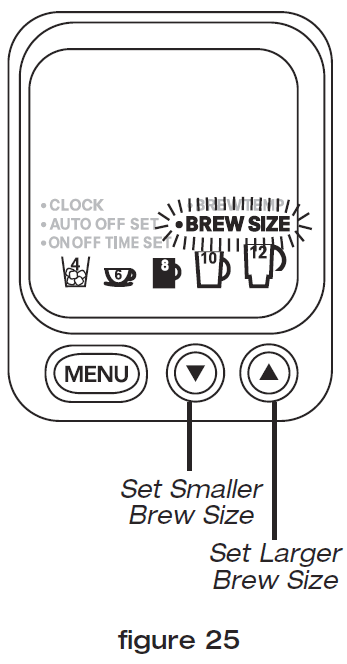
- Press the Menu button until BREW SIZE flashes (see Figure 25).
- Use or buttons to select your default brew size.
- Once the desired default brew size is selected, press the Menu button to set your default brew size and exit the programming mode. The control panel will display your selected default brew size.
- Note: You can always select another size prior to brewing

- Note: You can always select another size prior to brewing
Cleaning & Maintenance
Cleaning External Parts
We recommend regular cleaning of the Brewer’s external components.
- Never immerse the Brewer in water or other liquids. The housing and other external components may be cleaned with a soapy, damp, non-abrasive cloth.
- To remove the drip tray, simply slide it toward you, keeping it level at all times in order to prevent spills. The drip tray and drip tray plate are dishwasher safe.
Cleaning the My K-Cup® Reusable Coffee Filter
- Open the storage compartment located on the right side of the Brewer by pressing the finger indent. Remove the My K-Cup®.
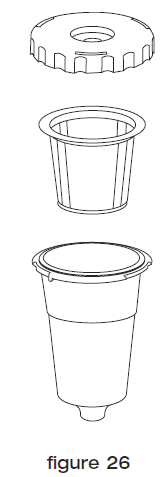
- Disassemble the My K-Cup® by turning the lid from the holder in a counterclockwise direction. Remove the filter basket from the holder (see Figure 26).
- Wash the My K-Cup® lid, filter basket, and holder in warm soapy water making sure to rinse and dry thoroughly. All My K-Cup® parts are dishwasher safe.

Troubleshooting
| Problem: | Solution: |
| Brewer does not have power. | Plug the Brewer into an independent outlet. |
| Make sure the Brewer is securely plugged in. | |
| Plug into a different outlet. | |
| Reset your home’s circuit breaker. | |
| Confirm the power has been turned on and the LCD is illuminated. | |
| The brewer will not brew. | Every once in a while an air bubble may get trapped in the water path. Lift off the reservoir, then put it back into place. |
| Turn off and unplug the brewer for 30 seconds or more. When you plug the brewer back in, be sure to turn the power back on. | |
| Make sure the water reservoir is properly in place, and perform a Rinse cycle. | |
| After placing the K-Cup® in the K-Cup® Holder, make sure the handle is pushed down securely and the LCD control panel reads READY. The and buttons, Brew, Hot Water, and Rinse buttons will be illuminated. Then press any of the lit buttons. | |
| If the LCD control panel indicates ADD WATER, check to make sure the water reservoir is properly filled. If not, add water. If so, make sure the water reservoir is properly seated in its base. | |
| If the LCD control panel indicates ADD WATER even after refilling and checking the base, contact Customer Service at 1-800-726-0190. | |
| The exit needle may be clogged (refer to page 19). | |
| Chlorine or mineral taste in coffee. | Consider using bottled water, filtered water or the Cuisinart Charcoal Water Filter. |
| Doesn’t brew a full cup. | Every once in a while an air bubble may get trapped in the water path. Lift off the reservoir, then put it back into place. |
| Turn off and unplug the brewer for 30 seconds or more. When you plug the brewer back in, be sure to turn the power back on. | |
| The exit needle may be clogged (refer to “Cleaning & Maintenance” page 18). | |
| Clean the K-Cup® holder brewing chamber (refer to “Cleaning & Maintenance” page 18). | |
| Make sure the water reservoir is properly in place, and perform a Rinse cycle. | |
| De-scale the Brewer (refer to page 20). | |
| If you have repeated the de-scale procedure two times and it is still only brewing a partial cup, contact Customer Service at 1-800-726-0190. | |
| The time is not displayed on the LCD control panel. | You must set the clock (refer to page 15) for the time to be displayed on the LCD. |
| If power is interrupted to the Brewer, you will need to reset the clock (refer to page 15). | |
| Brewer shuts off, or turns on, automatically. | Make sure the Auto Off and the On/Off time features have not been set. To do this, press the Menu button and scroll through the programming options. OFF should be displayed for Auto Off timer and On/Off. If OFF is not displayed, you must reset it (refer to page 15). |
| The blue light in the water reservoir is flashing. | This indicates the water level in the reservoir is low and water must be added (refer to page 14) in order to brew a full cup. |
| Coffee is too weak or watery. | Reduce the brew size for a stronger-tasting cup of coffee (refer to “Programming Your Brew Size” on page 18). Try an Extra Bold K-Cup®. It has 30% more ground coffee in each portion pack. |
For more manuals by Cuisinart visit, ManualsLibraryy
Cuisinart SS-700 Single Serve Brewing System-FAQs
How do I change the temperature on my Cuisinart coffee maker?
Turn the carafe TEMP knob to adjust the temperature to High, Medium, or Low. Refer to the user manual for detailed setup instructions.
Why won’t my Cuisinart coffee maker turn on?
Ensure the coffee maker is plugged in, the power outlet is working, and any necessary light switch is turned on. Also, check that all parts, such as the coffee basket and pot, are correctly placed, as some models won’t power on if parts are missing.
What does the Tone button do on a Cuisinart coffee maker?
The Tone button controls the Ready Tone, which beeps five times when brewing is complete. Press the Tone button to turn it off or on, with an icon appearing on the display when the tone is disabled.
Can I adjust the temperature on a coffee maker?
Some programmable coffee makers allow users to adjust the brew temperature and strength for a customized coffee experience.
What does “EEO” mean on my Cuisinart coffee maker?
The “EEO” message indicates that your coffee maker needs descaling.
Can I clean my Cuisinart coffee maker with vinegar?
Yes! While commercial descaling solutions are available, you can use a mix of distilled white vinegar and water to clean your coffee maker. However, baking soda is not recommended for descaling.
What is Bold mode on a coffee maker?
The Bold setting extends the brewing cycle, allowing coffee to steep longer, extracting more oils and flavors for a richer, stronger taste.
How much ground coffee should I use per cup?
Use 1½ to 2 tablespoons of ground coffee per cup, which equals approximately 10.6 grams per tablespoon.
What is the best temperature for brewing coffee?
The optimal brewing temperature for coffee is between 195°F and 205°F (90°C – 96°C), as recommended by the National Coffee Association for the best flavor extraction.

