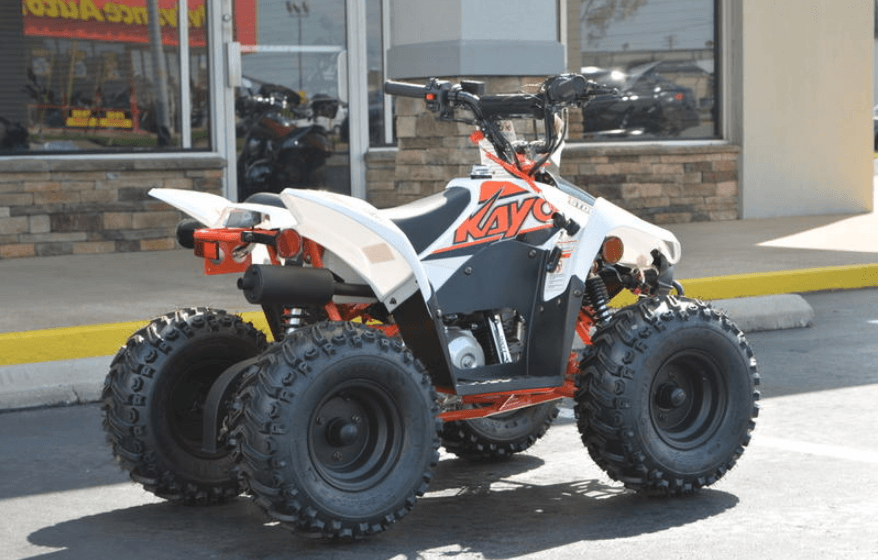
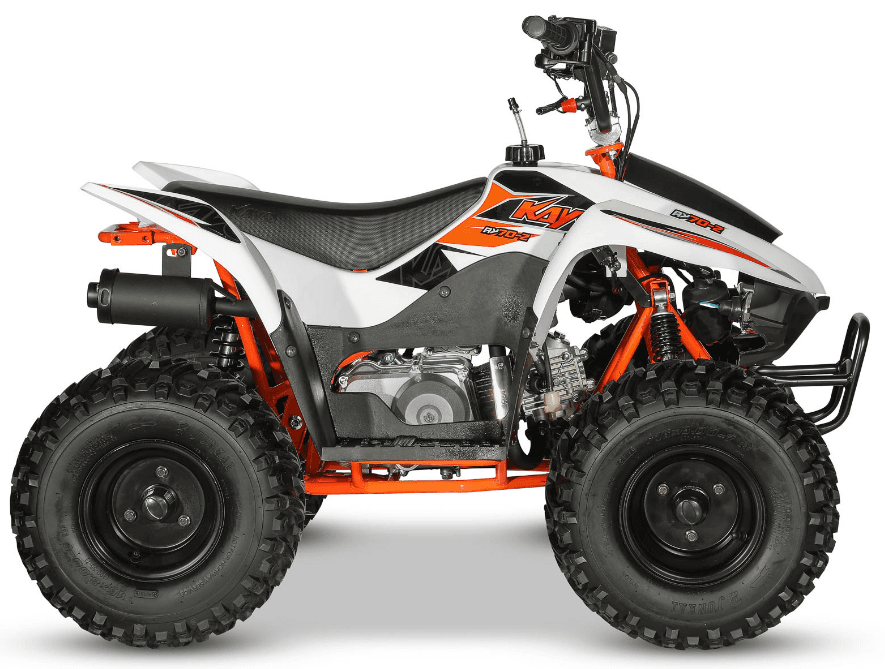
KAYO MOTOR AY70-2 FOX 70 ATV Bike
Safety precautions
Safety first
- Wear work clothes (coveralls), a hat, and safety boots suitable for the operation. In some conditions, safety glasses, dust masks, gloves, and other safety protective supplies are needed to protect you from injury.
- Do not run the engine in unventilated places.
- To prevent burns, do not touch the engine or exhaust until cooled.
- Battery solution ( dilute sulfuric acid) is a strong corrosive agent; contact with the skin contact with eyes may cause blindness. If the battery solution accidentally touches clothes or skin, rinse immediately with clean, cold water. If the battery solution touches the yes, please flush immediately with plenty of clean, cold water and get medical treatment as soon as possible. Batteries and battery solutions should be kept out of reach of children. Battery charging will produce flammable and explosive gases. if exposed to a source of fire or spark, there is a risk of explosion or fire. Please charge in well-ventilated places.
Specifications, Model information
| No. | Item | |
| 1 | Brand | KAYO |
| 2 | Type | AY70-2 |
| 3 | Name | 70cc utility ATV |
| 4 | Company | ZHEJIANG KAYO MOTOR CO., LTD. |
Dimensions, Vehicle Specifications
| 1 | Dimension(L*W*H)(mm) | 1230*800*870 |
| 2 | Handlebar height(mm) | 870 |
| 3 | Handlebar width(mm) | 800 |
| 4 | Rear height(mm) | 650 |
| 5 | Ground clearance of seat(mm) | 635 |
| 6 | Min. terrain clearance(mm) | 85 |
| 7 | Wheelbase(mm) | 900 |
| 8 | Front track(mm) | 640 |
| 9 | Rear track(mm) | 550 |
| 10 | Turning radius(mm) | 1650 |
| 11 | Turning angle(degree) | 38°±2° |
Engine parameters
| No. | Item | |
| 1 | Starting type | Electric |
| 2 | Type | Horizontal, Single cylinder, four stroke, oil cooling |
| 3 | Distribution way | SOHC/chain drive |
| 4 | Cylinder diameter × mileage (mm) | 47*41.4 |
| 5 | Compression ratio | 8.8 :1 |
| 6 | Lubrication mode | Combination splash and pressure feed |
| 7 | Oil pump type | Rotor |
| 8 | Lubricating oil filter type | All-flow filter, paper filter |
| 9 | Oil trademark | SAE15W-40 |
| 10 | Cooling type | Air cooling |
| 11 | Cooling fluid | / |
| 12 | Air filter type | Filter with a sponge filter element |
| 13 | Carburetor | Horizontal plunger type(Jingke PZ19/EPA state) |
| 14 | Tank volume | 2L |
| 15 | Clutch type | Dry automatic clutch |
| 16 | Gearshift method | CVT | |||||
| 17 | Gear range | CVT without reverse gear | |||||
| 18 | Shift type | R~N~D | |||||
|
19 |
Reduction ratio | Forward gear D | Reverse gear R | ||||
| Primary | Gear hub of the clutch/primary gear | ||||||
| Single-sta ge | Gear ratio of the forward gear | Gear ratio of the forward gear | |||||
| Overall | |||||||
| ● Frame | |||||||
| 20 | Drive sprocket ratio | 37/13 | |||||
| 21 | Output type | Chain drive, rear wheel drive | |||||
| 22 | Brake type | Front and rear disc | |||||
| 23 | Suspension type | Freestanding double rocker | |||||
| 24 | Frame type | Steel tube and steel plate welded type | |||||
Lubrication system
| Item | Standard | Limitation | ||
| Engine oil capacity | Change oil | 800mL(No oil filter element replaced | - | |
| Change oil | 800mL(replace the oil filter element) | |||
| Full capacity | 800mL | - | ||
| Recommended engine oil(original)
| · four-stroke motorcycles SAE-15W-40
For replacements, it must be within the following scope: ·API classification: SG or upper grade engine oil
·SAE specification: refer to the left table | |||
| Radial clearance of the inner | 0.07 mm~0.15mm | 0.2mm | ||
| Radial clearance between | 0.03 mm~0.10mm | 0.12mm | ||
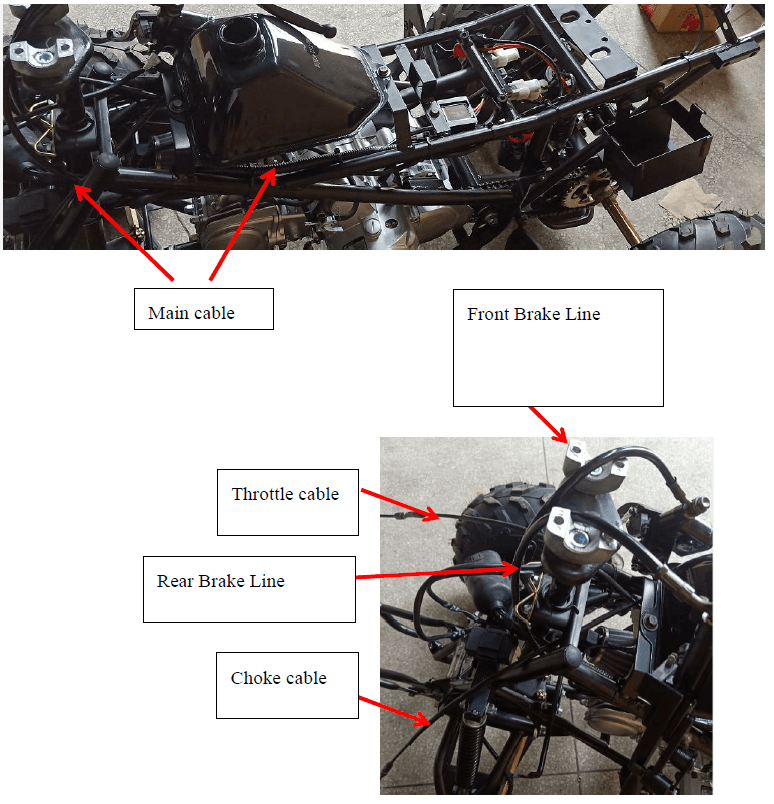
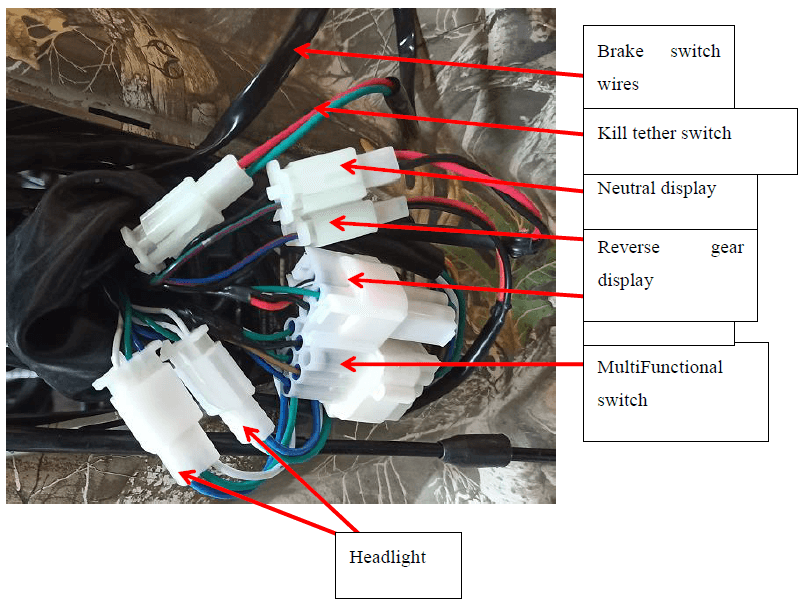
Wiring diagram of cable, hosepipe, and inhaul cable
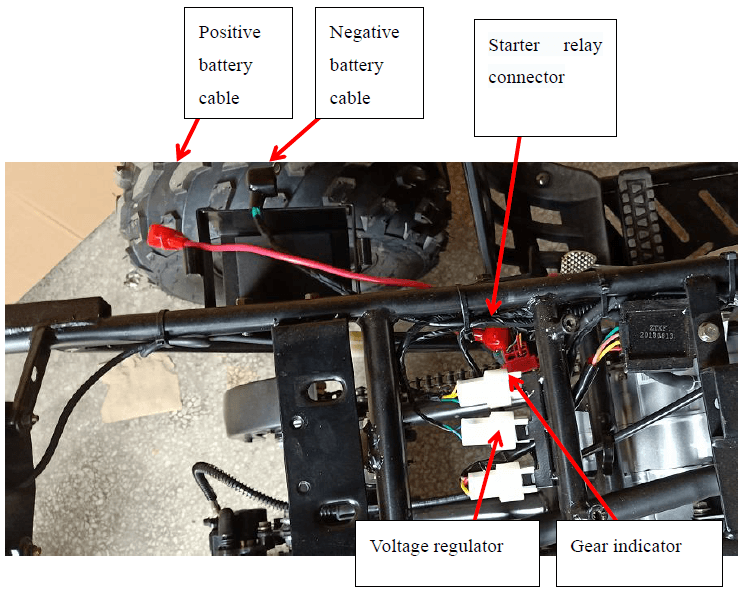
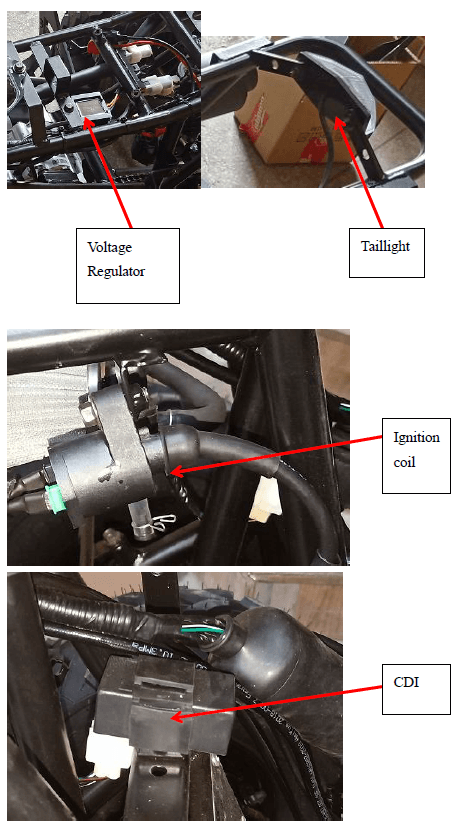
Maintenance cautions
Operation cautions
- When replacing plastic parts, please install new warning labels, stickers, and riveted tags on the new plastics.
- This chapter is about dismounting the body plastics. The pipe, inhaul cable should be equipped according to the wiring diagram of the cable, the hosepipe, and the inhaul cable.
Disassembly
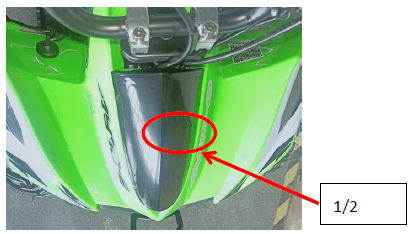
- Remove the bolts 1 and 2.
- Push down and gently pull the hood forward to remove. (Be careful as the tabs are easy to break )

Installation
- In reverse order of disassembly. Locate tabs into slots and push to lock into place, then install bolts 1 and 2 (note: replace hood plastic if any of the tabs broke during disassembly)
Handlebar
Disassembly
- Cut off power first. (Disconnect battery)
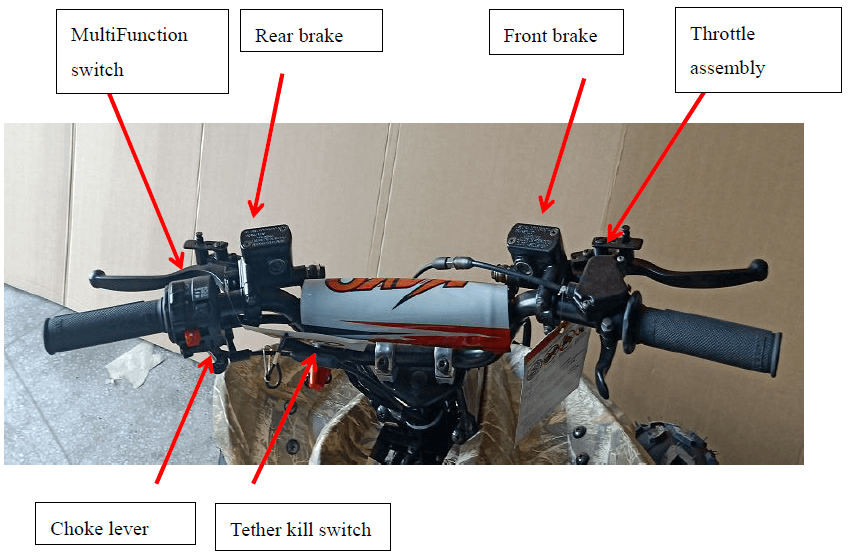
- Cut plastic ties first, then pluck the functional switch, stop switch, and brake cable plug in sequence.
- Loosen the fixed bolt from the brake bar with a tool and remove the rear brake bar.
- Remove the front brake bar as the same as the rear brake bar.
- Pull the damper cable as the picture shows, then remove it.
- Remove the bolt from the accelerator cap to remove the throttle cable.
- Dismount the fixed bolt, then the lower riser, remove the handlebar at last.

Installation
- In reverse order from disassembly, then check if it is installed well.
- Note:
- After installation, check the flame-out switch connector, function switch connector, brake connector, etc., in case of misconnection or looseness.
- Check if the dumper cable and throttle cable are in the right position.
- Front and rear brakes are in right position. The wiring way refers to the vehicle wiring diagram
Maintenance information
Note
- Do not run the engine in unventilated places, because the exhaust contains carbon monoxide (CO) and other toxic components.
- To prevent burns, don’t touch the engine or exhaust until it has cooled down. Please wear long-sleeved work clothes and gloves.
- Gasoline is flammable and explosive. Pay attention to sparks as well as open flames. Vaporized gasoline may explode if exposed to open flame or sparks, Please refuel in well-ventilated areas.
- Being careful of the drive system and rotating parts, keep fingers, loose clothing, and hair away from these parts
Maintenance period
- Engine maintenance is a regular periodic work due at certain time intervals for engine maintenance. Keeping up on standard maintenance will increase the lifespan and reliability of the components. The following is the AY70 engine maintenance period table.
| A: adjustment, C: clean, I: inspection L: lubrication | 10 hours or 300km | |||||
| 20 hours or 750 km | ||||||
| per 50 hours or 1500km | ||||||
| per 100 hours or 3000km or one 年 | ||||||
| per 200 hours or 6000km | ||||||
| 2 years | Remark | |||||
| Engine | ||||||
| Lubricating oil and air filter | R | R | ||||
| Damper adjustment | I, A | I, A | ||||
| Engine leakprofness | I | I | ||||
| Engine suspension | I | I | ||||
| Air filter | C | R | ||||
| Sparking plug | I | I | R | |||
| Fuel system | ||||||
| carburetor | I | I, L | ||||
| Driving wheel, driven wheel | I, C | |||||
| clutch | I | |||||
| Item | Period | Criterion | ||||
| Parts | Item | Daily | Half year | One year | ||
| Steering device | Steering wheel | Operating flexibility | ○ | |||
|
Steering system | Damage | ○ | ||||
| Installation status of the steering | ○ | |||||
| Ball pin shaking | ○ | |||||
| Braking device | Brake pedal | Pedal travel | ○ | ○ | ||
| Braking effect | ○ | ○ | ||||
| Connecting rod | Slackness, looseness, and | ○ | ○ | |||
| Brake fluid | ○ | ○ | Above the brake fluid lower limit | |||
| Hydraulic brake and brake disc |
Tear and damage of the brake disc |
○ |
○ | Replace the disc in time, when the front or rear brake working disc’s thickness is less than 3mm. | ||
|
Brake pad | Tear and damage of the brake pad |
○ |
○ | The minimum brake pad ( friction plate ) thickness≥1.5mm; less than 1.5mm, replace it. | ||
|
Driving device |
Wheel |
|
○ |
○ | Front wheel : 45kPa ( 0.45kgf/ cm2 ) (4.0PSI) rear wheel: 45kPa ( 0.45kgf/cm2) (4.0PSI) | |
| Crack and damage of the wheel | ○ | ○ | ○ | |||
| Tire groove depth and abnormal wear |
○ |
○ | If there’s no tear indicator on the wheel, the residual groove depth should be greater than3mm | |||
| Loss of wheel nut and axle | ○ | ○ | ||||
| Front wheel bearing vibration | ○ | ○ | ||||
| Rear wheel bearing vibration | ○ | ○ | ||||
| Buffer device | Suspension | Shaking of the connection part | ○ | ○ | ||
| Damper | Leakage and damage | ○ | ○ | |||
| Function | ○ | |||||
|
Transmissi on | Chain | Transmission and lubrication, tightness | ○ | ○ | Chain flapping>20mm | |
| Flywheel, chain wheel | Transmission and lubrication, the tightness of the fixing bolt | ○ | ○ | If the chain wheel and chain wear severity, replace it. | ||
| Electrical device | Ignition device | State of the spark plug | ○ | |||
| Ignition period | ○ | |||||
| Battery | Terminal connection status | ○ | ||||
| Electric circuit | Looseness and damage of | ○ | ||||
| Fuel device | Fuel leak | ○ | ||||
| Throttle condition | ○ | Throttle knob clearance: | ||||
| Lighting device and steering indicator | function | ○ | ○ | |||
| Exhaust pipe and muffler | Whether the installation is loose or damaged | ○ | ||||
| Function of the muffler | ○ | |||||
Disassemble, assemble, and maintain the crankcase
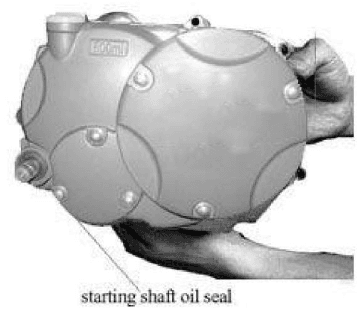
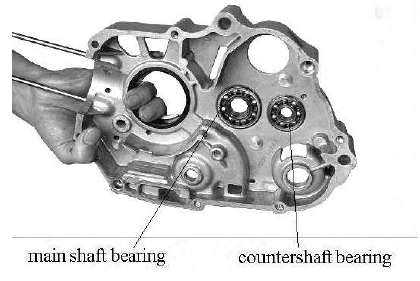
- Remove the cover of the right crankcase half. Check whether the oil seal of the starting shaft and the seal edge of the gearshift lever are worn. Replace if necessary.

- The left view of the right crankcase half is shown in fig and check whether the bearings of the main shaft and the countershaft are worn. Replace if necessary.

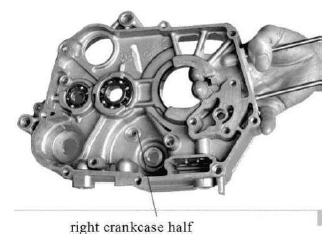
- The right view of the right crankcase half is shown in fig and check the state of the right crankcase half. Replace if necessary.

Troubleshooting of the crankcase, please refer to the following table.
| Description | Problem | Trouble | Compucation | Correction |
| Crack in the crankcase | Oil leakage from the | Repair or replace the | ||
| Oil leakage from the
joint of left and right | The crankcase gasket is
worn out | Replace the gasket | ||
| The threaded hole for oil
drain plug screw is | Oil leakage from the
threaded hole of the plug | Repair or replace the
crankcase | ||
| The threaded holes of the cylinder bolt are ineffective | Cylinder head retaining nut is impossible to screw up firmly, resulting in air leakage | The engine starts hard or fails to start. Insufficient engine output; Engine speed changes during | Repair the threaded or replace the crankcase | |
| The bolt of the cylinder | The same as the front | The same as the front | Replace the cylinder bolt | |
| The oil seal is damaged
Or the oil seal edge is | Oil leakage is ineffective | Oil leakage from the oil
seal | Replace the oil seal | |
| Right crankcase cover | The right crankcase | Oil leakage from the | Repair or replace the | |
| The gasket on the right
crankcase is broken | Oil leakage between
The case cover and the | Replace the gasket | ||
| Left crankcase cover | The left crankcase cover | Oil leakage from the | Repair or replace the | |
| The gasket on the left
crankcase is broken | Oil leakage between
The case cover and the | Replace the gasket |
Maintenance of Crankshaft Connecting Rod
Disassemble, assemble, and maintain the crankshaft connecting rod
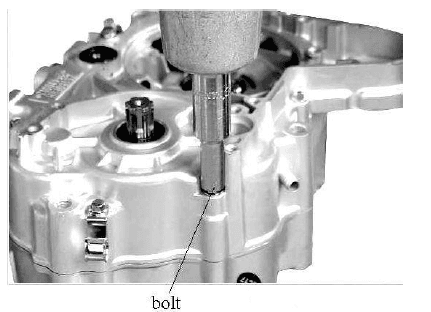
- Remove the fixing bolt of the crankcase from its holding place.

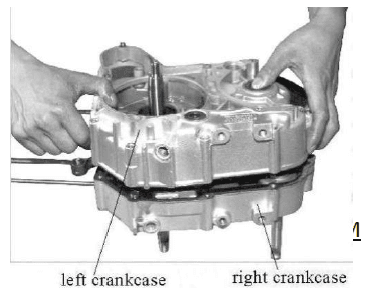
- Remove the left crankcase half. Take care not to forget the washer of the mainshaft and countershaft when removing the left crankcase.

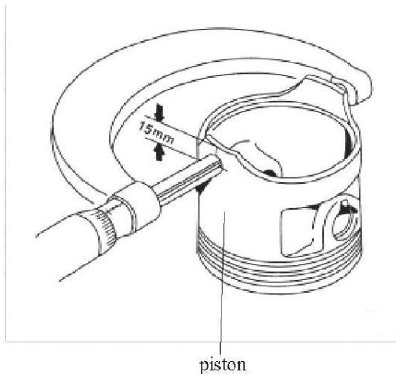
- Check the state of the piston and replace if worn or if reuse is questionable. Measure the diameter of the piston skirt. Replace it if the value is beyond the maintenance limit value.

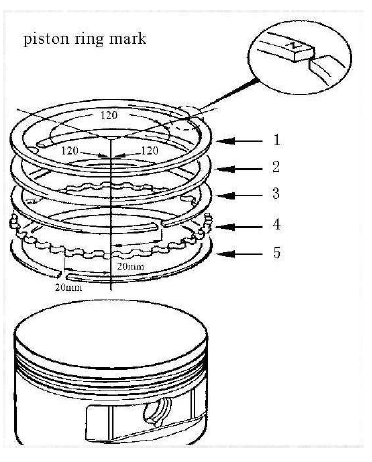
- Assemble the piston ring according to the figure and check whether the piston ring is damaged or the elasticity is weakened. Replace if necessary.

- For the troubleshooting of the crankshaft connecting rod mechanism, please refer to the following table.
- Maintenance of Crankshaft Connecting Rod Mechanism
Description Damage from Trouble Cause Correction Piston
Carbon deposit on the piston top
The engine overheats Remove the carbon deposit Carbon deposit in the ring groove
The piston ring is seized in the ring groove
The engine starts hard or fails to start. Insufficient engine output; Thick blue and white fumes form the exhaust muffler pipe
Scuffing or scratches on The surface of the piston skirt
Scuffing or scratches on the surface of the piston skirt
The piston and ring groove are overworn Excessive fitting clearance between the piston and the cylinder The engine starts hard or fails to start. Insufficient engine output; Thick blue and white fumes form The exhaust muffler pipe
Replace the piston The piston pin hole is over worn
Excessive fitting clearance between The piston ring and the hole.
Striking sound of the piston pin and of the cylinder
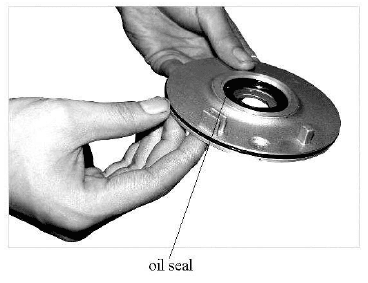
- Check whether the oil seal is worn. Replace if necessary.

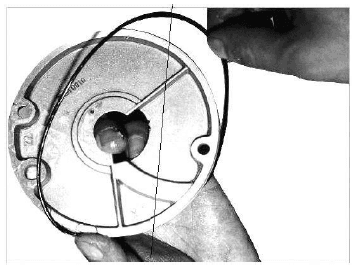
- Remove the seal ring. Check the condition of the oil seal ring and replace it is worn.

| Description | Damage form | Trouble | Cause | Correction |
|
Starter motor | The carbon brush is overworn. The carbon brush spring is | The starter motor has insufficient rotation force, or it is out of order. |
Replace the carbon brush | |
| fractured or has insufficient elastic force. | The starter motor has insufficient rotation force | Replace the carbon brush spring | ||
| Armature commentator surface is fouled. | The starter motor has insufficient rotation force | Clean the commentator’s surface | ||
| Armature commentator the surface is spotted, burnt, or damaged. | The starter motor has insufficient rotation force. | Polish the surface against The Commentator with a fine abrasive Paper. Make the cut on the mica Place between each commentator | ||
| Armature commentator surface is ablation or over worn. | The starter motor has insufficient rotation force or is out of order. | Replace the starter motor |
For more manuals by KAYO, visit ManualsLibraryy
KAYO MOTOR AY70-2 FOX 70 ATV Bike-FAQs
Is the Kayo Fox 70 a good ATV for kids?
Yes, the Kayo Fox 70 is a great beginner ATV for kids aged 6 and up. It features a 70cc fully automatic engine, electric start, and front/rear disc brakes for easy and safe handling.
What age is the Kayo Fox 70 suitable for?
The Fox 70 is designed for children aged 6 years and older, making it ideal for young riders just starting out.
What is the top speed of the Kayo Fox 70?
The Kayo Fox 70 is speed-governed to around 15 mph for safety. Larger models like the Storm 125 can reach up to 25 mph.
Where is the Kayo ATV manufactured?
Kayo ATVs are manufactured in China, with the company proudly designing and building its own off-road vehicles for over 20 years.
Why won’t my Kayo ATV start?
Common issues include a low battery, fuel problems, a faulty spark plug, or corroded wiring. Make sure the kill switch is off and try charging the battery or replacing the spark plug. If issues persist, consult a mechanic.
What is the weight limit for the Kayo Fox 70?
The recommended weight limit is 100 pounds, making it ideal for young riders within that range.
Is Kayo a Chinese brand?
Yes, Kayo is a Chinese company founded in 2002 by a former Honda engineer. It was the first to bring Chinese-manufactured pit bikes to the European market.
How fast can a 70cc ATV go?
Typically, a 70cc ATV can reach speeds of 20–30 mph, depending on design and restrictions.

