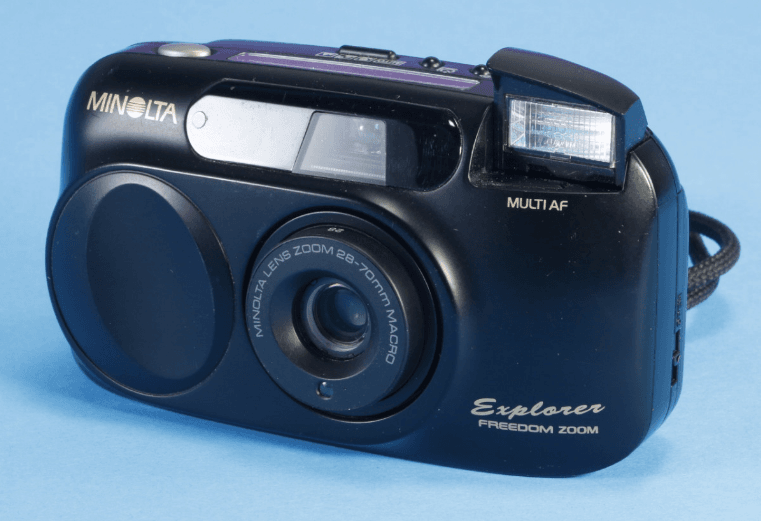
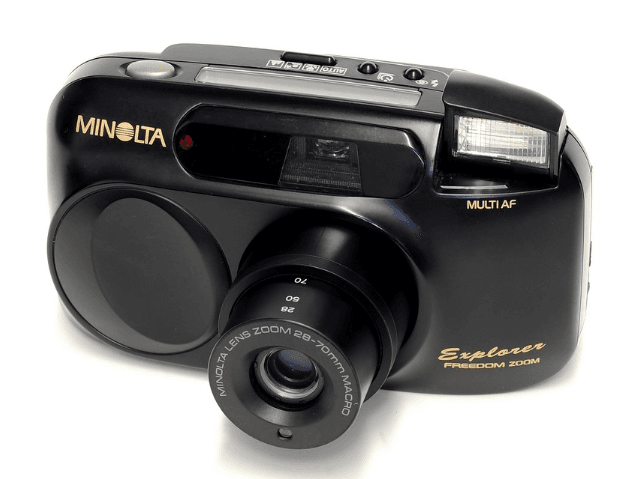
Minolta Explorer Freedom Zoom Film Camera
TECHNICAL SPECIFICATIONS
- Lens: 28-75mm f/3.5-8.9 power zoom lens with 4 elements in 4 groups
- Focusing: 3-beam, active infrared autofocus system with focus lock; Focusing range: 0.4m – ∞ (16 in. – co), Close-up: 0.4m – 1.0 (16 in. – 3.3 ft.); Maximum magnification 1/4.3X
- Exposure: Center-weighted metering; Metering range (ISO 100): 28mm: EV 2.6 – 17, 75mm: EV 3.3 – 17; Film speed range: Automatic setting for DX-coded film ISO 25-3200 in 1EV steps
- Film transport: Auto advance to first frame, auto rewind, auto threading, manual start of rewind possible; continuous drive: 1.2 sec./frame (without flash)
- Flash: Retractable, built-in flash, flashmatic with intensity control; Recycling time: approx. 0.3 – 7 sec.; Range (ISO 100): 28mm: 0.4 – 5.9m (16 in.- 19.4 ft.), 75mm: 0.4 – 2.3m (16 in. – 7.5 ft.)
- Viewfinder: Real-image zoom; Diopter (subject at 3m/10 ft.): -1 diopter
- Battery: One 3-volt CR123A or DL123A lithium battery; Battery performance: Approx.. 13 rolls (24 exp. roll w/ 50% flash)
- Dimensions: 121 x 66.5 x 44mm (4-3/4 x 2-5/8x 1-3/4 in.)
- Weight: 245g (8.64 oz.)
Specifications are based on the latest information available at the time of printing and are subject to change without notice.
FCC Rules
This device complies with Part 15 of the FCC Rules. Operation is subject to the following two conditions:
- This device may not cause harmful interference, and
- This device must accept any interference received, including interference that may cause undesired operation.
Changes or modifications not approved by the party responsible for compliance could void the user’s authority to operate the equipment. This equipment has been tested and found to comply with the limits for a Class B digital device, pursuant to Part 15 of the FCC Rules. These limits are designed to provide reasonable protection against harmful interference in a residential installation.
This equipment generates, uses, and can radiate radio frequency energy and, if not installed and used under the instructions, may cause harmful interference to radio communications. However, there is no guarantee that interference will not occur in a particular installation. If this equipment does cause harmful interference to radio or television reception, which can be determined by turning the equipment off and on, the user is encouraged to try to correct the interference by one or more of the following measures:
- Reorient or relocate the receiving antenna.
- Increase the separation between the equipment and the receiver.
- Connect the equipment to an outlet on a circuit different from that to which the receiver is connected.
- Consult the dealer or an experienced radio/TV technician for help.
This Class B digital apparatus meets all requirements of the Canadian Interference-Causing Equipment Regulations.

This mark on your camera certifies that this camera meets the requirements of the EU (European Union) concerning interference-causing equipment regulations. CE stands for Conformité Européenne (European Conformity). This mark on your camera certifies that this camera meets the requirements of the EU.
NAMES OF PARTS
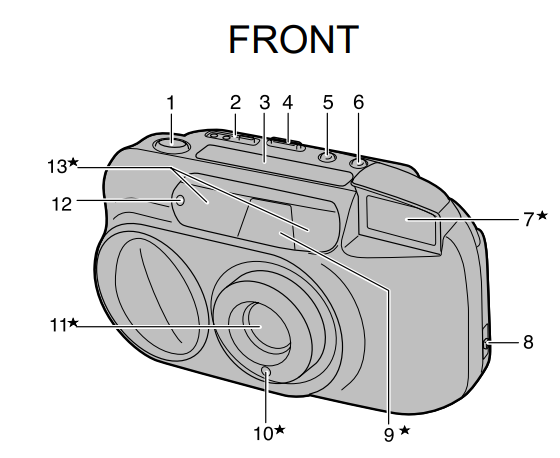
- Shutter-release button
- Date buttons (DATE model only)
- Data panel
- Subject-program selector
- Self-timer/Drive-mode button
- Flash-mode button
- Flash*
- Back-cover release
- Viewfinder window*
- Metering window*
- Lens*
- Self-timer/Remote-control lamp
- Autofocus windows/Remote-control receiver*
*Do not touch
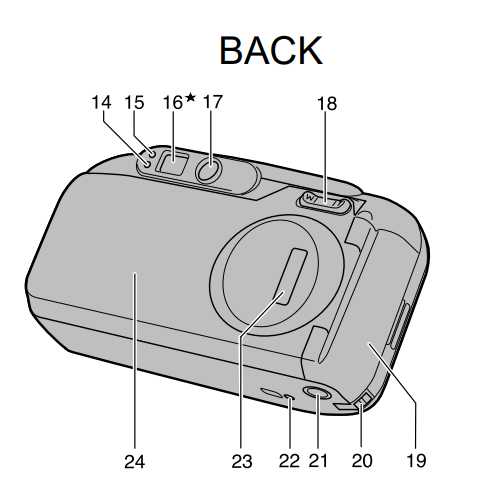
- Flash lamp (orange)
- Focus lamp (green)
- Viewfinder*
- ON/OFF button
- Zoom control
- Battery cover
- Strap eyelet
- Tripod socket
- Rewind button
- Film window
- Back cover
DATA PANEL
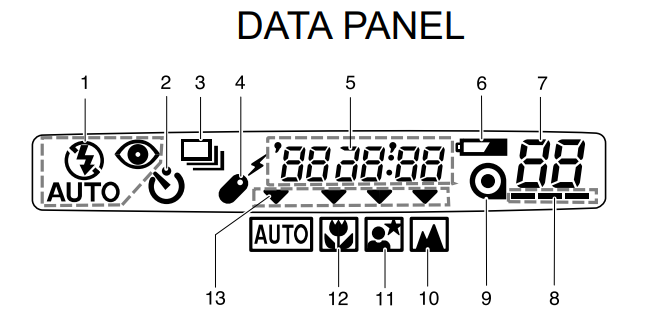
- Flash-mode indicator
- Self-timer indicator
- Continuous-drive indicator
- Remote-control indicator
- Date/Time display (date model only)
- Low-battery symbol
- Frame counter
- Film-transport signals
- Film-cartridge mark
- Landscape/Night View mode indicator
- Night Portrait mode indicator
- Close-up mode indicator
- Subject-program pointer
VIEWFINDER
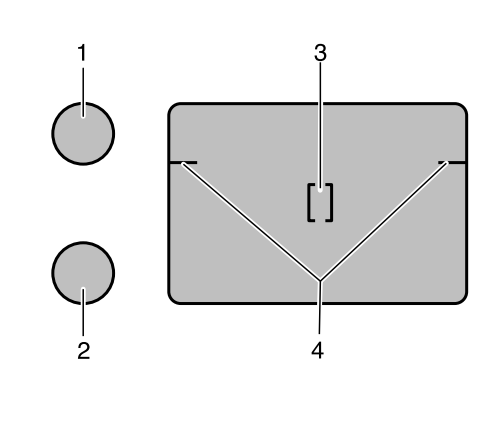
- Focus lamp (green)
- Glows: Focus confirmed
- Blinks: Subject too close
- Flash lamp (orange)
- Glows: Flash will fire
- Blinks quickly: Flash charging
- Blinks slowly: Camera-shake warning
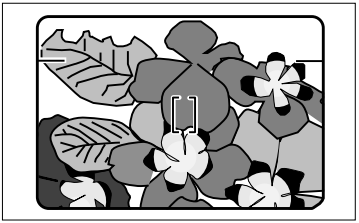
- Focus frame
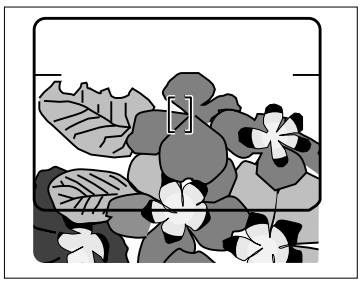
- Close-framing guides
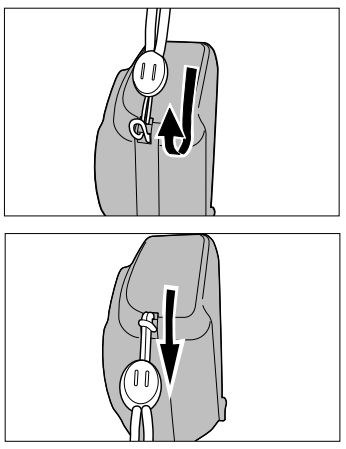
ATTACHING THE STRAP
- Attach the strap as shown.

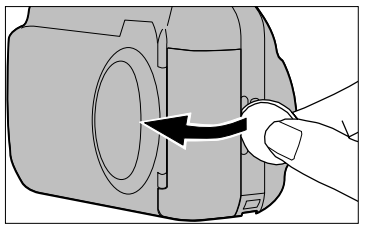
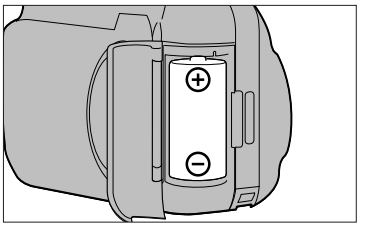
INSERTING THE BATTERY
Your camera uses one 3-volt CR123A or DL123A lithium battery to supply power for all camera operations.
- Open the battery cover using a coin similar object.

- Insert the battery according to the + and – marks inside the battery chamber and snap the cover closed.

- Before removing an old battery, make sure the camera is off.
LOW BATTERY SYMBOL
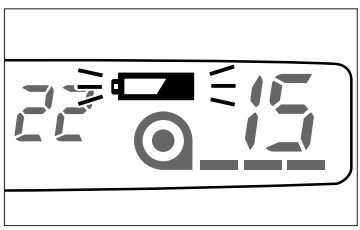
If the blinking low-battery symbol appears in the data panel with the other indicators, you can still use the camera, but the battery will have to be replaced soon.
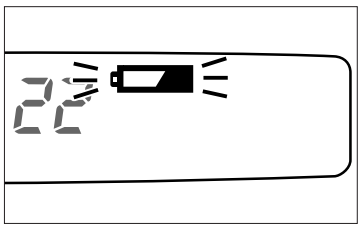
If the blinking low-battery symbol appears alone (date model: only the date/time display with the blinking low-battery symbol), you cannot use the camera until you replace the battery. The shutter cannot be released.
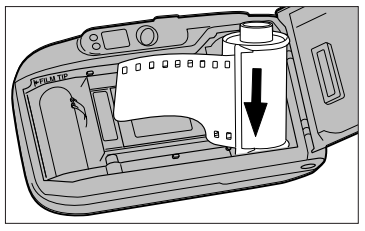
LOADING THE FILM
Use only 35mm, DX-coded film rated ISO 25 to 3200. ISO 400 or higher is recommended for taking telephoto photographs or pictures in low light.
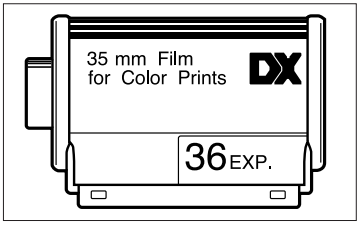
- Do not use Polaroid instant 35mm film. Winding problems may occur.
- Slide the back-cover release down to open the back cover and place the film cartridge into the film chamber.

- Always load and unload the film in subdued light.
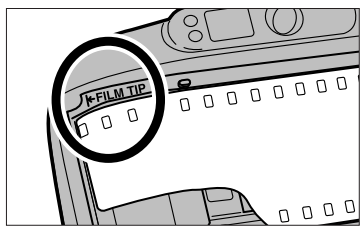
- Extend the film tip to the “FILM TIP” mark, making sure it lies flat.

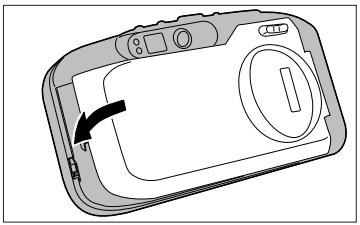
- Close the back cover.

- The film automatically advances to the first frame and appears in the data panel.
- If the film has been loaded improperly, it will blink in the data panel, and the shutter will remain locked. Open the back cover and repeat the loading procedure.
FULL AUTO OPERATION
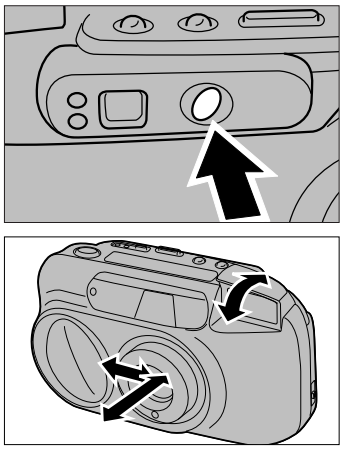
- Press the ON/OFF button to turn the camera on.

- The flash will pop up, and the lens barrel will extend.
- Press the ON/OFF button to turn the camera off.
- To conserve power, the camera automatically turns off if it is not operated for more than eight minutes. The lens barrel and flash will retract.
- Do not obstruct the lens while it is retracting.
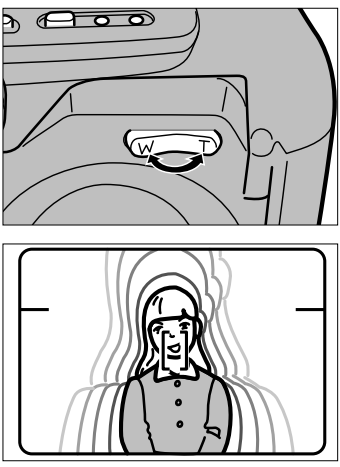
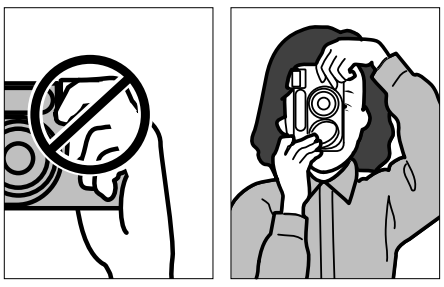
- Look through the viewfinder and press the W side of the zoom control to move toward wide angle or the T side to move toward telephoto.

- Do not hold the lens barrel; focus may not be accurate.
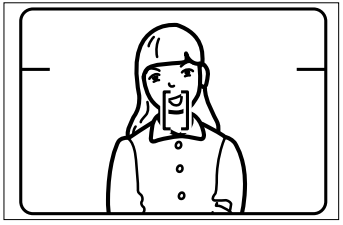
- Make sure your subject is at least 0.4 m(16 in) from the camera.
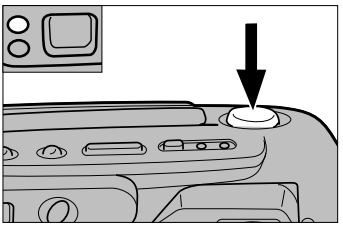
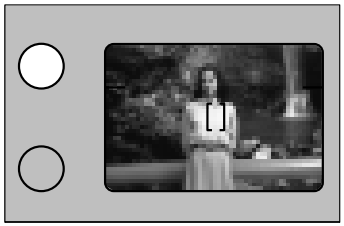
- Align your subject within the focus frame and press the shutter-release button partway down.

- When the green focus lamp glows, gently press the shutter-release button down to take the picture.

- The flash will automatically fire in low light.
- The film automatically advances to the next frame.
CLOSE-FRAMING
Close-framing Guides
When your subject is closer than 1.2m (4 ft.) at 75mm, first lock focus on your subject by pressing the shutter-release button partway down, then recompose your picture within the close-framing guides.
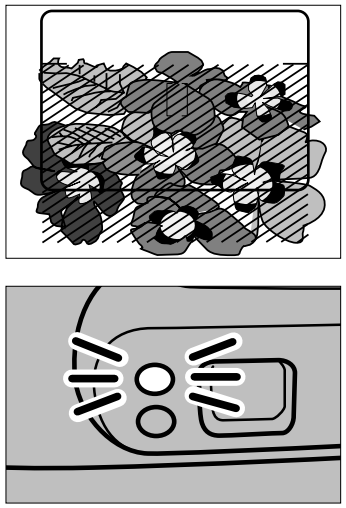
- If the green focus lamp blinks, your subject is closer than the minimum focusing distance of 0.4m (16 in.) and will not be in focus. The shutter cannot be released.
- If the subject is very close to the camera, the green focus lamp will glow, but the picture will not be in focus.
FOCUS LOCK
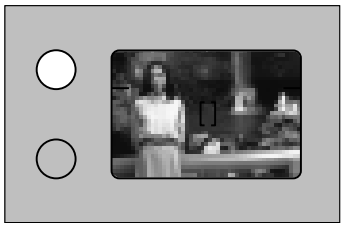
When your subject is located outside the focus frame, you can first lock focus on your subject, then recompose the picture as desired.
- Align the subject within the focus frame and press the shutter-release button partway down until the green focus lamp glows.

- Without lifting your finger, recompose the picture, then press the shutter-release button down to take the picture.

REWINDING THE FILM
The film will rewind automatically after the last frame has been exposed.
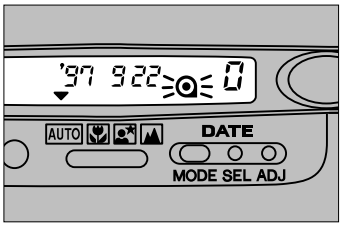
When ![]() appears and
appears and ![]() blinks in the data panel, open the back cover and remove the film.
blinks in the data panel, open the back cover and remove the film.
If rewind stops before the film has been completely rewound and all indicators blink, DO NOT OPEN THE BACK COVER. Insert a fresh battery, then press the rewind button.
MANUAL REWIND
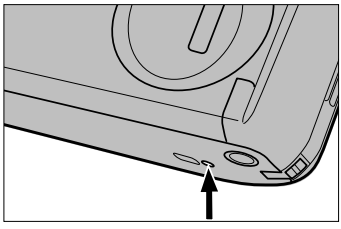
To begin, rewind before the end of the roll, turn the camera on, and gently press the rewind button using a pen or similar object.
USING THE BUILT-IN FLASH
Autoflash mode (![]() ), autoflash with red-eye reduction (
), autoflash with red-eye reduction (![]() ), manual fill-flash (
), manual fill-flash (![]() ), or flash cancel (
), or flash cancel (![]() ) can be selected.
) can be selected.
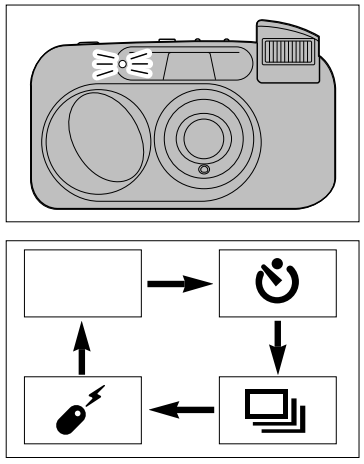
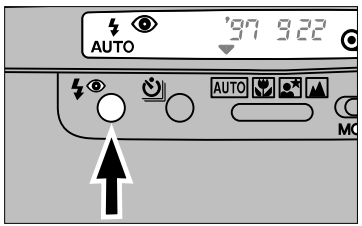
Press the flash-mode button until the desired indicator appears in the data panel.
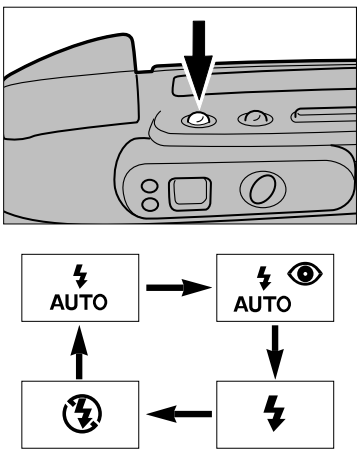
The sequence is as shown.
- When you turn the camera on, the built-in flash is set to autoflash or autoflash with red-eye reduction, whichever mode was last used.
FLASH RANGE
The range of the built-in flash depends on the film speed and focal length you are using. To ensure proper exposure, make sure your subject is positioned within the flash range.
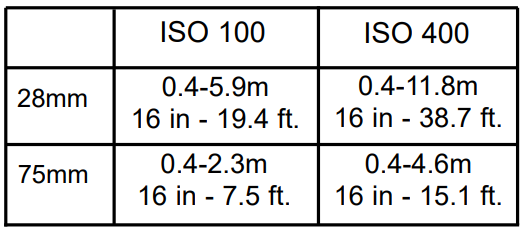
- Do not hold the flash down; the shutter may not release.
- For vertically framed pictures, hold the camera so the flash is on top.
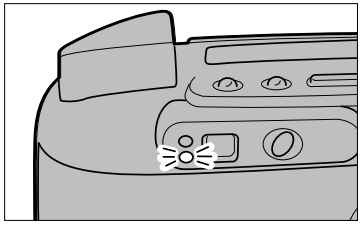
FLASH LAMP
While pressing the shutter-release button partway down:
- The orange flash lamp will glow whenever the built-in flash is on.
- When the orange flash lamp blinks slowly, your scene is too dark for a sharp hand-held picture. Use flash or place the camera on a tripod.
- When the orange flash lamp blinks rapidly, the flash is charging. Wait until it glows steadily, then take the picture. Flash recharge time is approximately 0.3 to 7 seconds.
AUTOFLASH MODE ![]()
- In autoflash mode, the flash will fire in low light.
RED-EYE REDUCTION MODE ![]()
In this flash mode, the flash will fire a few short bursts before the main flash burst to reduce the “red-eye” effect, which occurs when photographing people in low light.
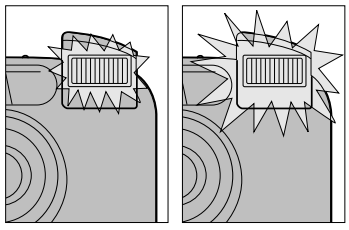
Press the flash-mode button until it appears ![]() in the data panel, then take the picture.
in the data panel, then take the picture.
- Before taking the picture, warn your subjects that the flash will fire a few short bursts before the picture is taken.
- The orange flash lamp will blink, indicating preflash.
MANUAL FILL-FLASH MODE ![]()
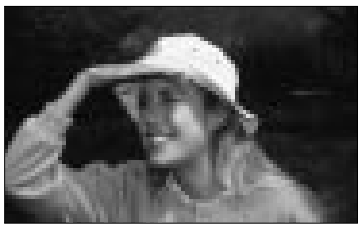
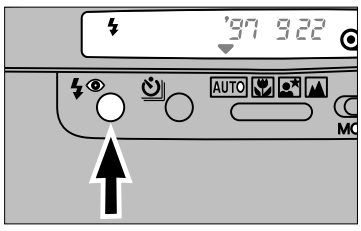
The flash will fire with every shutter release regardless of lighting. This can be used to reduce harsh, unflattering shadows on your subject’s face or illuminate your subject when it is back-lit.
Press the flash-mode button until it appears ![]() in the data panel, then take the picture.
in the data panel, then take the picture.
FLASH CANCEL MODE ![]()
With flash-cancel, the flash will not fire. This mode should be used when photographing twilight scenes or subjects that are beyond the flash range.
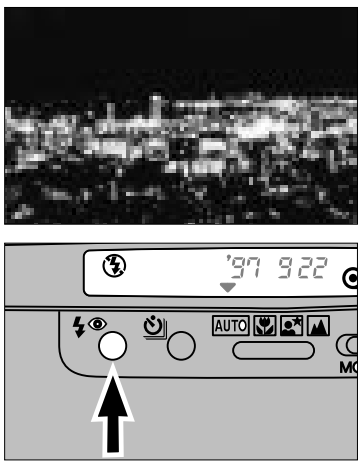
Press the flash-mode button until it appears ![]() in the data panel, then take the picture.
in the data panel, then take the picture.
- When the flash is cancelled, shutter speeds may be slow. Placing your camera on a tripod is recommended.
SELF-TIMER
The self-timer delays the release of the shutter for approximately 10 seconds after the shutter-release button is pressed.
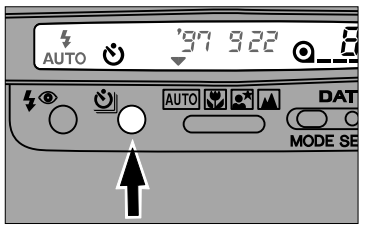
- Place the camera on a tripod and press the self-timer/drive-mode button until it appears
 in the data panel.
 - Align your subject within the focus frame, then press the shutter-release button.

- The self-timer indicator in the data panel and the self-timer lamp will blink slowly during the countdown and blink rapidly just before the shutter releases.
- Self-timer is automatically cancelled after the shutter is released.
- To stop the self-timer, press the self-timer/drive-mode button. Cancel the self-timer operation by turning the camera off or pressing the self-timer button until
 disappears from the data panel.
CONTINUOUS-DRIVE MODE
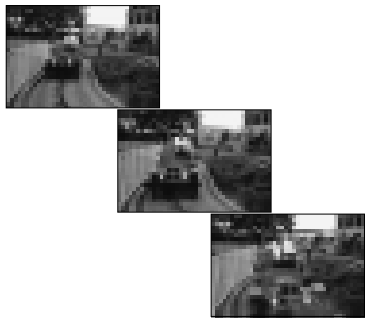
In this mode, the camera continuously takes pictures and advances the film as long as the shutter-release button is held down.
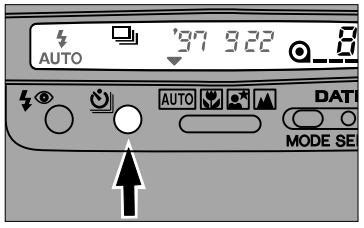
- Press the self-timer/drive-mode button until
 appears in the data panel.
 - Press the shutter-release button down and hold.

- Without flash, the shutter will release every 1.2 seconds; with flash, the shutter will release when the flash is charged.
- Continuous-drive mode remains selected after you finish the series.
- The subject-program mode remains selected as long as you are pressing the shutter-release button. When you have finished a series, the subject-program selection is reset to auto.
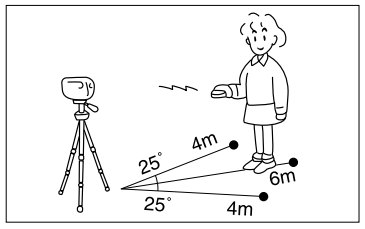
REMOTE CONTROL (SOLD SEPARATELY)
The optional IR Remote Control RC-3 allows remote camera operation up to 6 meters (19.7 feet) away.
- The remote control will not operate with backlit subjects.
- Bright light or reflections entering the viewfinder may affect the camera’s meter reading.
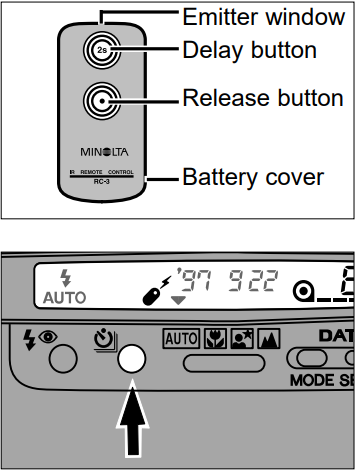
- Press the self-timer/drive mode button until
 it appears in the data panel.
 - Point the remote control toward the front of the camera and press either the Release or Delay button.

- Release: The remote-control lamp on the camera blinks once, then the picture is taken.
Delay: The remote-control lamp on the camera blinks twice, then the picture is taken. - To cancel remote control mode, press the self-timer/drive mode button until
 disappears or turn the camera off.
- Release: The remote-control lamp on the camera blinks once, then the picture is taken.
USING FOCUS HOLD IN REMOTE CONTROL MODE
- With the camera in remote mode, center the focus frame on the subject, then press the shutter-release button partway down.
- Recompose the picture, then use the remote control normally.
- Focus will remain locked after the picture is taken. To cancel the focus hold, turn the camera off.
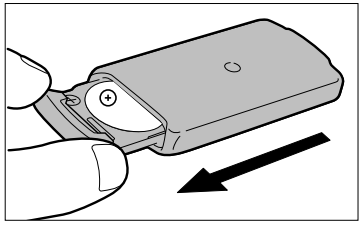
CHANGING THE BATTERY
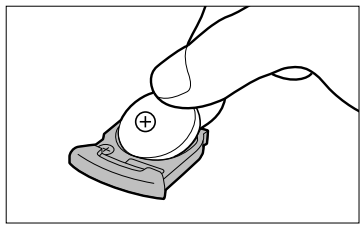
The remote control uses a 3V lithium battery (CR2032).
- Pull out the battery chamber and remove the old battery.

- Insert a new battery into the chamber with its + side up, then slide the chamber back into the remote control.

SUBJECT-PROGRAM SELECTION
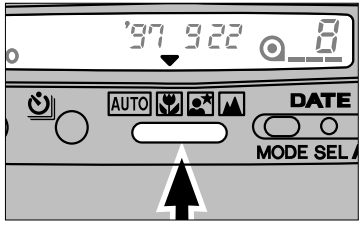
Subject-Program Selection allows you to tailor the camera’s fully automatic operation to suit the subject. It provides optimal camera settings for close-ups (Close-up ![]() ), portraits at night (Night Portrait
), portraits at night (Night Portrait ![]() ), and distant subjects or night scenes (Landscape/Night View
), and distant subjects or night scenes (Landscape/Night View ![]() ).
).
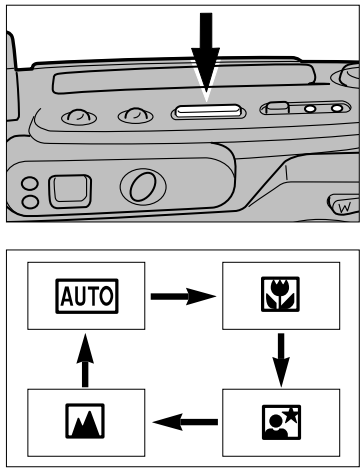
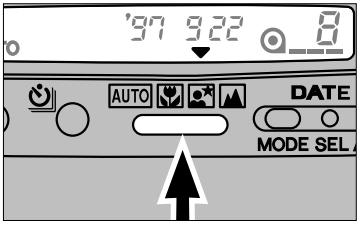
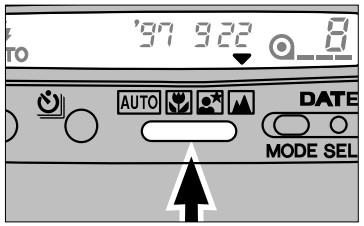
Press the subject-program selector until the pointer is above the desired indicator.
- After taking a picture in one of the subject-program modes, the camera will return to full-auto mode.
CLOSE-UP MODE ![]()
This mode enables you to take pictures of subjects as close as 40cm (16 in.).
- Press the subject program selector until the pointer is above
 .
.
- The lens will automatically zoom to 75mm, but any focal length can be used in close-up mode.
- Align your subject within the focus frame, then press the shutter-release button partway down until the green focus lamp glows.

- Without lifting your finger, recompose the picture so your subject is aligned within the close-framing guides, then press the shutter-release button down to take the picture.

NIGHT PORTRAIT MODE ![]()
Night-portrait mode sets a slow shutter speed to correctly expose a dark background, such as a sunset or night scene, while flash properly exposes the foreground.
- Press the subject program selector until the pointer is above
 .
.
- Use of a tripod is recommended.
- Manual fill-flash or manual fill-flash with red-eye reduction can be selected.
- Align your subject within the focus frame and press the shutter-release button partway down.
- When the orange flash lamp and green focus lamp glow, press the shutter-release button down to take the picture.
LANDSCAPE/NIGHT VIEW MODE ![]()
In this mode, focus is set to infinity. It can be used to photograph night scenes, ensure sharp focus for landscapes and other distant subjects, and should be used when photographing through glass.
- Press the subject-program selector until the pointer is above
 .
.
- At twilight or night, place your camera on a tripod to avoid blur caused by camera shake.
- Flash-cancel is set and cannot be changed.
- Compose your subject within the viewfinder, then take the picture.
FOR OWNERS OF THE DATE MODEL
This feature enables you to record the date or time onto the lower-right portion of the picture. It has an automatic calendar through the year 2029.
- Imprinted data may be difficult to read if the area over which it is superimposed is bright or non-uniform.
- Do not use the data back when temperatures exceed the operating range of 0° to 40°C (32° to 104°F).
- The data may not be imprinted on the last frame.
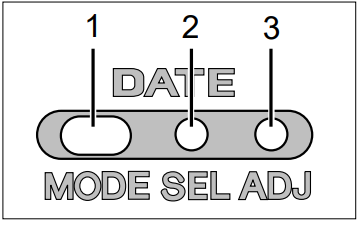
- MODE button
- SELECT button
- ADJUST button
SETTING THE TIME AND DATE
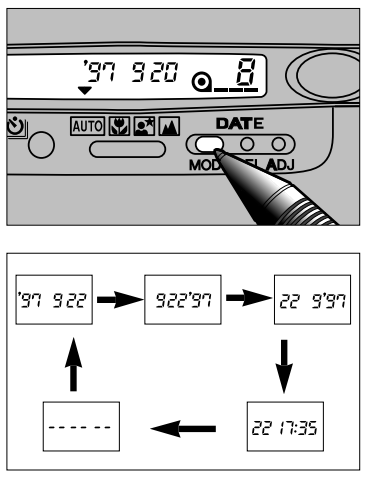
- Press the MODE button to choose the data imprinting format.

- The display will change as shown.
- Use the SELECT button to move between different parts of the displayed data. The selected part will blink, indicating that it is the data to be changed.

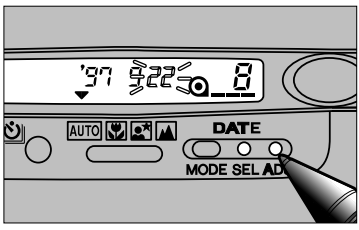
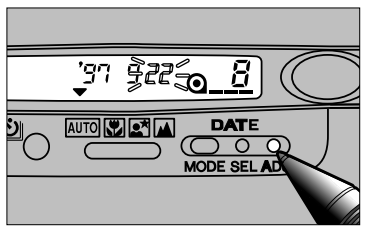
- Press the ADJUST button to change the data to the correct value. Data continues changing as long as you hold down the button.

- In Time mode, pressing the ADJUST button while the colon is blinking resets the second counter to 00.

- In Time mode, pressing the ADJUST button while the colon is blinking resets the second counter to 00.
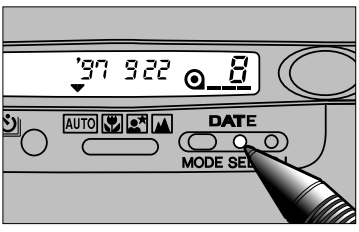
- When all data is correct, press the SELECT button until the data stops blinking.

- Reset the time and date after changing the battery.
CARING FOR YOUR CAMERA
CLEANING
- Keep the autofocus and metering windows clean, or the focus and/or exposure may not be accurate.
- If the camera body is dirty, gently wipe it clean with a soft, clean, dry cloth.
- To clean the lens surface, first brush away any dust or sand, then, if necessary, moisten a lens tissue with lens cleaning fluid and gently wipe the lens in a circular motion starting from the center.
- Never place lens fluid directly on the lens.
- Never touch the lens surface with your fingers.
- Never use alcohol or solvents to clean the camera.
BEFORE IMPORTANT EVENTS
- Check camera operation carefully or take test photographs.
- Minolta is not responsible for any loss that may occur due to an equipment malfunction.
STORAGE
When storing your camera for extended periods, please follow these guidelines:
- Store in a cool, dry, well-ventilated area away from dust and chemicals (such as ammophos. For very long periods, place the camera in an airtight container with a silica gel drying agent.
- Before using it after prolonged storage, always check the camera’s operation to make sure it is functioning properly.
QUESTIONS AND SERVICE
- If you have questions about your camera, contact your local camera dealer or write to the Minolta distributor in your area.
- Before shipping your camera for repair, please contact an authorized Minolta Service Facility for details.
For more manuals by Minolta, visit ManualsLibraryy
Minolta Explorer Freedom Zoom Film Camera- FAQs
What year was the Minolta Explorer Freedom Zoom released?
The Minolta Explorer Freedom Zoom was released in 1995.
Is the Minolta Freedom Zoom a good camera?
Yes! It’s a reliable, high-quality compact film camera with:
✔ Sharp lens
✔ Fast autofocus
✔ Lightweight & portable design
✔ Automatic exposure & flash
What type of film does the Minolta Freedom Zoom use?
It uses standard 35mm film (ISO 25–3200 compatible).
How do I load film into the Minolta Freedom Zoom?
Open the back cover by sliding the latch.
Insert the film canister into the left chamber.
Pull the film leader across to the right spool.
Close the back—the camera will auto-advance to frame 1.
How do I rewind the film?
The camera automatically rewinds when the roll is finished.
Does the Minolta Freedom Zoom have a zoom lens?
Yes! It has a motorized zoom lens (exact range varies by model).
Does it have a built-in flash?
Yes, with auto-flash that pops up when needed.
How do I turn on the date imprint function?
(For models with “Date” version)
Insert a CR2025 battery in the date back.
Use the mode button to set the date format.
How do I turn on the camera?
Slide the lens cover open—the camera powers on automatically.

