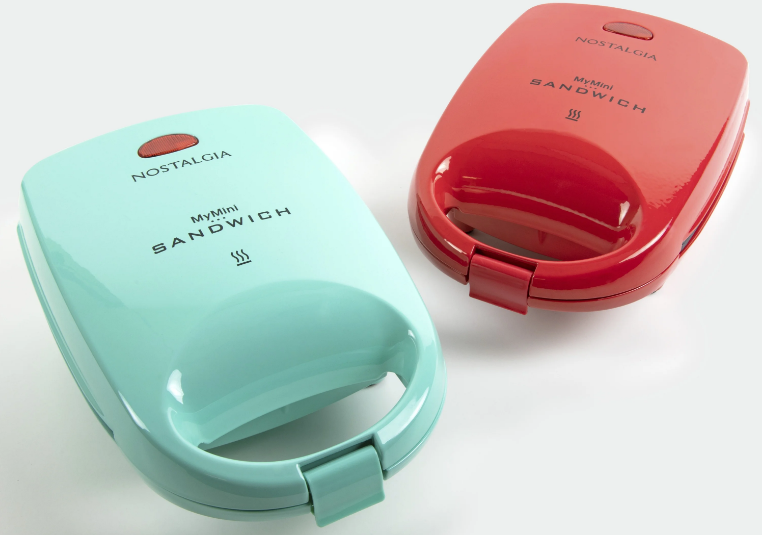
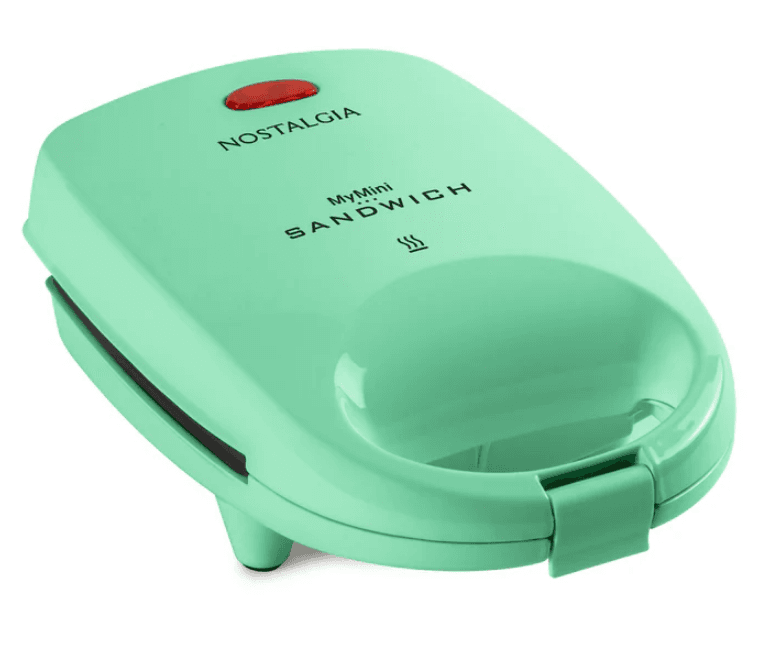
Nostalgia MyMini Personal Sandwich Maker
INTRODUCTION
- Congratulations on your purchase of the Nostalgia™ MyMINI SANDWICH MAKER! This personal-sized sandwich maker is perfect for making a variety of delicious sandwiches and desserts from the comfort of home!
Features
- Quick and healthier way to cook hot sandwiches, pizza pockets, panini pockets, quesadilla pockets, grilled cheese, and breakfast sandwiches
- Each cooking surface is 5 inches wide, providing quick, efficient, and consistent results. The nonstick surface easily wipes clean.
- Unique plate design creates two sectional pieces that seal in flavorful ingredients.
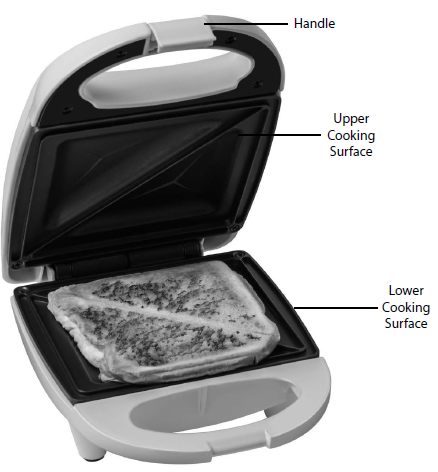
- Cool-touch handle allows you to keep your hands safe when opening and closing the lid. Locking latch secures lid during cooking
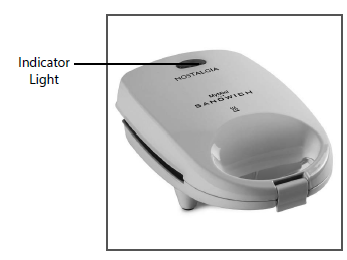
- The power and preheat indicator light will let you know when it’s time to start cooking
- Wrap the appliance cord underneath the base of the unit for tidy storage
PARTS & ASSEMBLY
HOW TO OPERATE
- Before first use, wipe down all surfaces with a damp, non-abrasive cloth. Remove all protective paper and wrapping.
- Find a dry, level surface near an electrical outlet.
- Preheat the appliance by closing the lid and plugging it into an electrical outlet. The indicator light will illuminate, signaling that the unit is heating up.

- Prepare your ingredients while the appliance is preheating. For one sandwich, you will need two slices of toasting bread or dough and your filling. Place the filling exactly between the slices of bread. Too much of the filling may make it hard to close the Sandwich Maker. In this case, it may be necessary to remove some of the filling. Do not use force to close the Sandwich Maker, as this may lead to damage.
- When the indicator light shuts off, the unit is ready to cook.
- Raise the lid using the handle. Use an oven mitt or pot holder to prevent accidental burns.
- Spray the upper and lower cooking surfaces with a non-stick cooking spray or lightly coat with a small amount of vegetable oil. NOTE: The oil helps protect the non-stick quality of the cooking surfaces.
- Open the Sandwich Maker and place the food on the bottom plate. Using the handle, close and press the top cooking plate to the bottom plate. Secure handles with the lock.
NOTE: Cooking time will vary based on the recipe and ingredients used.
CAUTION: Steam may release from the appliance during cooking. For your safety, avoid contact with steam as it is very hot and can cause burns. - Once food is cooked to your preference, raise the lid using the handle. Remove food using a heat-resistant nylon, silicone, or wooden cooking utensil.
NOTE: Do not use metal utensils, as they may scratch and damage the cooking surfaces. - If cooking more than one food item in a session, be sure to lower the lid in between batches to maintain the proper cooking temperature.
- As soon as you are finished cooking, unplug the appliance and allow it to cool.
CLEANING & MAINTENANCE
- Please take care of your SANDWICH MAKER by following these simple cleaning directions.
- Disconnect the appliance from the electrical outlet and allow it to cool completely.
- Using a damp, soapy, non-abrasive cloth, wipe down the exterior of the appliance, as well as the upper and lower non-stick cooking surfaces. Thoroughly rinse the cloth and wipe again. Dry with a clean cloth.
- DO NOT put any parts in a dishwasher.
- NEVER immerse an appliance or electrical cord in water.
RECIPES
- You can make a variety of mouth-watering recipes with your SANDWICH MAKER! This quick-cooking appliance makes delicious hot sandwiches, pizza pockets, panini pockets, quesadilla pockets, grilled cheese, and desserts! Be creative with your meals and enjoy your SANDWICH MAKER!
HOT HAM & CHEESE SANDWICH
- 2 slices of toasted bread: Preheat the appliance as directed.
- 1 or 2 slices of cheese: Between two slices of bread, place the cheese and ham. Between two slices of bread, place the cheese and ham.
- 2 slices of ham: Once the appliance is preheated, spray the upper and lower cooking surfaces with a non-stick cooking spray or lightly coat with a small amount of vegetable oil. Place the sandwich on the bottom side of the grill and close the lid. It takes 2-3 minutes to cook the sandwich.
QUESADILLA
- 2 tortillas (mini work better): Preheat the appliance as directed.
- Butter: Generously butter each side of the tortilla shell.
- Shredded cheese: Sprinkle the shredded cheese on one side of the tortilla and place the other tortilla on top. If you have other toppings such as beef, chicken, jalapenos, etc., please also place them inside. Make sure the beef or chicken is pre-cooked.
- Other toppings: Place the quesadilla on the bottom side of the sandwich maker and close the lid. It takes about 3-5 minutes to cook.
PEPPORONI PIZZA POCKET
- 2 (8-oz.) Packages Refrigerated Crescent Rolls: Unroll crescent dough and separate into 8 rectangles. Seal seams.
- 1 Cup Pizza Sauce: Divide sauce, cheese, and pepperoni among the 8 pieces.
- 2 Cups Shredded Mozzarella Cheese: Fold over and pinch edges together.
- 1 (8-oz.) Package Pepperoni: Note: You may substitute or add your favorite pizza ingredients, like pre-cooked sausage, chopped onion, green pepper, mushroom, etc. It takes about 3-5 minutes to cook.
CHERRY PIE
- 1 can of cherry pie filling: Preheat the appliance as directed.
- 1 packaged refrigerated croissant dough roll: Unroll the dough and form into one big square or oval. Place cherry filling on top of the dough and then fold over and pinch edges together, forming a seal.
- 1 tsp. sugar: Note: You may substitute or add your favorite pie fillings. It takes about 3-5 minutes to cook. Sprinkle sugar on top.
CINNAMON ROLLS
- 1 package of refrigerated cinnamon roll dough: Preheat the appliance as directed. Unroll the dough and form it into a square to fit the sandwich maker.
- Jar of cinnamon bun frosting or icing: Place onto the bottom side of the grill and close the lid. After 3-5 minutes, take out the cinnamon roll dough and frost the bun with frosting or icing.
GIANT CHOCOLATE CHIP COOKIE
- 1 cup cookie dough: Preheat the appliance as directed. Once preheated, spray the upper and lower cooking surfaces with a non-stick cooking spray or lightly coat with a small amount of vegetable oil. Scoop 1/4 cup of cookie dough onto the lower cooking surface. Close the lid and allow to cook for about 10 minutes. Use a spatula to remove the cookie from the appliance when the cookie has just barely started to turn brown. Repeat three more times to use the rest of the cookie dough. Allow cookies to cool on a cooling rack before serving.
For more manuals by Nostalgia, visit ManualsLibraryy
Nostalgia MyMini Personal Sandwich Maker- FAQs
Q1: How do I use the MyMini Personal Sandwich Maker?
A: Plug in the unit and wait for the indicator light to turn off. Place your sandwich on the bottom plate, close the lid, and cook for 3–5 minutes.
Q2: Does it need to be preheated before use?
A: Yes, preheat the unit until the indicator light goes off before placing your sandwich.
Q3: Can I cook things other than sandwiches?
A: Yes, it can also be used for making omelets, quesadillas, French toast, and more.
Q4: How do I clean the sandwich maker?
A: Unplug it and let it cool. Wipe the plates with a damp cloth or sponge. Do not immerse in water.
Q5: Is it safe for kids to use?
A: Adult supervision is recommended, as the appliance gets hot during use.
Q6: What should I do if my food sticks to the plates?
A: Lightly grease the plates with cooking spray or oil before use to prevent sticking.
Q7: How will I know when my sandwich is ready?
A: Most sandwiches are done in about 3–5 minutes. Check for golden brown color and melted fillings.
Q8: Can I store it vertically?
A: Yes, the compact design allows for vertical storage to save space.
Q9: What’s the voltage requirement?
A: It operates on standard 120V household current.
Q10: Is there an on/off switch?
A: No, the unit turns on automatically when plugged in. Unplug it to turn it off.

