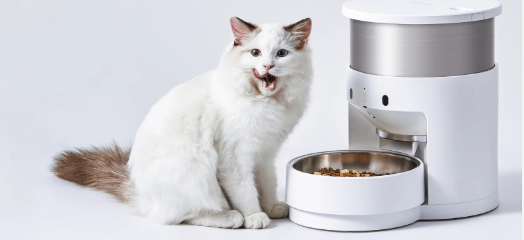
Petwant F3-LED Smart Automatic Pet Feeder
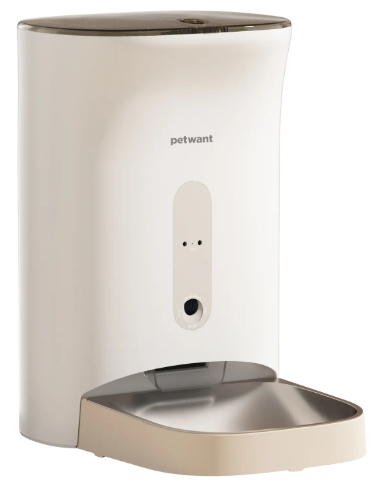
Meet Your Automatic Pet Feeder
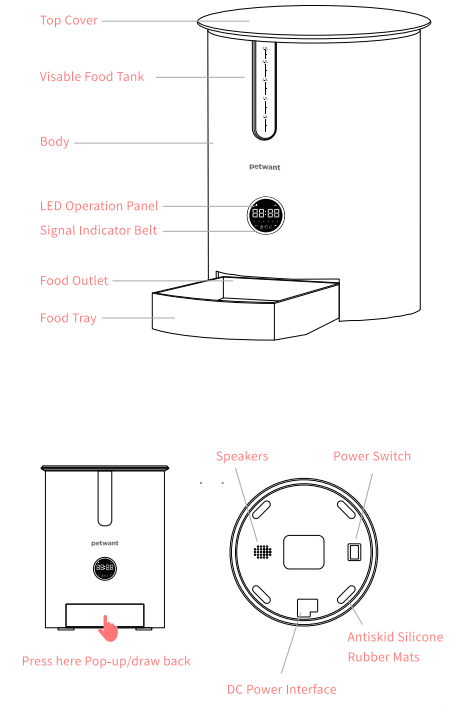
Set Up Your Automatic Pet Feeder
LED Operation Panel:
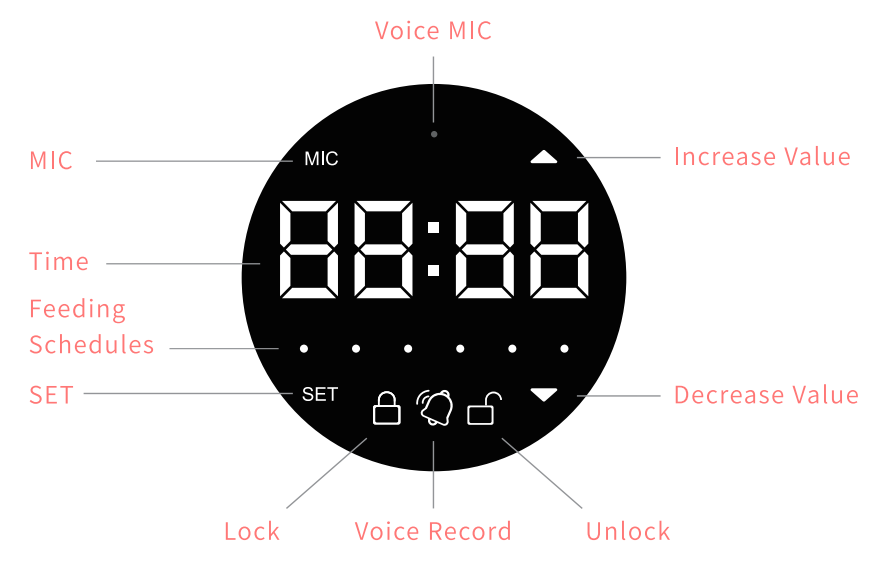
Plug in and switch on, then you can start to set up your automatic pet feeder.
- Please press for one second, the feeder will get instant dispense, one portion for once instant feeding.
- Please press up and down at the same time to unlock the feeder.
Set current time:
- Press the button. The hour digits will flash.
- Press the or buttons to find the current hour and press “8” again to save.
- Once an hour is saved, the minute digits will flash.
- Press the button to find the current minute and press”8″ again to save and enter Meal Time Settings.

Set Up Your Automatic Pet Feeder
Set first meal time:
- When the hours digits and are flashing, repeat step 1 to set the feeding time.
- Press shortly to save the schedule and go to the first meal feeding portion setting.

Set first meal portion:
- Once the time is set, the unit will enter Meal Time Settings. The LED Screen will display the “PD” and the portion digits will flash.
- Press the button to set the portion size and press “8” again to save. NOTE: Repeat the above operation to complete the 6 meal settings. If you prefer 3 meals per day, you can hold the set button for 1 second to save the meal settings and return to the current time.

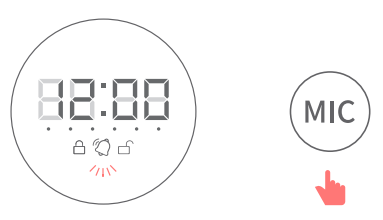
Voice Record and Play:
To record a call to your pet at meal time, follow these steps.
- Press and hold the button.
- Speak into the Recording Port (small hole by the MIC light) and record your message (up to 10 seconds).
- Release the button when finished recording. The will be solid.
- Press the button to listen to the message.
Assembly & Disassembly
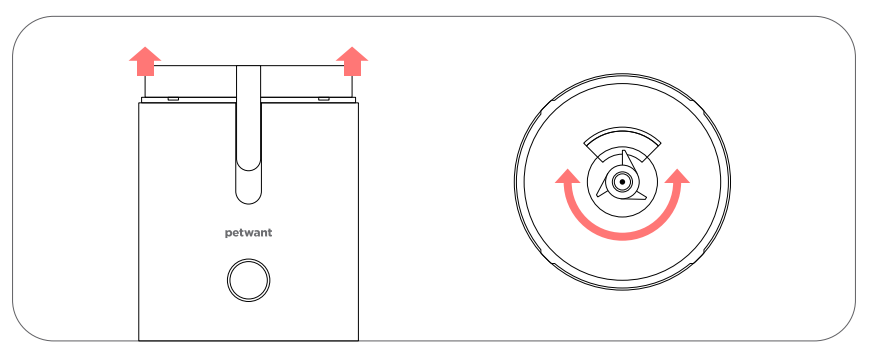
ASSEMBLING AND DISASSEMBLING THE FEEDER:
Hold both sides of the food bucket and lift upwards for removal. The direction of the food bucket gears needs to be aligned with the direction of the main body slot. Once aligned, press downward.
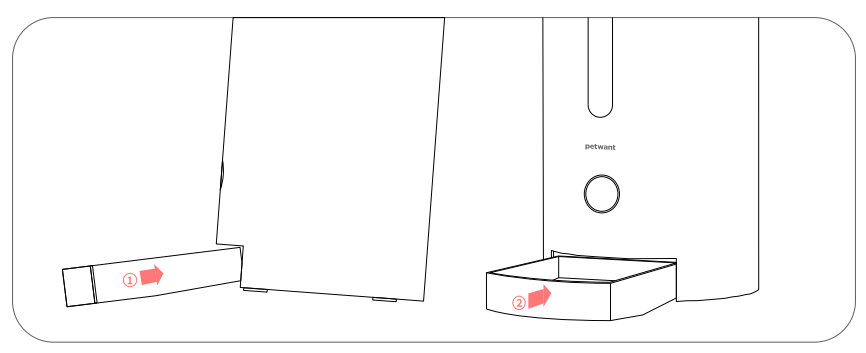
ASSEMBLING THE FOOD TRAY
Hold the feeder slightly backwards and fit the tray into the opening below. Push it towards the body. The metal tray also lifts out for easy cleaning.
Cleaning Your Smart Feeder
- Please turn off and unplug the device before cleaning.
- Clean the unit with a damp cloth rather than a soaked cloth.
- The food tray and tank can be removed for cleaning in an automatic dishwasher.
- The base cannot be immersed in water at any time, as it may cause a short circuit in the device.
Important Safety Information
- Fit for small animals.
- Do not use outdoors. For indoor (household) only.
- Do not disassemble the feeder’s components except the food tray and food tank.
- Do not place anything on top of the feeder.
- Do not install or expose the feeder to a low temperature environment below-20 °C ( -6868°F ).
- The feeder is suitable for operation by users over 12 years old.
- Do not disassemble or repair the feeder privately. If there is any malfunction or damage to the feeder, please contact our customer service team.
- The feeder is suited for 0.2 – 0.6 inch diameter dry pet food. Do not put other things into the feeder except pet food.
- Please ensure the eeder is properly plugged in to ensure adequate power before a long trip.
- If the plug of this device gets wet, turn off the electricity to the wall outlet. Do not unplug. If there is damage around the power cord or adapter, please contact our customer service team.
- To avoid electric shock, do not place the power cord or plug near water or other liquids; only use the power cord that is sold by the manufacturer.
- Do not immerse the feeder in water at any time. The pet feeder should not be submerged in water at any time; otherwise, the electric components will be damaged.
- Dispose of all packaging materials properly. Some components may be packed in poly bags; these bags could cause suffocation. Keep away from children and pets.
- Examine this appliance after installation. Do not plug it in if there is water on the power cord or plug. To avoid tipping, please place the device against a wall.
- This product is for use by pets; any accidents caused by unauthorized usage are invalid. We will not be responsible for unauthorized usage.
FOR MORE MANUALS BY PETWANT, VISIT MANUALSLIBRARYY
Petwant F3-LED Smart Automatic Pet Feeder-FAQs
Q1. Why is my Petwant automatic feeder not working?
Make sure the power cord is firmly connected and the outlet is working. If using batteries, remember they act only as a backup power source.
Q2. How do I connect the feeder to Wi-Fi?
Open the app, select Add Device → Pet Feeder, choose your 2.4GHz Wi-Fi network, and enter the password. If the light doesn’t blink, hold the reset button for 5 seconds.
Q3. Why won’t my feeder connect to Wi-Fi?
Unplug the feeder for 30–45 seconds, then plug it back in. Hold the reset button until you hear a beep and the Wi-Fi light flashes before reconnecting via the app.
Q4. How do I reset my Petwant feeder?
Press and hold the Feed or Reset button for about 5 seconds until a sound is heard. This restores factory settings and erases saved schedules.
Q5. Do automatic feeders need Wi-Fi?
Not all models need Wi-Fi. However, the Petwant F3-LED supports Wi-Fi for remote scheduling and monitoring through the mobile app.
Q6. How can I check if my feeder is working properly?
Listen for a faint humming sound and test dispense a few times before relying on it while away.
Q7. Can I put wet food in this feeder?
This feeder is designed mainly for dry food. Wet food may spoil quickly and is not recommended.
Q8. How long can I leave my cat alone with the feeder?
With food and water, it’s safe for 2–3 days maximum. Longer periods are not advised, as no one will be there if your cat gets sick or needs attention.
Q9. What are common problems with automatic pet feeders?
Issues may include Wi-Fi disconnection, pets being startled by sounds, overfeeding, or difficulty cleaning. Regular checks and cleaning help prevent problems.
Q10. How do I clean the Petwant F3-LED feeder?
Remove the food container and tray, wash them with mild soap and water, and dry completely before reassembling. Avoid submerging the main unit.

