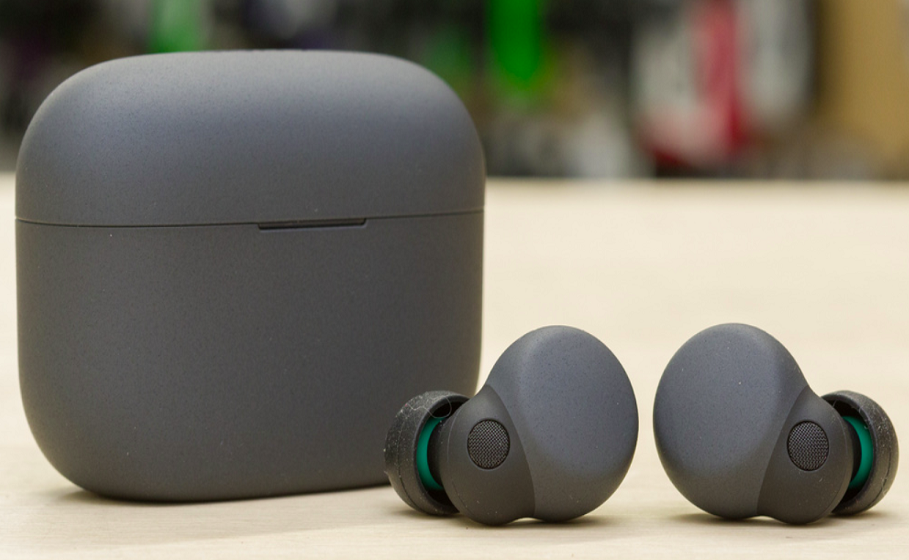
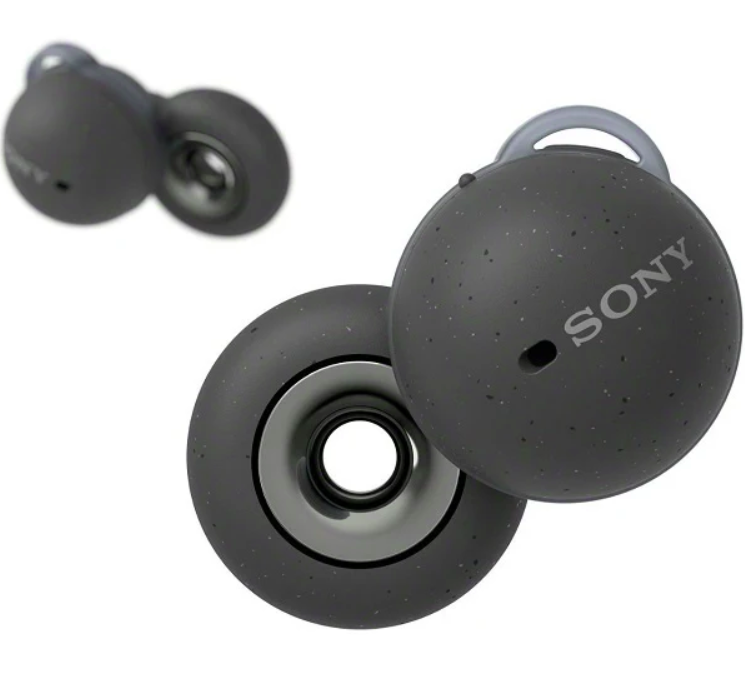
Sony LinkBuds Truly Wireless Earbud Headphones
Quick Start Guide
Find your fit
- Text for video

Download the app and set up the headset
![]()
Let’s start to use


Getting started
- What you can do with the Bluetooth function
- About the voice guidance
Supplied accessories
- Checking the package contents
- Replacing the fitting supporters
Parts and controls
- Location and function of parts
- About the indicator
Wearing the headset
- Wearing the headset
- Using only one unit of the headset
Checking the package contents
After opening the package, check that all of the items in the list are included. If any items are missing, contact your dealer. Numbers in ( ) indicate the item amount.
- Wireless Stereo Headset
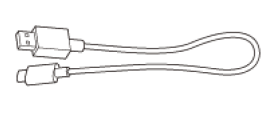
- USB Type-C® cable (USB-A to USB-C®) (approx. 20 cm (7.88 in.)) (1)

- Fitting supporters ( XS/S/M/L/XL 2 each)
- M-sized fitting supporters come attached to the left and right units of the headset at the time of purchase.

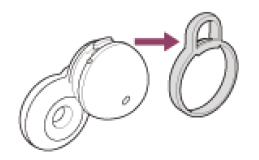
Replacing the fitting supporters
M-sized fitting supporters come attached to the left and right units of the headset at the time of purchase. If you feel the size of the fitting supporters does not fit your ears, change the fitting supporters to another size that fits your ears better
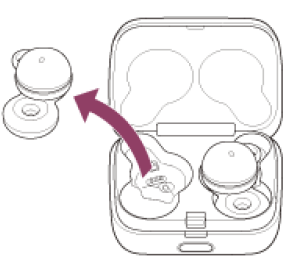
- Remove the fitting supporter

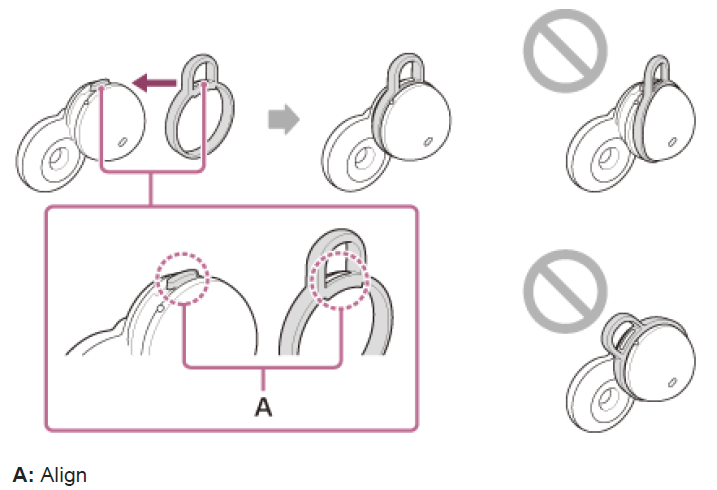
- Attach the fitting supporter

- Align the protruding part of the headset with the hole part of the fitting supporter and firmly insert the fitting supporter all the way. Do not attach the fitting supporter in a loose or skewed manner. After attaching the fitting supporter, check that there is no floating between the fitting supporter and the headset
Wearing the headset
About the instruction manual video
- Watch the video to find out how to change the fitting supporters and how to wear the headset in your ears. Text for video

- Check the (left) and (right) marks on the headset.
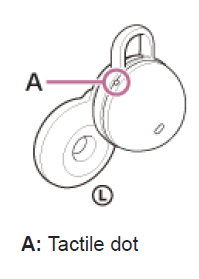
- Put the headset unit with the (left) mark into your left ear and the headset unit with the (right) mark into your right ear. There is a tactile dot on the left unit of the headset.

- Put the headset unit with the (left) mark into your left ear and the headset unit with the (right) mark into your right ear. There is a tactile dot on the left unit of the headset.
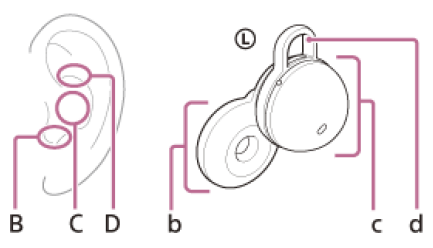
- Check the position relation between the ear and the headset when you put the headset unit into your ear.

- B: Position to insert the driver unit part
- C: Position to support the housing part
- D: Position to hook the fitting supporter
- b: Driver unit part
- c: Housing part (Insert the side with the charging port into your ear)
- d: Fitting supporter
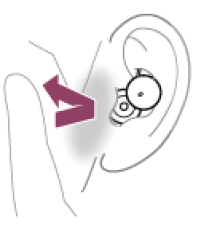
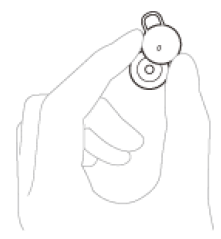
- Hold the headset with your fingers
If the headset is out of your ears, you feel uncomfortable when wearing the headset, or your ears hurt
- M-sized fitting supporters come attached to the left and right units of the headset at the time of purchase. When the headset is worn following the procedures described above, and you feel the size of the fitting supporters does not fit your ears, change the fitting supporters to another size to comfortably and snugly fit your left and right ears.
- For the proper sound quality, call sound quality, etc., to be effective
- If the headset is not worn properly in your ears, tap operations or Speak-to-Chat speech detection may not work correctly, or you may not obtain the correct sound qualities or call performance. If any of this is the case, see the steps and check that you are wearing the headset properly in your ears.
- When the headset is removed
- When you listen to music while wearing both headset units in your ears, the headset will pause music playback if one or both headset units are removed. When the headset is worn again, the headset resumes music playback.
- When the headset is not worn for about 15 minutes after being removed from the charging case, the headset turns off automatically to save the battery. Turn the headset on by putting the headset into your ears.
In order to prevent the headset from reacting incorrectly, music playback, making and receiving calls as well as other operations, cannot be performed by tapping the headset removed from your ears
Using only one unit of the headset
- You can remove one unit of the headset from the charging case and use the unit by itself. In this case, only the unit that has been removed from the charging case will turn on

- When you put on the other unit of the headset
- The connection between the left and right units is established automatically, and you will hear the music or other audio on both units of the headset.
- Assigning functions to the left and right units of the headset
- Depending on the headset unit you are wearing, some functions may not be available in the factory settings. In this case, you can change the function assignments to the left and right units of the headset using the “ Sony | HeadphonesConnect ” app.
About the wide area tap
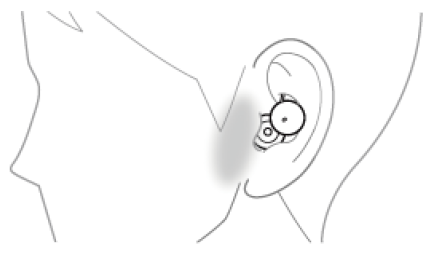
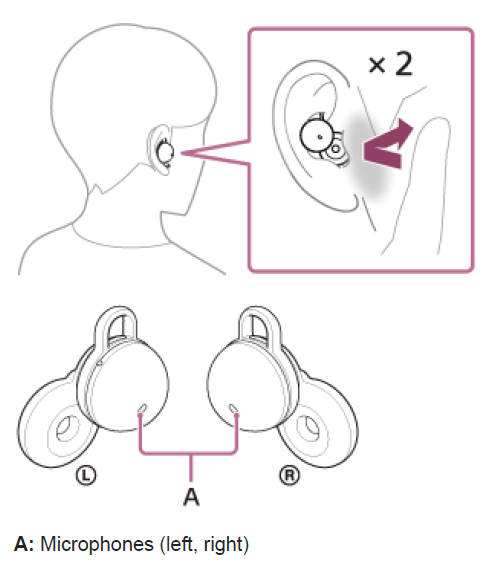
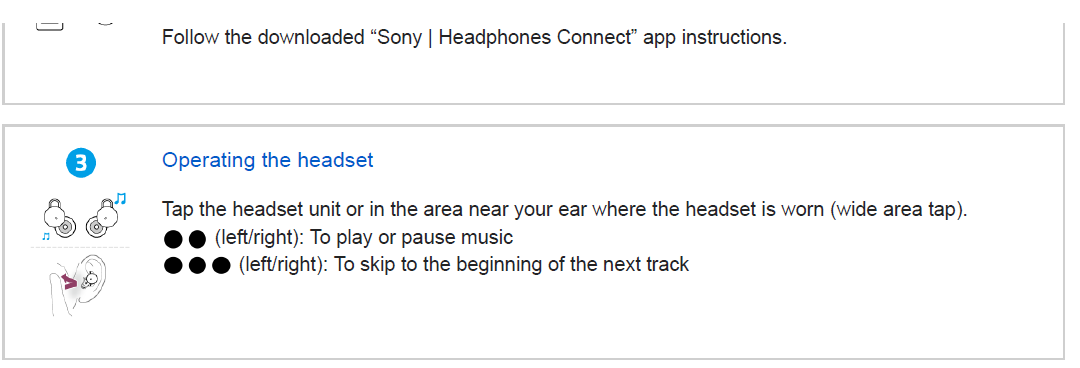
- Wide area tap is a function that detects vibration around the ears with the acceleration sensors that are built into the headset and determines the tap operations. By tapping not only the headset unit but also the areas around the ears where the headset is worn, you can perform various operations such as music playback or phone calls.
- The range in which the headset can detect tap operations is from around the tragus to the lower side and the sideburn.

- When tapping, use your forefinger to perform a harder tap within the tap detection area.

Some available operations

About the instruction manual video
- Watch the video to find out how to use wide area tap https://rd1.sony.net/help/mdr/mov0040/h_zz/
Pairing and connecting with an Android smartphone
The operation to register the device that you wish to connect to is called “pairing”. First, pair a device to use it with the headset for the first time. Before starting the operation, make sure of the following:
- The Android smartphone is placed within 1 m (3 feet) of the headset.
- The headset is charged sufficiently.
- The operating instructions of the Android smartphone is in hand.
Enter pairing mode on this headset.
When you pair a second or subsequent device (the headset has pairing information for other devices)
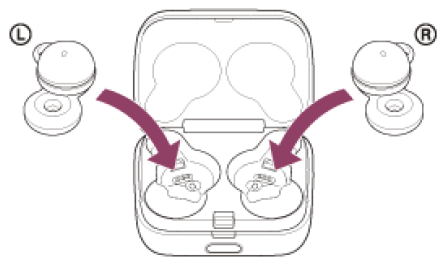
- Set the headset into the charging case.
- Put the left unit of the headset (the unit with the tactile dot) back into the left hole of the charging case, put theright unit of the headset back into the right hole of the charging case, insert the units until they click, and thenmake sure that the units are locked in the charging case.

- Put the left unit of the headset (the unit with the tactile dot) back into the left hole of the charging case, put theright unit of the headset back into the right hole of the charging case, insert the units until they click, and thenmake sure that the units are locked in the charging case.
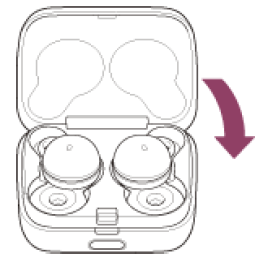
- Close the lid of the charging case.

- By closing the lid once, the headset units are straightened and locked in place, even if they were not locked in the charging case before.
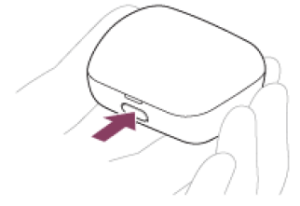
- Hold the charging case in your hand and press the lid open button to open the lid.

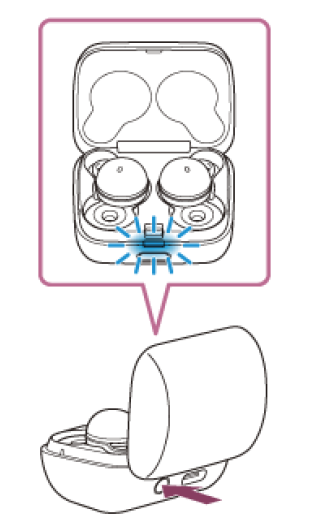
- Press and hold the pairing button of the charging case for about 5 seconds.

- The indicator (blue) on the charging case repeatedly flashes slowly twice in a row, and the headset goes into pairing mode. You can remove the headset from the charging case after entering pairing mode. When you put the headset units into both ears, you will hear a notification sound and the voice guidance say “Pairing” from both headset units at the same time.
Pairing and connecting with a computer (Windows® 10)
The operation to register the device that you wish to connect to is called “pairing”. First, pair a device to use it with the headset for the first time. Before starting the operation, make sure of the following:
- Your computer has a Bluetooth function that supports music playback connections (A2DP).
- The computer is placed within 1 m (3 feet) of the headset.
- The headset is charged sufficiently.
- The operating instructions of the computer is in hand.
- Depending on the computer you are using, the built-in Bluetooth adaptor may need to be turned on. If you do not know how to turn on the Bluetooth adaptor or are unsure if your computer has a built-in Bluetooth adaptor, refer to the operating instructions supplied with the computer.
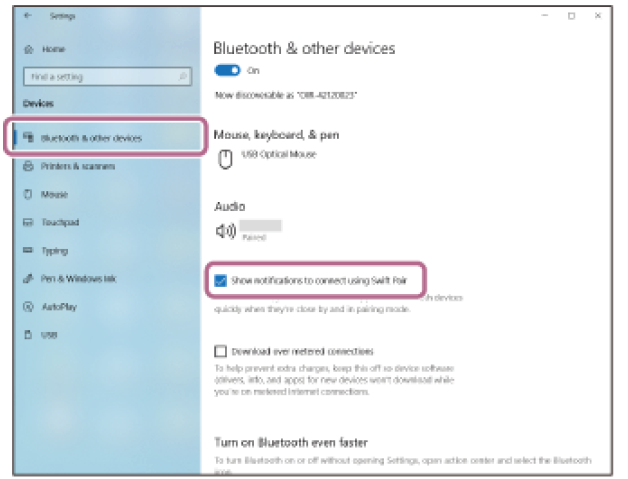
- If your OS version is Windows 10 version 1803 or later, the Swift Pair function will make pairing easier. To use theSwift Pair function, click the [Start] button – [Settings] – [Devices] – [Bluetooth & other devices], and check [notifications to connect using Swift Pair].

Pairing and connecting with a computer (Windows 8.1)
The operation to register the device that you wish to connect to is called “pairing”. First, pair a device to use it with the headset for the first time. Before starting the operation, make sure of the following:
- Your computer has a Bluetooth function that supports music playback connections (A2DP).
- The computer is placed within 1 m (3 feet) of the headset.
- The headset is charged sufficiently.
- The operating instructions of the computer is in hand.
- Depending on the computer you are using, the built-in Bluetooth adaptor may need to be turned on. If you do not know how to turn on the Bluetooth adaptor or are unsure if your computer has a built-in Bluetooth adaptor, refer tothe operating instructions supplied with the computer
Enter pairing mode on this headset.
When you pair a second or subsequent device (the headset has pairing information for other devices)
- Set the headset into the charging case.
- Put the left unit of the headset (the unit with the tactile dot) back into the left hole of the charging case, put theright unit of the headset back into the right hole of the charging case, insert the units until they click, and thenmake sure that the units are locked in the charging case.

- Put the left unit of the headset (the unit with the tactile dot) back into the left hole of the charging case, put theright unit of the headset back into the right hole of the charging case, insert the units until they click, and thenmake sure that the units are locked in the charging case.
- Close the lid of the charging case.

- By closing the lid once, the headset units are straightened and locked in place, even if they were not locked in the charging case before.
- Hold the charging case in your hand and press the lid open button to open the lid.

- Press and hold the pairing button of the charging case for about 5 seconds.

- The indicator (blue) on the charging case repeatedly flashes slowly twice in a row, and the headset goes into pairing mode. You can remove the headset from the charging case after entering pairing mode. When you put the headset units into both ears, you will hear a notification sound and the voice guidance say “Pairing” from both headset units at the same time.
Connecting to a paired computer (Mac)
Compatible OS
- macOS (version 10.15 or later)
Before starting the operation, make sure of the following:
- Depending on the computer you are using, the built-in Bluetooth adaptor may need to be turned on. If you do not know how to turn on the Bluetooth
adaptor or are unsure if your computer has a built-in Bluetooth adaptor, refer to the operating instructions supplied with the computer. - Set the computer speaker to the ON mode. If the computer speaker is set to the “OFF” mode, no sound is heard from the headset. Computer speaker in the ON mode

Receiving a call
You can enjoy a hands-free call with a smartphone or mobile phone that supports the Bluetooth profile HFP (Hands-free Profile) or HSP (Headset Profile), via Bluetooth connection.
- If your smartphone or mobile phone supports both HFP and HSP, set it to HFP
- The operation may vary depending on the smartphone or mobile phone. Refer to the operating instructions supplied with the smartphone or mobile phone.
Depending on the connected device or the application you are using, the functions may not work properly even if you try to operate them with the headset.
- Connect the headset to a smartphone or mobile phone via Bluetooth connection beforehand.
- When you hear a ring tone, tap the left or right unit of the headset or in the area near your ear twice quickly(with an interval of about 0.2 seconds) and receive the call.
- A voice will be heard from the headset.
- When you receive an incoming call while you are listening to music, playback pauses and a ring tone will be heard from the headset.
- You can talk using the microphones on the headset.

Specifications
Headset
- Power source:
- DC 3.85 V: Built-in lithium-ion rechargeable battery
- DC 5 V: When charged using USB
- Operating temperature:
- 0 °C to 40 °C (32 °F to 104 °F)
- Charging time:
- Approx. 1.5 hours (Headset)
- Approx. 3 hours (Charging case)
- Charging temperature:
- 5 °C to 35 °C (41 °F to 95 °F)
- Mass:
- Approx. 4.1 g × 2 (0.15 oz × 2) (Headset (including fitting supporters (M)))
- Approx. 34 g (1.20 oz) (Charging case)
- Transmission range (A2DP): 20 Hz – 20,000 Hz (Sampling frequency 44.1 kHz)
- The actual range will vary depending on factors such as obstacles between devices, magnetic fields around a microwave oven, static electricity, reception sensitivity, antenna’s performance, operating system, software application, etc.
- Bluetooth standard profiles indicate the purpose of Bluetooth communications between devices.
- Codec: Audio signal compression and conversion format
For more manuals by Sony, visit ManualsLibraryy
Sony LinkBuds Truly Wireless Earbud Headphones-FAQs
Can Sony earbuds connect to multiple devices?
Yes, select Sony earbuds (like WF-1000XM4/XM5) support Bluetooth Multipoint, allowing simultaneous connections to two devices (e.g., phone + laptop).
How do I pair Sony earbuds with a new device?
Enter pairing mode: Hold the touch sensor for ~7 seconds until the LED flashes blue/red.
Select “Sony WF-XXXX” in your device’s Bluetooth settings.
Are Sony earbuds waterproof or water-resistant?
Most models (e.g., LinkBuds S, WF-1000XM4) have an IPX4 rating, meaning they resist sweat and light splashes but aren’t waterproof. Avoid submersion.
Can I use Sony earbuds in the rain?
Light rain is okay for IPX4 models, but prolonged exposure may damage them.
How do I control volume on Sony earbuds?
Tap controls: Quickly tap the left earbud 4+ times to decrease volume or the right earbud 4+ times to increase (varies by model).
App control: Adjust via the Sony Headphones Connect app.
How do I turn on noise cancellation (ANC)?
Press and hold the touch sensor (or use the app) to toggle ANC modes (ANC/Ambient Sound/Off).
How do I check battery level?
Voice prompt: Says “Battery level _” when powering on.
App: Check real-time status in Sony Headphones Connect.
LED lights: Orange = low, Green = charged.
How do I turn on Sony earbuds without the case?
Removing them from the case automatically powers them on (LED flashes blue).
Can I charge the case without the earbuds?
Yes! The case charges via USB-C/Qi wireless charging (if supported).

