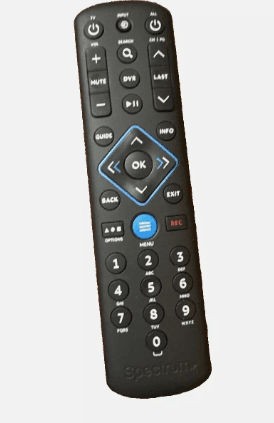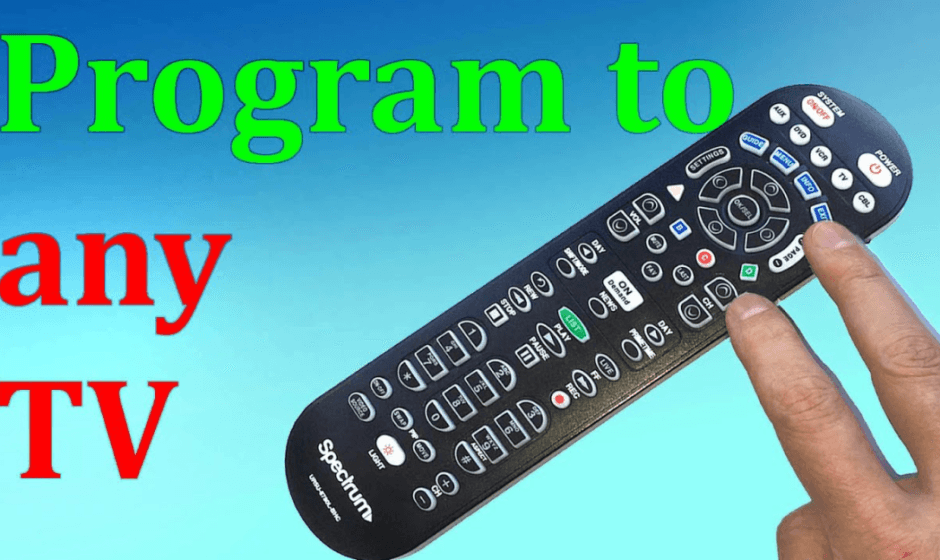
Spectrum URC1160 Remote Control

Charter Spectrum Remote Control User Guide
URC1160
Image of remote line art
Getting Started: Install Batteries
- Apply pressure with your thumb and slide the battery door for removal .Show image of bottom of remote, indicating pressure point and slide direction
- Insert 2 AA batteries. Match the + and – marks. Show illustration of batteries in place
- Slide the battery door back into place. Show bottom of remote with battery door in place, include arrow for slide direction.
Setup Your Remote for a Charter World Box
If you have a Charter World Box, the remote must be paired with the box. If you do NOT have a World Box, proceed to PROGRAMMING YOUR REMOTE FOR ANY OTHER CABLE BOX.
To Pair the Remote to the World Box
- Ensure that your TV and World Box are both powered-on and that you can view the video feed from the World Box on your TV. Show image of STB and TV connected and on
- To pair the remote, simply point the remote at the World Box and press the OK key. The Input key will begin blinking repeatedly. Show image of remote pointed at the TV, transmitting data
- A confirmation message should appear on the TV screen. Follow the on-screen instructions to program the remote control for your TV and/or audio equipment as needed.
To Un-Pair the Remote to the World Box
- If you wish to use the remote with a different cable box, follow these steps to un-pair it with your World Box. Press and hold MENU and Nav Down keys simultaneously until the INPUT key blinks twice. Show remote with MENU and Nav Down keys highlighted
- Press 9-8-7 digit keys. The INPUT key will blink four times to confirm pairing has been disabled. Show remote digits with 9-8-7 highlighted in order.
Programming Your Remote for Any Other Cable Box
This section is for any cable box that is NOT a Charter World Box. If you have a World Box, refer to the section above for remote pairing, following the on-screen instructions for any other remote programming.
Setup Remote to Control Cable Box
Point your remote at your cable box and press MENU to test. If the cable box responds, skip this step and proceed to PROGAMMING YOUR REMOTE FOR TV AND AUDIO CONTROL.
- If your cable box is branded Motorola, Arris, or Pace:
- a. Press and hold MENU and the 2 digit key simultaneously until the INPUT key blinks twice. Show remote with MENU and 3 keys highlighted.
- If your cable box is branded Cisco, Scientific Atlanta, or Samsung:
- a. Press and hold MENU and the 3 digit key simultaneously until the INPUT key blinks twice. Show remote with MENU and 3 keys highlighted.
Programming Your Remote for TV and Audio Control
Setup for Popular TV Brands
This step covers setup for the most common TV brands. If your brand is not listed, please proceed to
SETUP USING DIRECT CODE ENTRY
- Ensure that your TV is powered-on. Show TV with remote pointed at it.
- Simultaneously press and hold MENU and OK keys on remote until the INPUT key blinks twice Show remote with MENU and OK keys highlighted
- Find your TV brand in the chart below and note the digit that relates to your TV brand. Press and hold down the digit key.
Digit TV Brand 1 Insignia/Dynex 2 LG/Zenith 3 Panasonic 4 Philips/Magnavox 5 RCA/TCL 6 Samsung 7 Sharp 8 Sony 9 Toshiba 0 Vizio - Release the digit key when the TV turns off. Setup is complete. Show remote pointed at TV, transmitting data and TV is off.
NOTES: While holding the digit key, the remote will test for the working IR code, causing the INPUT key to flash each time it tests a new code.
Process in Setup Using Direct Code Entry
This step covers setup for all TV and Audio brands. For faster setup, be sure to locate your device brand in the code list before beginning setup.
- Ensure that your TV and/or audio device is powered-on. Show TV with remote pointed at it.
- Simultaneously press and hold MENU and OK keys on remote until the INPUT key blinks twice. Show remote with MENU and OK keys highlighted
- Enter the 1st code listed for your brand. The INPUT KEY will blink twice to confirm once complete. Show remote with digit keys highlighted
- Test volume functions. If the device responds as expected, setup is complete. If not, repeat this process using the next code listed for your brand. Show remote controlling TV.
Assigning Volume Controls
The remote is set to default to control TV volume once the remote is programmed for a TV. If the remote is also set up to control an audio device, then volume controls will default to that audio device.
If you wish to change volume control settings from these defaults, perform the following steps:
- Simultaneously press and hold MENU and OK keys on remote until the INPUT key blinks twice. Show remote with MENU and OK keys highlighted
- Press the key below for the device that you wish to use for volume controls:
- TV Icon = To lock volume controls to the TV, Press VOL +
- Audio Icon = To lock volume controls to the audio device, Press VOL Cable
- Box Icon = To lock volume controls to the cable box, Press MUTE
Troubleshooting
- Problem: INPUT key blinks, but remote does not control my equipment.
- Solution: Follow the programing process in this manual to set your remote up to control your home theater equipment
- Problem: I want to switch VOLUME CONTROLS from to control my TV or to my Audio Device.
- Solutions Follow ASSIGNING VOLUME CONTROLS instructions in this document
- Problem: The INPUT key does not light up on the remote when I press a key
- Solution: Ensure that the batteries are functional and are inserted properly Replace the batteries with two new AA size batteries.
- Problem: My remote won’t pair with my Cable Box
- Solution: Ensure that you have a Charter World Box Ensure that the remote has a clear line of sight to the Cable Box when pairing .Be sure to follow the on-screen instructions that appear when pairing.
Remote Key Chart
Show image of the whole remote control with lines pointing to each key or key group for the description
below.
- TV POWER: Used to turn on the TV
- INPUT: Used to switch video inputs on your TV
- ALL POWER: Used to turn on the TV and set-top box
- VOLUME +/- : Used to change volume level on TV or Audio Device
- MUTE: Used to mute volume on TV or STB
- SEARCH: Used to search for TV, Movies, and other content
- DVR: Used to list your recorded programs
- PLAY/PAUSE: Used to play and pause current selected content
- CH +/- : Used to cycle through channels
- LAST: Used to jump to the previous tuned channel
- GUIDE: Used to display the program guide
- INFO: Used to display selected program info
- NAVIGATION UP, DOWN, LEFT, RIGHT: Used to navigate on-screen content menus
- OK: Used to select on-screen content
- BACK: Used to jump to previous menu screen
- EXIT: Used to exit the current displayed menu
- OPTIONS: Used to select special options
- MENU: Used to access main menu
- REC: Used to record current selected content
- DIGITS: Used to enter channel numbers
Declaration of Conformity
Federal Communication Commission Interference Statement
This equipment has been tested and found to comply with the limits for a Class B digital device, pursuant to Part 15 of the FCC Rules. These limits are designed to provide reasonable protection against harmful interference in a residential installation. This equipment generates, uses, and can radiate radio frequency energy and, if not installed and used in accordance with the instructions, may cause harmful interference to radio communications. However, there is no guarantee that interference will not occur in a particular installation. If this equipment does cause harmful interference to radio or television reception, which can be determined by the turning of equipment off and on, the user is encouraged to try to
correct the interference by one of the following measures:
- Reorient or relocate the receiving antenna.
- Increase the separation between the equipment and receiver.
- Consult the dealer or an experienced radio/TV technician for help.
- Connect the equipment into an outlet on a circuit different from that to which the receiver is connected.
This device complies with Part 15 of the FCC Rules. Operation is subject to the following two conditions:
- This device may not cause harmful interference, and
- this device must accept any interference received, including interference that may cause undesired operation. The user is cautioned t that the changes and modification made to the equipment without the approval of manufacturer could void the user’s authority to operate this equipment.
For more manuals by Spectrum visit, ManualsLibraryy
Spectrum URC1160 Remote Control-FAQs
How do I program the Spectrum URC1160 remote to my TV?
To pair your Spectrum remote with your TV, press the MENU button on the remote. Navigate to Settings & Support, select Support, then Remote Control. Choose RF Pair New Remote and follow the on-screen instructions.
How do I program a TV remote?
Turn on your TV or device. Press and hold both the Device and Power buttons on the remote until the Power button lights up, then release. Aim the remote at your TV, press the Power button, and wait a few seconds.
What are the TV codes for Spectrum remotes?
Here are some common codes:
LG: 363, 113, 116, 102, 112, 143, 569, 284, 648, 741
ONN: 705
Samsung: 258, 050, 363, 143, 333, 228, 229, 515, 655
Sharp: 251, 019, 028, 363, 143, 175, 308, 684, 692, 735
What are the four colored buttons on the Spectrum remote for?
The colored buttons control specific functions:
Red: Closes the menu (Exit)
Green: Displays TV information (Info)
Yellow: Switches broadcast type (Broadcast)
Blue: Switches TV input (Input)
How do remote buttons work?
The remote sends infrared (IR) pulses to the device, which decodes the signals into binary code. The device’s microprocessor interprets the code and performs the desired action. IR remotes use LED lights to transmit signals.
Does Spectrum offer a voice remote for TV?
Yes, the Spectrum Xumo Stream Box includes a voice remote. Simply speak into the remote to find your desired movies, shows, or sports events, making it easy to locate content.
Are Spectrum remotes universal?
Yes, Spectrum remotes are universal and can be programmed to control other devices like DVD players or audio systems in addition to the Spectrum receiver.
How do I use the “Input” or “Source” button on my Spectrum remote?
Press the Input/Source button (it may also be labeled as Input, Source, or TV/Video). Use the on-screen menu to navigate and select the correct input for your device.
How do I access the TV guide on my Spectrum remote?
Press the Guide button to view the full-screen grid guide. To access the Mini Guide, press OK twice on the remote, which lets you browse channels while watching a program.
How do I program a Spectrum URC remote?
Hold down the MENU and OK buttons until the INPUT key blinks twice. Enter the code for your device from the CodeFinder tool. Test the remote to ensure it controls your device properly.

