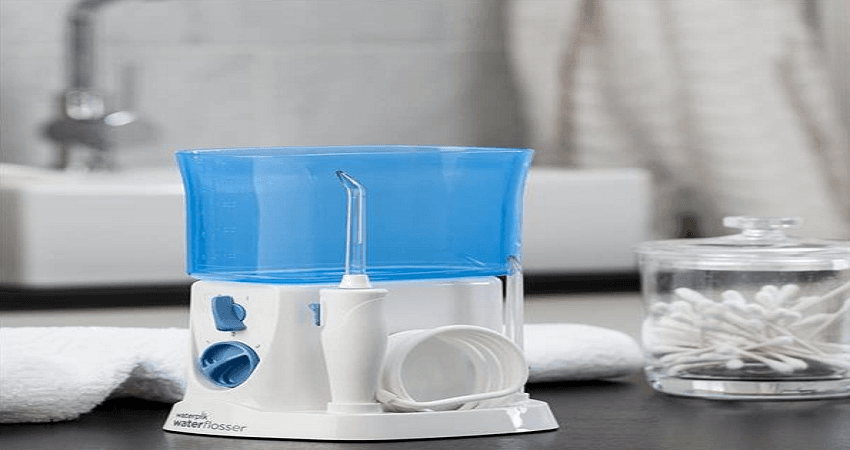
Waterpik WP-250 and 300 Series Water Flosser
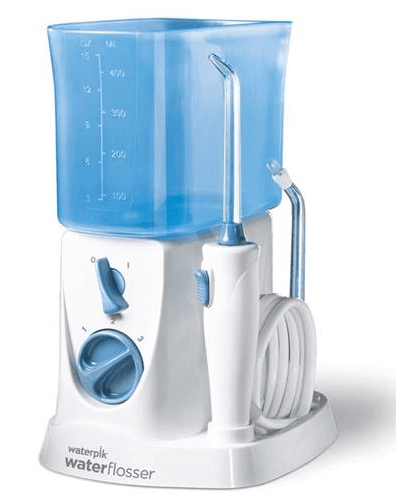
PRODUCT DESCRIPTION
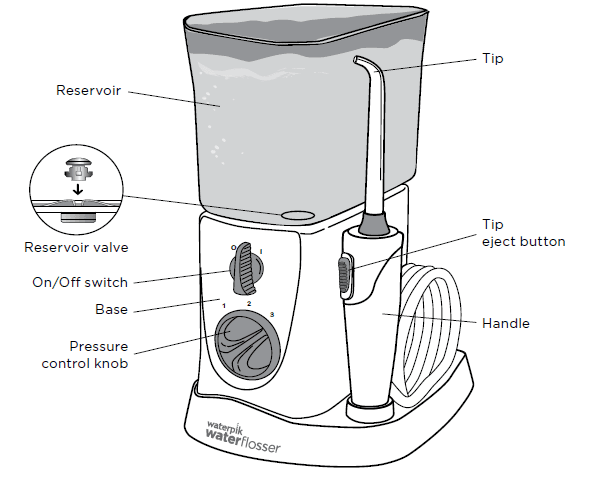
GETTING STARTED
- Powering the Unit
Plug the cord into an electrical outlet. If the outlet is controlled by a wall switch, be sure it is turned on. - Preparing the Reservoir
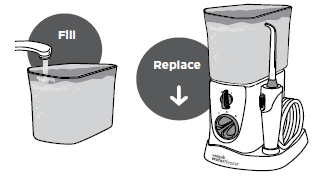
Remove the reservoir, and fill with lukewarm water. Replace the reservoir over the base and press down firmly.
- Inserting and Removing Tips
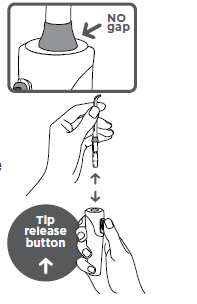
Insert tip into the center of the Water Flosser handle, pressing down firmly until the tip clicks into place. The colored ring will be flush with the top of the handle if the tip is correctly locked into place. To remove tip from the handle push the tip eject button on the handle.
- Prime Unit (First Time Use Only)
Set pressure control dial on base to high (pressure setting No.3), point the handle and tip into sink. Turn power on until water flows from the tip. Turn unit OFF.
- Adjusting the Pressure Setting
Turn the pressure control dial on the base of the unit to the lowest setting (pressure setting No.1) for first-time use. Gradually increase pressure over time to the setting you prefer or as instructed by your dental professional.
- Using the Water Flosser
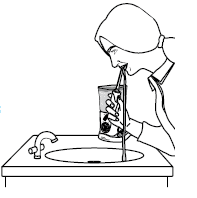
Always place the tip in your mouth before turning the unit ON. Lean over sink and slightly close lips enough to prevent splashing while still allowing water to flow from mouth into the sink. Turn power switch ON. When finished, turn power switch OFF.
- Recommended Technique
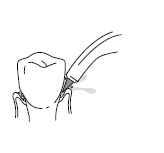
For best results, start with back teeth and work toward the front teeth. Direct the stream at a 90-degree angle to your gum line with tip in mouth. Glide tip along gum line and pause briefly between teeth. Continue until you have cleaned the inside and outside of both the upper and lower teeth.
- When Finished
Turn the unit off. Empty any liquid left in the reservoir.
TIP USAGE
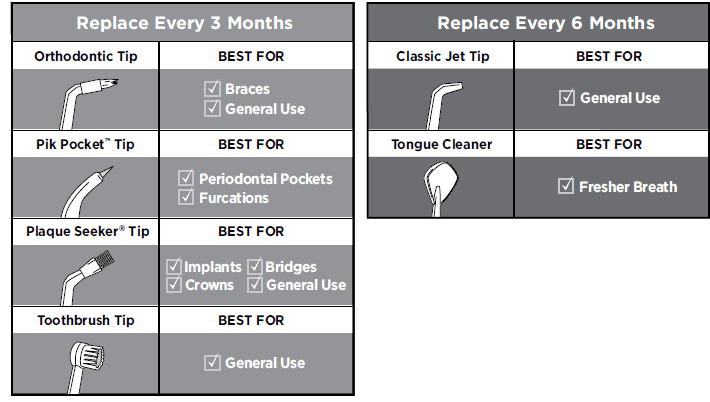
- Orthodontic Tip
To use the orthodontic tip, gently glide tip along gum line, pausing briefly to lightly brush area between teeth and all around orthodontic bracket, before proceeding to the next tooth.
- Tongue Cleaner Tip
Set to lowest pressure setting, place tip in the center/middle of your tongue about half way back. Pull forward with light pressure. Increase pressure as you prefer.
- Plaque Seeker™ Tip
To use the Plaque Seeker™ tip, place the tip close to the teeth so that the bristles are gently touching the teeth. Gently glide tip along gum line, pausing briefly between teeth to gently brush and allow the water to flow between the teeth.
- Toothbrush Tip
Place the toothbrush tip in mouth with the brush head on the tooth at the gum line. The toothbrush tip can be used with or without toothpaste. Using a light pressure (bristles should not bend) massage the brush back and forth with very short strokes much like you would with a manual toothbrush.
CLEANING AND TROUBLESHOOTING YOUR WATERPIK® WATER FLOSSER
Using Mouthwash and Other Solutions
Your Water pick® Water Flosser can be used to deliver mouthwash and antibacterial solutions. After using any special solution, rinse unit to prevent clogging by partially filling reservoir with warm water and running unit with tip pointed into sink until unit is empty.
Cleaning
Before cleaning, unplug from the electrical outlet. Clean the product when necessary by using a sof cloth and mild non-abrasive cleanser. The water reservoir is removable for easy cleaning and is top rack dishwasher safe.
Removing Hard Water Deposits/ General Cleaning
Hard water deposits may build up in your unit, depending on the mineral content of your water. If left unattended, it can hinder performance. Cleaning internal parts: add 2 tablespoons of white vinegar to a full reservoir of warm water. Point the handle and tip into sink. Turn unit ON and run until reservoir is empty. Rinse by repeating with a full reservoir of clean warm water. This process should be done every 1 to 3 months to ensure optimal performance.
Leakage
If leaking due to a damaged hose, replacement hoses and handles can be purchased at www.waterpik.com or contact Water Pick Inc. customer service for a self service repair kit. If leakage occurs from the reservoir, ensure the valve is right side up or contact Water Pick Inc. customer service for a replacement valve.
Service Maintenance
Water pick® Water Flossers have no consumer serviceable electrical items and do not require routine service maintenance. For all parts and accessories go to www.waterpik.com. You may also call our toll-free customer service number at 1-800-525-2774 (USA). Refer to the serial and model numbers in all correspondence. These numbers are located on the bottom of your unit.
LIMITED THREE -YEAR WARRANTY
Water Pick, Inc. warrants to the original consumer of this new product that it is free from defects in materials and workmanship for 3 years from the date of purchase. Consumer will be required to submit the original purchase receipt as proof of purchase date and if requested, the entire product, to support a warranty claim.
Water Pick, Inc. will replace at its discretion the product, provided the product has not been abused, misused, altered or damaged after purchase, was used according to instructions, and was used only with accessories or consumable parts approved by Water Pick, Inc. This limited warranty excludes accessories or consumable parts such as tips, etc. Use with improper voltage will damage product and VOID warranty. This warranty gives you specific legal rights. You may also have other rights that vary, depending on the law in your place of residence.
For more manuals by Waterpik visit, ManualsLibraryy
Waterpik WP-250 and 300 Series Water Flosser-FAQs
How long does it take to charge a Waterpik?
It takes approximately 4 hours to fully charge the Waterpik. Simply plug the USB charger into a wall outlet, connect the magnetic charger to the unit, and ensure the tip is firmly placed into the unit.
How do I know when my Waterpik is fully charged?
The charge indicator light on the handle will flash while charging. Once fully charged, the light will remain on continuously.
What is the power consumption of a Waterpik?
The Waterpik Water Flosser Model WP-650/655/660 uses 12.5W, with a voltage of 120V and a frequency of 60Hz.
How does a water flosser work?
A water flosser uses a pressurized stream of water to clean between your teeth, making it easier to use than traditional flossing. It requires less technique and is more hands-off.
Why is my Waterpik not working?
If there is no water flow, the most likely cause is a clogged jet tip. To check, remove the jet tip and see if water bubbles from the top. If so, replace the jet tip, which should be changed every 3-6 months.
Why is my Waterpik so loud?
Increased noise could be caused by a blockage, trapped air, or a malfunction. Try cleaning and reassembling the unit. Placing a towel beneath the base may help reduce the noise. If the issue persists, contact customer service.
Can I add salt to my Waterpik?
No, it is not recommended to add salt, iodine, essential oils, or baking soda to the Waterpik reservoir as it may damage the unit or reduce its performance.
How can I stop water from spraying everywhere while using the flosser?
To avoid water splashing, keep your mouth open while using the water flosser and lean over the sink. Looking straight down into the sink instead of up toward the mirror will prevent water from dripping down your chin.

