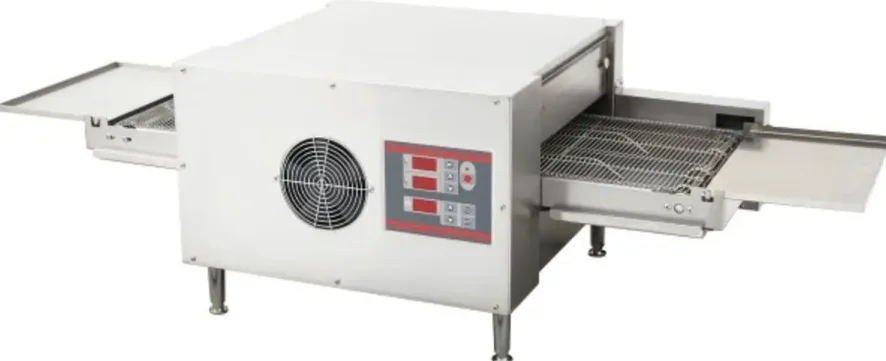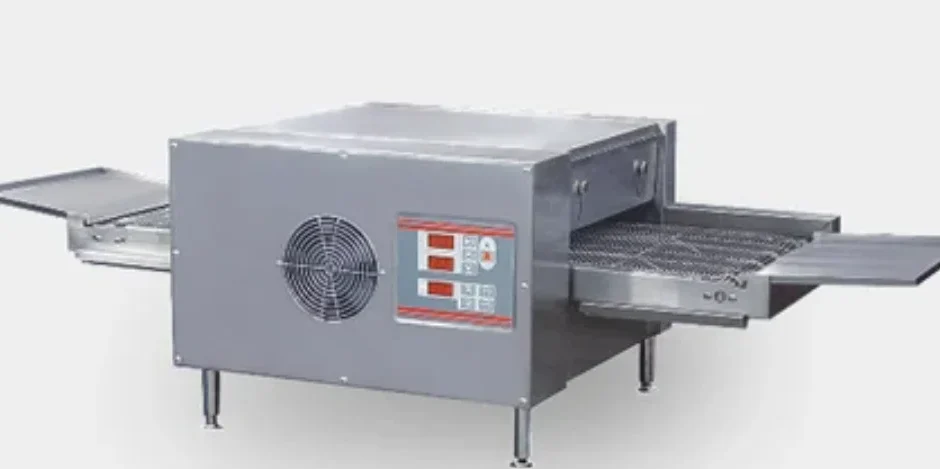
Adexa CP-105IR Commercial Pizza Conveyor Oven

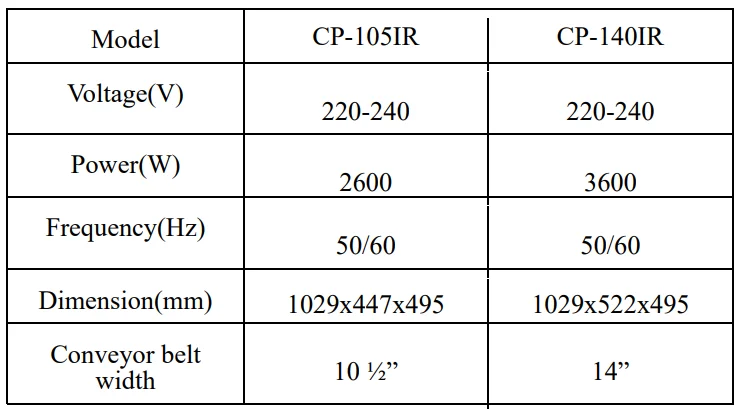
Technical Parameter

Electricity installation
- Ensure the supplied voltage is compatible with the operating voltage used.
- The power wire should be connected to the special socket, leads through the special air switch, and the electric leakage protector. Make sure the ground wire connection is connected well. For convenient operation, ban from piling up the sundry goods near the switch.
Operation
- This conveyor oven has been designed to continuously produce toasted bread or buns.
The desired toasted colour of the product can be adjusted by changing the belt speed of the conveyor and the individual heat controls for the top and bottom elements. Depending on the installation position, the toasted product can be discharged to the front or rear of the unit. - Before operating this unit, it thoroughly cleaned as described in the cleaning section of this leaflet.
- As detailed in the diagrams below, the unit can be assembled with either front or rear discharge depending on installation position and preference.
- The unit has three controls.
- Speed or colour control determines the length of time the toast or product is in the heating chamber. Obviously, the slower the speed, the longer the exposure, and the darker the product.
- The top and bottom heater elements have individual heat control switches, es with 77s7 settings :
- a. “1” – Position is the lowest temperature setting.
- b. “1 – 7” – The heat will vary from low to high w,, where “1” is the lowest setting and 7 is the highest setting.
- When using the machine, select switch positions according to requirements and allow approximately 5 minutes for the operating temperature to be attained. As described above, product appearance or colour is dependent on conveyor speed, heat setting, and product.
Please note that a number of factors can affect the toasting colour.- Moisture content of the product
- Sugar content of the product
- Initial product temperature
Generallyforor he fothe r best results, day-old bread is stored at room temperature.
- Turn on the main switch the conveyor will now run. Set the temperature to approx. 400F w which equates to 5.7 on the scale. Any high-quality edible oil can be used with this conveyor oven. It is preferable to use oil specifically suited for use in toasters/ovens. The pilot cycle cycles with the heating element and indicates when the heater is on. It is preferable to wait until the unit has reached operating temperature and the light has cycled on and off twice. Try to toast two pieces of bread to see whether the color is good or not, and adjust the speed of the chain net. Iyou f you want the color to deepen, turn the color controller to the right to go over the “3” position. (Notice: the more graduation and lower chain net speed, the color of the bread will deepen. As the visa.) After adjusting the speed of the chain net, put the bread into the chain net, following the tray. The bread will go with the chain net into the inside of the unit and be toasted in the inside of the unit.
- After finishing working, turn the main switch tthe o the “OFF” position and pull the plug out.
- If the wire was damaged, replace it by the manufacturer or service agent and the qualified person only, in order to avoid danger.
Clean and maintenance
Note: THE UNIT MUST BE DISCONNECTED FROM THE POWER SOURCE AND ALLOWED TO COOL DOWN BEFORE CLEANING TAKES PLACE
- After finishing adwork, pull out the tray and clean it. Use the soft, wet towel that has no corrosive cleaning preparation to clean the unit. Do not wash the unit with water jets.
- To prevent the unit from being polluted and affecting the unit’s function, do not use the unit to toast food that contains too much sugar on the ssurfacefood will flow and stick after heating.
Daily checking
Check the appliance before and after use. Before using, make sure the appliance does not lean. Be certain that the power cord is not worn out or broken. When in use, make sure no unpleasant smell is present and there is no unusual noise.
This manual must be read and understood by all persons using or installing this appliance. Contact your local dealer if you have any questions concerning the installation thisequipmentmentt.
IMPORTANT: DO NOT DISCARD THIS MANUAL
This manual is considered to be part of the appliance and is to be given to the owner or manager of the hotel or restaurant, or to the person responsible for training operators of this appliance. It should be retained for future reference. Additional manuals are available from your local dealer.
ADEXA DIRECT LIMITED
GROUND FLOOR UNIT 1 214 PURLEY WAY CROYDON CR0 4XG LONDON UNITED KINGDOM
T: +44 1483 931040
Declaration of Conformity

Adexa Direct Limited declares that:
- Equipment Type: Electric conveyor oven
- Model: CP-105IR, CP140IR
- Imported By: ADEXA DIRECT LIMITED GROUND FLOOR UNIT 1 214 PURLEY WAY CROYDON CR0 4XG LONDON, UNITED KINGDOM
- Brand: ADEXA
- Application of Council Directive(s):
- EMC 2014/30/EU
- LVD 2014/35/EU
- Standards:
- EN 55014-1:2017+A11:2020
- EN IEC 61000-3-2:2019
- EN IEC 61000-3-3:2013+A1:2019
- EN 55014-2:2015
- EN 60335-1:2012+A11:2014+A13:2017+A1:2019+A2:2019+A14:2019
- EN 60335-2-48:2003+A1:2008+A11:2012+A2:2019
- EN 62233:2008
I, the undersigned, hereby declare that the equipment specified above conforms to the above Directive(s) and Standard(s).
- Date: 16.8.2022
- Signature:

- Full Name: Hakan Baykal
- Position: Purchase Manager
Declaration of Conformity

Adexa Direct Limited declares that:
- Equipment Type: Electric conveyor oven
- Model: CP-105IR, CP140IR
- Imported By: ADEXA DIRECT LIMITED GROUND FLOOR UNIT 1 214 PURLEY WAY CROYDON CR0 4XG LONDON, UNITED KINGDOM
- Brand: ADEXA
- Application of Council Directive(s): Electromagnetic Compatibility Regulations 2016 and Electrical
- Standards:
- BS EN 55014‐1:2017+A11:2020
- BS EN IEC 61000‐3‐2:2019
- BS EN IEC 61000‐3‐3:2013+A1:2019
- BS EN 55014‐2: 2015
- BS EN 60335‐1:2012+A11:2014+A13:2017+A1:2019+A2:2019+A14:2019
- BS EN 60335‐2‐48:2003+A1:2008+A11:2012+A2:2019
- BS EN 62233:2008
I, the undersigned, hereby declare that the equipment specified above conforms to the above Directive(s) and Standard(s).
- Date: 25.10.2022
- Signature:

- Full Name: Hakan Baykal
- Position: Purchase Manager
For more manuals by Adexa, visit ManualsLibraryy
Adexa CP-105IR Commercial Pizza Conveyor Oven- FAQs
How do I turn on the Adexa CP-105IR oven?
Plug in the oven, turn on the main power, set the desired temperature on the control dial (0–300°C), and set the timer. The indicator lights and interior lamp will turn on.
What temperature should I set for a pizza in a conveyor oven?
The ideal temperature is between 400°F and 600°F (205–315°C) depending on pizza type and crust preference.
How long does it take a commercial pizza oven to heat up?
It usually takes 15–30 minutes to reach optimal cooking temperature, depending on the oven size and settings.
How long should I cook a pizza in a conveyor oven?
Cooking time ranges from 5–10 minutes, depending on pizza thickness, toppings, and oven temperature.
What is the best temperature for a crispy pizza?
For a crisp crust, aim for 700–800°F (370–425°C) and cook quickly. Thin crust pizzas benefit from the higher end of this range.
How do I adjust the cooking temperature?
Use the temperature control dial on the front panel. Turn clockwise for higher heat or counterclockwise for lower heat. Wait a few minutes for the oven to stabilize at the new temperature.
How do I adjust cooking time on the conveyor oven?
Use the timer knob. Adjust depending on the pizza thickness, toppings, and desired crust crispiness. The conveyor speed controls the exposure time inside the oven.
What should I do if the oven is not heating properly?
Check the power supply, heating elements, and circuit breakers. If necessary, inspect or replace the heating element or thermostat.
How do I reset the oven temperature or heat?
Turn off the oven, unplug it, and allow it to cool. For calibration, slightly adjust the temperature knob screws clockwise (if too hot) or counterclockwise (if too cold) in small increments.

