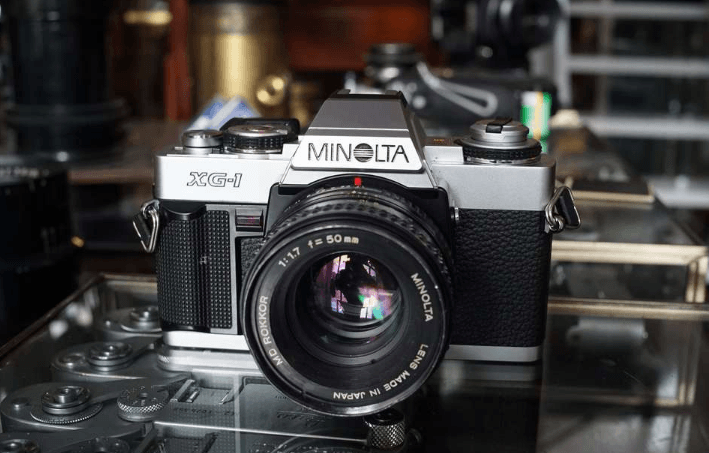
Minolta XG-1 Film Camera
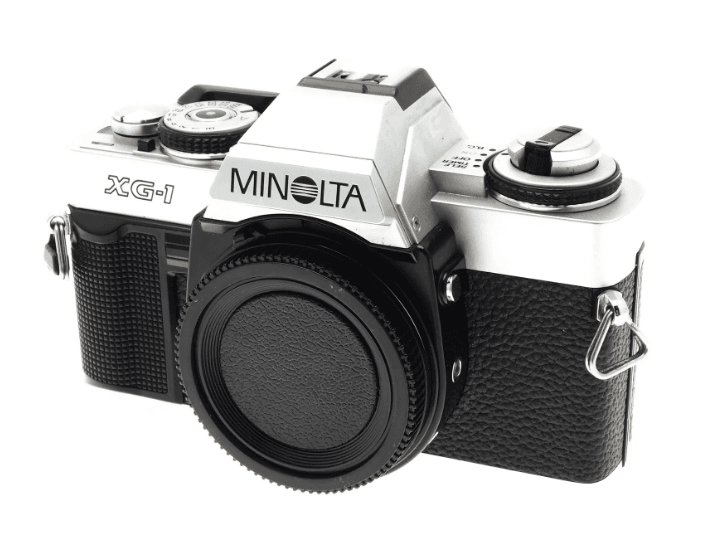
MAIN FEATURES
Fail-safe electronic exposure system. Incorporating many of the features developed for Minolta’s top electronic cameras, the XG-1 covers a wide range of photographic conditions. It’s an electronic shutter that automatically locks to prevent overexposure and electromagnetic shutter release, with a unique touch switch metering that adds to the handling ease of the camera. The XG-1 ‘s system features:
- Full automatic exposure by stepless shutter speeds from 1 /1000 to 1 sec. plus full manual settings.
- Electromagnetic shatter release.
- Unique Touch switch metering.
- Shutter-release lock prevents overexposure when the light is over the meter’s range or the battery power is low.
- Two tiny silver-oxide batteries as a power source.
Solid-state information viewfinder
- Focusing can be done in three ways: By the split-image spot or microprism focusing aid, or on the matte field.
- Automatic shutter speeds, indicated by LED’s are visible while you view.
- LED at “60” position blinks at flash-ready signal when Auto Electroflash 200X or 132X is attached and charged.
Easy handling controls
Lightweight and compact, the XG-1 is human-engineered to fit the user’s hands for smooth operation :
- Smooth, short stroke film advance.
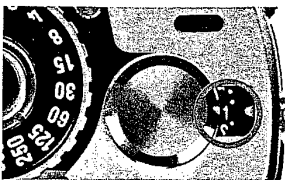
- Large, easy-to-adjust shutter-speed dial.
- “Soft-touch” electromagnetic shutter release.
- Curve formed body with cushioned body grip.
- Minolta bayonet lens mount with large release button.
- Balanced wind operation.
Quick attach auto winder
The XG’s accessory auto-winder attaches quickly, without access caps to remove or store, freeing the user from advancing film in single-frame or continuous operation up to two frames per second. It’s a strong, efficient, and careless micromotor that winds as many as 150 or more cartridges per set or charge of batteries. At the end of each cartridge, the motor automatically
shuts off.
Special camera-control flash units
When attached to the XG-1 and ready to fire, both the Auto Electroflash 132X and 200X start a flash-ready signal blinking in the viewfinder and automatically set the shutter for X-synchronization (1 /60 sec.) when the shutter is released. The Auto Electroflash 132X features two auto settings as well as manual, and a tiltable flash head for bounce flash. It’s a special flash distance check lamp that lights up to indicate when flash brightness is sufficient for correct exposure. The 200X model provides an auto flash at either of two apertures and either full-power manual operation or when powered by Ni-Cd batteries, up to two continuous-sequence flash exposures each second with the Auto Winder G.
User-oriented features
- Up to two stops’ continuous adjustment over or under the normal electronic setting.
- X-type flash synchronization through the hot shoe or PC terminal. ·
- Electronic self-timer with blinking indicator light.
- Eyepiece cap for unmanned or similar operation.
- Exclusive Safe Load Signal monitors film alignment and advancement.
- ASA/DIN conversion scale on the back.
- Release terminal for tripod shots with electronic or standard release cord.
- The shutter is not operative when the operation switch is off.
- Virtually all existing Minolta interchangeable lenses and applicable system accessories can be used in either automatic
or manual operation.
NAMES OF PARTS
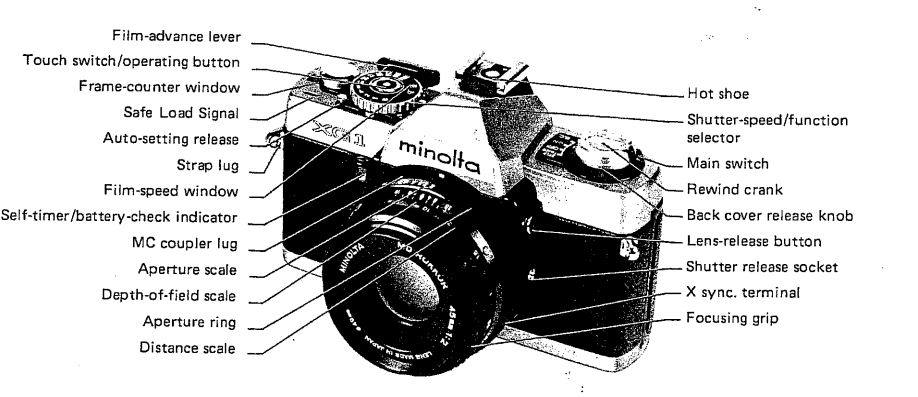
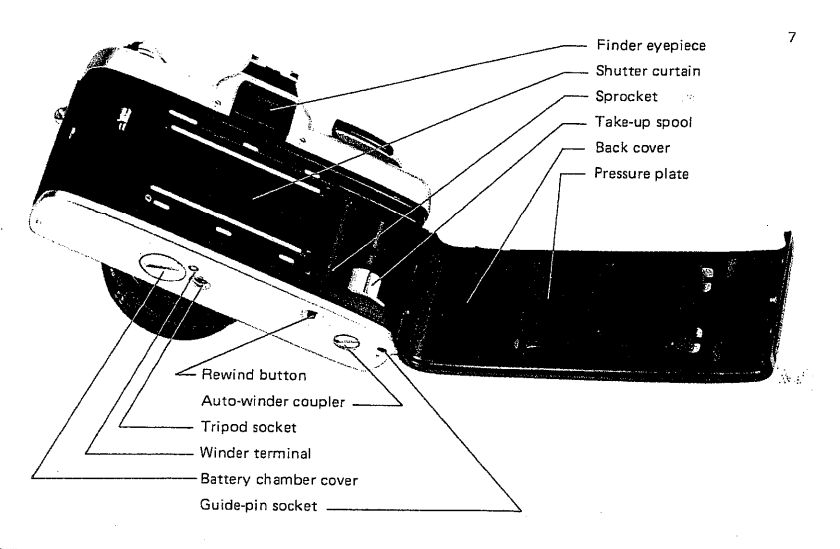
SUMMARY OF OPERATION (on automatic)
The steps pictured on this page outline the use of your XG-1 in automatic mode. They give a general idea of how very easy it is to get perfectly exposed pictures with this camera and is keyed to the corresponding sections of the manual for ready reference. This brief guide may also be useful for good results after you have not used the camera for some time. It is not, however, a substitute for the detailed instructions in the rest of this manual, which should be thoroughly studied for best results.
- Check batteries (see 12)

- Move the main switch to “ON” (p. _13)

- Open the back cover (p. 14)

- Load film properly; close cover (p. 14)

- Advance film to “1” (p. 17)

- Set film speed (p. 18)

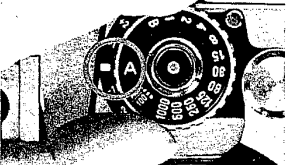
- Set the selector dial to “A” (p. 24)

- Set lens aperture (p. 24)

- Adjust focus (p. 35)

- Release shutter (p. 38)

- Turn the power off (p.13)

- Rewind and remove film (p . 41)

ATTACHING AND REMOVING LENSES
To Attach
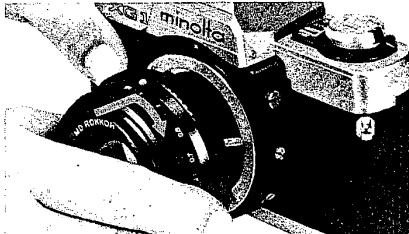
- Remove the body cap from the camera lens mount and the rear cap from the lens bayonet, each by turning the cap counterclockwise.
- Align the red mounting index on the lens barrel with the red index above the camera lens mount; insert the lens bayonet into the mount; and turn the lens clockwise until it locks into place with a click.

To Remove
While pushing the lens-release button, turn the lens counterclockwise as far as it will go; then lift the lens bayonet out of the mount.
CAUTION
If it becomes necessary to set the lens down without a rear lens cap attached, be sure to set the lens only on its front end (except for fisheye lenses), as damage to the diaphragm control pin could result from rear lens contact with a hard surface.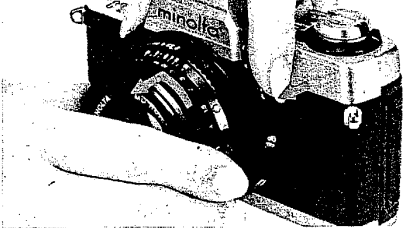
BATTERIES AND POWER
Two 1.5-volt silver-oxide batteries, Eveready S-76 or equivalent, supply the power for the meter, electronic exposure control, electromagnetic release, electronic shutter settings, and LED indication.
CAUTION
- The shutter will not release when the operating button is pushed if: battery power is too low; the operating switch is at “OFF,” or exposure conditions exceed the range of the automatic exposure system.
- Do not use 1.3V mercury batteries, Eveready EPX-675 or equivalent, which have a similar shape.
NOTE
- If the camera is not used for. After more than two weeks, it is advisable to remove the batteries.
- Fresh spare batteries may be stored in the battery holder provided with the camera strap.
Installing batteries
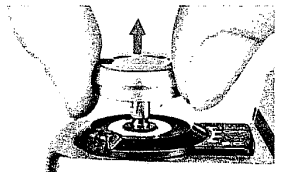
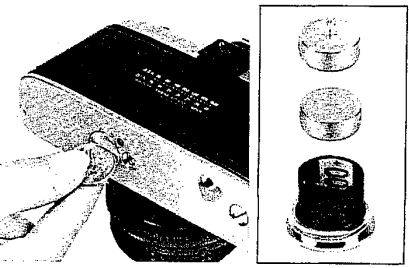
- Using a coin or similar object, turn the battery-chamber cover counterclockwise and remove it.
- After wiping terminals with a clean, dry cloth and handling only by the edges, insert two of the specified batteries plus (+) side out, into the sleeve on the inside of the cover. (If batteries are inserted improperly, they will not make contact, and no current will flow.)

- Replace the cover and screw it in clockwise as far as it will go.

Testing batteries
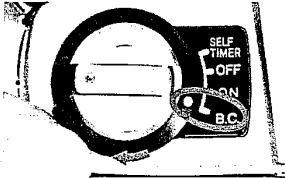
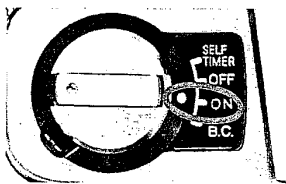
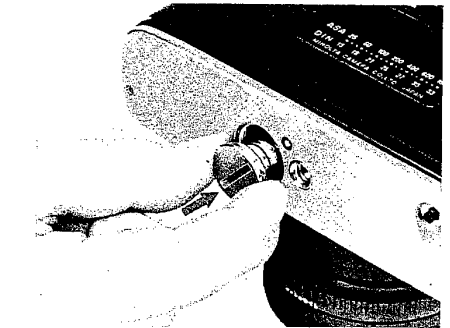
Move the main switch to align the index with “8.C.” If the red battery-check indicator on the front of the camera lights, batteries are serviceable. When released, the main switch will automatically move to the “ON” position. Test batteries immediately after installing them. If the indicator does not light, make sure that they are fresh and have been inserted correctly. Batteries should be tested from time to time thereafter, preferably before starting each new roll of film and particularly before starting picture-taking sessions or trips. A set of batteries will generally last for about one year in proper normal use.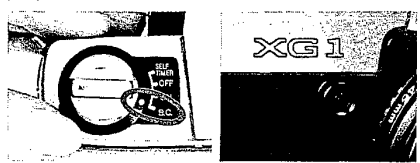
Main switch
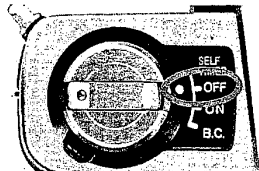
To operate the camera, move the main switch to “ON.” This allows current to flow to the Touch switch/operating button. The main switch also serves as the self-timer and battery check switch. To prevent accidental exposures and needless battery drain, always be sure to move the main switch to “OFF” when not using the camera.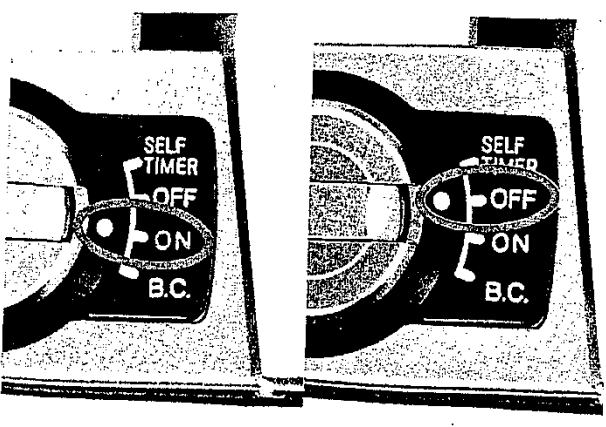
Touch switch/operating button
Finger contact with the Touch switch/operating button activates the camera’s electronic shutter, and when the shutter-speed/function selector is set at “A” (automatic), powers the electronic exposure control and LED circuits. If proper contact with the touch switch is not possible (i.e., while wearing gloves or when fingers are dry), slight pressure on the button will also activate the camera.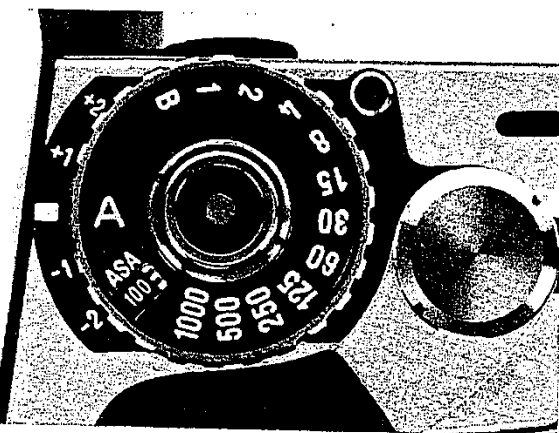
NOTE
Wipe off any dust or dirt that might accumulate on the touch switch with a clean, dry cloth. This will ensure good contact and
proper operation.
Cold-weather operation
Batteries, by nature, tend to decrease in capacity as the temperature goes down. Though the silver-oxide batteries used for the XG-1 are superior to most others in this respect, it also happens with them. lf old batteries are used at a temperature below Q°C (32°F), the camera’s electronic operation may not be satisfactory. You should thus replace older batteries with fresh ones before using your XG-1 in cold weather and carry spare fresh batteries with you during such use. Battery capacity will be restored to its normal level when the batteries are warmed to their recommended operating temperature range. After you have not used your camera for some time, check the Safe Load Signal and frame counter to be sure that there is no film in the camera. If the camera is unloaded, proceed as follows:
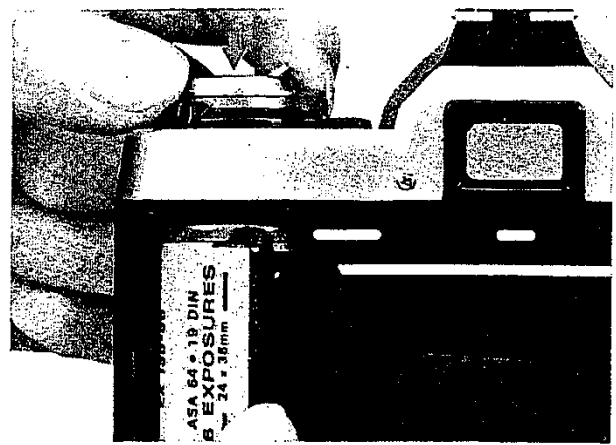
- Pull out on the back cover release knob until the camera back springs open.

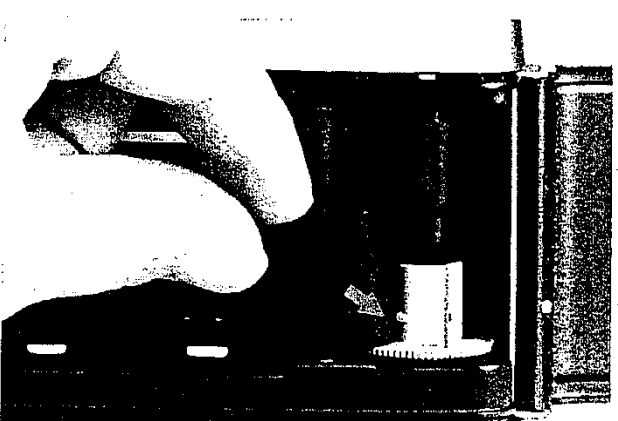
- Leaving the knob pulled out, position a film cartridge in the chamber with the projecting spool end toward the bottom of the camera. Then push the back-cover release knob all the way in, rotating it slightly to do so if necessary.

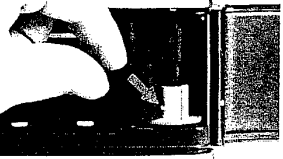
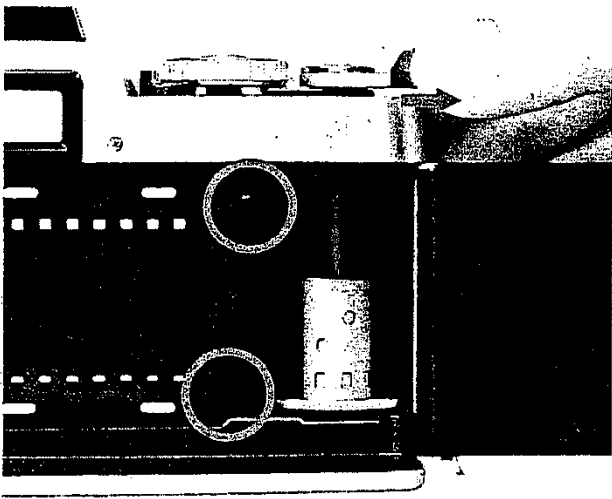
- Insert the end of the film leader as shown into one of the slots in the take-up spool so that the tooth is engaged with a sprocket hold near the end of the leader. Make sure that the end of the leader does not project from another slot between tabs on the spool.

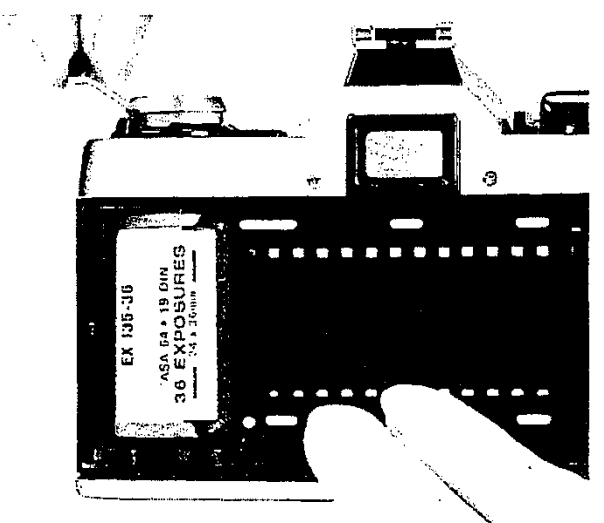
- With the shutter speed function selector on manual setting to operate the film-advance lever slowly until the film has begun to wind firmly around the take-up spool and the sprocket teeth are engaged with holes on both edges of the film. If the advance lever stops at the end of a full stroke during this procedure, release the shutter and continue.

- Close the camera back amt push in on it until it clicks loaded.
- A red “S” should now appear opposite the index in the frame-counter window. Advance the film and release the shutter until the index points to “1” on the frame-counter dial.

- A red bar should also now appear at the extreme left in the Safe Load Signal window. This indicates that the film is loaded and winding properly on the take-up spool. If the Safe Load Signal does not appear or swings far to the right in the window, repeat steps 1 through 6 to assure that film is properly engaged on the spool. As you continue to take pictures, the red signal will move gradually toward the right in the window, indicating that film is advancing properly.

CAUTION
Film should be handled and loading done in subdued light, at least shaded from direct sunlight by the body.
Film-advance lever and frame counter
The film-advance lever is designed with 30° unengaged movement before the beginning of its engaged stroke to allow swinging it out from the body so that the right thumb will fit comfortably behind it. Continuing to move the lever until it stops, an angle of 130°, advances film and frame counter and cocks the shutter for the next exposure.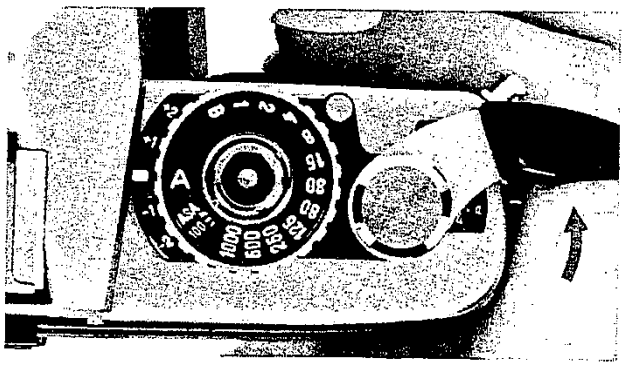
FILM SPEED
When the lever stops and resists further movement at the end of a film, never attempt to force it further. (See p. 41 for instructions on rewinding and unloading film.) The counter automatically resets for film loading when the camera back is opened.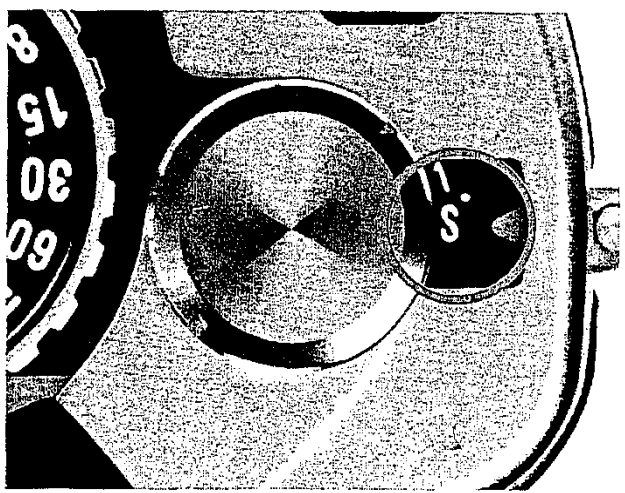 Each film on the market has <1n ASA or DIN exposure index number to indicate its sensitivity to light. For correct exposure, the meter must be set for the effective exposure index of the film in use.
Setting film speed
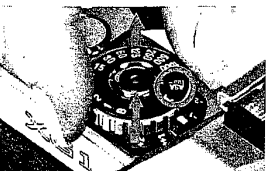
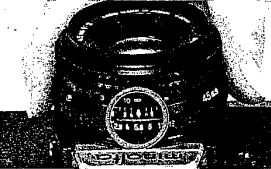
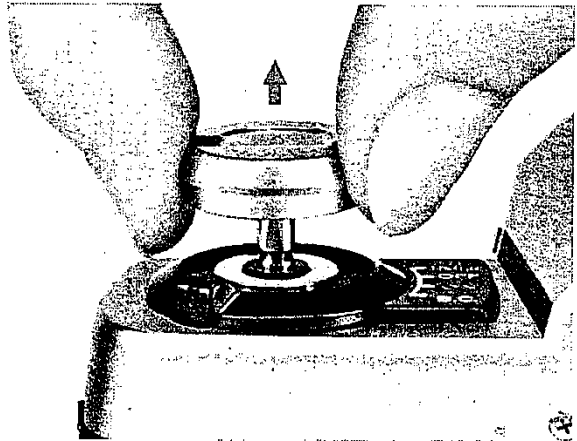
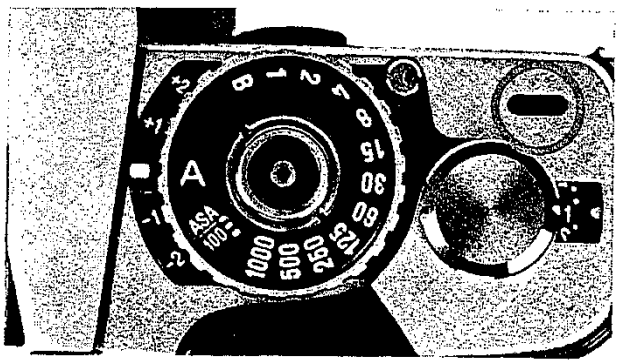
To do this, lift up on the knurled ring of the shutter-speed/function selector and turn it until the proper ASA indication appears centered in the film-speed window and locks in that position when the ring is released. Marks between numbered graduations indicate ASA numbers as follows: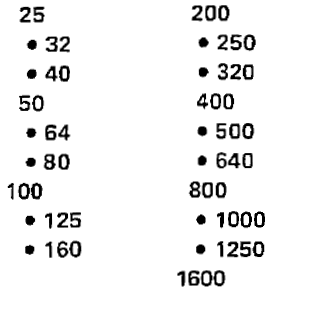
ASA/DIN conversion scale
A convenient scale for converting DIN to ASA film-speed ratings is located on the back cover of the camera.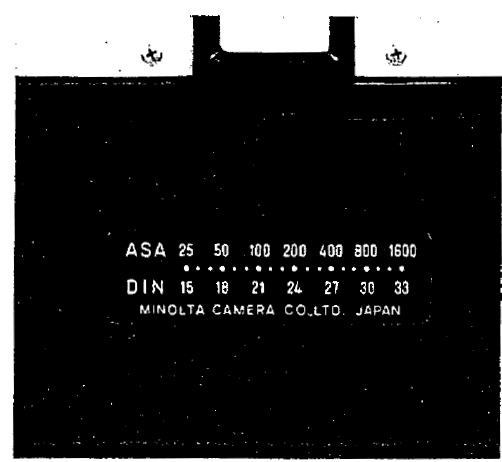
EXPOSURE-CONTROL FUNDAMENTALS
The two camera exposure-control settings are the lens opening (aperture) and the shutter speed. The size of the aperture determines the amount of volume of light reaching the film from a given subject and lighting. The shutter speed determines the length of time th is light acts upon the film. Apertures are expressed in f-numbers, which are larger for small openings and vice versa (e.g ., f/16 represents a small opening, f/2 a large one). Shutter speeds are expressed in seconds or fractions thereof, which are generally the reciprocals of the numbers shown on shutter-speed scales (e.g., 60 = 1 /60 sec., and 2 = 1 /2 sec.). At usual apertures, each f-number setting (e.g, f/8) lets in twice as much light as the next numerically larger one (f/11)
and half as much as the next smaller (f/5.6). Similarly, each shutter speed (e.g., 1 /60 sec.) allows light to strike the film twice as long as the next higher speed (1/125) and half as long as the next lower one (1/30). The interval between two standard f-numbers (say, f/4 and f/5.6) or shutter speeds (say, 1/15 and 1/30) is one “stop.” Total exposure on the film is determined by the combination of aperture and speed. Other things being equal, using the next smaller f-number (i.e., giving one stop more
exposure) will balance using the next higher shutter speed (i.e, giving one stop less exposure), and so on. A great range of combinations (e.g., f/5 .6 at 1/30, f/4 at 1/60, f/2.8 at 1/125, f/2 at 1/250, etc.) will thus yield the same total exposure. The specific combination you choose under given lighting conditions will depend upon the degree to which you want the greater
depth of field (see p. 36) of smaller apertures and the greater movement-blur preventing ability of faster speeds (p . 28).
METERING WITH THE XG-1 (Automatic mode only)
The center-weighted metering system in your XG-1 employs two CdS cells mounted behind the pentaprism so that light from all parts of the viewfield (picture area) is measured but influence from a broad central area is greatest. Thus, the reading should yield satisfactory exposure without adjustment as long as the main subject area occupies a major part of the frame. If the subject area to be measured occupies a relatively small part of the frame, move the camera so that the main subject fills most of the frame. Note the shutter speed setting in this position and compensate for the exposure difference with the shutter-speed/function selector or use manual speeds to set the same value when making the exposure from the original position. Further, if the most important area is very much brighter or darker than the rest of the frame and does not fill most of it, exposure should be decreased or increased with the same control from 1 /2 to 2 stops, the exact amount varying with the specific brightness difference and the effect desired. (p. 29). As with most metering systems, strong sources of direct light or other very bright areas may influence the reading adversely if allowed to dominate the frame. Though your XG-1 finder is designed to minimize the effect on the meter of light entering through the finder eyepiece under usual conditions, care must be exercised to prevent this, especially if you wear glasses. Use of a rubber eyecup is further recommended when the subject is in shade and the camera is in sunlight, when bright sidelight falls between eye and eyepiece, or when stop-down metering is used, particularly at small apertures (see p. 44). When viewing is unnecessary, the eyepiece cap (see p. 25) can be used to completely eliminate this problem.
VIEWFINDER
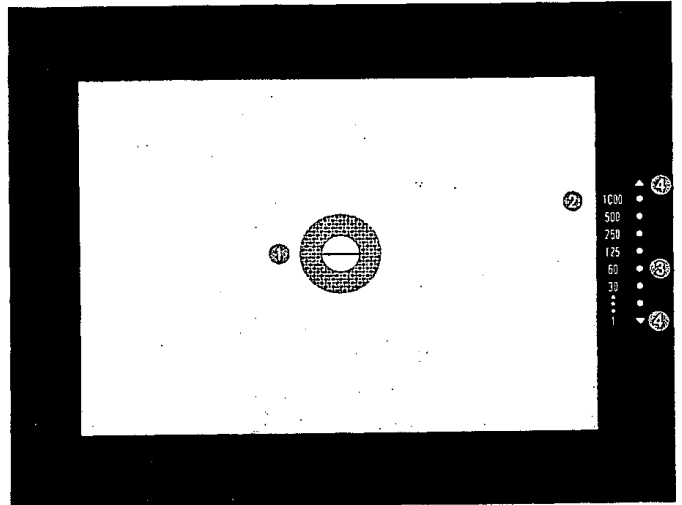
As you look through the viewfinder of your XG-1, you can see :
- Split-image/microprism focusing spot,
- Shutter speed scale,
- Indicator LEDs (Auto mode only, show shutter speeds being selected by the automatic exposure system; in manual and
automatic mode, LED at “60” is also a flash-ready signal) - LED over- or under-range indicators (auto mode only)
For operation details, see the following section on exposure control and focusing.
STANDARD LENS SPECIFICATIONS
SPECIFICATIONS
- Type: 35mm single-lens reflex with automatic and full manual exposure control
- Lens mount: Minolta SLR bayonet, 54° rotating angle; coupling for full-aperture metering and automatic diaphragm control with Minolta MD and MC lenses (Standard lenses MD Rokkor-X/Rokkor 50mm f/1.2, #/1.4, f/1.7 or 45mm
£12; see p. 49 for specifications) - Auto-exposure control: Special low-voltage, low-current computer circuit, actuated by contact or pressure on “touch switch operating button, varies the shutter speed continuously and steplessly to yield proper exposure according to metering system indication at the aperture, film speed, and exposure adjustment set Auto-exposure range: EV 2 to EV 17 (e.g., 1/2 sec. at £/1.4 to 1/1000 at £/11) at ASA 100 with £/1.4 lens
- Shutter: Horizontal-traverse focal-plane type; electronically controlled speeds: 1/1000 to 1 sec., steplessly on automatic mode or in steps on manual mode
- Metering: Full-aperture TTL center-weighted type, by two CdS cells mounted on either side of the eyepiece at the rear of the pentaprism
- Film-speed range: ASA 25 to 1600 set on the shutter-speed/function selector
- Autoexposure: Up to +2 EV continuous adjustment of automatic exposure with 1/2 EV.
- adjustment: click-stops and lock at A” (zero setting)
- Mirror: Oversize quick-return type (PO value: 123mm)
- Viewfinder: Eye-level fixed pentaprism type showing 93% of 24 x 36mm film-frame area
- Magnification: 0.87X with 50mm standard lens focused at infinity; Matte-Fresnel-field focusing screen with central horizontally oriented splitimage focusing spot surrounded by microprism band; stepless speeds indicated by 7 light-emitting diodes; LED over-/under-range indicators; LED at “60” position also blinks as flash-ready signal with Auto
Electroflash 200X and 132X. - Flash sync: PC terminal and hot shoe for X sync. (disconnect when unit not installed): Electronic flash synchronizes at 1/60 sec. and slower step or stepless speeds; Class MF, M, FP flashbulbs synchronize at 1/15 or slower speeds. Extra contact on the hot shoe receiver’s signal from the camera-control contact of the Auto Electroflash 200X and 132X
- Film advance: Motorized: Through built-in coupler key with accessory Auto Winder G Manual: By lever with single 130° stroke after 30° unengaged movement Film-advance release button for rewinding; advancing-type frame counter and Safe Load Signal that indicates film loading and advancing conditions
- Power: Two 1.5V silver-oxide cells are contained in the camera base, powering both auto exposure control and the shutter’s electronically governed operation. The LED battery check indicator lights when the operating switch is in battery check position. The shutter will not release when the voltage is too low for proper operation
- Self-timer: Electronic, LED indicated types; approximately 10 sec. delay
- Other: 4-slot take-up spool; detachable back cover with ASA-DIN conversion scale
- Size and weight: 52 x 88 x 138mm (2 x 3-7/16 x 5-5/8 in.) 4909 (17-5/16 0z.) without lens and power cells
- Accessories: Exclusive Auto Winder G, Auto Electroflash 200X and 132X, Remote Cords 50cm (20-in.) and Remote Cord L 5m (16-ft.); MD, MC, and other interchangeable Rokkor-X/Rokkor lenses and applicable Minolta SLR system accessories.
For more manuals by Minolta, visit ManualsLibraryy
Minolta XG-1 Film Camera-FAQs
Does the Minolta XG-1 require batteries?
Yes, the camera uses two 1.5V alkaline-manganese (A-76) or silver-oxide (EPX-76/S-76) batteries. These power the light meter, shutter, LED display, and exposure controls.
How do I charge a Minolta camera?
For digital Minolta models, insert the USB cable into the camera’s charging port and connect the other end to the AC adapter. A red light indicates charging, and it turns off or green when fully charged.
What lens mount does the Minolta XG-1 use?
The XG-1 uses the Minolta MD (SR Mount), compatible with a range of manual focus Minolta lenses.
Does Minolta make digital cameras?
Yes, Minolta produces digital models, such as the 48MP 4K Digital Camera with features like 16x zoom, anti-shake, time-lapse, and face detection.
What is the difference between the Minolta XG-1 and XG-A?
The XG-A is a simplified version of the XG-1, lacking manual exposure control. It shares styling with the X-7 but has fewer features.
How do I check the battery on a Minolta film camera?
Turn the switch on the bottom of the camera to “B.C.” (Battery Check). If the needle moves to the battery mark, the batteries are working.
Does Minolta offer flash units?
Yes, Minolta made many flash units tailored to different models. Some, like the Duo Fit S, were designed specifically for compact cameras.
How long does it take to charge a Minolta battery?
Charging a lithium-ion battery (e.g., NP-200) typically takes about 80 minutes.
What lens comes with the Minolta XG-1?
The XG-1 is often paired with the 50mm Rokkor-X f/1.7 lens. The camera supports manual focus, aperture priority, and TTL metering.

