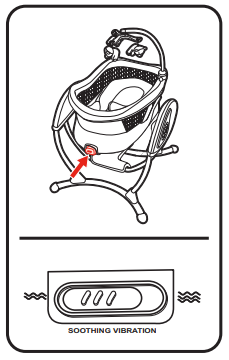
Graco Duoglider Baby Swing
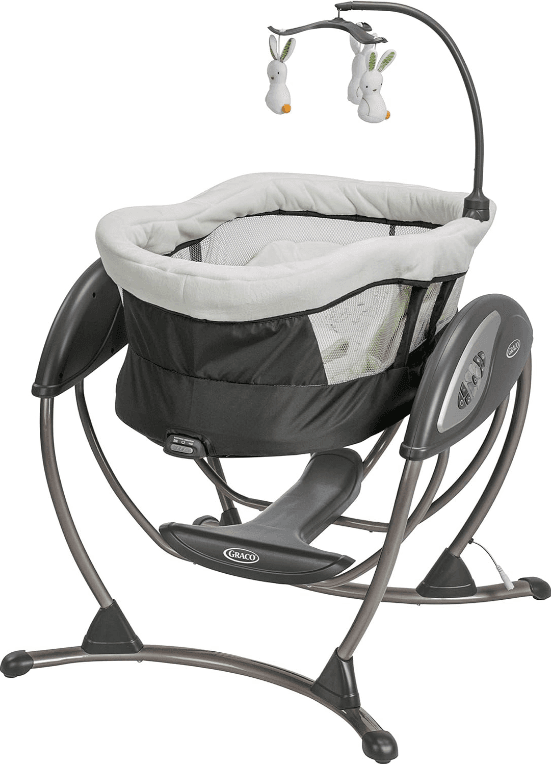
Parts List
Verify that you have all the necessary parts for this model before assembling your product. If any parts are missing, call Customer Service.
Tools required:
Phillips Screwdriver
ALL MODELS
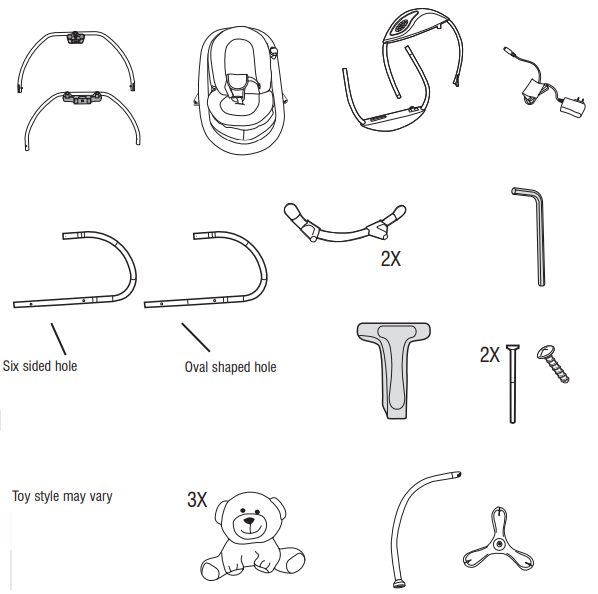
Frame Assembly
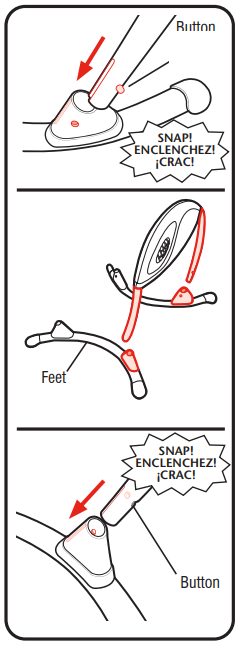
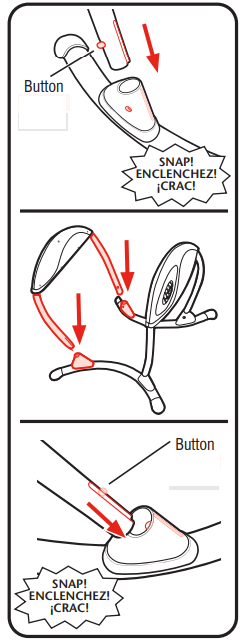
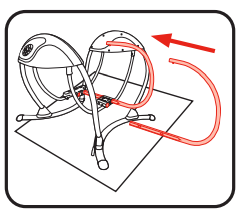
- Lay your feet on the floor. Insert battery housing leg tubes into both feet as shown

- Insert the other leg tubes into both feet as shown.
Attaching Swing Arms
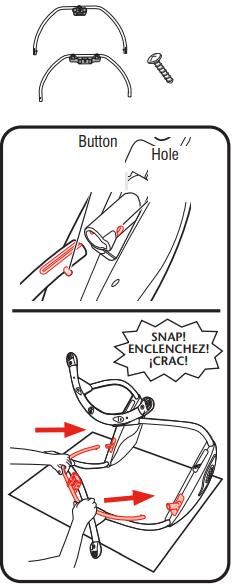
- Insert the single-hinge swing arm into the housing, ensuring the buttons align with the hole in the housing as shown.

- Attach the hanger tube with a double hinge until the buttons snap into place as shown.

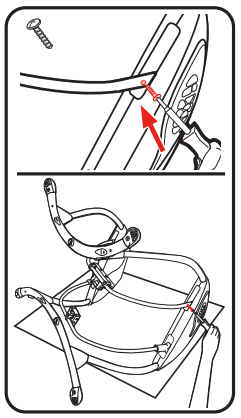
- Fasten the screw as shown into the hanger mount
Assembling Seat
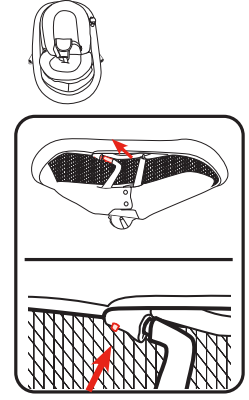
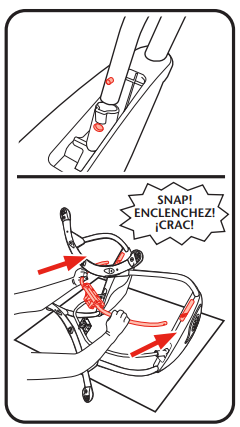
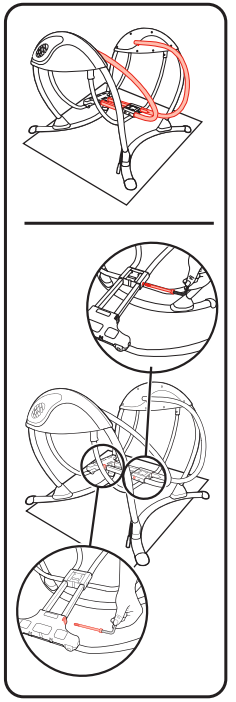
- Insert the side tube of the seat into the connector on the tube as shown. CHECK that the button is visible in the hole in the connector.

- Insert the side tube on the other side of the seat into the connector on the tube as shown. CHECK that the button is visible in the hole in the connector.

- Insert the side wire into the hole in the tube as shown

- Insert the side wire on the other side of the seat into the hole in the tube as shown.

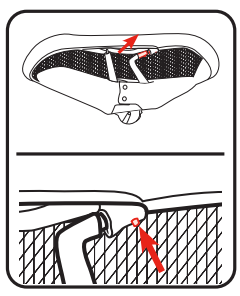
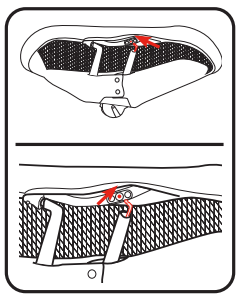
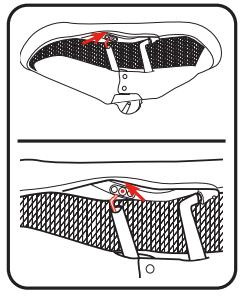
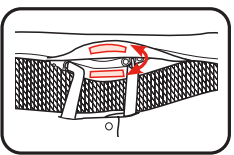
- Attach hook and loop tape on both sides of the seat.
Attaching Seat to Frame
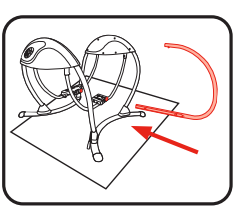
- Insert the hanger tube with the six-sided holes into the swing
arm bracket as shown.
- Insert the hanger tube with the oval-shaped holes in the swing arm bracket as shown

- Insert a bolt through the holes in the swing arm bracket as
shown. Tighten the bolt with the wrench provided. Repeat with
the other bolt on the other bracket.
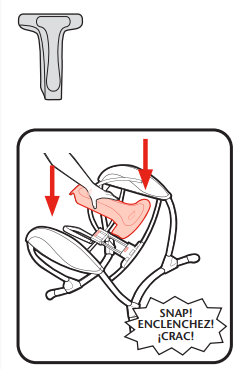
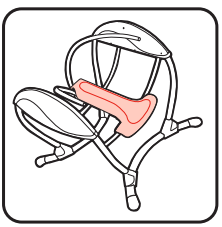
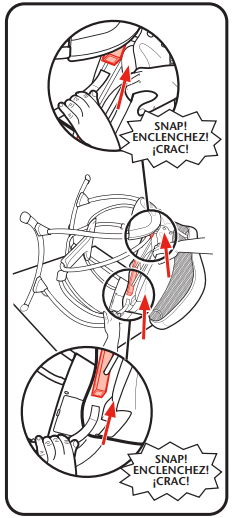
- Attach the plastic cover over the tubes as shown until it snaps into place.

- CHECK to make sure the cover is attached by pulling up on it.

- Place the assembly onto the side and insert the hanger tube into the sides of the seat tube until it clicks into place.
Toy style may vary
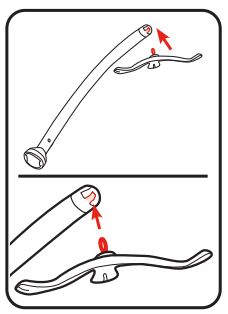
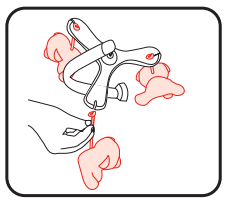
- Attach an elastic loop on the mobile around the hook on the mobile arm.

- Attach toys to the mobile by sliding the ropes on the toys into the slots in the mobile

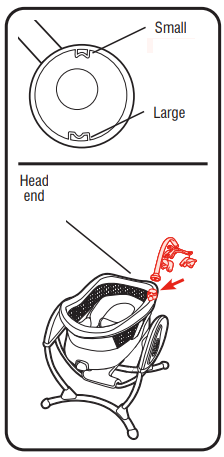
- With a small tab inside of the mobile towards the head end of the
swing, insert the tabs into the grooves in the mobile mounts
and push down.
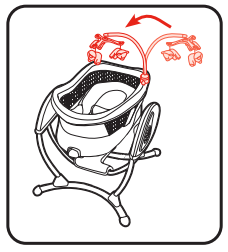
- Twist the mobile counter-clockwise and lock the mobile in place over the child’s area of the swing.
To Adjust Recline
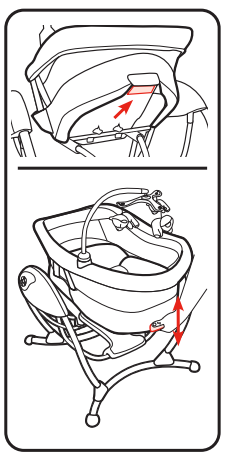
Keep the swing seat in lower recline positions until the child is approximately 4 months old AND can hold up their head without help. If the seat is too upright, the infant’s head can drop forward, compress the airway, and result in DEATH.
- To raise or recline, squeeze the handle and push the seat up or down.
To Secure Infant
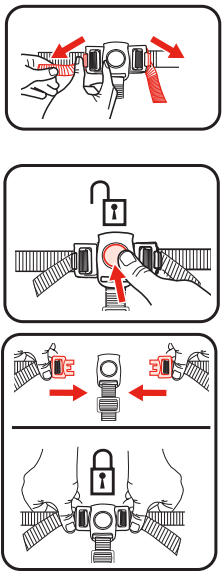
- Use the slide adjuster at the waist for further adjustment.
- To release the press button in the center of the buckle
- Secure the waist straps to the sides of the buckle.
To Use Vibration
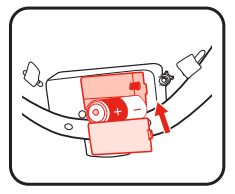
- Remove the battery lid, found under the seat, with a key, and insert 1-D
(LR20-1.5V) battery in the module. Replace lid
- Vibration: To use the integrated vibration switch, slide the button to
left or right for high or low-speed
Installing Batteries (not included)
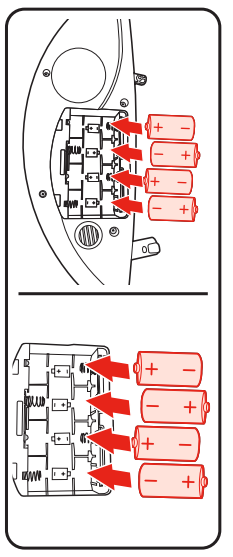
- With the baby out of the swing, open the battery compartment lid by
inserting a key into the slot. Insert four D (LR20 -1.5V) batteries. Replace the battery lid. CHECK that the batteries are
put in correctly. Your swing will not run if the batteries are put
in backward. Refer to WARNINGS For Safe Battery Use
Problem-Solving
SWING WON’T OPERATE:
- No batteries in the wing.
- Batteries dead.
- The speed is set too low.
- Batteries in back — check “+” and “-”.
- Corrosion on battery terminals. Rotate batteries in place against terminals, or clean with sandpaper or steel wool if corrosion The baby is present.
- Baby leaning too far forward.
- Baby, the rocking wings. (Discontinue the seat.)
- The seat was not pushed high enough for a good start.
SEAT DOESN’T SWING VERThe control
- Contris ol The blanket hangs down, causing increased wind resistance.
- Baare Batteries are too weak.
- The baby is too heavy or too active. (Discontinue use.)
- Soft carpet (swings higher on hard floors).
Care & Maintenance
- FROM TIME TO TIME CHECK YOUR SWING for loose screws, worn parts, torn material, or stitching. Replace or repair the parts as needed. Use only Graco replacement. Clean the seat it SEAT, wipe a clean with a damp cloth.
- TO CLEAN HARNESS COVER AND SEAT PAD: (if so equipped) Refer to your care tag on your seat pad for washing instructions. NO BLEACH the frame. CCLEANcuse only FRAMEld soap and warm water.
- NO BLEACH OR DETERGENT.
- EXCESSIVE EXPOSURE TO SUN OR HEAT could cause fading or warping of parts.
FOR MORE MANUALS BY GRACO, VISIT MANUALSLIBRARYY
Graco Duoglider Baby Swing-FAQs
How do I fold the Graco DuoGlider Swing?
To fold the DuoGlider Swing:
Unplug or remove batteries for safety.
Press the release button (if available) near the base.
Gently fold the frame until it locks into place.
Secure with the storage latch (if included).
What car seats are compatible with the Graco DuoGlider?
The Graco DuoGlider Swing is not a stroller (it’s a baby swing), but the Graco DuoGlider Double Stroller is compatible with these Graco infant car seats:
SnugRide® SnugLock® 35 LX
SnugRide® Lite LX
SnugRide® SnugFit® (all models)
What is the weight limit for the Graco DuoGlider Swing?
The DuoGlider Swing supports babies up to 30 lbs (13.6 kg) or until the baby can sit up unassisted.
How do I clean the Graco DuoGlider Swing?
Fabric Seat Pad: Spot clean with mild soap + warm water (check care tag).
Plastic/Metal Frame: Wipe with a damp cloth (no bleach).
Harness Straps: Hand wash with mild detergent, air dry.
Does the Graco DuoGlider Swing need batteries?
Yes, it runs on 4 D-cell batteries OR can be plugged into an outlet (AC adapter included).
How do I reset the Graco DuoGlider Swing if it stops working?
Unplug from the outlet (or remove batteries).
Wait 10 seconds, then reconnect power.
Turn it on again—this often fixes minor issues.
Does the mobile on the DuoGlider Swing spin?
No, the stars on the mobile hang but do not rotate.
How do I adjust the swing speed?
Use the 6-speed settings on the control panel to increase/decrease motion.
Can I wash the Graco DuoGlider Swing fabric?
Spot clean only (machine washing may damage padding).
Air dry completely before reuse.

