Brentwood TS-240 Compact Dual Sandwich Maker

IMPORTANT SAFEGUARDS
When using this or any other electrical appliance, always follow these basic safety precautions, especially when children are present.
READ ALL INSTRUCTIONS
BEFORE USE WARNING-To reduce the risk of fire, electric shock, serious personal injury, and property damage, please note the following:
- This appliance is not intended for use by children. Keep the appliance out of the reach of children and pets. Extra caution is necessary when using this appliance near children.
- Always ensure the product is unplugged from the electrical outlet and allowed to cool before assembling, disassembling, relocating, or cleaning it.
- Do not leave the appliance unattended while it is in use. Always unplug the appliance from the electrical outlet when not in use.
- Do not immerse or expose the Base, Power Cord, or Plug of this appliance in water or other liquids.
- Do not touch hot surfaces. Use handles or knobs when handling product. Use protective oven mittens or gloves when removing the Lid or handling hot containers to avoid burns or personal injury.
- This appliance generates heat and steam during use. Please take the proper precautions to avoid burns, fire, and personal or property damage.
- Do not use attachments not recommended or sold by the Manufacturer, as they may cause fire, electric shock, or injury. Attachments, when furnished, may become hot during use. Allow any attachments to cool before handling them.
- Do not place the appliance on or near a hot gas or electric burner, in a heated oven, or on other heated surfaces.
- Use extreme caution when moving an appliance containing food or liquids.
- Use the product in a well-ventilated area. Keep at least 4-6 inches of space on all sides of the product to allow adequate air circulation.
- Use the appliance on a table or sturdy flat surface.
- Keep the appliance away from curtains, wall coverings, clothing, dish towels, or other flammable materials.
- Do not plug or unplug the appliance from the electrical outlet with a wet hand.
- This appliance is intended solely for non-commercial, non-industrial, household use in the cooking of food for human consumption; do not use the product outdoors or for any other purpose.
- Do not operate the appliance empty.
- Do not let the cord hang over the edge of the table or counter where it may be tripped over or pulled. Do not allow the cord to touch hot surfaces.
- Do not operate the appliance if it has a damaged power cord or plug, if wires are exposed, if it malfunctions, if it is dropped or damaged, or if the motor housing is dropped in or exposed to water.
- This appliance has no user-serviceable parts.
- Do not attempt to examine or repair this appliance yourself. Only qualified service personnel should perform any servicing. Take the appliance to the appliance repair shop of your choice for inspection and repair.
- Do not put any stress on the power cord where it connects to the appliance, as the power cord could fray and break.
- This appliance does not have an “OFF” feature; to shut off, please disconnect from the power supply.
SPECIAL INSTRUCTIONS:
- A short power supply cord is provided to reduce the risk of becoming entangled in or tripping over a longer cord. An extension cord is not recommended for use with this product, but if one must be used:
- The marked electrical rating must be at least as great as that of the product.
- If the product is of a 3-prong grounding type, the extension cord must be a grounding-type 3-wire cord.
- Arrange the extension cord so that it will not drape over the countertop or tabletop where it can be tripped over or pulled.
WARNING: This product is equipped with a polarized plug (one blade is wider than the other blade) to reduce the risk of electrical shock. This is a safety feature. The plug will fit into a polarized outlet only one way. If you are unable to insert the plug into the electrical outlet, try reversing the plug. If the plug still does not fit, contact a qualified electrician. Never use the plug with an extension cord unless you can fully insert the plug into the extension cord. Do not alter the plug. Do not attempt to defeat the safety purpose of the polarized plug.
SAVE THESE INSTRUCTIONS FOR FUTURE REFERENCE
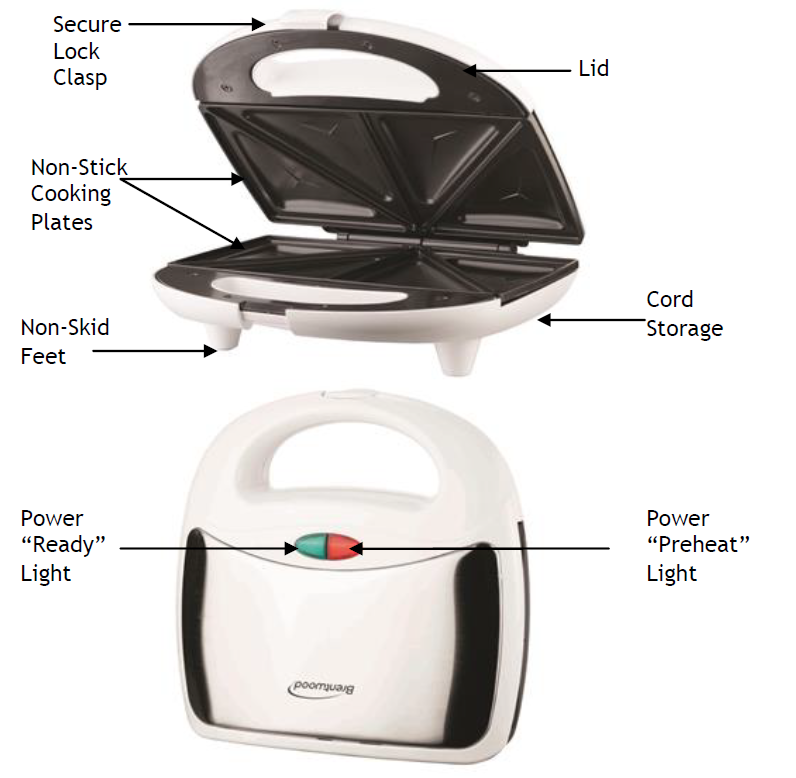
Parts:

Before First Use
IMPORTANT: Please check all packaging material carefully before discarding, as there may be accessory parts contained within the packaging material.
- Before your first use, wipe down all surfaces with a damp cloth and then dry.
Using Your Sandwich Maker:
WARNING: Avoid contact with hot parts.
- Place your sandwich maker on a sturdy and clean flat surface.
- You can lightly coat the non-stick cooking plates with a small amount of vegetable oil. You can use a lightly coated paper towel or pastry brush. This helps to prolong the life of your non-stick.
- Plug the product into a standard 120-volt AC electrical outlet, and preheat the appliance by closing the lid.
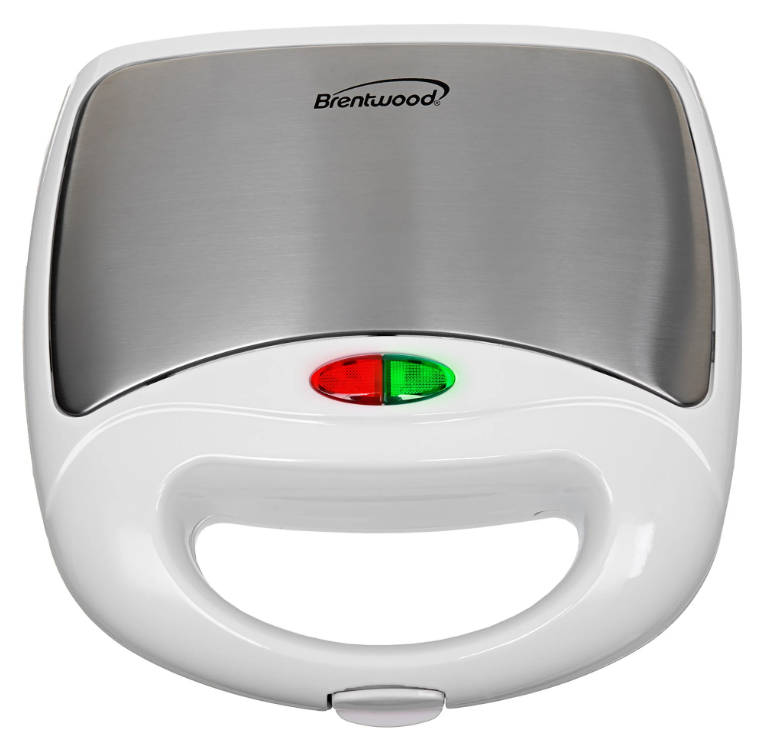
Attention: First use may cause a slight odor or small smoke upon heating, which is normal. This is a result of the heating element’s chemical reaction. It quickly goes away. - When the Power is on, the red power light will come on to indicate the appliance is preheating. Preheat your appliance for a minimum of 3 minutes. The green ready light will come on to indicate it is ready to cook.
- While the appliance preheats, you can prepare the sandwiches.
- Once the green ready light has come on, raise the lid using an oven mitt to prevent any burns.
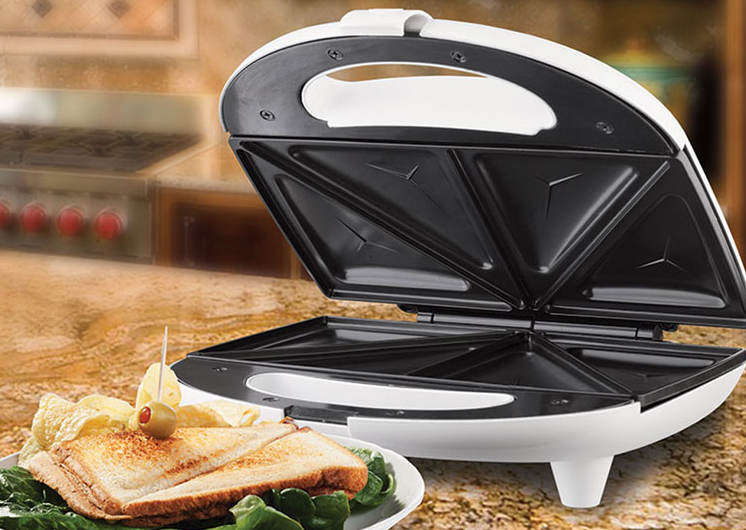
- Place one sandwich on each side of the nonstick cooking plates. Your sandwich maker will portion sandwiches in half.
CAUTION: Do not overfill the product or operate it when empty. - Close the lid using the oven mitt and secure the lock clasp in position.
NOTE: Steam may be released from the appliance during cooking. Only handle the appliance using kitchen gloves to avoid burns. - Cooking time generally ranges from 6-9 minutes and can vary depending on taste.
- Once your sandwiches have finished cooking, raise the lid with the oven mitt. Remove the sandwiches using a plastic or wooden spoon; do not use metal utensils as they may scratch and damage the non-stick cooking surface.
- If you are cooking more than one batch of sandwiches in a session, after the first batch, lower the lid to maintain the heat level until it’s ready to cook the next batch.
- As soon as you are finished cooking your batch of sandwiches, unplug the appliance and allow it to cool.
Cleaning Your Sandwich Maker:
WARNING: Always unplug the product and allow it to cool before cleaning or storing it.
NOTICE: Never immerse the Sandwich maker, plug or cord in water or any other liquid.
- Disconnect the Sandwich maker from the electrical outlet.
- Make sure the appliance is completely cooled before handling.
- Clean the upper and lower non-stick plates using a damp nonabrasive cloth.
NOTE: NEVER IMMERSE THE SANDWICH MAKER - The exterior of the Sandwich maker can be cleaned with a damp cloth as well.
- Wrap the cord in the cord storage below the appliance.
- Dry all parts thoroughly before storing or using again.
- Store in a cool, dry place. Away from the reach of children.
For more manuals by Brentwood, visit ManualsLibraryy
Brentwood TS-240 Compact Dual Sandwich Maker-FAQs
How long should I cook a sandwich in the Brentwood TS-240?
Typically, 3–5 minutes is enough for a golden, crispy finish. Cooking time may vary depending on sandwich thickness and fillings.
How do I clean my Brentwood sandwich maker?
After each use: Wipe the plates with a damp cloth while still warm (not hot).
For stuck-on food: Use a soft brush or sponge with mild soapy water.
Never submerge the unit in water.
Do I need to oil the plates before use?
Yes! Lightly coat the plates with cooking oil or non-stick spray before heating to prevent sticking.
How does a sandwich press work?
It heats and compresses sandwiches between two hot plates, creating a crispy, grilled texture without flipping.
Can I use this sandwich maker for other foods?
Absolutely! It works great for:
Grilled chicken breasts
Vegetables (zucchini, peppers, onions)
Burgers & quesadillas
Why is my sandwich maker smoking?
Excess oil or food debris burning on the plates.
Solution: Clean thoroughly and use less oil next time.
How do I season the plates?
Clean and dry the plates.
Apply a thin layer of vegetable or canola oil.
Heat on high for 10 minutes, then let cool.
Repeat if needed for better non-stick performance.
Can I leave the sandwich maker plugged in?
No! Always unplug after use for safety.
How do I keep sandwiches warm for later?
Wrap them in aluminum foil + a towel to retain heat for short periods.
What’s the best temperature setting?
Medium-high (~375°F) for most sandwiches.
Adjust based on bread thickness and fillings.

