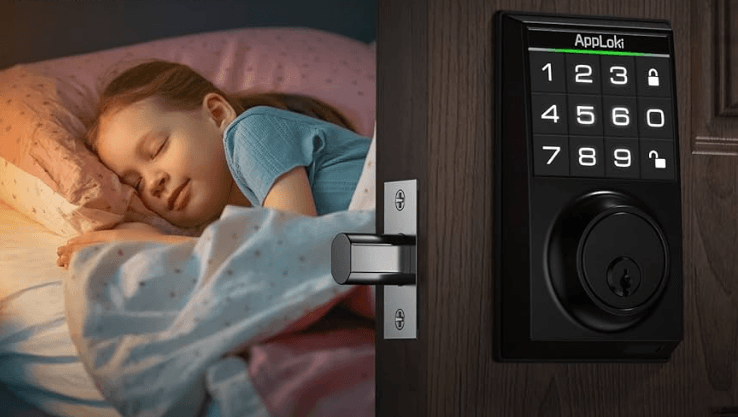
AppLoki D100 Electronic Keypad Smart Lock
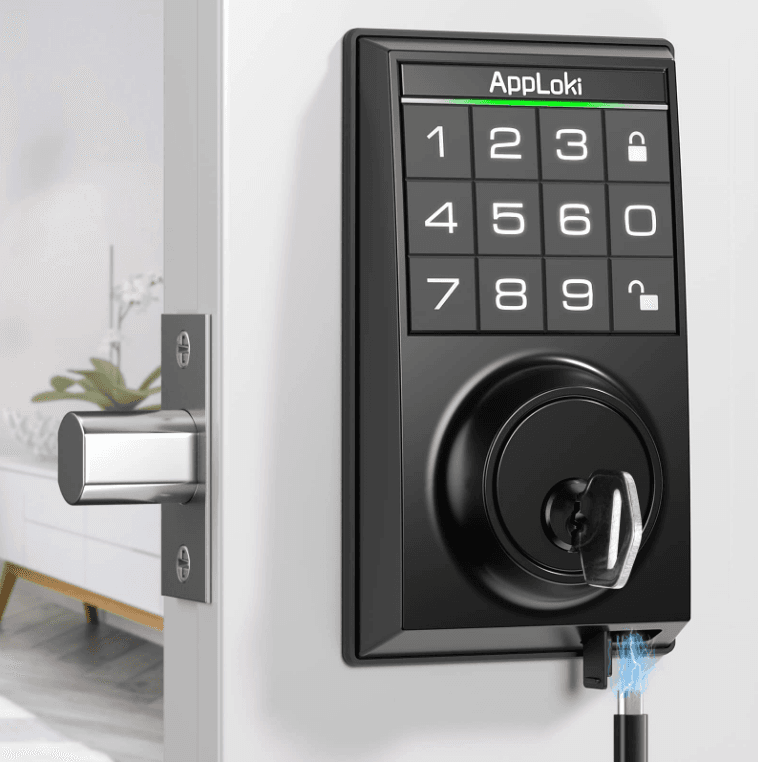
Instructions for use
Wann tips: Please prepare 1 cross screwdriver and a drilling machine before installation.
- For the new locks just leaving the factory, if the equipment is not bound to a user, the lock can be opened with the keys of 123456+ ■.
- In case of unlocking when a user has registered with the lock: Press the password of 6-10 digits ‘°key to unlock.
- In case of unlocking, if the battery is running low, a “short beep sound” will be prompted for 4 times in a 2-round cycle, and the keyword light will flash. When there is a prompt of battery low, please replace the battery on time, and the door can still be opened for 200 times.
- Please do not scratch the surface with corrosive or sharp items to prevent the lock
surface from being damaged. - When the battery is running low or the electric part is out of order, an emergency key can be used to unlock the outside. Please take good care of the key and keep it in a safe place outdoors.
- After assembly, the door must be kept in an open state to conduct commissioning
and the initialized parameter setting. - Operating temperature: -4°F/-20°C-+140°F/+60°C.
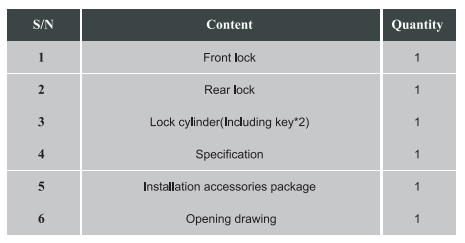
Packing list
Product functional characteristics

- Unlock via key password
- Unlocking via password
- Standard key cylinder
- Low-voltage alarm
- Virtual password
- Automatic locking
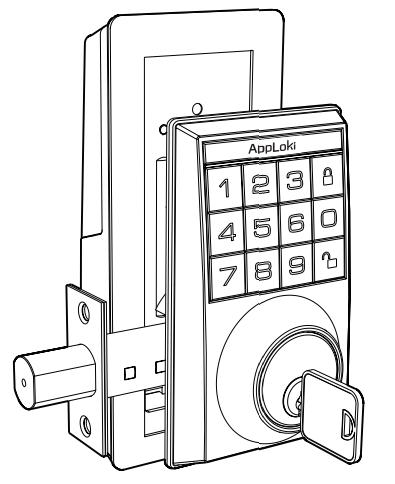
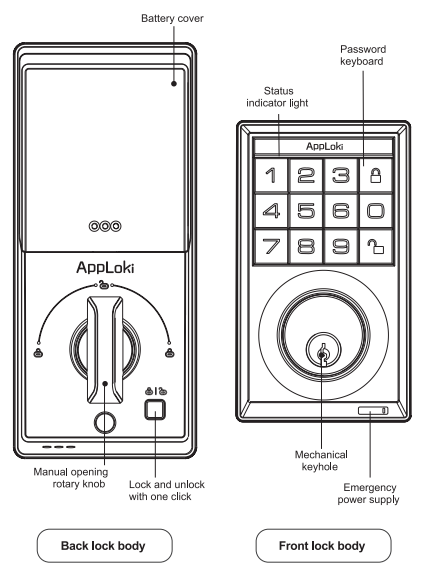
Schematic Diagram of Product Breakdown
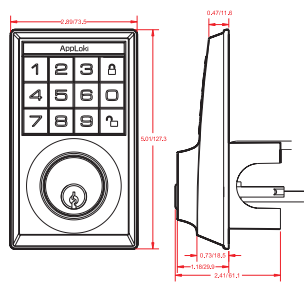
Product size
Front lock body. Unit: in/mm
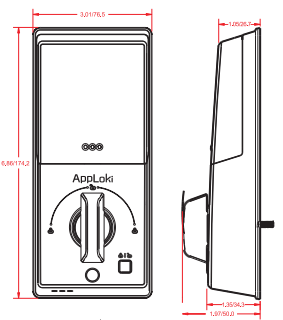
Back lock body. Unit: in/mm
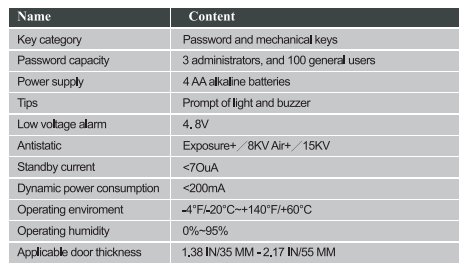
Product specification and how to operate the menu
Key and light indication functions
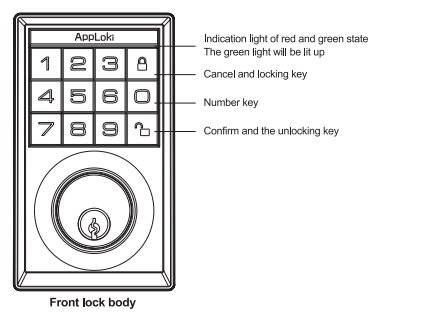
Description of “buzzer” prompt note:
- Short “beep” for once: Button sound;
- Short “beep” twice: Operation continues;
- Short “Beep” three times: Error reminder;
- Long •seep•: Operation success reminder;
- Short “Beep” four times: Alarm sound:
Installation
While installing and commissioning, please stand in the mom all the time.
Automatic locking
- While installing the front panel, keep the logo up and pass the connection wire under the lock body, keep the bump of the paddle faces upwards, and fit it into the lock body.
- After the installation is completed, check whether the password 123456, the mechanical key, knob work well or not.
- If it does not work properly, please check whether there has been an error installation or a loose power cord connector during installation.
Open Hole: Please refer to the open hole drawing, and drill the correct holes in the door.
Install Lock Body
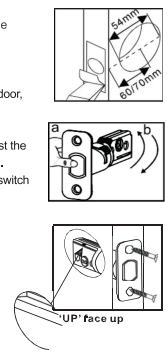
- According to the central position of the open hole of the door, adjust the position of the pick jack of the lock body.
- Hold the head of the lock body with your hand.
- Turn the lock tail clock. Wise or counter-clockwise. Wise, adjust the position of the pick jack of the lock body to 60 mm or 70 mm.
- Insert and turn the paddle to test whether the lock body switch is okay or not.
- The mark ‘UP’ face UP and front the lock body.
- Twist 2 tapping screws.
Install Lock
Install the Front Panel
Pass the connection wire under the lock body.
Adjust the paddle to the horizontal UP(UP’ face up direction, keep the bump of the
paddle faces upwards and fits into the pick of the lock body.
- Fix the front panelon the outdoors.
- The iron plate is fixed on the inner side of the door through the connection wire so that the pick is centered.
Install The Back Panel Connection

- Remove the back cover, pass the connection Screw(Standby) wire through the back panel, and straighten.
- Turn the KNOB to the vertical position and align the pick to the door.
- Turn the KNOB to check the latch switch is ok.
- Lock 2 back panel screws(M4″35mm)and 1 back panel screw(M4 $25mm), shake the front (M4″6MM)”2 and back panel to ensure the front nd back panel are tight.
- The excess wire is hidden in the back cover frame. Install the back cover.
- Install 4 AA batteries and the battery cover.
Operating process
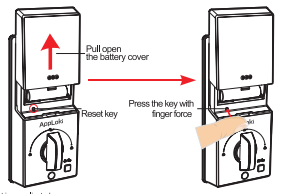
1.1 Factory settings
Press and hold the reset button for 3 seconds (prompt “restore factory settings,
verify administration. Enter the administrator password + ” ‘l.” key or enter the solidified password “123234345455” +” ‘•”key to restore the factory settings directly.
Note: If no administrator is added, you can directly restore the factory without verifying
the administrator.
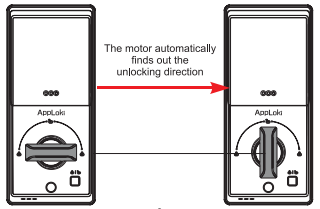
Setting the unlocking direction
When the system is in a state as delivered, an initialization setting is carried out for the
lock(No users entered), and the direction will be automatically set after being powered on. The long “beep” sound refers to the successful setting of the lock direction when the users are entered. The unlocking direction of the lock cannot be automatically set.
Register No. 1 administrator
- Press the reset button (within 2 seconds)
- The lock prompts “Add an administrator, please enter a new password.”
- Enter the same 6-10-digit new password+”‘•” key twice, and the system will prompt that the registration is successful
Add administrators 2-3 (an administrator password has been registered)
- Press the reset button (within 2S)
- The lock prompts “add user, verify administrator.”
- Enter administrator password No. 1 + ” ‘•” key
- After the verification is successful, it prompts “Add an administrator, please enter a new password.”
- Enter the same 6-10-digit new password” ·•• key twice to register the second
administrator successfully.
Opening and closing the door inside
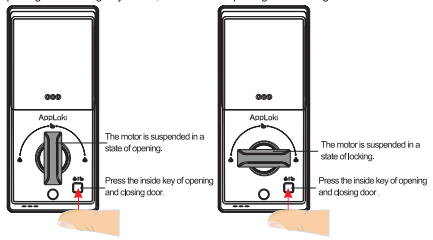
One-click opening and locking inside
If you are inside the door and want to get out, or lock the door inside speedily, press the
door opening and closing key inside, and turn the opening and locking lock with the motor.
Manual locking inside
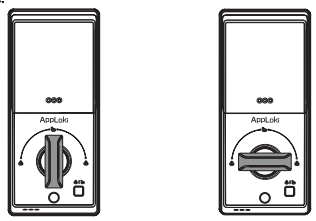
When the system is in a state as delivered, the initialized setting is carried out for the
lock(No users entered), and the direction will be automatically set after being powered on. The long”beep” sound refers to the successful setting of the lock direction. Note: when the users are entered, the unlocking direction of the lock cannot be automatically set.
► Precautions
- Prohibit any disassembly at will. The product is composed of precise and complex components. Please do not disassemble any structures inside to avoid operation abnormalities of the product or other use dangers resulting from this. If you need to disassemble, again, please contact a professional.
- Choose the cleaning method carefully. Please clean the product with a dry cloth; water is prohibited for cleaning the product to avoid power failure.
- Measures to cope with the battery running low or out of power
- a. Prompt of battery running low. There will be a “beep” sound four 4 times when unlocking. The keyboard light will flash. At this time, please change the battery promptly.
FOR MORE MANUALS BY APPLOKI, VISIT MANUALSLIBRARYY
AppLoki D100 Electronic Keypad Smart Lock-FAQs
How does the AppLoki D100 smart lock work?
It uses a numeric keypad where you enter a PIN code. If correct, the lock disengages the deadbolt, allowing access.
Do I need Wi-Fi for this lock?
No. The D100 works without Wi-Fi. However, Wi-Fi (if connected via a hub) adds features like remote access and app control.
What happens if the battery runs out?
You can use the backup key or connect an external power supply to unlock the door and then replace the batteries.
How long do the batteries last?
On average, 6–12 months depending on usage. A low-battery indicator will remind you to replace them.
Are keypad smart locks safe?
Yes. They use encryption and secure PIN entry. For better safety, update your codes regularly and avoid sharing them.
Can smart locks be hacked?
While possible, strong encryption and regular firmware updates reduce risks. Use strong Wi-Fi security and unique PINs.
Do smart locks work during a power outage?
Yes. Since the D100 is battery-operated, it continues working even if household power is out.
What if my keypad stops working?
Check or replace the batteries, clean the keypad, and reset if needed. If it still doesn’t work, use the backup key or contact support.

