
DS18 JL-SB6 Plug and Play Sound Bar Enclosure
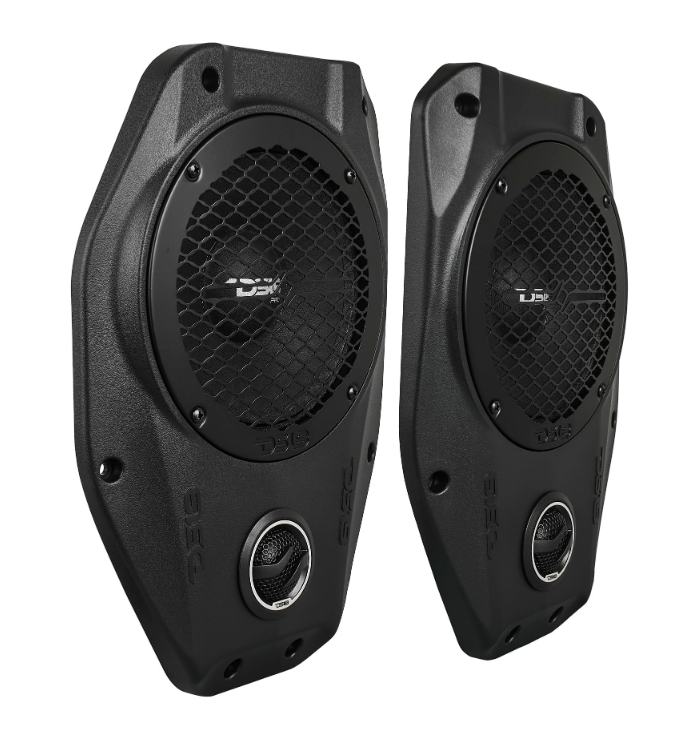
FEATURES
- Designed to upgrade the factory 2-way speakers from 4″ to 6.5″
- 6.5″ Neodymium speaker with 1″ dome Tweeter included
- Speaker depth 2.5”
- Mounting plate/cutting template included
- All installation screws included
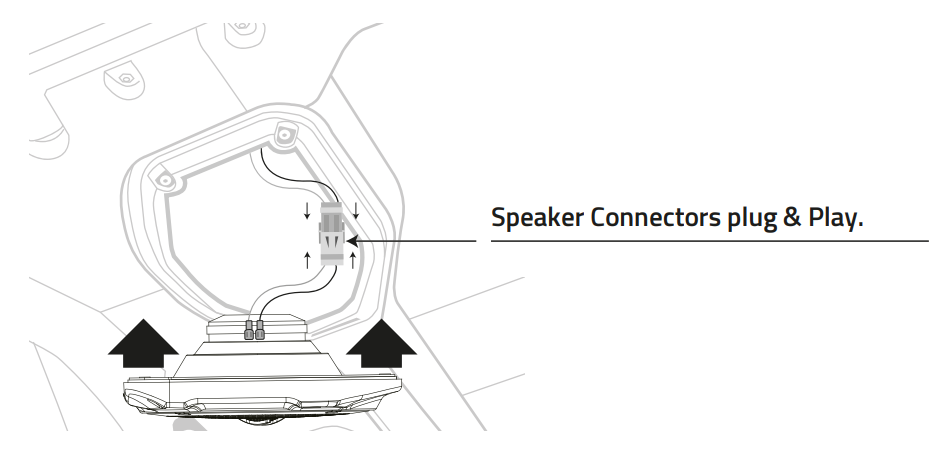
- Speaker Connectors Plug & Play
PACKING INCLUDES
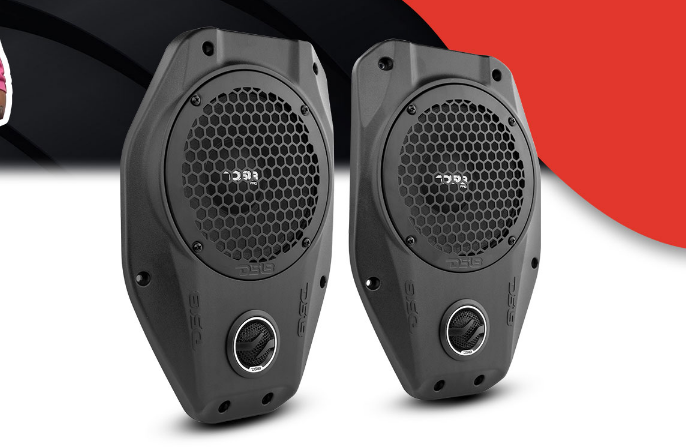
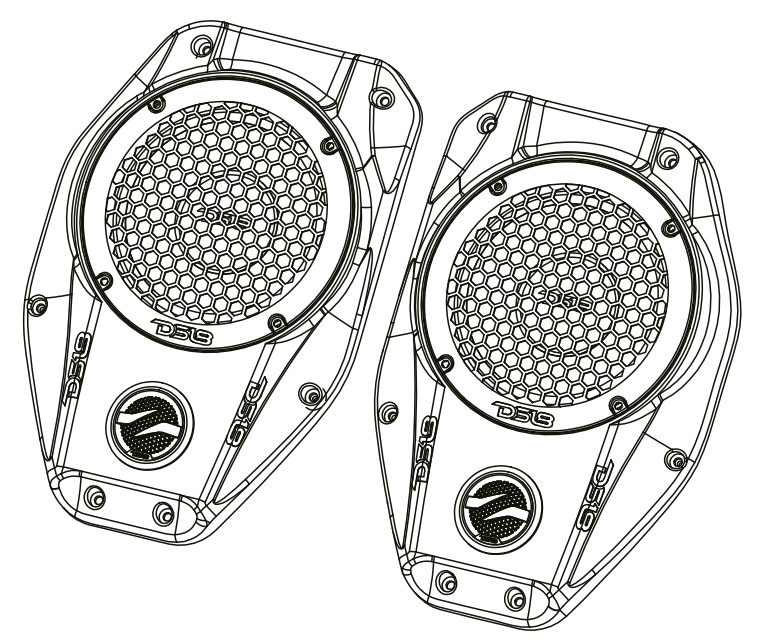
- Set (Left and Right) of Speaker Soundbar Upgrade Kit with 6.5” Neodymium
 Midrange and 1” Tweeter.
 - Set (Left and Right) of Mounting | Cutting Template.

- Harness and Screws
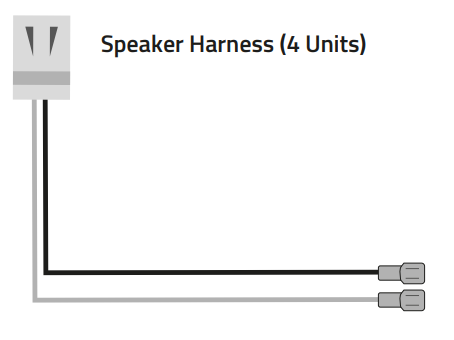
Speaker mounting screws (8 units)

Cutting template/grille support screws (20 units)

Grille replacement mounting screws (12 units)

TOOLS REQUIRED
- 3/16” Allen Key

- Phillips bit

- Reciprocating saw or other cutting device

SOUNDBAR REMOVAL
- It is highly recommended that the sound bar be removed before installing this speaker adapter kit.
- Remove all panels along the top trim of the vehicle to gain access to the soundbar. (Figure A)
- Remove all the screws holding the sound bar to the car. Please be careful and
have access to help if needed, not to break or damage the car or soundbar. (Figure B) - Unplug the harness and remove the soundbar from the car.
Figure A
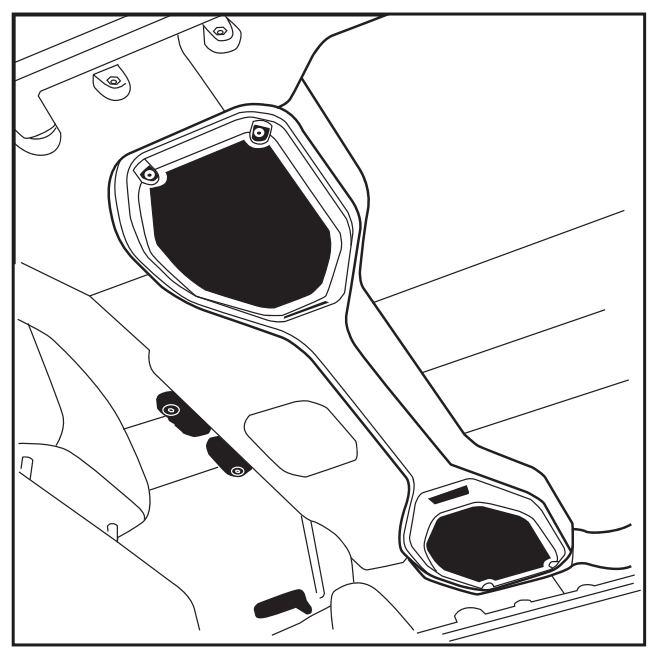
Figure B

TEMPLATE CUTTING
- Remove the screws holding the grill in place.
- Remove the speakers from the soundbar.
- Carefully hide the harness in the soundbar so as not to cut the wiring while cutting the interior structure of the soundbar.
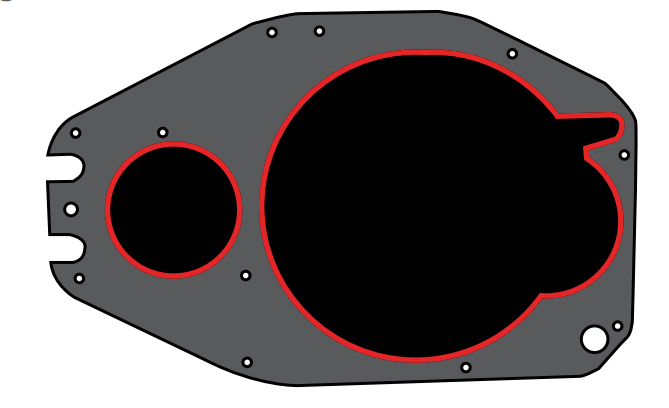
- Place the template in place and secure with the provided (9) screws. (Figure A)
- Trace the area highlighted in Figure B and remove the template; this will be the
area that needs to be cut.
Figure A
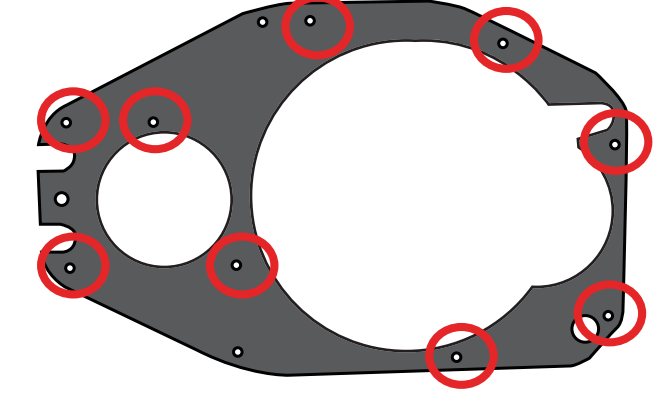
Figure B
TEMPLATE CUTTING (CONT.)
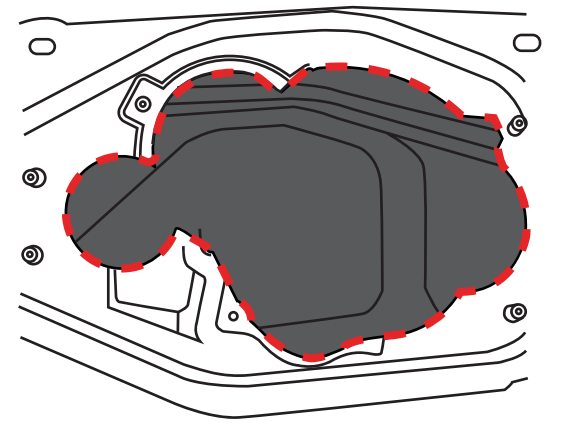
- Remove the template and cut the traced area carefully. Be sure not to cut through
to the back of the soundbar and not to cut through the wiring in the bar. Also, be
careful not to cut the 4 outter most threaded holes as those will be used to
secure the grill. - Figure D is with the section cut out and removed. Reinstall the metal cutting
template. This will be used as a mounting surface for the grill.
Figure C
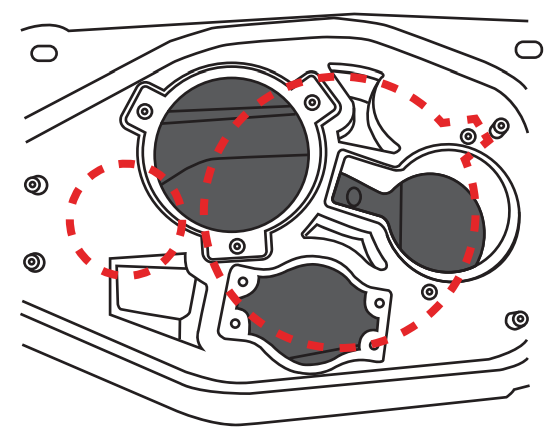
Figure D
- After re-installing the metal cutting template using the ( 9 ) provided screws, line up the grille and check the cut made previously. (Figure A)
- Connect all the Speakers using the Harness connector included with each size of each (Tweeter and Mid-range).
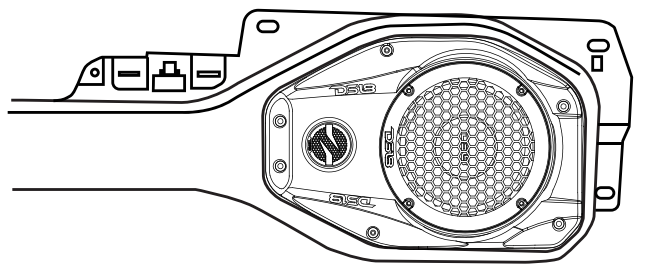
- If everything is good, attach the grille using the provided (6) screws. (Figure B)
Figure A
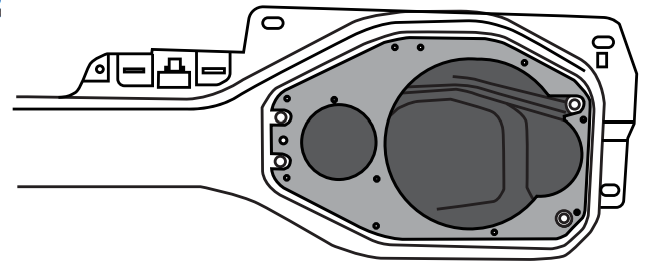
Figure B
WIRING
GENERAL SPECIFICATIONS:
- Component Set ………………………………………………………………….. 2-Way / 2 Vias
- Nominal Speaker Diameter ……………………………………………………6.5″ / 165mm
- Nominal Tweeter Diameter Tweeter…………………………………………. 1.7″ / 43mm
- Nominal Impedance ………………………………………………………………. 4 Ohms
- RMS Power Handling ……………………………………………………………… 150 Watts
- MAX Power Handling………………………………………………………………. 300 Watts
- Total Sensitivity (1w/1m) / Sensibilidad Total (1w/1m)…………………………97 dB
- Frequency Response……………………………………………………………….60Hz-20KHz
SPEAKER SPECIFICATIONS
- Nominal Impedance ………………………………………………………………… 4 Ohms
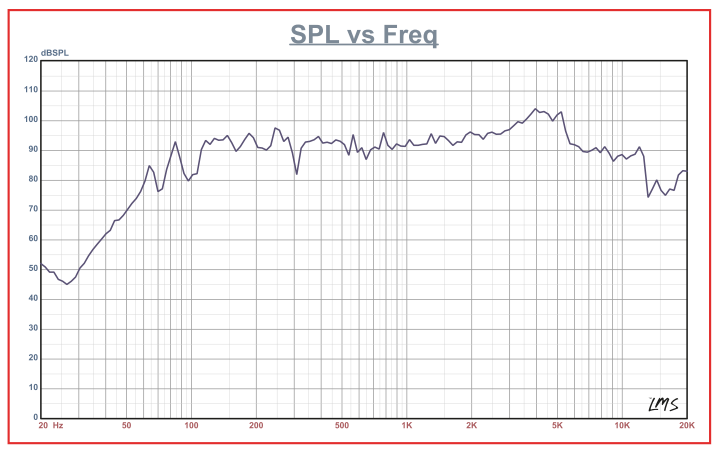
- Total Sensitivity (1w/1m) / Sensibilidad Total…………………………………… 96 dB
- Frequency Response……………………………………………………………. 60Hz-10KHz
- Voice Coil Diameter……………………………………………………………… 1.5″ / 38mm
- Voice Coil Former Material …………………………………… Kapton
- Winding Mat………………………………………………………. CCAW
- Cone Material ……………………………………………………………..Paper / Papel
- Dust Cap Material …………………………………………………………….Paper
- Surround Material ………………………………………………………………… Cloth
- Basket Material ………………………………………………………………..Steel
- Magnet Material …………………………………………………………. Neodymium
- Magnet Weight …………………………………………………………………………….. 3 Oz
SPEAKER THIELE & SMALL PARAMETERS
- Equivalent Volume ……………………………..Vas……………………….4.46L / 0.152ft3
- Excursion (one way)……………………………..Xmax …………………………………. 15 mm
- Free Air Resonance……………………………..Fs ………………………………………. 138 Hz
- Mechanical Factor………………………………..Qms …………………………………4.249
- Electrical Factor ……………………………………..Qes …………………………………0.977
- Total Factor ……………………………………..Qts ………………………………………..0.794
- Moving Mass / Factor Total……………………………….Mms ……………………. 7.166g
- Compliance / Factor Total …………………Cms …………………….. 148.927
- U/M/NBl Factor / Factor Total…………………Bl………………………………….4.767
- Voice Coil Inductance / Factor Total………………………………..Le…………..0.08696mH
- Diaphragm Area / Factor Total……………………………..Sd…………………… 145cm2
- DC Resistance / Resistencia DC ………………………………..Re …………….. 3.2 OHM
- Mechanical Mass …………………….Mmd………………………………….. 6.159g
TWEETER SPECIFICATIONS
- Nominal Impedance …………………………………………………………………. 4 Ohms
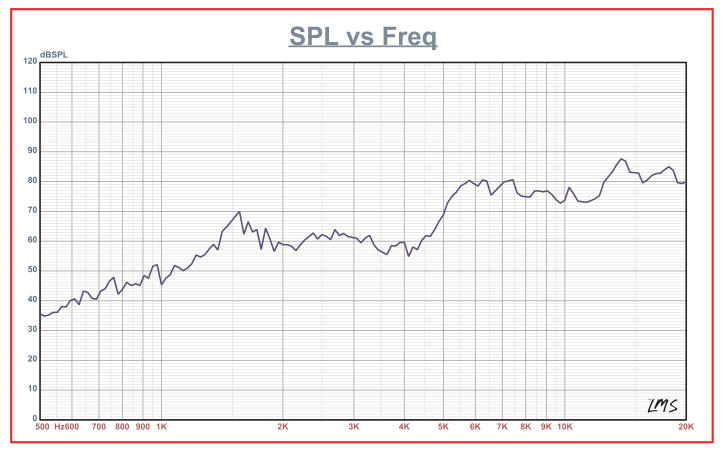
- Sensitivity (1w/1m) / Sensibilidad Total (1w/1m)……………………………….. 92 dB
- Frequency Response ……………………………………………………….1KHz-20KHz
- Hi Pass Crossover ……………………………………………………………… 3.5khz
- Body Color | Material ………………………………………… Black | ABS / ABS | Negro
- Voice Coil Diameter ……………………………………………………………1” / 25.4mm
- Voice Coil Former Material ………………………………. Aluminum
- Winding Material …………………………………………………………………… SV
- Diaphragm Material ……………………………………………. PEI
- Magnet Material ………………………………………….Neodymium
- Magnet Weight ……………………………………………………………………… 13 g
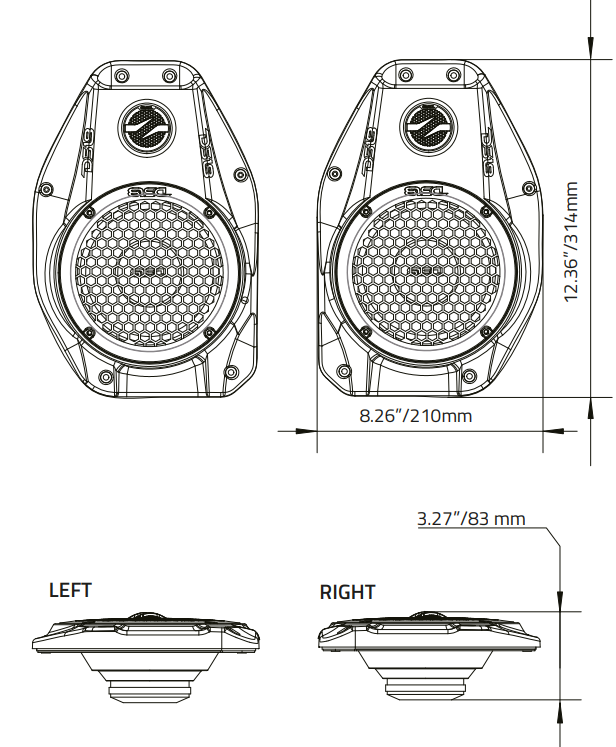
MEASUREMENTS :
- Overall Wide Total……………………………………………………………… 8.26” / 210mm
- Overall Length / Longitud Total………………………………………. 12.36” / 314mm
- Overall Depth / Profundidad Total ……………………………………..3.27” / 83mm
Mid-Range Speaker
Tweeter
DIMENSIONS
FOR MORE MANUALS BY DS18, VISIT MANUALSLIBRARYY
DS18 JL-SB6 Plug and Play Sound Bar Enclosure-FAQs
Q1. What is the DS18 JL-SB6 enclosure used for?
It is a plug-and-play enclosure designed for mounting two 6.5-inch speakers and two tweeters in Jeep sound bars.
Q2. Which speaker sizes does the JL-SB6 support?
It supports 6.5-inch midrange speakers and 1.75-inch tweeters for a complete audio upgrade.
Q3. Is the JL-SB6 compatible with Jeep JL models?
Yes, it is specifically designed to fit Jeep JL and Gladiator JT sound bar locations.
Q4. Do I need to modify my Jeep to install the JL-SB6?
No, the JL-SB6 is plug-and-play, meaning it mounts directly without major modifications.
Q5. Does this enclosure come with speakers included?
No. The JL-SB6 is sold as an empty enclosure. Speakers and tweeters must be purchased separately.
Q6. What type of speakers are recommended?
DS18 recommends using high-quality component speakers and tweeters for the best performance.
Q7. Do I need an amplifier for this sound bar?
Yes, adding an amplifier is recommended to power the speakers effectively and deliver clear, loud sound.
Q8. Can I still use my factory Jeep wiring?
Yes. The JL-SB6 uses factory-style connectors for a direct plug-and-play installation.
Q9. Is the enclosure durable for off-road use?
Yes, it is built from high-strength materials to handle vibrations, outdoor weather, and rugged conditions.

 Midrange and 1” Tweeter.
