Petlibro PLAF203 Granary Smart Camera Feeder

In the Box
Automatic Pet Feeder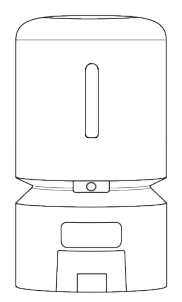
Food Bowl with Holder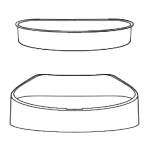
Power Adapter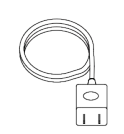
Desiccant Bag
User Manual
Quick Start Guide
Product Overview

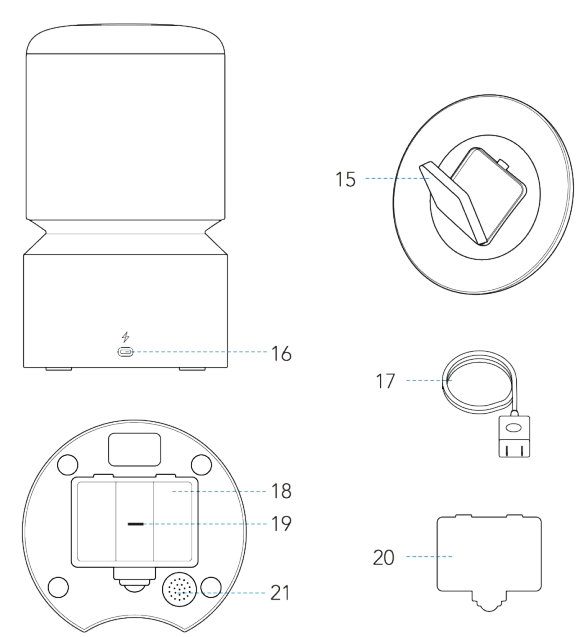
- Lid
- Sealing Strip
- Food Tank
- Transparent Window
- Tank Base
- Anti-Clog Detector
- Camera
- Infrared Light
- Control Panel
- Display Panel
- Food Outlet
- Feeder Base
- Stainless Steel Bowl
- Bowl Holder
- Desiccant Box
- Power Jack
- Power Adapter
- Battery Compartment
- SD Card Slot
- Compartment Lid
- Speaker
Buttons and Indicators Overview
Buttons Overview
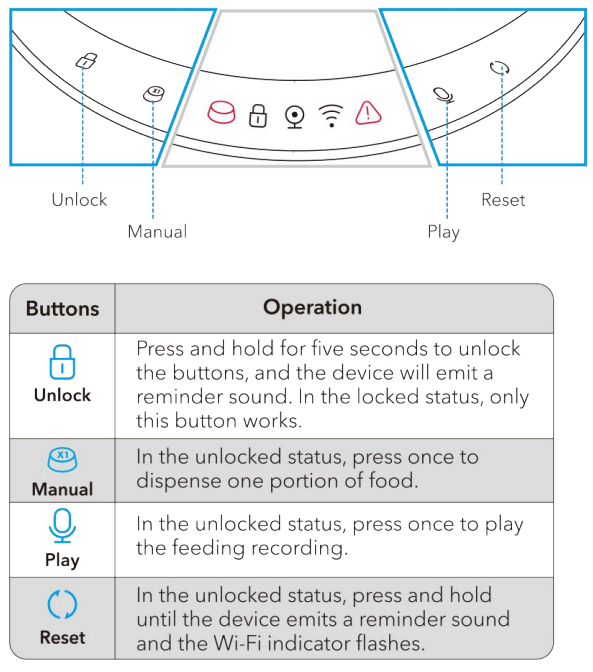
Indicators Overview

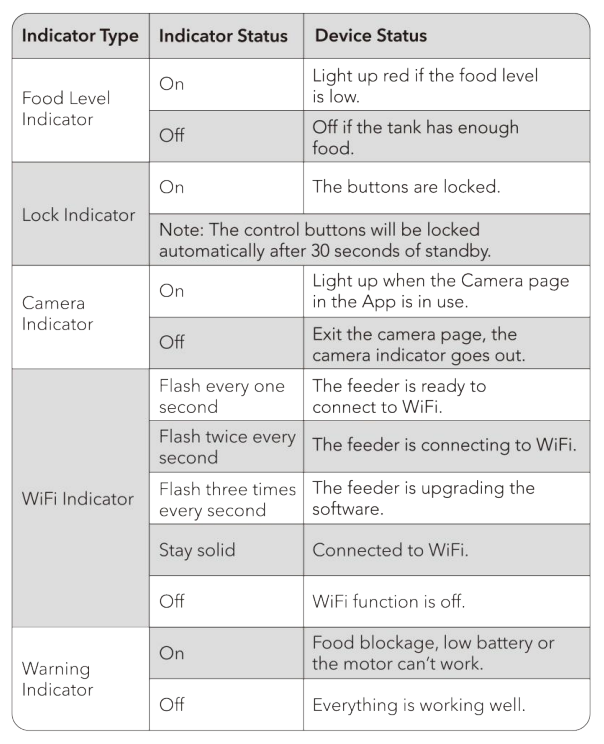
Status Indicators
Set up the Feeder
Getting started
Installation
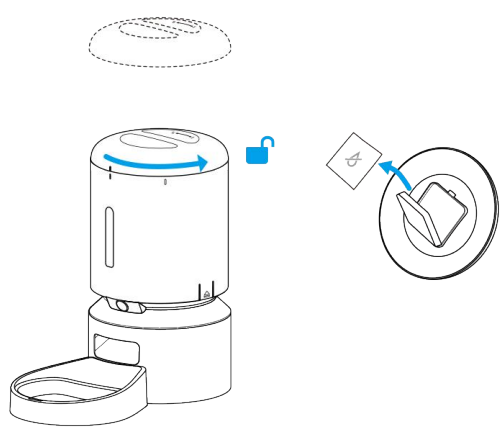
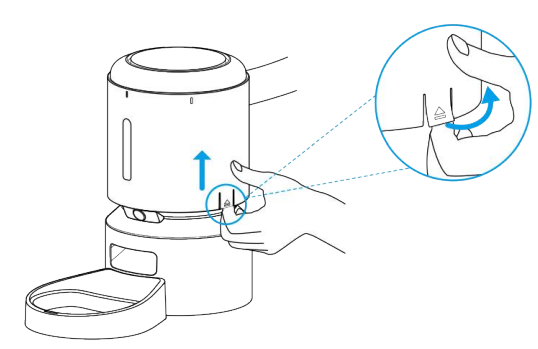
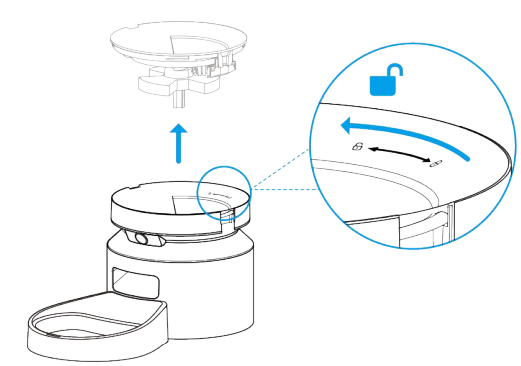
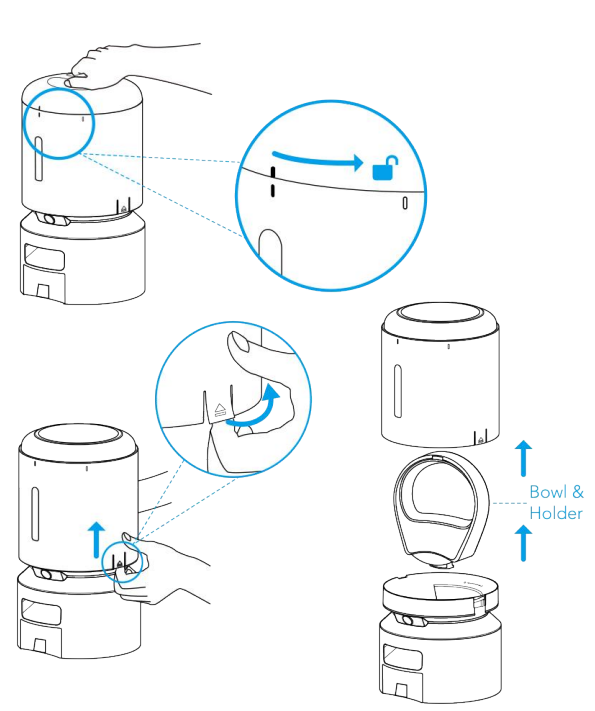
- Take out the food bowl inside the food tank. Twist the lid anticlockwise to remove the lid. Pull the notches on both sides outward a little and then up to remove the food tank.

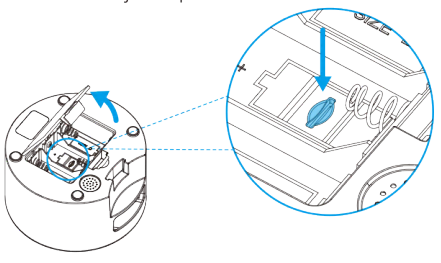
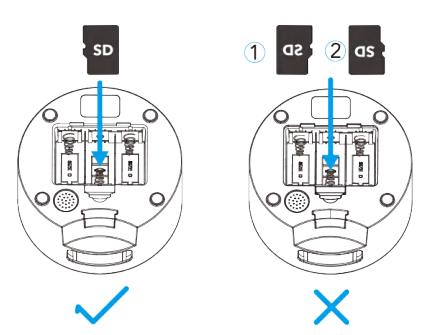
- Insert the SD card (Card NOT included). To enable the video recording function, insert an SD card first, then enable the recording function in the app: tap in the upper right corner > Device Camera > Video Settings.
- Open the battery compartment; the SD card slot is in the middle of the battery compartment.

- Insert the SD card in the direction shown. Slide it in until it clicks into place.
Do not force or apply excess force when inserting the SD card. Notes:
- This product supports standard SD cards (such as Samsung and SanDisk) with a capacity of 16-256GB and a speed of Class 10 or above.
- Before first use, please use the app to format the SD card in Settings.
- To remove an SD card, push the SD card in lightly. For reasons of privacy, the video files on the SD card can only be checked through the Replay section of the app and cannot be read by a PC or phone.

- Open the battery compartment; the SD card slot is in the middle of the battery compartment.
- Connect Power
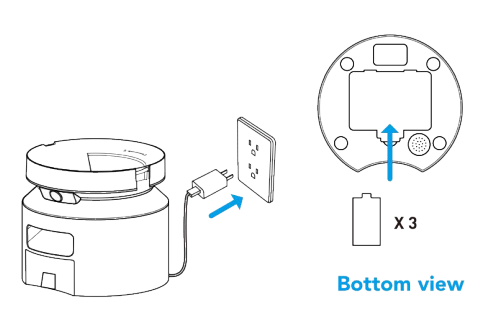
- Plug the 5V power adapter into a power socket and the USB cable into the USB port on the back of the feeder.
- The indicators will light up automatically to indicate the feeder is on.
- Open the battery compartment at the bottom of the feeder. Install three alkaline D batteries (not included) in case of a power outage. Make sure the batteries match the positive and negative poles with the markings in the
compartment. Notes:- Batteries are not included.
- To avoid a sudden power outage and the feeding of your pet, do not use the batteries as the only source to power the feeder; the batteries can only be used as an emergency plan.
- To avoid battery leakage, remove the batteries if the device won’t be in use for a period of time.
- When the feeder is powered only by batteries, the WiFi function, camera function, record button, and reset button will be disabled to extend the working time; the meal schedules will be carried out normally.

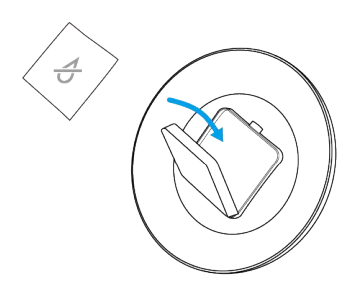
- Place the desiccant bag into the inner box under the lid.
- It is recommended to change the desiccant bag every 15 days to prevent mold growth.
- Remove the desiccant bag before cleaning the lid.

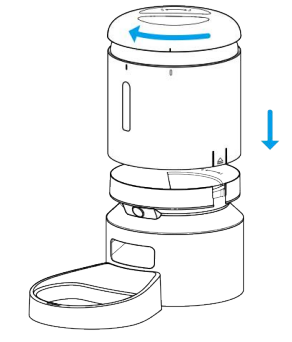
- Install the food tank. Align the food tank with the notches on both sides of the tank
base.
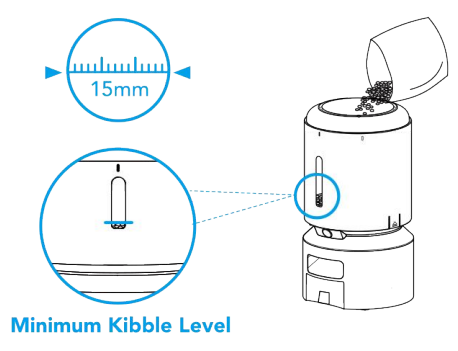
- Add dry pet food to the food tank.

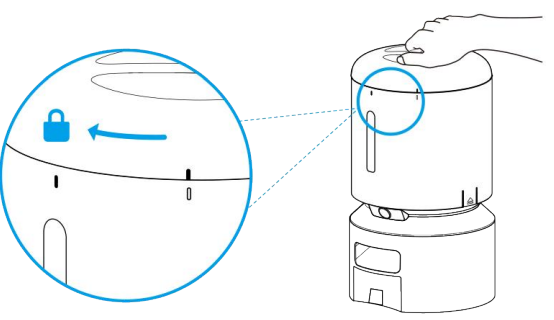
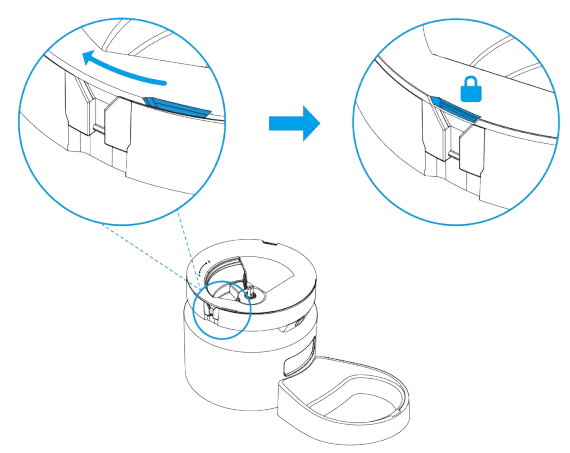
- Put the lid back on. To snap into place, turn the lid clockwise from the right rotating sign to the left rotating sign.

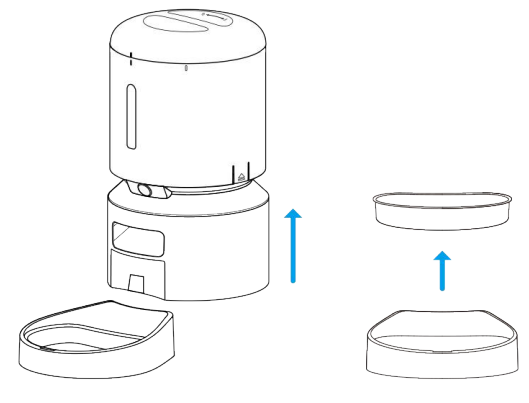
- Install the Food Bowl. Attach the bowl to the designated notches underneath the
feeder base.
App Control
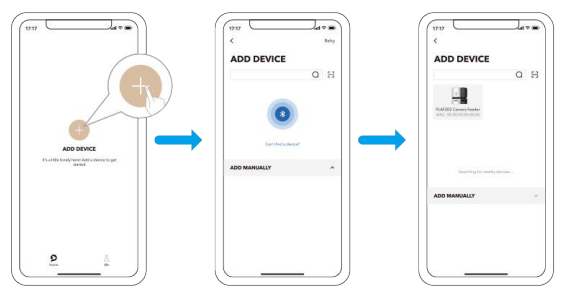
- Download and install the PETLIBRO app.

- Follow the instructions to configure the network.

Care And Maintenance
It’s recommended to clean the feeder regularly for the health of the pets. The washable parts are as follows: lid, food tank, tank base, stainless steel bowl, and bowl holder. Clean other parts with a dry cloth.
Clean the tank lid, food tank, and tank base
Before removing the food tank, be sure that the food tank is empty in case of food spilling all over.
- Disconnect power before cleaning.

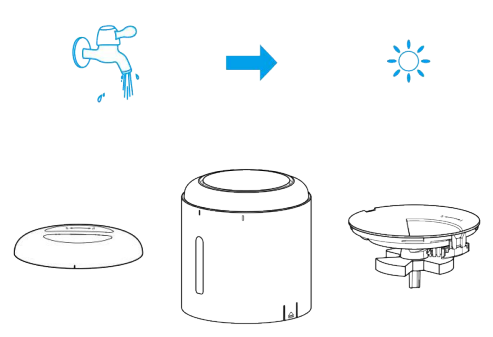
- Twist anticlockwise to remove the lid and take out the desiccant bag from the inner box under the lid.

- Pull the notches on both sides outward a little and then up to remove the food tank.

- Twist anticlockwise to remove the tank base.

- Thoroughly rinse and air dry the lid, tank, and tank base.

- Refit them to the machine. Turn the tank base clockwise until it snaps into place

- Install the tank and lid.

Clean the Food Bowl
- Press down the food bowl with the holder to remove it.

- Rinse and air-dry them thoroughly before refitting them to the machine.

Specifications

Troubleshooting


Safety Instructions
- Use the feeder in a dry place.
- Use the feeder on a level surface.
- Dispose of all packaging materials properly. Some items may be packed in plastic bags; these bags could cause suffocation.
- Keep them away from children and pets.
- Do not use the feeder with pets that are not able to reach the food bowl or with any physical disability.
- Do not immerse the base part in water at any time, as it may damage electronic components.
- Do not use the feeder outdoors. Check its operation frequently to be sure it is operating properly.
- Do not disassemble the feeder other than as instructed in this user manual.
- Only use accessories recommended or sold by the manufacturer. The use of accessories not recommended or sold by the manufacturer may cause an unsafe condition.
- Do not modify the feeder.
- Examine the feeder after installation. Do not plug in if there is water on the power cable or plug.
- To avoid tripping, always position the power cable out of the way of foot traffic.
- Do not install or store the feeder where it will be exposed to weather or temperatures below 0°C (32°F).
- Do not use the feeder without adding pet food first. Power off the feeder when it’s not in use.
FOR MORE MANUALS BY PETLIBRO, VISIT MANUALSLIBRARYY
Petlibro PLAF203 Granary Smart Camera Feeder-FAQs
How do I connect the Petlibro Granary Feeder?
Plug in the feeder using the original adapter and power cable, then wait about 30 seconds. The feeder will automatically initialize and be ready to use.
Can I control the feeder remotely?
Yes. The feeder connects to both 2.4GHz and 5GHz Wi-Fi, allowing you to schedule and monitor meals anytime through the Petlibro app on iOS or Android.
Does the feeder need to stay plugged in?
The feeder can run on wall power or three D-cell batteries. However, batteries are recommended mainly as backup during power outages.
How long does the battery last?
With three fresh D-cell alkaline batteries, the feeder can last up to 180 days without needing a recharge or replacement.
How accurate is the Petlibro PLAF203 feeder?
It dispenses precise portions of both large and small kibble, making meal scheduling and portion control reliable.
What type of SD card does it support?
The feeder supports microSD cards up to 256GB for video storage.
How do I clean the feeder?
Remove the food tank and base, rinse them thoroughly, and let them air-dry before reinstalling. Regular cleaning helps maintain hygiene and performance.
What are the benefits of using this feeder?
The Petlibro feeder ensures consistent meal schedules, allows diet adjustments remotely, includes real-time monitoring with its camera, and provides peace of mind even when you’re away.

 Notes:
