Petlibro PLCT004 Infinity Cat Tree Villa
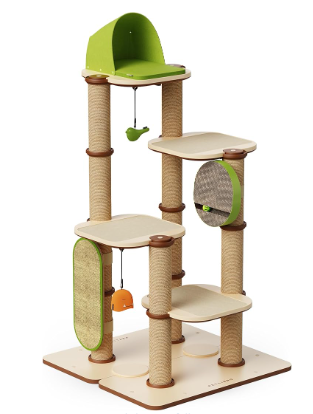
IN THE BOX
Base Platform
Platform
Scratching Post
Scratching Post Cap
Cat Bed
Felt Pad
Scratching Board
Toy
Hex Key  Screw
Screw
![]()
Base Platform Connector![]()
Connector Cap
Cat Bed Fastener PVC Sticker (48-Pack)

Non-slip Pads
![]()
Notes
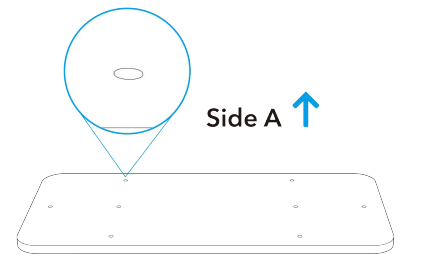
- Make sure the A side of the base platform is facing upwards.

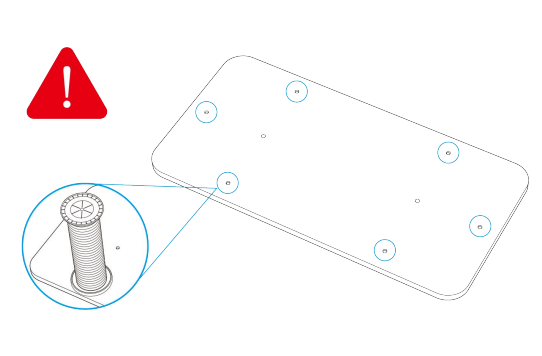
- Please install the non-slip pads on the B side of the base platform, as shown in the diagram.

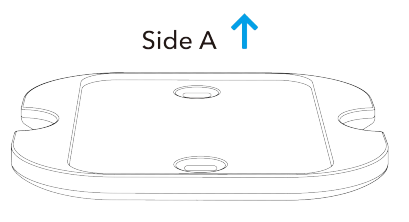
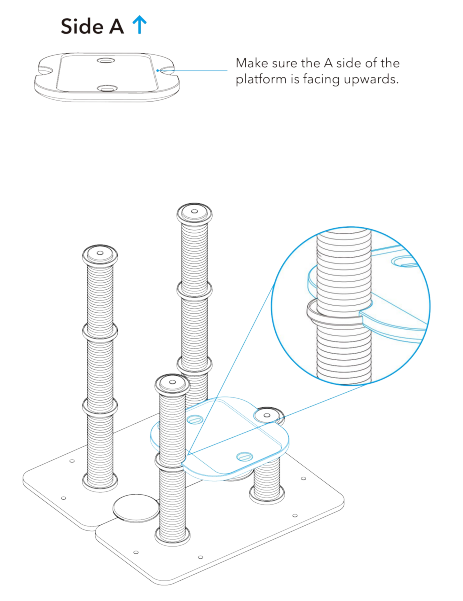
- Make sure the A side of the platform is facing upwards.

- The height of your cat tree after installation should not exceed 4 layers.
WARNING & CAUTIONS
- Place the cat tree indoors, away from direct sunlight or damp areas.
- Keep all tools and instructions in a safe place for future reference.
- This cat tree is intended for cat use only. Please keep children away.
- Keep all small parts away from children and pets to avoid choking hazards.
- Do not climb, rock, shake, step on, or hang on the cat tree.
- Place the cat tree on a flat, level surface for stability.
- Check the cat tree often for loose screws or parts that may need re-tightening.
- Do not place heavy items on the cat tree.
- Do not sit or stand on the cat tree.
- Inspect the cat tree for damage and discard it if any part gets worn or damaged.
- Failure to follow the installation instructions in this manual may cause the cat tree to fall over and cause injury.
Notes
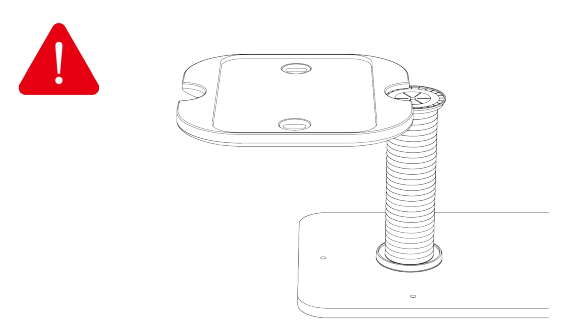
- Do not install the scratching post in one of the side holes on the base platform.

- Do not attach the platform to one scratching post only.
KEY INSTALLATION METHODS
Scratching post + scratching post
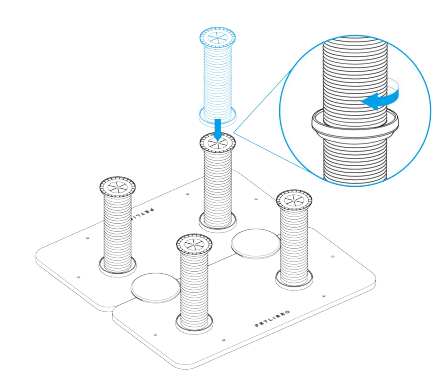
Insert the screw of one scratching post into the screw hole of another scratching post, and rotate one of the scratching posts to tighten.
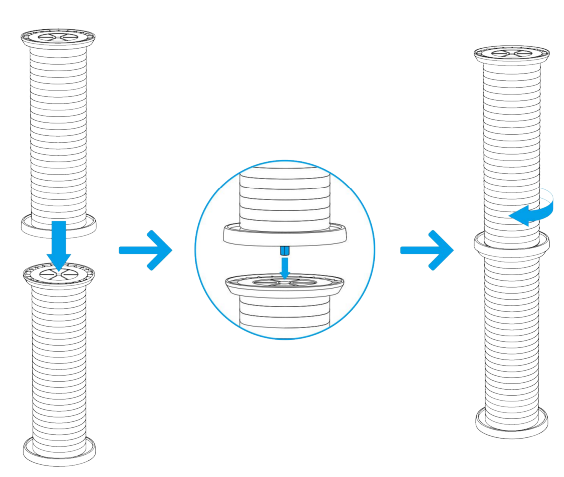
Scratching post + platform
Notes
- Make sure the A side of the platform is facing upwards.

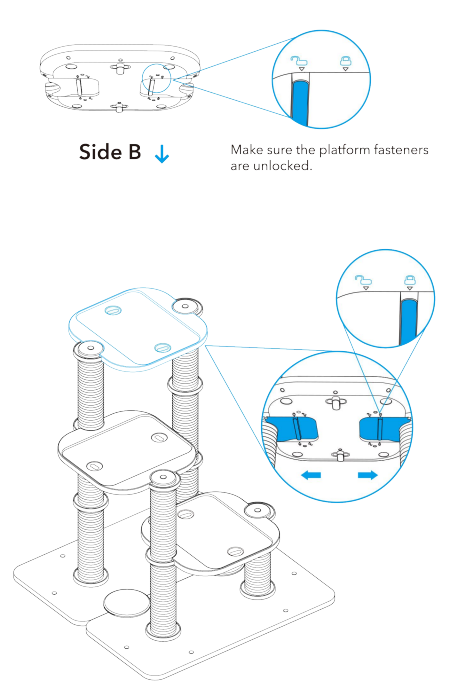
- Make sure the platform fasteners are unlocked before installation.

- Align the cutouts of the platform with the connecting parts (grooves) of two scratching posts, and attach the platform to the scratching posts.

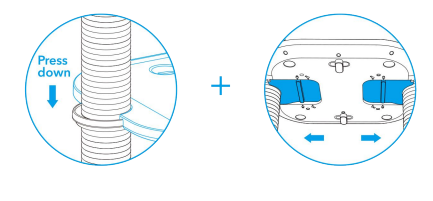
- Push the bottom platform fasteners towards the posts until the fasteners cannot be moved.

- If you can’t push the platform fasteners, try pressing around the cutouts on the platform while pushing the fasteners.
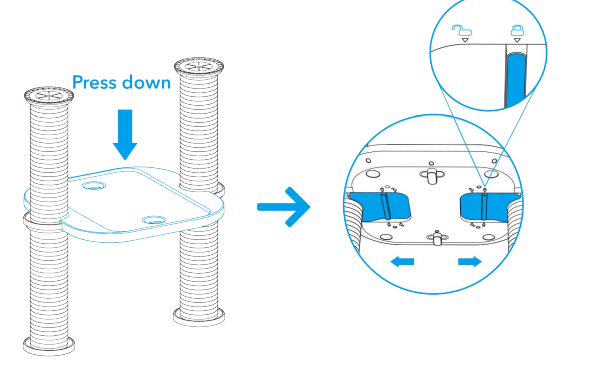
INSTALLATION STEPS
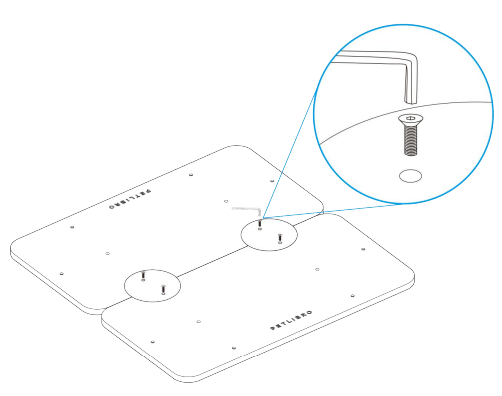
- Base platform + base platform
- A. Place two base platforms side by side and align them.

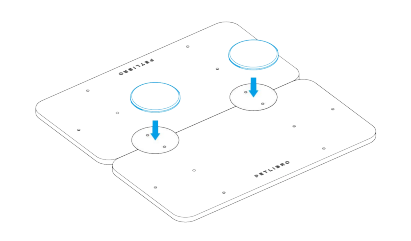
- B. Align two base platform connectors with the screw holes on the base platform.

- C. Insert screws into the holes and tighten with the hex key.

- D. Put the connector caps on the connectors.

- A. Place two base platforms side by side and align them.
- Base platform + scratching post. Insert the screw of the scratching post into one of the base platform screw holes (not the side holes) and rotate the scratching post to tighten.

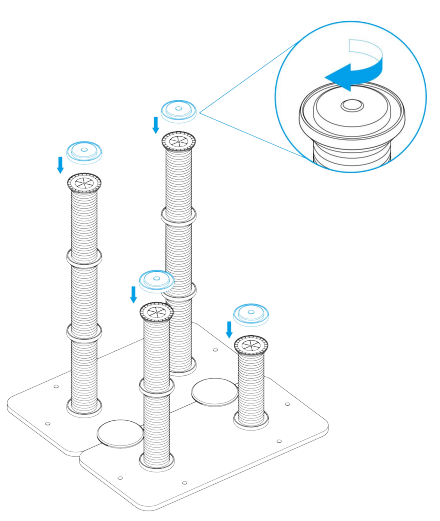
- Scratching post + scratching post + scratching post cap
- A. Scratching post + scratching post. Insert the screw of one scratching post into the screw hole of another scratching post, and rotate one of the scratching posts to tighten.

- B. Scratching post + scratching post cap. Insert the screw of the scratching post cap into the screw hole of the scratching post and rotate the cap to tighten.

- A. Scratching post + scratching post. Insert the screw of one scratching post into the screw hole of another scratching post, and rotate one of the scratching posts to tighten.
- Scratching post + platform
- A. Align the cutouts of the platform with the connecting parts (grooves) of two scratching posts, and attach the
platform to the scratching posts.
- B. Push the bottom platform fasteners towards the posts until the fasteners cannot be moved.

- C. If you can’t push the platform fasteners, try pressing around the cutouts on the platform while pushing the
fasteners.
- A. Align the cutouts of the platform with the connecting parts (grooves) of two scratching posts, and attach the
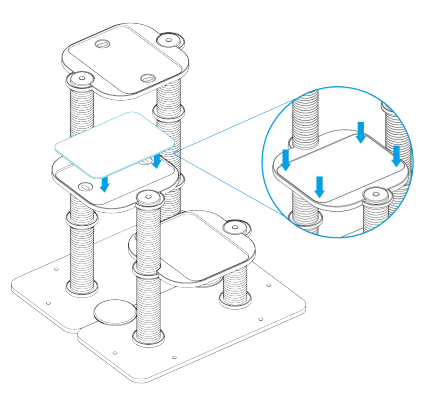
- Felt pad + platform. Place the pad on the platform and press it down to make sure the platform surface is level.

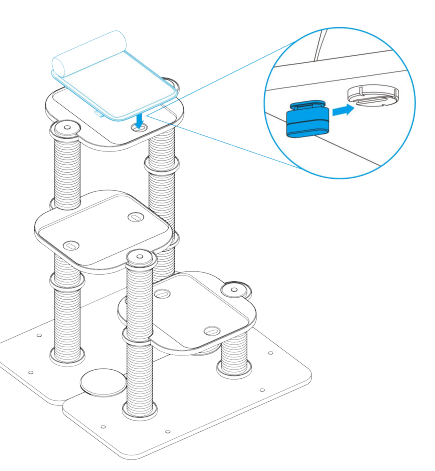
- Cat bed + platform
- A. Slide to install the cat bed fasteners to the cat bed.
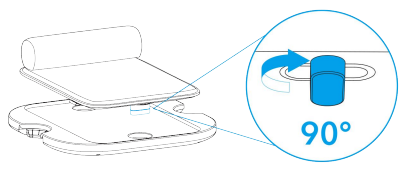
- B. Insert the fasteners under the bed into the holes on the platform.

- C. Rotate the fasteners 90 degrees.

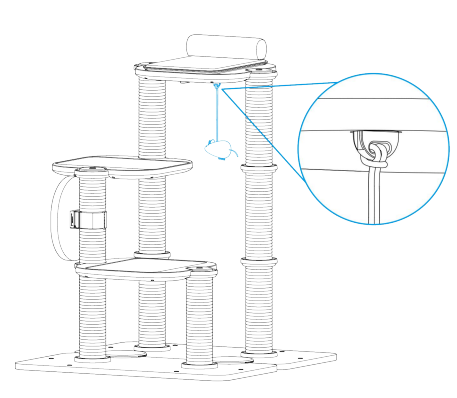
- Toy + platform
- A. Insert the fastener of the toy into a corner hole on the B side of the platform.

- B. Rotate the fastener 90 degrees.

- A. Insert the fastener of the toy into a corner hole on the B side of the platform.
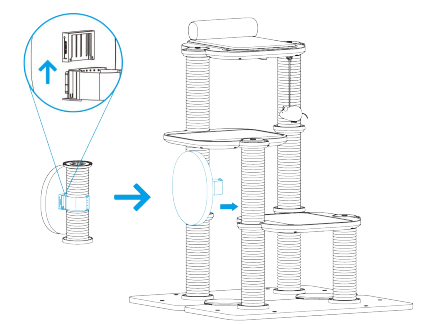
- Scratching post + scratching board
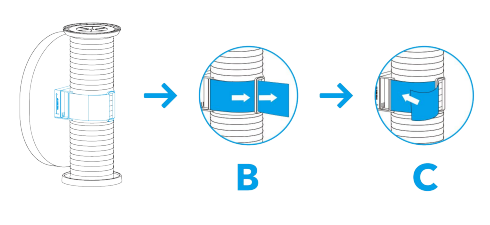
- A. Slide to install the scratching board fastener to the back of the scratching board.

- B. Align the fastener of the scratching board to the scratching post, and thread the strap with Velcro through
the buckle. - C. Secure the strap.

- A. Slide to install the scratching board fastener to the back of the scratching board.
- Base platform + screw hole sticker. After installation, apply PVC stickers to the unused holes on the base platform.
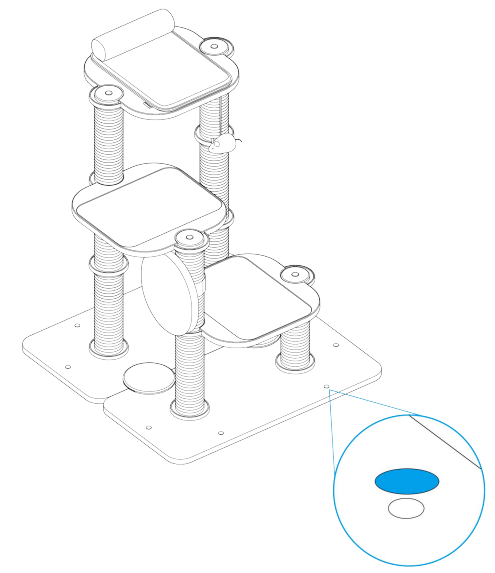
DIY POSSIBILITIES FOR REFERENCE
Notes
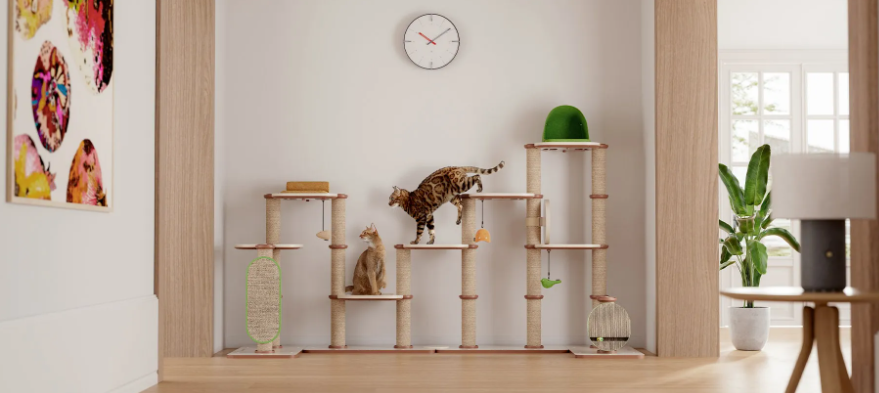
- If your cat tree does not look like any of the following examples, make sure the cat tree is stable after installation to avoid pet injury.
- Install the base of the cat tree first.
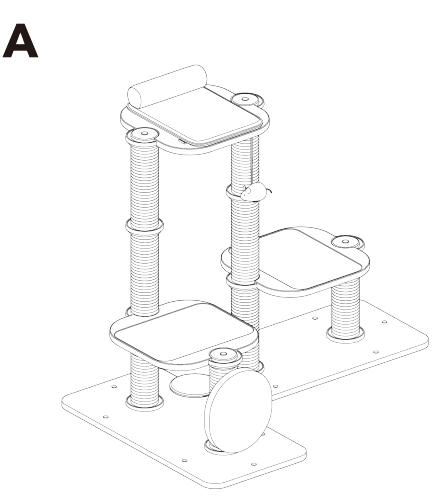
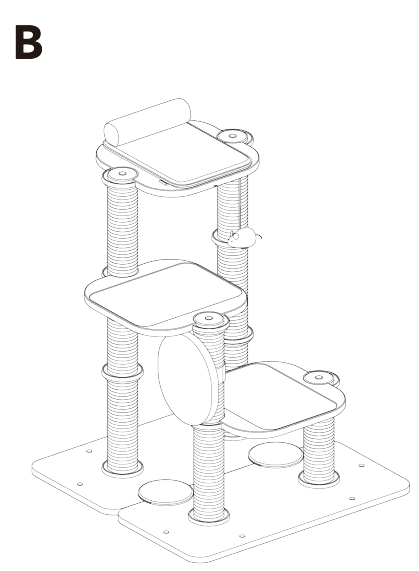
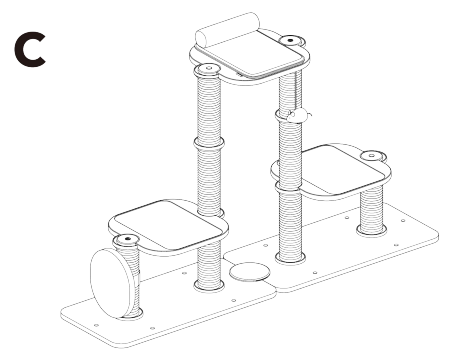
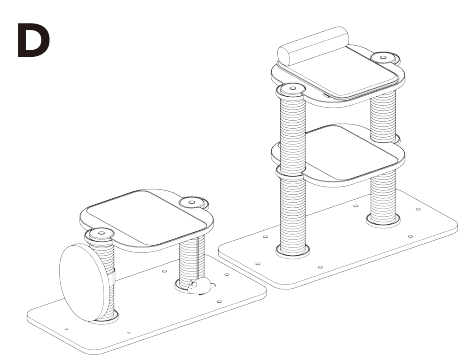
Do not install the cat tree as in the examples below. Or else it would be unstable and cause injury
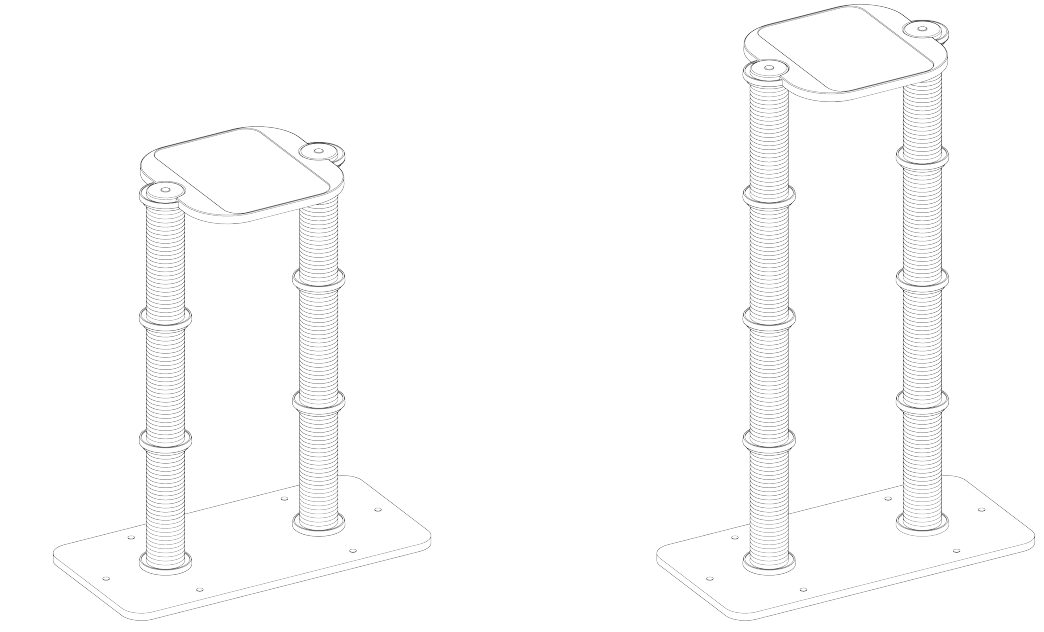
CARE AND MAINTENANCE
Cleaning the felt pad
- Do not use a washing machine.
- Do not use a brush to clean the pad.
- Do not place the pad in a dryer.
- Keep away from direct sunlight.
- Do not use a hairdryer to dry the pad.
- Do not use bleach for cleaning.
Cleaning the platform, scratching board, and scratching post
- To remove hair and dust, use a vacuum cleaner.
- Do not wash with water.
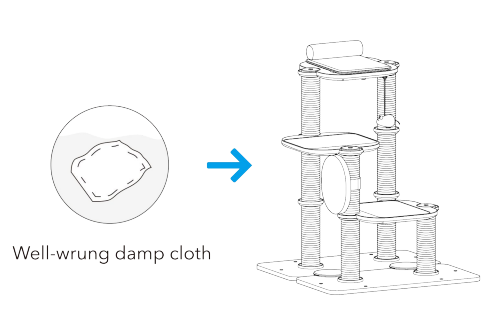
- Dampen a soft cloth with soapy water.
- Spot clean the stains and soiled areas with the cloth.

- Air-dry the wet areas completely.
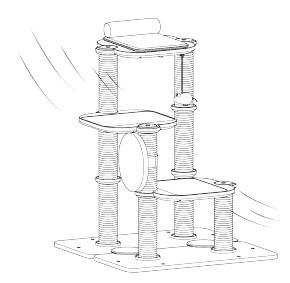
SPECIFICATIONS

FOR MORE MANUALS BY PETLIBRO, VISIT MANUALSLIBRARYY
Petlibro PLCT004 Infinity Cat Tree Villa-FAQs
Q1. How do I get my cat to use the cat tree?
Place the tree near a favorite spot or window, and encourage use with treats, toys, or catnip to create a positive association.
Q2. What is the purpose of a cat tree?
A cat tree provides climbing, scratching, and resting areas, giving cats exercise, security, and a personal space to relax.
Q3. How long does a cat tree last?
On average, a quality cat tree lasts 3–5 years, depending on usage and material durability.
Q4. What features should a good cat tree have?
It should include sturdy posts, scratching areas, cozy hideouts, and elevated perches for climbing and lounging.
Q5. Where is the best place to put a cat tree?
Position it near a wall or window where your cat feels safe and can enjoy outdoor views.
Q6. How do I maintain a cat tree?
Vacuum pet hair weekly, wipe surfaces with pet-safe cleaners, and inspect scratching posts for wear. Replace worn parts as needed.
Q7. Can a cat tree get wet?
Most indoor cat trees are not designed for moisture. If exposed to water, materials like sisal and fabric may weaken or fray.
Q8. Are cat trees hard to assemble?
No, most cat trees, including the Petlibro Infinity Villa, come with simple step-by-step instructions for easy setup.
Q9. Do cats really need a cat tree?
Yes. A cat tree supports natural instincts like scratching, climbing, and perching, while protecting your furniture from damage.

