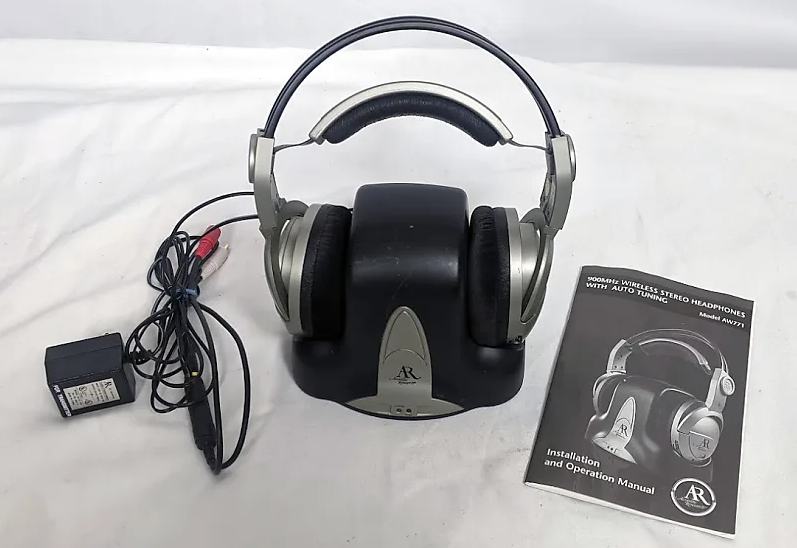
Acoustic Research AW772 Portable Wireless Headphones
INTRODUCTION
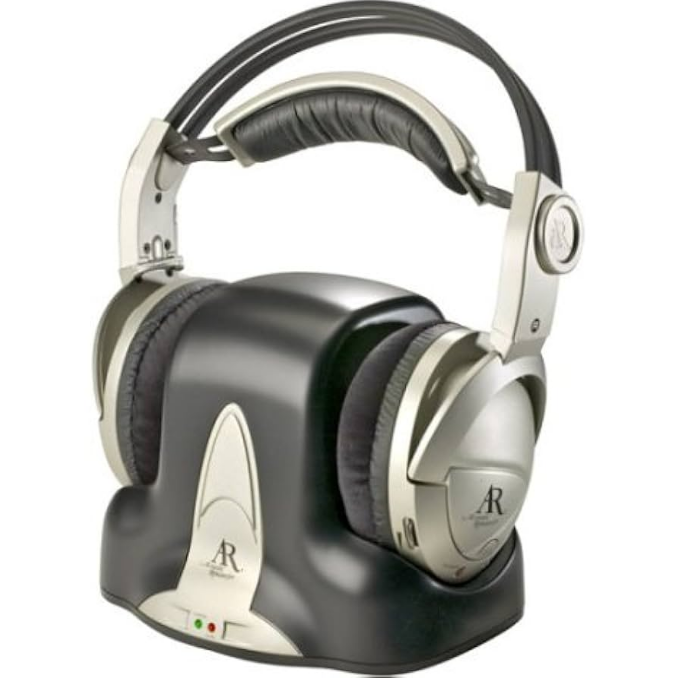
Congratulations on your purchase of this wireless headphone system. The AW722/AW772 utilizes wireless, radio frequency transmission (900 MHz). The headphones are induction-recharged using an electric field and incorporate Phase Lock Loop (PLL) technology, which offers three channels for radio transmissions. This 900 MHz stereo wireless headphone system features a compact design that enables you to enjoy music and TV sound just about anywhere inside or outside your home. It’s simple to connect this system to any sound source, such as a DVD, DBS, CD, TV, VCR, stereo receiver, or radio.
FEATURES
900 MHz RF technology lets you roam freely throughout your hous.e Operating distance up to 150 feet/45 meters from cradle/transmitter* No line-of-sight limitatio.ns Convenient power, vol,ume and tuning controls located on headph.ones Range may vary by environment.
HEADPHONE SET DESCRIPTION
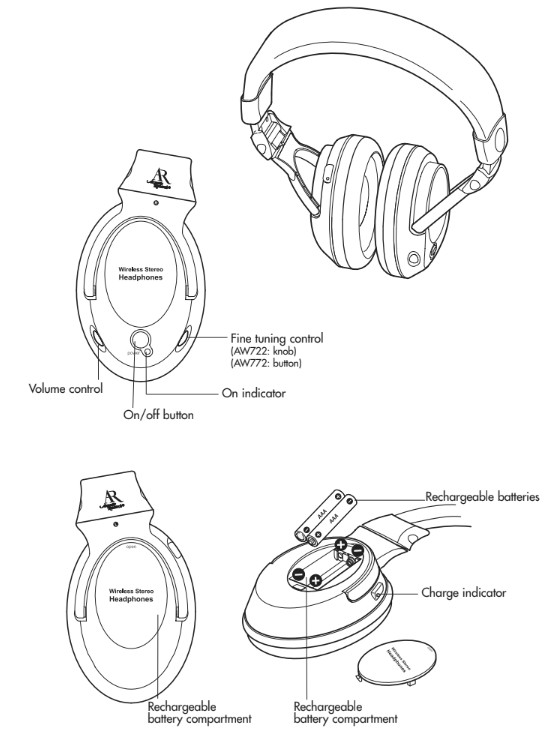
For stand-alone functioning, your wireless headphones must be powered by rechargeable batteries (included). The rechargeable batteries must be instain in the battery compartment and recharged before use. (See Battery Installation and Information, page 6).
RECHARGING THE HEADSET
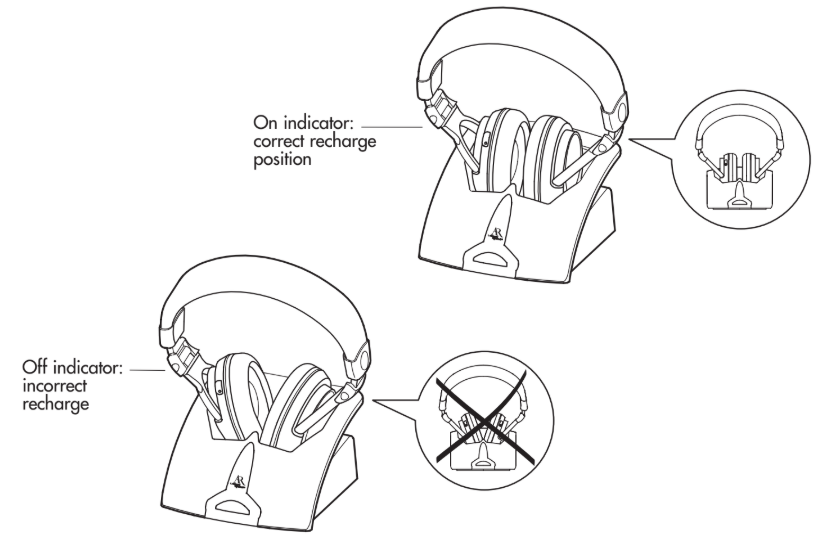
To recharge the headset unit, place the headphones into the recharging cradle/transmitter with the charge indicator facing the front. The headphones must be placed in a completely vertical position, not leaning to either side. If the headphones are placed correctly, the charge indicator light on the headphones illuminates.
RECHARGING CRADLE/TRANSMITTER
The recharging cradle/transmitter acts both as the transmitter of the signal to the headphones as well as the recharging base.
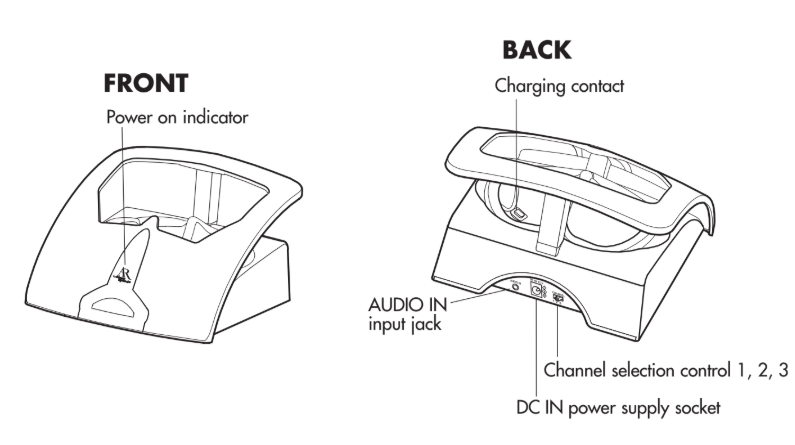
SUPPLIED ACCESSORIES
This headphone system includes accessories that enable you to use your wireless headphone set in a number of ways. (See sections on Standard Usage, page 8, and Alternate Installation Configuration, page 9).
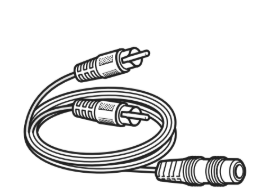
Stereo Y adapter cable (RCA/3.5 mm jack)
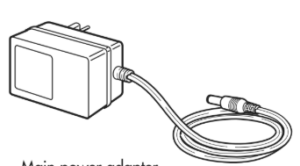
Main power adapter (AC/DC: 120 V ~ 60 Hz, 12 V = 200mA)

3.5 mm/6.35 mm jack adapter
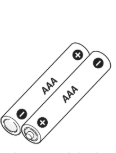
Rechargeable batteries (600mAH, NiMH)
BATTERY INSTALLATION AND INFORMATION
Your wireless headphone unit requires two rechargeable AAA batteries. The two rechargeable batteries that are supplied with your wireless headphones are uncharged. Before you can use the wireless headphones, the batteries must be charged. Follow these steps to charge and install the batteries.
Installing the Rechargeable Batteries
Take care to follow these steps to correctly charge and install the batteries.
- On the left earphone, locate the battery compartment and the word “Open.” Use your fingernail in the groove on top of the battery compartment to lift the cover.
- Insert two AAA rechargeable batteries (included), carefully following the markings inside to ensure the batteries are inserted properly, with the + and – ends in the correct positions.
- Replace the battery compartment cover.
Charging the Rechargeable Batteries
Follow these steps to recharge the NiMH rechargeable batteries.
- Connect the AC/DC main power adapter to the DC IN power supply socket, located on the back of the recharging cradle/transmitter.
- Then, plug the adapter into an electrical outlet.
- Place the headphones into the recharging cradle/transmitter, with the charge indicator facing the front. Make sure the headphones are placed in a completely vertical position, not leaning to either side. If the headphones are placed correctly, the charge indicator light illuminates.
- Subsequent charging must be performed in about 15-17 hours.
NiMH Rechargeable Battery Memory Effect
When a NiMH rechargeable battery is first used, it is important to fully charge it and then allow it to discharge three times in order to maximize the battery’s storage capacity. When a battery is recharged before it is completely discharged, it develops a memory that will limit the amount of charge in the future. This reduces the battery’s storage
capacity for subsequent charges and swhichreduces the amount of time your headphones can be used before recharging is necessary.
NiMH Natural Power Discharge
Due to their chemical design, all rechargeable batteries incur some degree of natural discharge. This means they automatically lose their charge in varying degrees, even when not in use. The size of this power loss varies, depending on the battery’s type, size, design, internal resistance, and, most especially, the temperature. The higher the
temperature, the greater the power loss through natural discharge.
NiMH Battery Warnings: If you are using NiMH or NiCd batteries, the batteries will charge when the headphones are powered with the AC power adapter. Do not power the
headphones with the AC power adapter if you installed alkaline or other non-rechargeable batteries—this could cause the batteries to leak. Do not mix batteries with different chemistry types (for example, a zinc battery with an alkaline battery). Do not mix new and used batteries. Do not leave batteries installed in the product when not in use for long periods. Respect the environment and the law. Before disposing of rechargeable batteries, ask your retailer if they can be recycled and whether or not the retailer collects rechargeable batteries for recycling.
CONNECTING THE RECHARGING CRADLE/TRANSMITTER
Follow this quick setup guide to ensurea trouble-free installation of your headphones. To connect the recharging cradle/transmitter to the audio source, follow these steps.
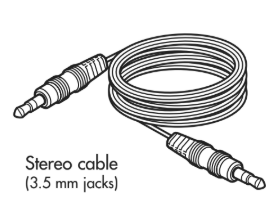
- Plug the stereo audio cable into the headphone jack of your audio source (e.g., stereo, TV, CD player, DVD, etc.). If your audio source has two RCA output jacks instead of a headphone jack, use the supplied Y cable to connect your headphones to the two (red and white) RCA jacks.
- Connect the other end of the stereo audio cable to the AUDIO IN socket at the back of the recharging cradle/transmitter.
- Connect the AC/DC main power adapter to the DC IN power supply socket at the back of the recharging cradle/transmitter. Then, connect the adapter to an electrical outlet.
OPERATION
- Switch on the audio source (TV, DVD, CD player, etc.) to which the recharging cradle/transmitter is connected. If your audio source is a DVD or CD player, start a disc.
- The recharging cradle/transmitter is now ready to receive an audio signal. The recharging cradle/transmitter is activated automatically when receiving an audio signal from the audio source.
- Check to make sure the power-on indicator light on the front of the recharging cradle/transmitter is lit, indicating that the unit is ready.
- Push the POWER ON/OFF button, located on the right earphone. The LED light turns on to indicate activation.
- The recharging cradle/transmitter features three channels for radio frequency transmissions. Select one of these channels, using the switch on the back of the recharging cradle/transmitter.
- After selecting a channel, use the fine-tuning control, located on the right earphone, to adjust the reception. The PLL function automatically locks the three channels, providing you with top-quality audio reception with no sound loss.
- Adjust the volume using the volume control, also located on the right earphone.
- When you are through using the headphones, switch them off using the POWER ON/OFF button, and place the audio source on standby.
Alternate Installation Configuration
The accessories included with your headphone system include a jack adapter for connecting the unit to a 6.35 mm headphone socket and a Y cable. Normally, when a device is plugged into a headphone jack, it automatically shuts off the speakers. If you want the speakers to continue playing while you are using the headphone set, you can use the Y adapter instead of the headphone jack. Use the supplied Y cable to connect your headphones to the two (red and white) RCA jacks. Connect the other end of the stereo audio cable to the AUDIO IN input jack at the back of the recharging cradle/transmitter. This is especially useful if, for example, your family is listening to music in one room of your home and you want to listen to the same music in another
room. It is also beneficial in families where one person has a hearing impairment. That person can use the headphones to listen to the audio source, adjusting the volume as needed. This type of connection also enables you to use your headphones more simpl,y as you will only need to switch on the audio source and switch on your headphones to activate.
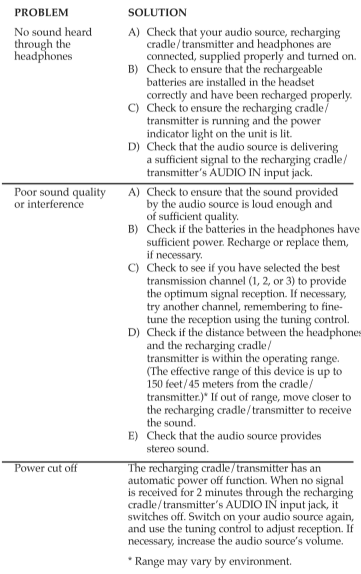
TROUBLESHOOTING
Refer to this troubleshooting section if you encounter any difficulties in setting up and using your headphones.
SPECIFICATIONS
- Models: AW722,AW772
Description: Radio Frequenc y,Wireless Headphones System - Transmitter
Carrier Frequency: 900 MHz
Effective Range: Up to 150 feet/45 meters*
Power Supply: 12 V (DC) via a 120 V–60 Hz (AC) main power supply adapter
Transmission Frequency: UHF – 900 MHz/three channels: 911.9 MHz (1), 912.6 MHz ,(2) and 913.3 MHz (3) - Headset
Power Supply: Two AAA 1.2 V rechargeable batteries
FOR MORE MANUALS BY Acoustic Research, VISIT MANUALSLIBRARYY
Acoustic Research AW772 Portable Wireless Headphones-FAQs
Q1. How do I connect my AW772 wireless headphones?
Turn on the headphones, enable Bluetooth on your device, and select “AW772” from the available devices list to pair.
Q2. How do I activate pairing mode?
Press and hold the power button until the LED flashes, indicating the headphones are ready to pair.
Q3. What should I do if my headphones won’t connect?
Restart Bluetooth on your device, forget the headphones from the list, then re-pair. Ensure the headphones are charged and within range.
Q4. Can I use these headphones without Wi-Fi?
Yes, they connect via Bluetooth, so no Wi-Fi is needed to play audio.
Q5. How do I reset the headphones?
Disconnect the USB charging cable, reconnect it, and clear the headphones from your device’s Bluetooth list. Pair them again afterward.
Q6. How do wireless headphones like the AW772 work?
They use Bluetooth signals to transfer audio wirelessly from your phone, tablet, or computer.
Q7. How can I pair them with an Android phone?
Go to Settings > Connected devices > Bluetooth, turn it on, and select “AW772” from the available devices.
Q8. What does pairing mode mean?
Pairing mode allows the headphones and your device to recognize each other so they can establish a wireless connection.

