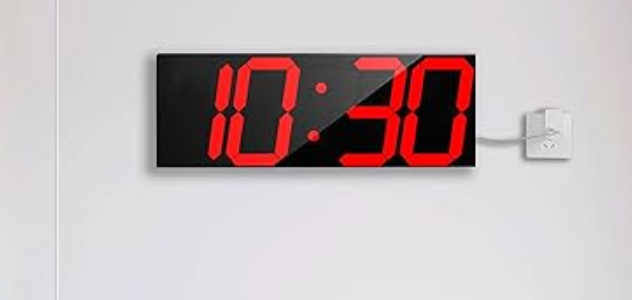
Chkosda CH3387 LED Large Digital Wall Clock
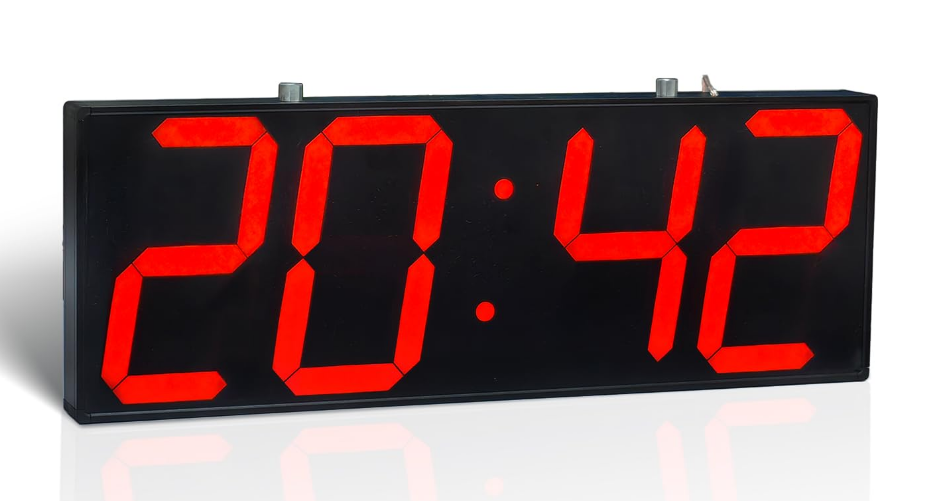
Instruction:
RET Button
Return (exit); in any interface, press this button to return to the normal display time interface.
POWER Button
In the normal display state, press the power button to turn the clock on or off/on.
MUTE Button
Turn all sounds on or off.
FLASH Button
Jumping seconds (Colon) flashing / not flashing settings.
12/24 Button
Switch between 12-hour mode and 24-hour mode. The clock rings once for 12-hour mode, clock rings 2 times for 24-hour mode.
+− Button
Manual 8-level brightness adjustment. (If you can’t adjust by directly pressing the “+” “-” button, you can press the “DIM” button first and then the “+” “-” button.)
DIM Button
Switch the automatic or manual brightness adjustment mode, press the “DIM” button, one beep is manual adjustment mode, and two beeps are automatic dimming mode.
NUMBER 0-9 Button
When setting the time, alarm, countdown, and other functions, set the value size directly by pressing the number keys. (Like the TV remote control button, inputting two digits needs to be completed quickly within 2 seconds.)
T SET Button (Time Setting)
Attention: Press the “UP” and “DOWN” buttons to adjust the value.
- Press the “T SET” button into the time setting and adjust the hour.
- Press the “MODE” button to switch to adjust the minutes.
- Press the “MODE” button to switch to adjust the seconds.
- You can press the “RET” button to exit the settings.
CD SET Button (Countdown)
Attention: Press the “CD SET” button twice directly in the settings. You can press the “RET” button to exit the settings. Press the “UP” and “DOWN” buttons to adjust the value.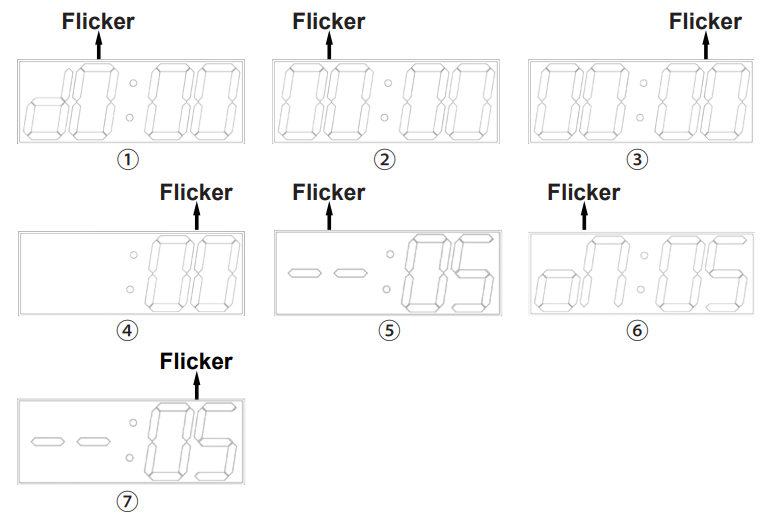
- Press the “CD SET” button twice directly in the settings and adjust the day. (If you don’t need to count down the days, just leave it for 0 00.)
- Press the “MODE” button to switch to adjust the countdown hour.
- Press the “MODE” button to switch to adjust the countdown minutes.
- Press the “MODE” button to switch to adjust the countdown seconds.
- Press the “MODE” button to switch to adjust the “ON” / “- -”. (Press the “UP” and “DOWN” buttons to control whether to remember this countdown.) “oN” is memory, “–” is no memory.
- Press the “MODE” button to adjust the countdown prompt setting. Press the “ ⏯” button to start the countdown. You can press the “RET” button to exit the settings.
Attention: When you want to repeat the countdown you have set, just press the “CD/SET” button twice to set the countdown page and press “ ⏯” once more to start the countdown.
DISP Button (Fixed Display)
- Press the “DISP” button to enter the display mode and show the date.
- Press the “DISP” button to switch to fixed display temperature.
- Press the “DISP” button to the loop display.
- Press the “DISP” button to return to the fixed time display.

AL SET Button (Alarm Setting)
Attention: The “AL 01” is the first group. You can set 16 groups in our clock; if you want to set others, you can press the “UP” button to change them. Press the “UP” and “DOWN” buttons to adjust the value.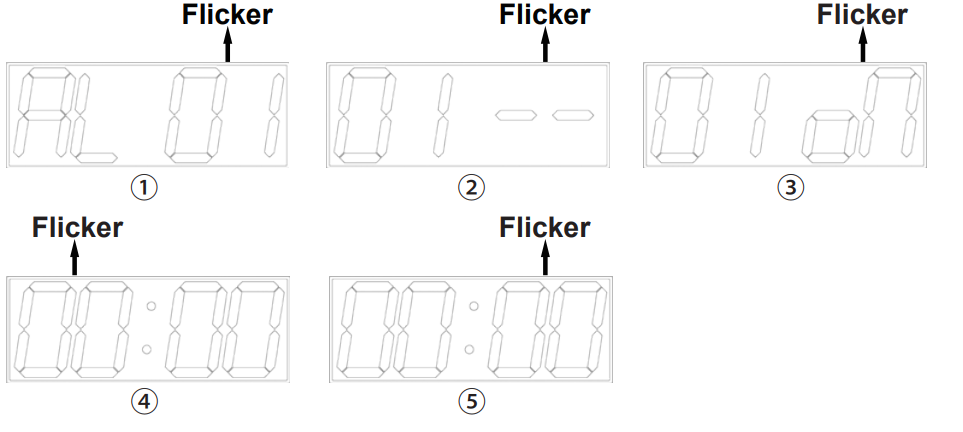
- Press the “AL SET” button into the alarm setting and adjust the “AL 01” (If you don’t need other alarms, just leave it for 01).
- Press the “MODE” button to switch to adjust “01 oN/ – -”. (Press the “UP” and “DOWN” buttons to control this alarm’s open or closed.) “oN” is open, “–” is closed.
- Press the “MODE” button to switch to adjust the alarm hour.
- Press the “MODE” button to switch to adjust the alarm minute. You can press the “RET” button to exit the settings.
ST Button (Sequential)
- Press the “ ” button to play and pause. You can press the “RET” button to exit the settings.

C SET Button (Calendar Setting)
Attention: Press the “UP” and “DOWN” buttons to adjust the value.
- Press the “C SET” button in the calendar setting and adjust the year.
- Press the “MODE” button to switch to adjust the month.
- Press the “MODE” button to switch to adjust the day.
- You can press the “RET” button to exit the settings.
A++ Button
Browse 01-16 alarm.
℃ ℉ Button (Temperature Mode)![]()
Attention: You can press the “RET” button to exit the settings.
- Press the “C/F” button on the thermometer.
- Press “MODE” to switch to Centigrade or Fahrenheit mode.
AL ON/OFF Button
When you have set up the alarm, you can open or close the alarm.
FULL Button
Test the light and sound, press “RET” to exit.
A1\~A3 Button
View the corresponding group number alarm. You can check the 01-04 alarm clock. If you want to check 01-016, you can continue pressing the “A++” button.
0/φ Button
Press the 0/φ button to switch the time display mode (e.g., 08:30/8:30).
Precautions:
- If the clock crashes during the running or setting process (the display does not move or displays garbled characters), unplug the power cord, remove the button battery, or replace the power plug and button battery. Load the button battery after normal.
- This product is a precision timing device. It should avoid severe impact, avoid high temperature, and avoid being placed in a corrosive gas environment to avoid damage. Since this product is an electronic device, it should avoid a short circuit in the internal circuit caused by liquid immersion, especially corrosive liquids.
Warning: It is strictly forbidden to connect the clock power cable directly to the 110V or 220V mains. Otherwise, the circuit will be burnt due to excessive voltage. In this case, the product is not guaranteed.
WiFi Digital LED Wall Clock Instruction
- Scan the QR code and download the App “CHKOSDA” (Go to the App Store, search “CHKOSDA” and download the app)

- Turn on your phone’s Bluetooth

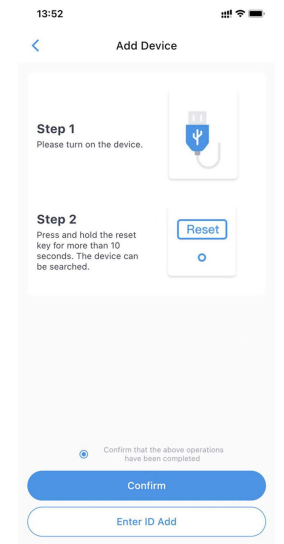
- Open the CHKOSDA app, and according to the app prompts to reset the device

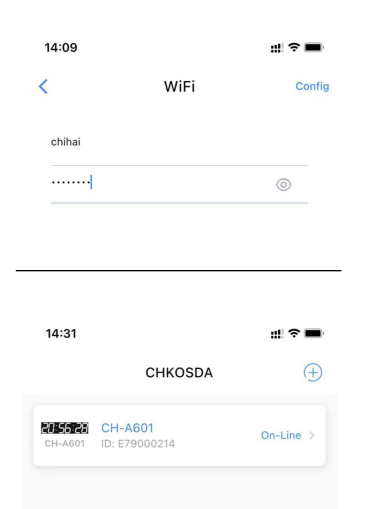
- Click the right corner search icon, click the device name, and connect the device

- Enter your wifi password, press the right corner “config”, press the device name, and enter the settings menu

- Click the left corner “Select TimeZone” to select your right timezone

FCC Warning:
This equipment has been tested and found to comply with the limits for a Class B digital device, pursuant to part 15 of the FCC Rules. These limits are designed to provide reasonable protection against harmful interference in residential installation. This equipment generates, uses, and can radiate radio frequency energy and, if not installed and used in accordance with the instructions, may cause harmful interference to radio communications.
However, there is no guarantee that interference will not occur in a particular installation. If this equipment does cause harmful interference to radio or television reception, which can be determined by turning the equipment off and on, the user is encouraged to try to correct the interference by one or more of the following measures:
- Reorient or relocate the receiving antenna.
- Increase the separation between the equipment and receiver.
- Connect the equipment into an outlet on a circuit different from that to which the receiver is connected.
- Consult the dealer or an experienced radio/TV technician for help.
Caution: Any changes or modifications to this device not explicitly approved by the manufacturer could void your authority to operate this equipment. This device complies with part 15 of the FCC Rules. Operation is subject to the following two conditions:
- This device may not cause harmful interference, and
- This device must accept any interference received, including interference that may cause undesired operation.
This equipment complies with FCC radiation exposure limits set forth for an uncontrolled environment. This equipment should be installed and operated with a minimum distance of 20 cm between the radiator and your body.
For More Blogs, Visit ManualsLibraryy.
Chkosda CH3387 LED Large Digital Wall Clock-FAQs
Q1. How does a digital wall clock work?
A digital wall clock operates electronically using a power supply (battery or AC adapter) and a quartz oscillator that generates precise pulses to keep accurate time. The time is then displayed on an LED or LCD screen.
Q2. How do I set the time on the Chkosda CH3387 wall clock?
To set the time, press the “SET” button until the hour digits blink, then use the “UP” or “DOWN” buttons to adjust. Repeat for minutes, and confirm by pressing “SET” again.
Q3. How can I calibrate my digital wall clock?
Use a reliable source (such as an atomic clock or phone) to check accuracy. Adjust the displayed time using the clock’s setting buttons. Monitor for drift over a few days and fine-tune if needed.
Q4. Why is my wall clock not working?
The most common reason is a drained or incorrectly inserted battery. Replace it with a new one of the recommended type. If powered by AC, ensure the adapter is firmly connected.
Q5. Why is my digital clock showing the wrong time?
Check if the correct time zone and daylight-saving settings are applied. Also, verify that the backup battery is working so the clock keeps time during power interruptions.
Q6. What principle does a digital clock work on?
Digital clocks work on the principle of counting oscillations from a quartz crystal, usually vibrating at 32,768 Hz, which is divided down electronically into seconds, minutes, and hours.
Q7. Why does a digital clock sometimes run fast or slow?
Variations in the quartz crystal frequency or power fluctuations may cause small time errors. Extreme temperature changes can also affect accuracy.
Q8. How does the Chkosda CH3387 display time?
This clock uses bright LED digits to clearly display hours, minutes, and sometimes seconds. It supports both 12-hour and 24-hour formats depending on your preference.
Q9. How do I know if my clock is showing AM or PM?
In 12-hour mode, a small indicator or dot on the display shows “PM.” If there is no indicator, it is “AM.”
Q10. How do I reset the clock to default settings?
Unplug the power supply and remove the backup battery for a few minutes. Reconnect the power, then set the time again.

