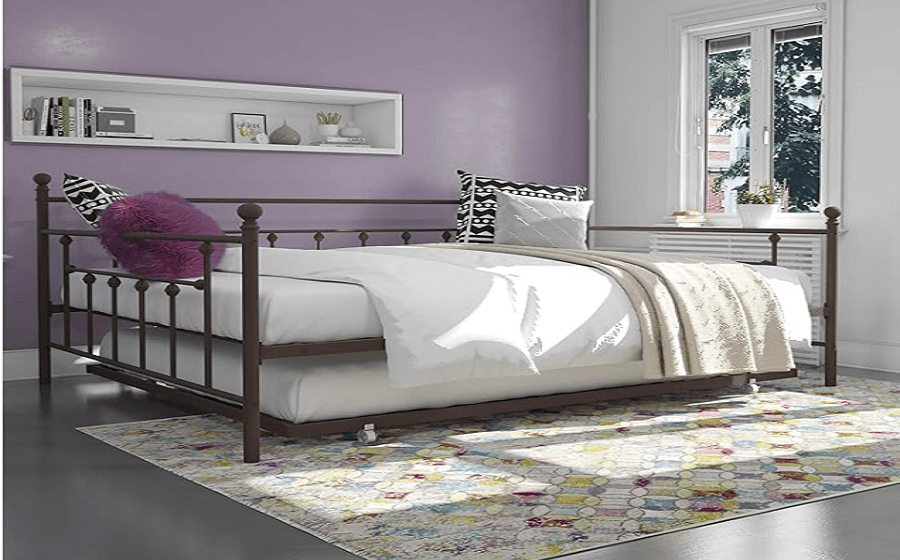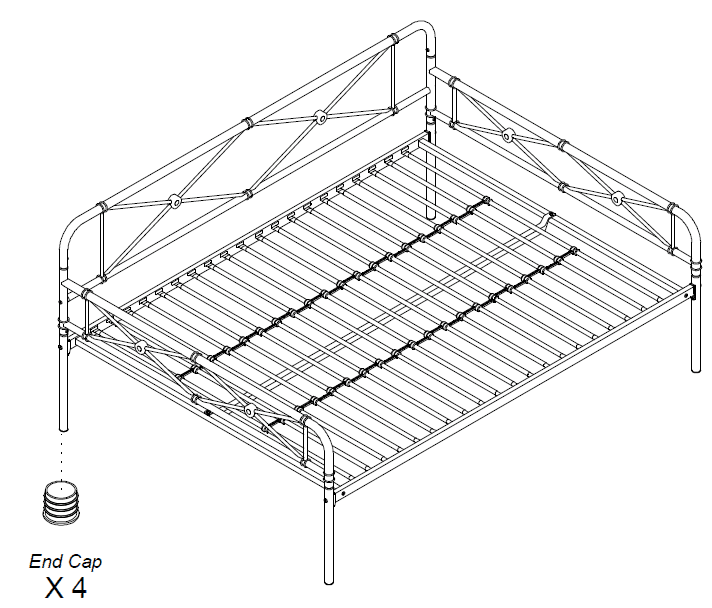
Dorel Home Products DA4056029 Metal Daybed
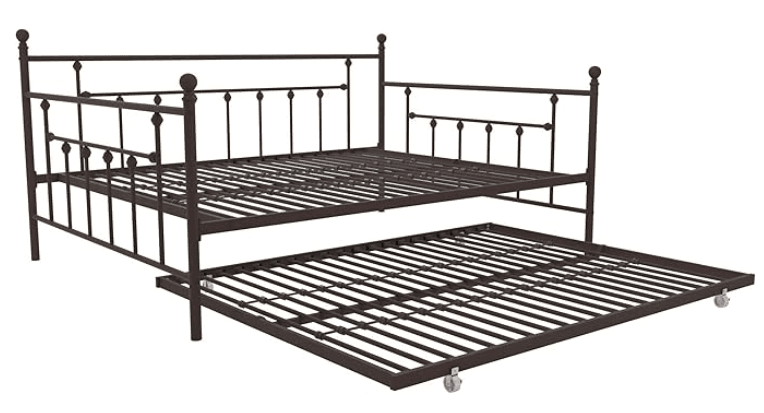
PARTS
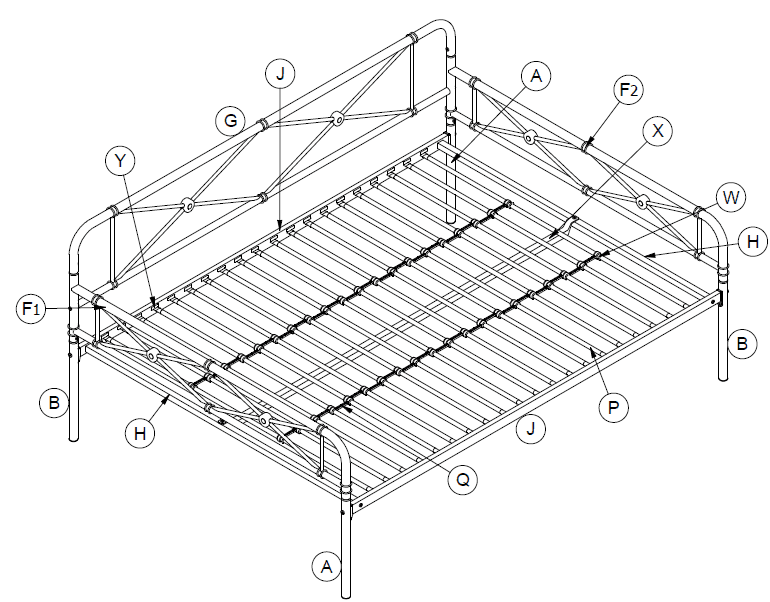
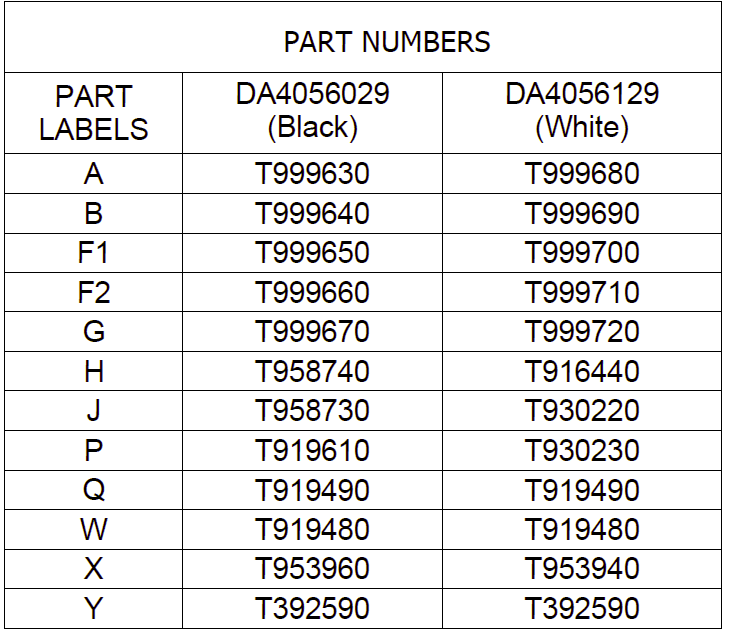
PARTS LIST
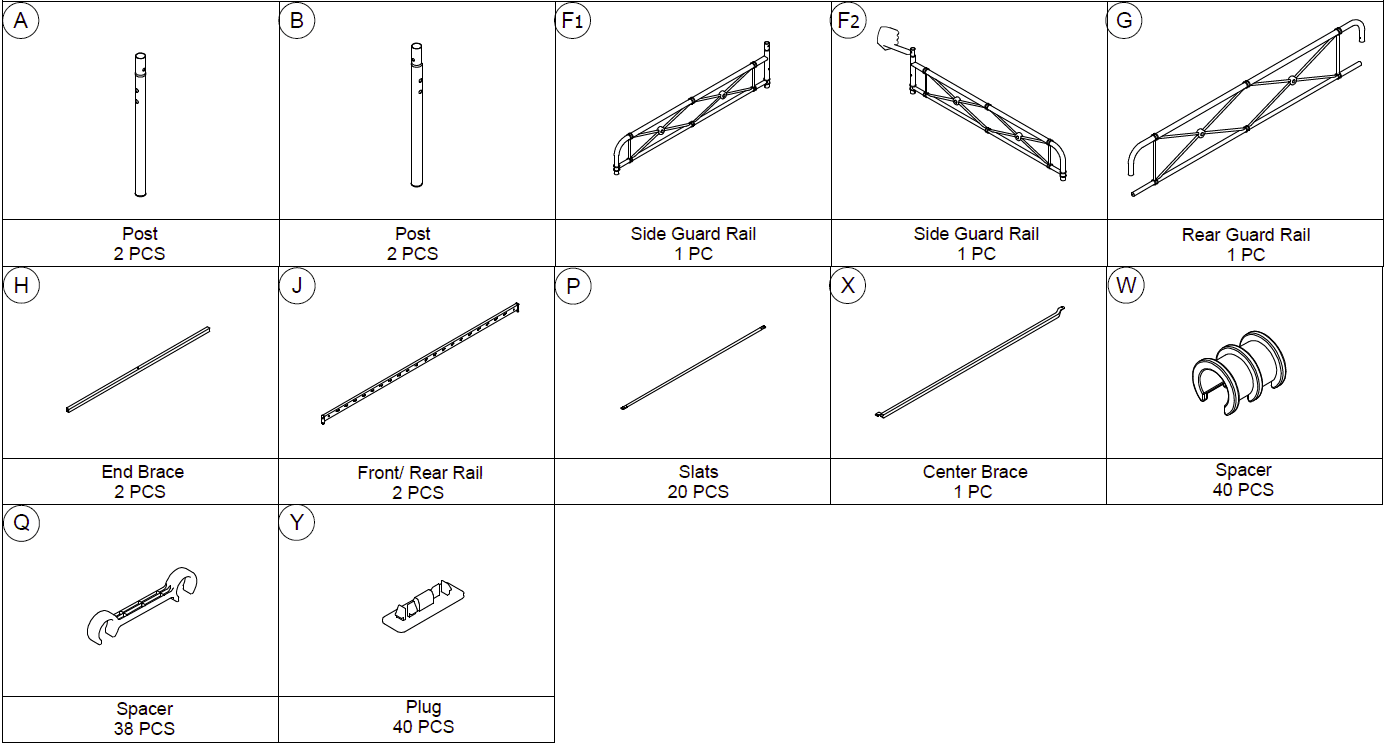
- Each part has unique part number. Please reference the appropriate part number when contacting customer service for replacement parts.
- Before throwing any packaging, please verify all contents and make sure you have received all the parts listed above

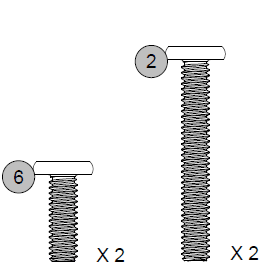
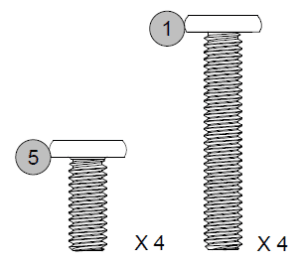
HARDWARE LIST
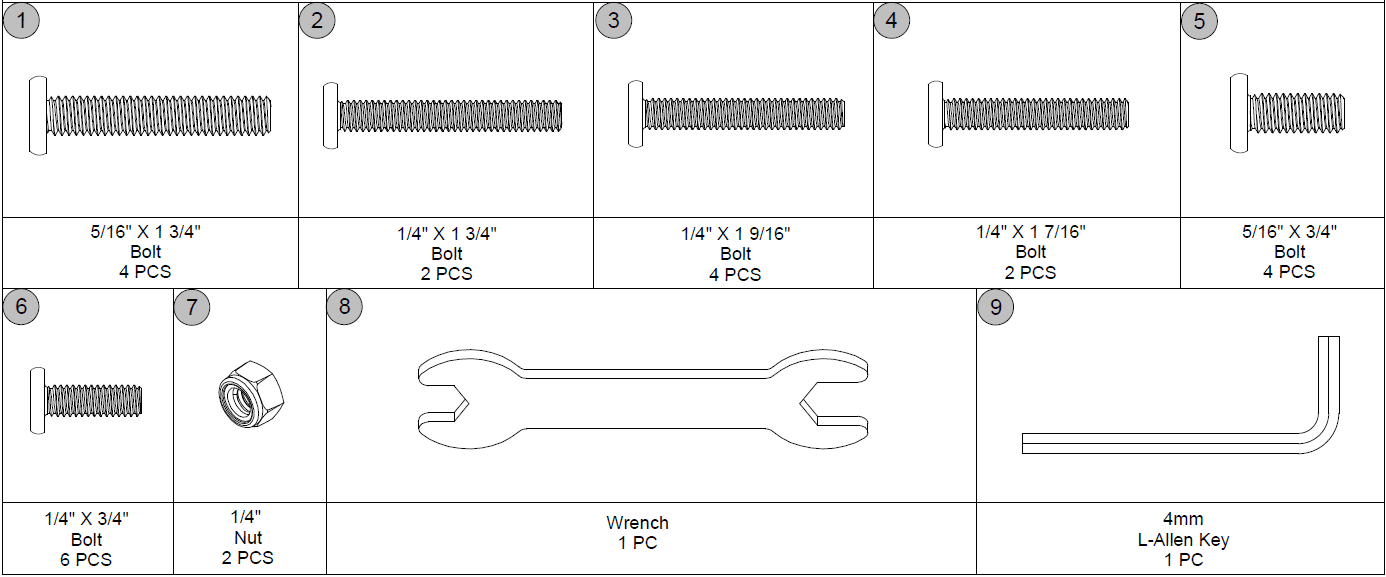
- Please do not completely tighten all the hardware, until the entire assembly is complete, unless otherwise indicated in the step-by-step instructions.
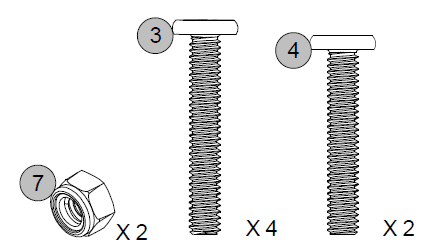
- The screw(s), bolt(s) to be used at each step are shown in actual size in the lower right corner of the page.
Step 1
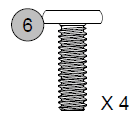
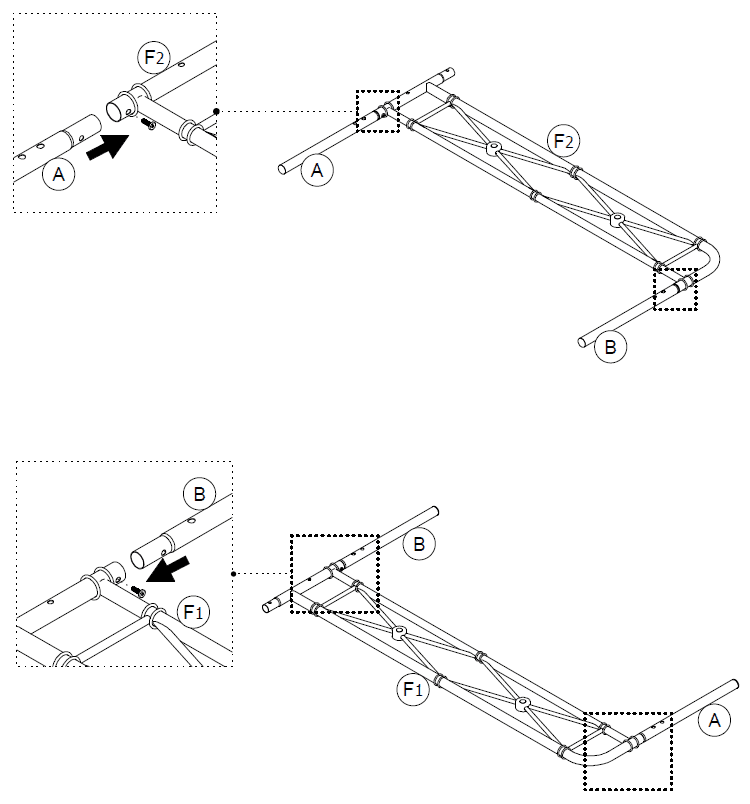
- Insert A and B into F1 with 6
- Insert A and B into F2 with 6


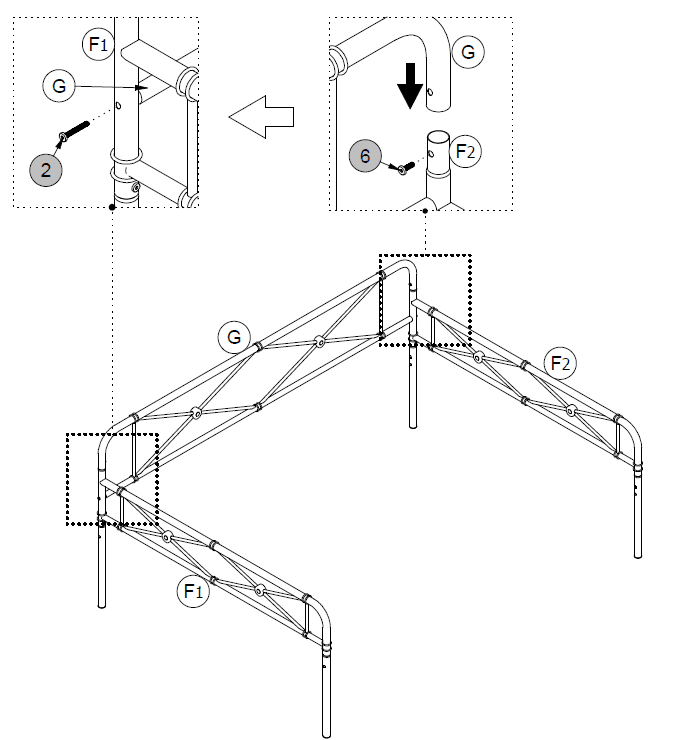
Step 2
- Attach G to F1 and F2 with 2 and 6.


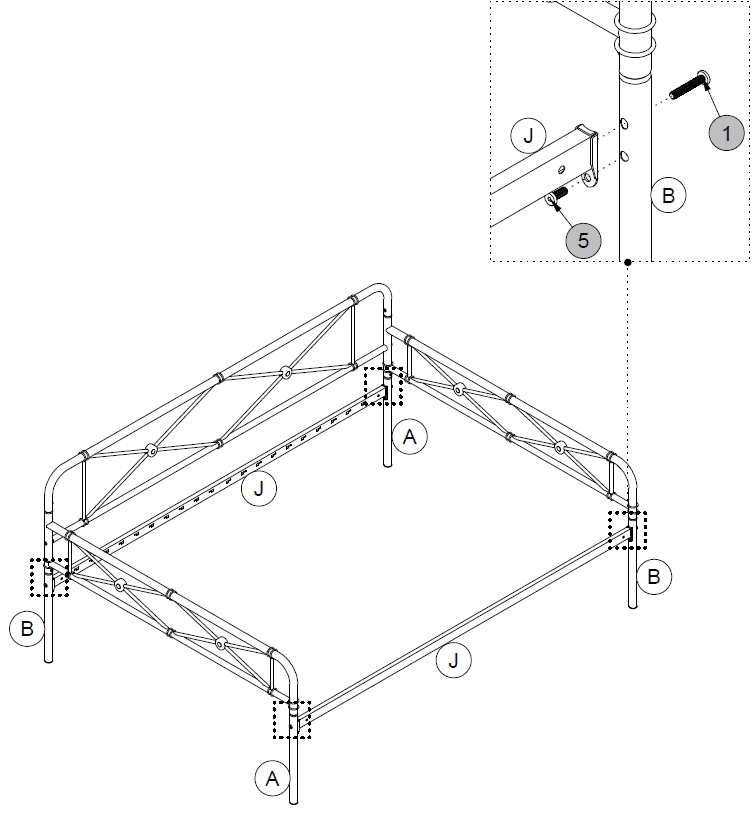
Step 3
- Attach J x 2 to A x 2, B x 2 with 1 and 2


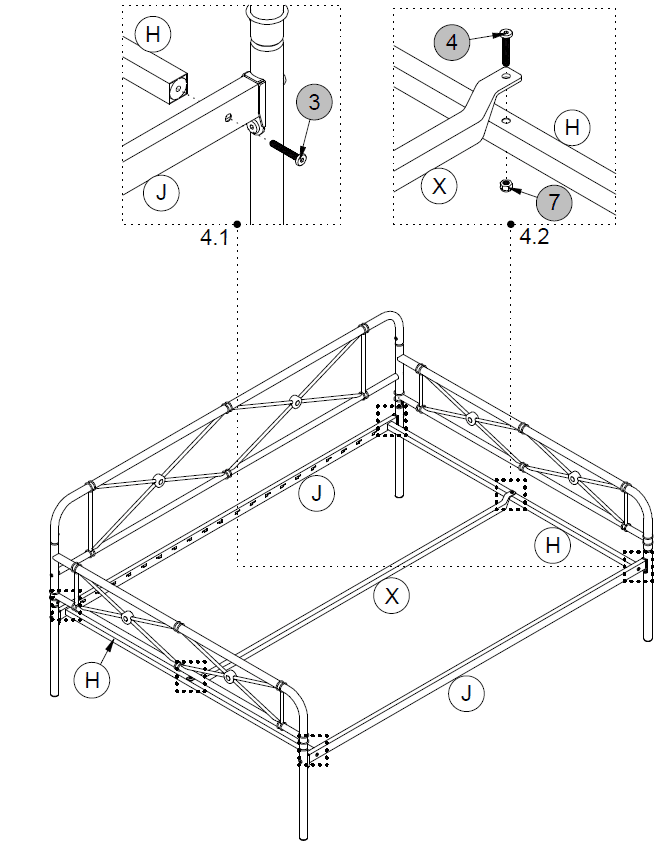
Step 4
- 4.1 Attach H X 2 to J X 2 with 3
4.2 Attach X to H X 2 with 4 and 7

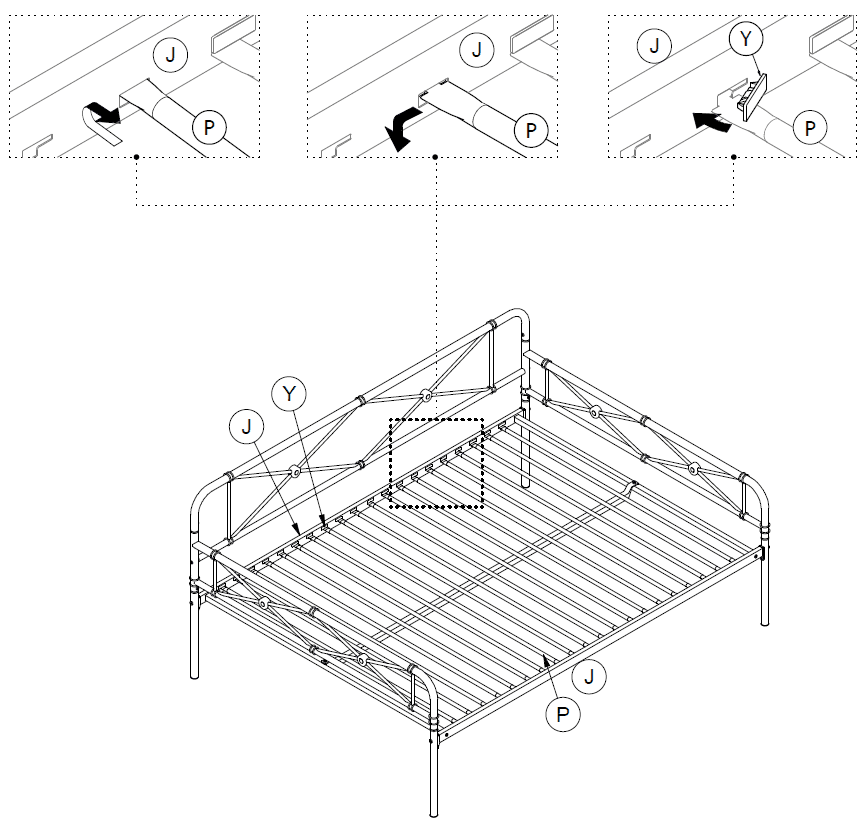
Step 5
- Insert P into J X 2 as illustrated, then lock P into place with Y.

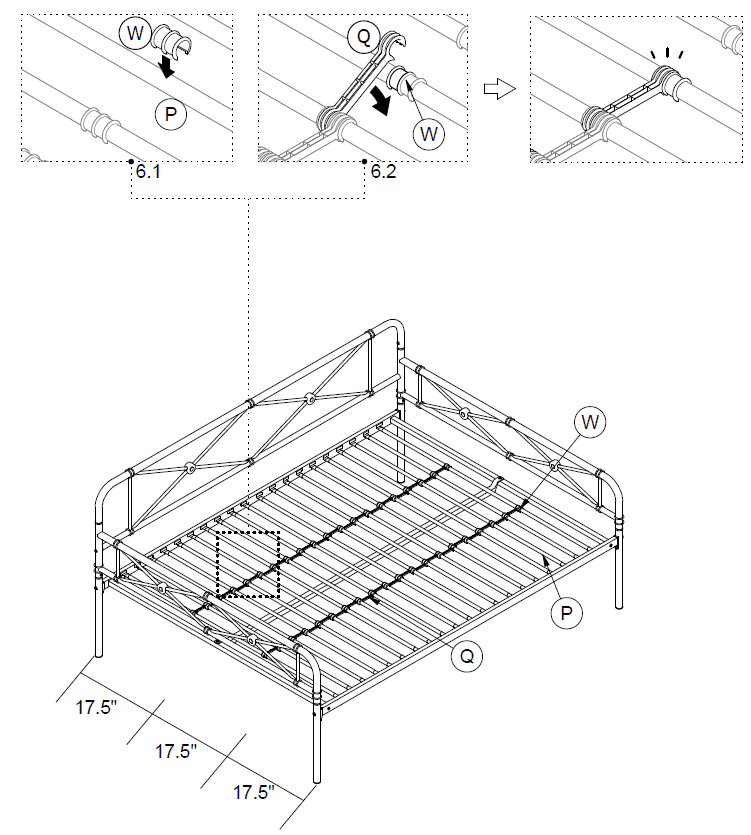
Step 6
- 6.1 Press W onto P as illustrated.
- 6.2 Attach Q to W alternating left and right as illustrated.
- For better performance, attach the Slat Spacers Q at equal spaces. (Approximately= 17. 5 inches or 445 mm)

- CAUTION: This unit is intended for use only with the products and/or maximum weights indicated. Use with other products and/or products heavier than the maximum weights indicated may result in instability or cause possible injury

Helpful Hints
- Move your new furniture carefully, with two people lifting and carrying the unit to its new location.
- Your furniture can be disassembled and reassembled to move.
- Clean the product with a soft damp cloth. DO NOT use harsh chemicals or abrasive cleaners.
- Some parts have been pre-assembled for this item. They are illustrated on this page and available for replacement.
- Check bolts and nuts periodically and tighten if necessary.
For more manuals by Dorel Home, visit ManualsLibraryy
Dorel Home Products DA4056029 Metal Daybed-FAQs
How do I assemble the Dorel Home Products DA4056029 Metal Daybed?
1. Begin by attaching the side rails to the back frame using the provided screws and bolts.
2. Secure the legs to the base frame.
3. Follow the step-by-step instructions to complete the assembly, ensuring each part is tightly secured.
What tools are needed to assemble the daybed?
The assembly requires a Phillips screwdriver and a wrench, which are typically included in the packaging. You may also need an additional pair of hands to help with assembly.
How do I clean the metal frame of the daybed?
1. Wipe the metal frame with a damp cloth to remove dust and debris.
2. For stubborn dirt, use a mild soap solution and gently scrub the surface.
3. Avoid using abrasive cleaners that could scratch the metal finish.
How do I attach the slats to the metal daybed frame?
1. Lay out the slats evenly across the frame, ensuring they align with the designated slots.
2. Secure each slat with the provided screws or clips, following the manual’s instructions.
What is the weight capacity of the Dorel metal daybed?
The Dorel Home Products DA4056029 Metal Daybed typically supports up to 300 pounds for a twin-sized mattress. For detailed weight capacity information, refer to the manual.
Can I use the daybed as a sofa during the day?
Yes, the daybed is designed to function as both a bed and a seating area. Simply add cushions or pillows for a comfortable seating arrangement.
How do I make the daybed into a full-sized bed?
For a full-sized bed, ensure that you have a mattress that fits the frame. You can use a mattress up to the size recommended in the manual (usually a twin-size mattress).
How do I maintain the metal daybed?
1. Periodically check and tighten any screws or bolts to ensure stability.
2. Keep the frame clean and dry to prevent rusting.
3. Rotate the mattress regularly for even wear.
Can I use the daybed outdoors?
The metal daybed is designed for indoor use only. Exposure to outdoor elements can cause damage to the frame and finish.
How do I disassemble the daybed?
1. Reverse the assembly process by removing the screws and bolts securing the frame and slats.
2. Carefully take apart the frame and store the pieces for future use or relocation.

