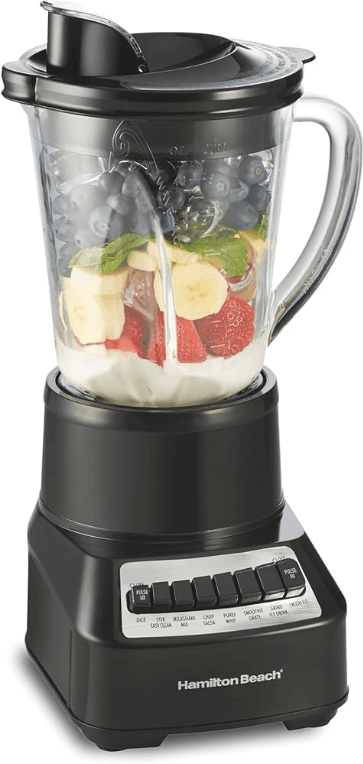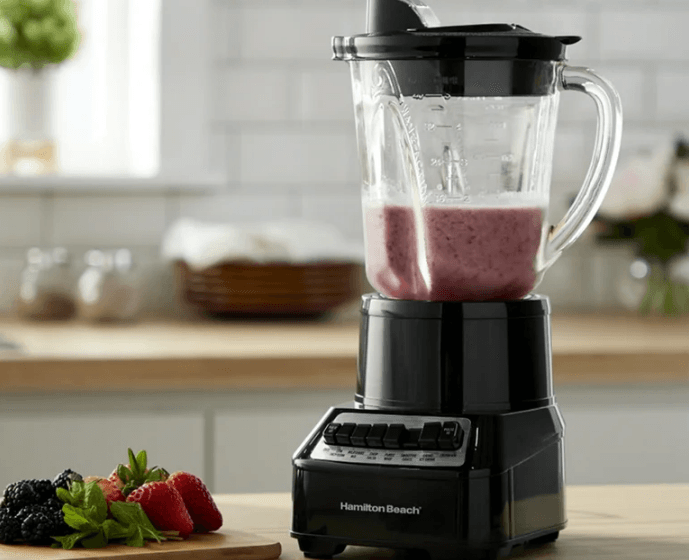
Hamilton Beach Wave Action Blender

IMPORTANT SAFEGUARDS
When using electrical appliances, basic safety precautions should always be followed to
reduce the risk of fire, electric shock, and/or injury to persons, including the following:
- Read all instructions.
- This appliance is not intended for use by persons with reduced physical, sensory, or mental capabilities, or a lack of experience and knowledge, unless they are closely
supervised and instructed concerning the use of the appliance by a person responsible
for their safety. - This appliance shall not be used by children. Keep the appliance and its cord out of reach of children.
- Close supervision is necessary when any appliance is used near children. Children
should be supervised to ensure that they do not play with the appliance. - To protect against the risk of electrical shock, do not put the cord, plug, base, or motor in
water or other liquid. - Turn the appliance OFF, then unplug from the outlet when not in use, before putting on or taking off parts, and before cleaning. To unplug, grasp the plug and pull from the outlet. Never pull from the power cord.
- Avoid any contact with moving parts.
- Do not operate any appliance with a damaged supply cord or plug, or after the appliance malfunctions, or has been dropped or damaged in any manner. Supply cord replacement and repairs must be conducted by the manufacturer, its service agent, or similarly qualified persons in order to avoid a hazard. Call the provided customer service number for information on examination, repair, or adjustment.
- The use of attachments, including canning jars, is not recommended or sold by the AnAn
appliance manufacturer may cause a risk of injury to persons. - Do not use outdoors.
- Do not let the cord hang over the edge of the table or counter, or touch hot surfaces, including.
The stove. - Do not place on or near a hot gas or electric burner or in a heated oven.
- Keep hands and utensils out of the jar and away from the cutting blade while blending or chopping food to reduce the risk of severe personal injury and/ or damage to the blender or available attachments (attachments may not be provided with the blender). A rubber spatula may be used, but it must be used only when the blender is not running.
- Blades are sharp; handle carefully, especially when assembling, disassembling, or cleaning inside the blender jar.
- Do not use a broken, chipped, or cracked blender jar.
- Do not use broken, cracked, or loose cutting blades.
- Always operate the blender with the lid in place.
- Ensure the cutting blade assembly is tight and secure to the jar. Injury can result from moving
blades accidentally becoming exposed. - Check that the appliance is OFF before plugging the cord into the wall outlet. To disconnect, turn the control to OFF, then remove the plug from the wall outlet. To
unplug, grasp the plug and pull from the outlet. Never pull from the power cord. - Do not use the appliance for anything other than its intended purpose.
- Do not place the blender jar in the freezer filled with food or liquid.
- Electronic push button control (Model 58181): Flashing light indicates ready to
operate. Avoid any contact with blades or movable parts. - Do not blend hot liquids in a personal jar.
- Be careful if hot liquid is poured into the blender container, as it can be ejected
out of the appliance due to a sudden steaming. - When blending hot liquids, remove the fillercap of the two-piece lid or open the vent opening
of a lid with a mess-free spout, and close any lid openings along the edge intended for
pouring. To prevent possible burns: Do not exceed the 3-cup (710-ml) level. Hot
liquids may push off the lid during blending; therefore, with the protection of an oven
mitt or thick towel, place one hand on top of the lid, keep exposed skin away from
The lid, and start blending at the lowest speed. - CAUTION! To avoid a hazard due to inadvertent resetting of the thermal cutout, this appliance must not be supplied through an external switching device.
Such as a timer, or connected to a circuit that is regularly switched on and off by the utility. - To reduce the risk of injury, never place the cutting blade assembly on the base without a
blender jar or a personal jar attached. - If the jar should twist or rotate when the motor is switched ON (I), switch OFF immediately and tighten the jar in the collar or on the blender base.
- Do not leave the blender unattended while it is operating. SAVE THESE INSTRUCTIONS
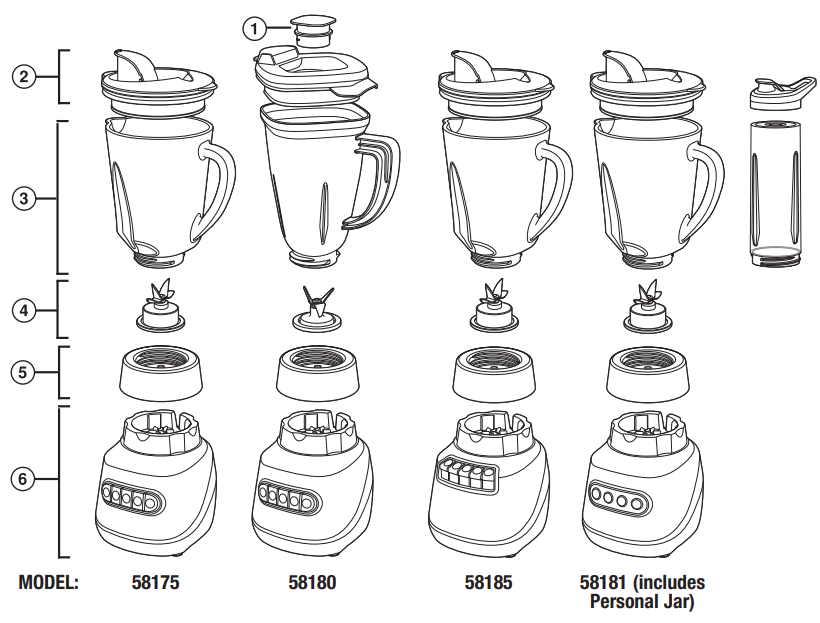
Parts and features

- Ingredient Measuring Cap (58180 only)
- Lid
- Blender Jar
- Cutting Blade Assembly
- Collar (same for all models)
- Base
NOT SHOWN: Cord Storage (back of Base)
CONTROL PANELS

How to use
IMPORTANT: Your Blender Jar and Cutting Blade Assembly are subject to wear during normal use. Always inspect the Blender Jar for nicks, chips, or cracks. Always inspect
Cutting Blade Assembly for broken, cracked, or loose blades. If Blender Jar or CCuttingTheThe
Blade Assembly is damaged; do not use. Call our customer service number to obtain
replacement parts.
- Make sure Blender is unplugged. Place the Base on a clean, dry surface to keep foreign particles from being pulled up into the motor during operation.
- Place the Cutting Blade Assembly, blade side up, through the opening in the Blender Jar before twisting the collar onto the bottom of the jar. Place the Blender Jar on the Base.
- Add ingredients to the Jar. Plug into the outlet.
- Place the Lid onto the Blender Jar. Push the desired function button. Blender speed increases
As buttons are pushed left to right. When using the PULSE button, Blender will operate as long as the button is pressed. The remaining speed buttons will run Blender until the OFF button is pressed. IMPORTANT: Do not operate your Blender continuously for long periods exceeding 3 minutes. If you start to smell a burning odor, stop immediately and remove the Blender Jar. Start and run the Blender— Base ONLY with NO Blender Jar—on the highest speed for 2 minutes. When trying similar recipes in the future, reduce the total amount of ingredients. - Always place one hand on the Lid during operation. WARNING: Burn Hazard. When blending hot liquids, remove the filler cap of the two-piece Lid or open the vent opening of the Lid with a mess-free spout, and close any Lid openings along the edge intended for pouring. Hot liquids may push the Lid off the Blender Jar during blending. To prevent possible burns: Do not fill the Blender Jar beyond the 3-cup (710-ml) level. With the protection of an oven mitt or thick towel, place one hand on top of the lid. Keep exposed skin away from the Lid. Start blending at the lowest speed.
- ALWAYS turn Blender OFF and wait until the blades have stopped rotating before
Removing the jar. - To remove the Blender Jar after blending is complete, lift the Blender Jar straight up.
- NEVER replace the Blender Jar onto the unit while the motor is running
Using Personal Jar
- Carefully place the Cutting Blade Assembly and Collar onto the Personal Jar. Ingredients for Personal Jar.
- Turn the Personal Jar upside down, shake to mix ingredients, and place onto the Base.
- Plug in the unit. Hold the Personal Jar in place while blending. Press ON (I) and PULSE
to blend 15 to 30 seconds or until smooth. Always operate on a countertop or other supporting surface. - Unplug from the electrical outlet. Hold the Personal Jar and lift straight up to remove.
- Turn bottom up; remove the Collar and Cutting Blade Assembly from the Personal Jar. Hand-tighten the Drinking Lid onto the Personal Jar.
Blending Tips for the 20-oz (591 ml) Personal Jar
- If the blending action does not start, stops during blending, or ingredients stick to
the sides of the Personal Jar, turn the Blender OFF. Remove Personal Jar, shake contents, and return to blending. - For best performance in the 20-oz (591 ml) Personal Jar, the minimum amount of liquid needed per recipe is 3/4 cup (6 ounces [177 ml]).
- When filling the Personal Jar, place frozen ingredients or ice into the Personal Jar first.
- When turned upside down to blend, the frozen items will be on top.
- Do not chop or process hard foods such as cheese, crackers, or meat.
- Avoid bumping or dropping the Blender.
- Do not blend hot liquids in the Personal Jar.
- Do not fill the Personal Jar above the MAX fill line.
Care and cleaning
WARNING: Electrical Shock Hazard. To protect against the risk of electrical shock, do not put the cord, plug, Base, or motor in water or other liquids.
- Unplug the Blender from the electrical outlet.
- Wipe the Base, Control Panel, and cord with a damp cloth or sponge. To remove
stubborn spots, use a mild, nonabrasive cleanser. - Blender Jar, Lid, Cutting Blade Assembly, and Collar are dishwasher-safe. The lid
should be placed in the top rack only. DO NOT use the “SANI” setting when
washing in the dishwasher. “SANI” cycle temperatures could damage your product. Parts may also be washed with hot, soapy water. Care should be taken when handling the Cutting Blade Assembly, as it is very sharp. Rinse and dry thoroughly. Do not soak. - Store the Blender with the Lid ajar to prevent container odor.
How to use the Easy Clean function
To Easy Clean, pour 2 cups (473 ml) warm water into the jar and add one drop of liquid dishwashing detergent. Run the Blender on EASY CLEAN for 10 seconds. Discard soapy water. Rinse with clean water. This function is not a substitute for regular cleaning as instructed in “Care and cleaning.”
FOR MORE MANUALS BY HAMILTON BEACH, VISIT MANUALSLIBRARYY
Hamilton Beach Wave ActionBlender-FAQs
Can I crush ice with my Hamilton Beach blender?
Yes, you can. The blender handles ice better when a small amount of liquid is added, which helps achieve smoother results.
What is the Wave~Action system in this blender?
The patented Wave~Action System continuously pulls ingredients down into the blades, ensuring a smoother and more consistent blend—perfect for smoothies, shakes, and icy drinks.
Can I blend hot liquids in this blender?
It’s not recommended to blend very hot liquids in standard blender jars. High heat may cause the container to warp or leak and could be dangerous due to steam pressure.
How do I clean my Hamilton Beach blender?
Wipe the base and cord with a damp cloth. To clean the jar, unscrew the retaining ring and remove the blade assembly. Wash each part with mild soap and water.
Is it safe to blend warm liquids?
Yes, but do so carefully. Keep the measuring cap on to allow steam to vent and always start blending on a low or pulse setting. Let hot liquids cool slightly before blending if possible.
Why isn’t my blender blending properly?
The blades may be dull or damaged. Check the blade assembly and replace it if necessary for optimal performance.
What does a blender actually do?
A blender uses sharp rotating blades to break down solid ingredients into smooth liquids or purees. It’s a versatile tool great for sauces, smoothies, and more.
How can I blend without a blender?
You can finely chop and soften ingredients, then mash them with a spoon, fork, or use a mortar and pestle. A rolling pin over a sealed bag can also help create a paste.

