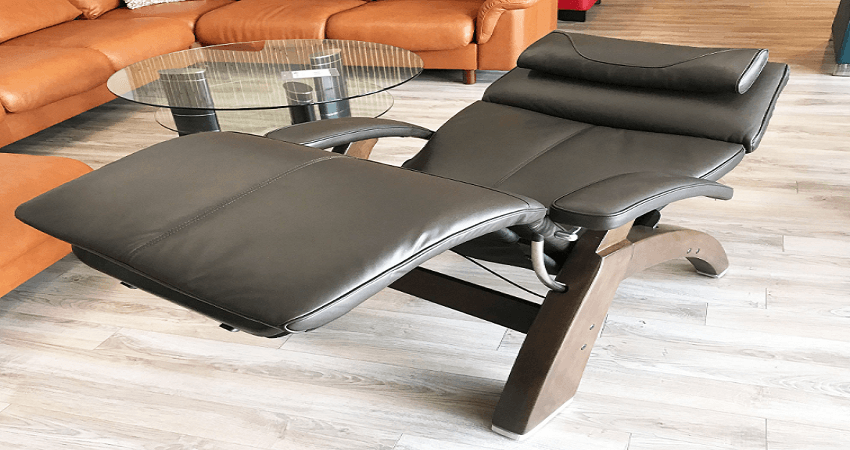
Human Touch Perfect Chair PC-420
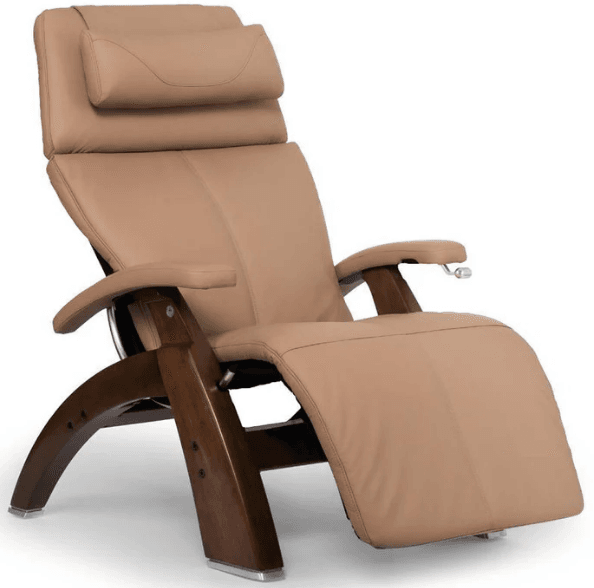
UNPACK THE BOXES
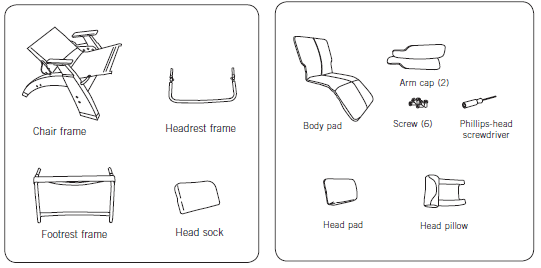
INSTALLING THE FOOTREST FRAME
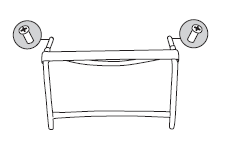
- Remove the footrest frame screws.
Using the Phillips-head screwdriver (provided), remove the two screws from the footrest frame. Retain them for use in step 3.
- Slide the footrest frame onto the chair frame.
Slide the two ends of the footrest frame into the holes in the front of the chair frame.
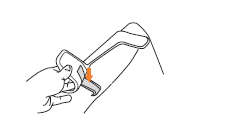
- Replace the footrest frame screws.
Using a Phillips-head screwdriver and the two provided screw
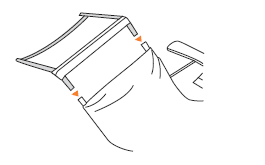
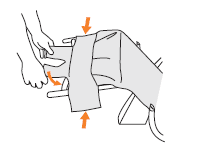
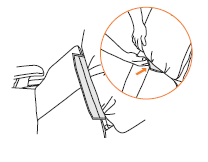
- Attach the canvas to the footrest frame.
Using both hands, gently pull the seat canvas forward just to the top of the footrest frame, then secure the two flaps located underneath the canvas to the footrest frame.
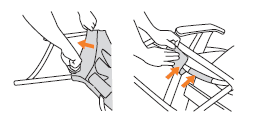
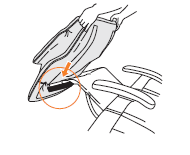
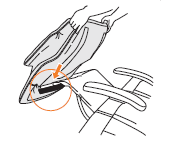
- Finish securing the canvas to the frame.
Using both hands, continue to pull the seat canvas all the way forward to cover the footrest frame, then secure the two front and two side flaps, using the hook and loop fasteners.
ATTACH THE BODY PAD
- Slide the body pad onto the chair frame.
Slide the body pad onto the lower part of the chair frame, making sure that the frame slides into the fabric pocket located on the bottom side of the pad.
- Secure the body pad.
Smooth the body pad into place, from the footrest toward the backrest. The pad is automatically secured using the hook and loop fasteners.
ATTACH THE HEADREST FRAME
- Raise the chair to an upright position.
For your convenience, and to better position the chair for the remaining assembly, use the recline lever to adjust the chair to an upright position. - Remove the headrest frame screws.
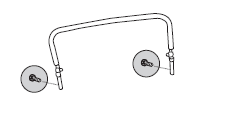
Using the Phillips-head screwdriver (provided), remove the two screws from the headrest frame. Retain them for use in step 4.
- Insert the headrest frame into the backrest frame.
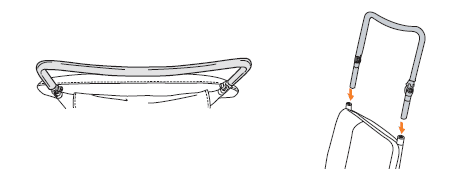
With the arc of the headrest frame pointing toward the back of the chair, slide the two ends of the headrest frame into the open tube ends at the top of the backrest frame.
- Replace the headrest frame screws.
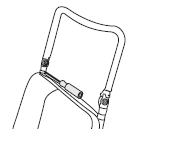
Using a Phillips-head screwdriver, replace the two headrest frame screws, securing the headrest frame to the backrest frame.
ATTACH THE HEAD PAD
- Slide the head sock over the headrest frame.
Slide the head sock over the headrest frame, as far as it will go. The padded side of the head sock should face the back of the chair.
- Slide the head pad over the head frame.
Slide the head pad over the head frame, ensuring that the frame slides into the fabric pocket located on the bottom side of the pad. Pull the head pad down as far as it will go.
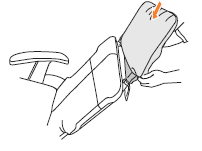
- Tuck in the body pad flap.
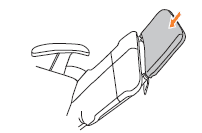
From the front of the chair, tuck the flap on the top of the body pad up into the head pad and smooth it flat. The flap is automatically secured to the pad, using the hook and loop fasteners.
- Attach the head pillow.
Attach the head pillow straps to the head pad straps using the hook and loop fasteners. Adjust the head pillow height for maximum comfort.
ATTACH THE ARM CAPS
Remove the three screws taped to the underside of the right-hand arm cap, then place the right-hand arm cap on top of the armrest. From the underside of the armrest, secure the arm cap using the three screws. Repeat these steps to attach the left-hand arm cap.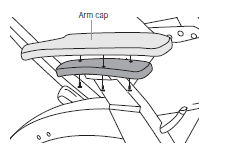
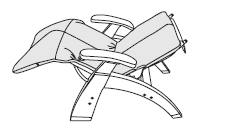
Adjust the recline angle
To recline, gently pull up on the recline lever, lean back on the backrest to adjust it to the desired angle, then release the lever. To incline to a more upright position, gently pull up on the recline lever, then pull up on the armrests with your hands while applying slight downward pressure with your elbows, until the backrest inclines to the desired position. Release the recline lever.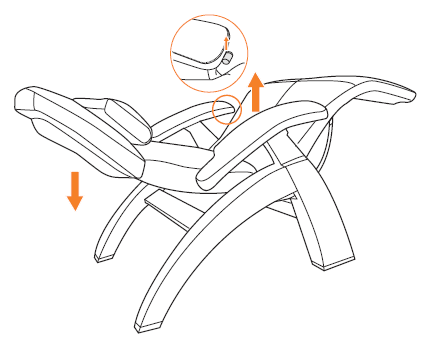
Adjust the headrest
While seated, reach up with both hands and grasp both sides of the headrest. You will feel the rigid frame beneath the soft head pad. Grasping the rigid frame, tilt the headrest forward or backward for maximum comfort. The headrest remains in this position until you adjust it again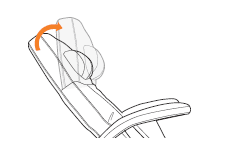
Adjusting lumbar support
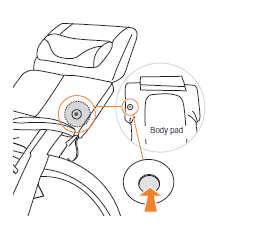
- To decrease lumbar support, sit in the chair, lean against the backrest, then push the ball valve on the back of the body pad. When the lumbar support reaches the desired thickness, release the valve.
- To increase lumbar support, lean forward to remove pressure from the pad, then push the ball valve inward. When the lumbar support reaches the desired thickness, release the valve. It takes approximately ten seconds for the lumbar support to fully inflate.
LUMBAR SUPPORT PERFORMANCE NOTES
- You must remove all body weight from the pad when increasing lumbar support.
- If the lumbar support has been compressed for a long period of time, it may take up to one minute to restore it to its full thickness.
- The colder the pad is, the longer it takes to react to lumbar support changes.
- Should the ball valve leak during use, push the black ball in and, with a cotton swab, apply a small amount of Vaseline inside the valve. NOTE: It is normal for the lumbar support to return to a fully expanded state over time.
- Keep sharp objects away from the pad. The pad contains a precision air-tight bladder which that will not function properly if punctured.
Maintenance and Repair
- The mechanics of this product are specially designed and constructed to be maintenance free. No periodic lubrication or servicing is required.
- Your chair should only be serviced by an authorized service center.
Use and Storage Environment
- When not in use for a long period of time, we recommend that the chair be covered and the unit be placed in an environment free of dust and moisture.
- Do not store near heat or open flame.
- Do not leave this product exposed to direct sunlight for long periods of time. This may cause fading or damage.
- Do not use or store in extreme temperatures; product stored in cold temperatures may require 48 hours at room temperature to function properly.
- Product should be used and stored in an environment with non-condensing humidity ranging from 10 to 80%; excessive humidity will damage the mechanics.
For more manuals by Human Touch visit, ManualsLibraryy
Human Touch Perfect Chair PC-420-FAQs
How long do Human Touch massage chairs last?
With proper care and maintenance, a Human Touch massage chair can last between 10 and 15 years.
What are the disadvantages of a massage chair?
Massage chairs can be quite expensive, which may discourage some buyers. They also tend to be bulky and require dedicated space in the home.
How do you maintain a massage chair?
To maintain your massage chair, wipe it down with a soft cloth and vacuum any debris from crevices. Avoid harsh chemicals; instead, use a damp cloth with mild soap to spot clean and always dry it afterward.
How do I activate the recliner function?
To activate the recliner, press and hold the open button to extend the footrest. Continue holding it to recline the backrest. On some models, the headrest adjusts independently to support your head after the backrest is fully reclined.
Is it OK to sit in a massage chair every day?
While there are no specific limits on frequency, it is recommended to use a massage chair no more than three times a day. Following general massage guidelines, two to three sessions per week are typically suggested for optimal benefits.
Does a massage chair consume a lot of electricity?
Massage chairs use significantly less electricity than appliances like microwave ovens. However, models with more advanced features tend to consume more power than simpler models.
Can massage chairs be repaired?
Some repairs, like fixing loose screws or reattaching a tube, can be handled by the owner. For more complicated repairs, it’s recommended to consult a certified technician or the manufacturer for guidance.
What is the concept of a massage chair?
Massage chairs are designed to mimic the hand movements of a massage therapist using massage rollers and airbags to target different parts of the body. The first robotic massage chairs were introduced in 1954 by the Fujiryoki company.
Which is better: a manual or power recliner?
Power recliners offer more comfort and convenience with electric controls, though they tend to be more expensive. Manual recliners are simpler, more affordable, and ideal for those who prefer a straightforward setup.

