JLR Gear Smart Gear Wireless Weather Station
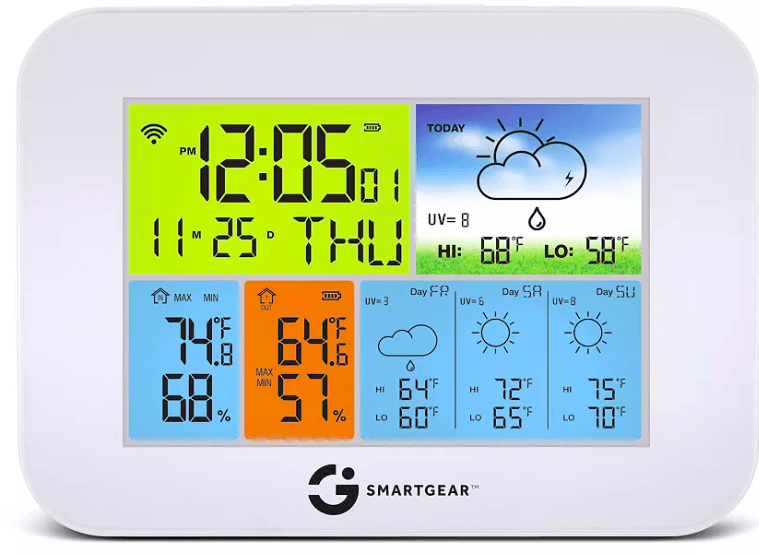
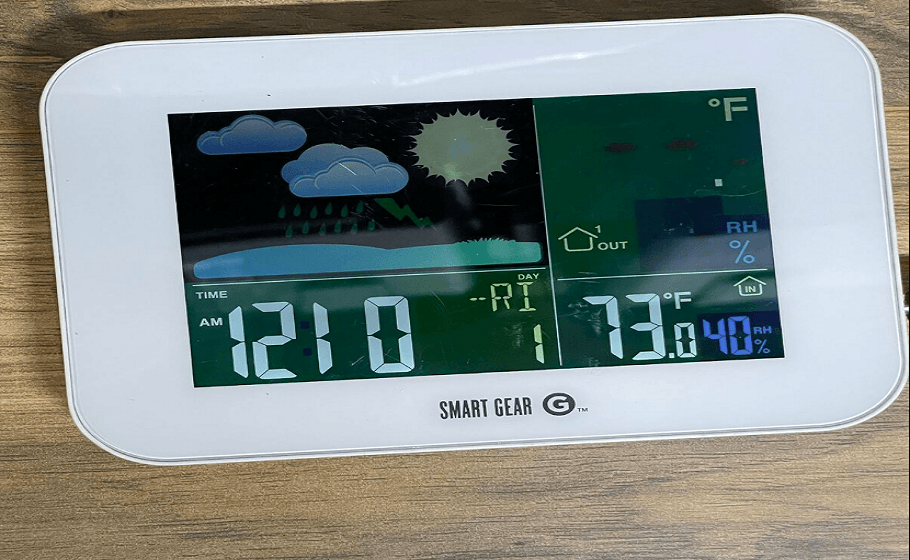
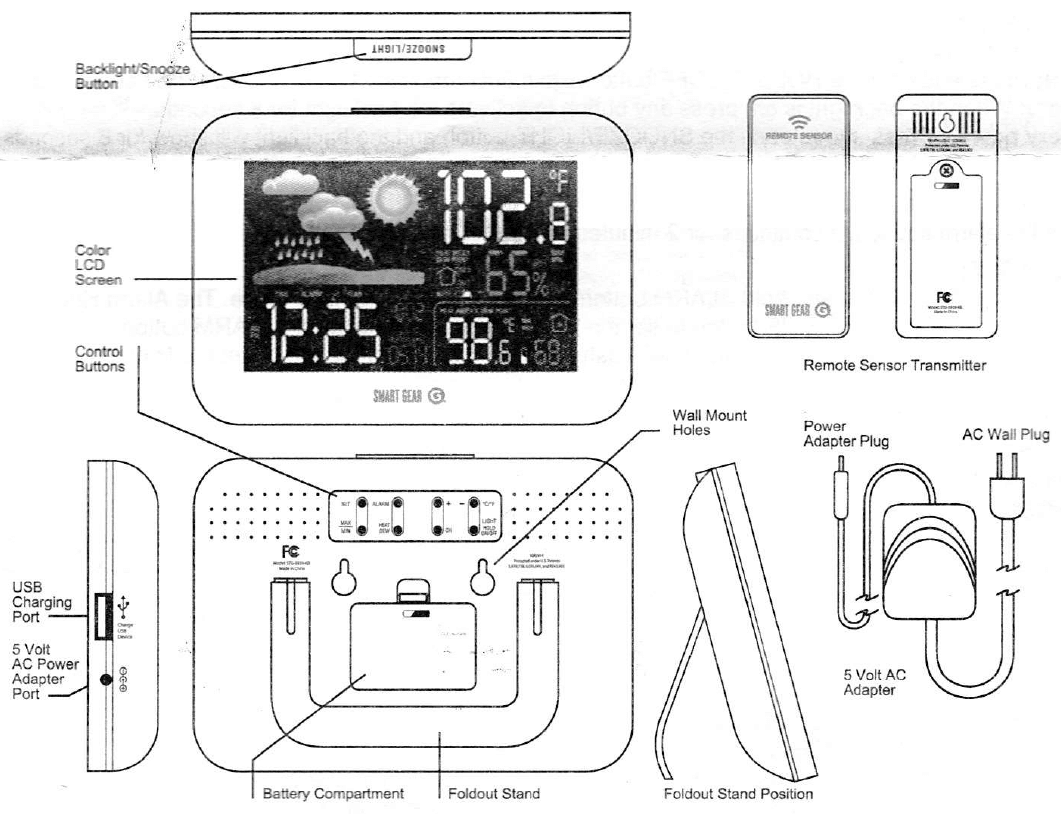
- The indoor/Outdoor Wireless Weather station features weather forecasts. indoor and outdoor temperature/humidity as well as heat index and dew point. on an easy-to-read display. Use the integrated LJSB charging port to charge your devices when the Weather Station is plugged into a power outlet.

BATTERY INSTALLATION
OPERATING INSTRUCTIONS
SETUP STEP-BY-STEP INSTRUCTIONS
- STEP 1
- OPTIONAL BATTERY OPERATION: insert 3 NEW AAA batteries (not included) following the instructions for battery installation. Observe the correct polarity (+ and -). The Wireless Weather Station will light up and show indoor temperature, humidity, and channel 1.
- STEP 2
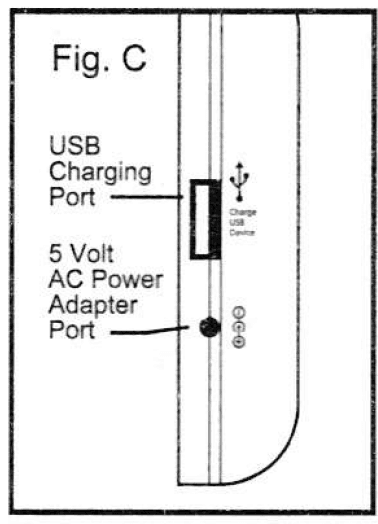
- Insert the S-volt a/c power adapter into the adapter port on the side of the Wireless Weather Station (Fig. C). Plug the a/c power adapter into a wall outlet for continuous backlight (ON/OFF), and dimmer feature. The backlight will illuminate for 8 seconds when using only battery power with a press/release of the SNOOZE/LIGHT button.
- STEP 3
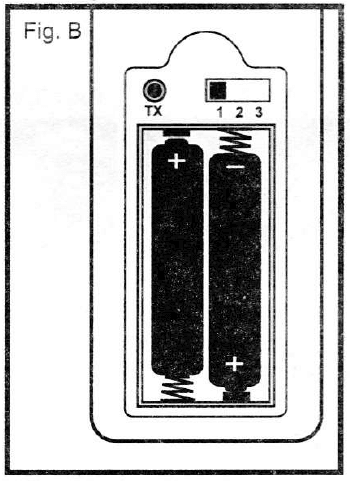
- Ensure that the transmitter is within 10 feet of the Weather Station. insert 2 NEW AAA 1.5V batteries (not included) into the Remote Sensor Transmitter. Observe the correct”polarity(+and-) see Fig.B.The TX switch is set to Channel ‘l by default, see Fig B. Confirm channel 1 is selected. Within 3 minutes the Weather Station will beep and then show readings in the outdoor temperature area on the Wireless Weather Station LCD.
- Note: Use Alkaline batteries (or Lithium for temperatures below -20″F/-28.8 “C).
- POSITIONING THE REMOTE SENSOR TRANSMITTER
- Once the Wireless Weather Station shows the outdoor temperature, place it and the transmitter in the desired locations and wait approximately 1 hour before permanently mounting the transmitter to ensure that there is proper reception. The transmitter should be mounted vertically, in a shaded, protected area,
at least 6 feet from the ground to avoid damage and ensure accurate readings. The transmitter is water resistant. not waterproof and should not be placed where it will become submerged in water or subject to standing water or snow
- WALL MOUNT
- Choose a shaded location (under an overhang) for the transmitter that is within the confirmed wireless reception range of the Weather Station for accuracy. install one mounting screw (not included) into a wall leaving approximately %of an inch (12.7mm) extended. Place the hanging hole (on the back of the
- transmitter) onto the mounting screw and gently slide the transmitter down to secure it.

BUTTON FUNCTIONS:
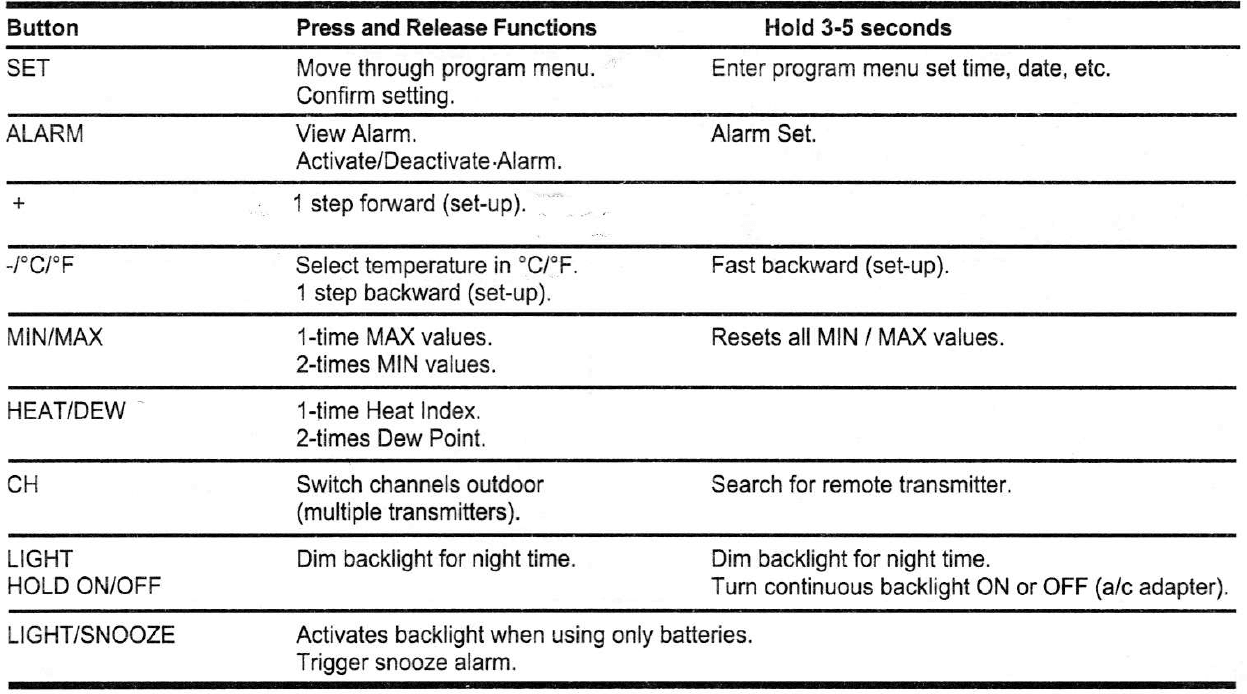
PROGMM MENU:
The SET button will move through the program menu. The + or J”C/”F button will change the value.
- 12124 HOUR TIME: 12H will flash. Press and release the + or J’CI” F button to select 24H.
- Press the SET button to confirm and move to the next item.
- HOUR: The hour will flash. Press and release the + or J”C/”F button to select the correct hour.
- Press the SET button to confirm and move to the next item.
- MINUTES: The minutes will flash.
- Press and release the + or 1’Cl’F button to select the correct minutes.
- Press the SET button to confirm and move to the next item.
- YEAR: The year will flash.
- Press and release the + or -/”C/”F button to select the correct year.
- Press the SET button to confirm and move to the next item.
- MONTH: The month will flash.
- Press and release the + or -l’Cl’F button to select the correct month.
- Press the SET button to confirm and move to the next item.
- DATE: The date will flash.
- Press and release the + or J”C/”F button to select the correct date.
- Press the SET button to confirm and exit the program menu.
ALARM SET:
- ALARM HOUR: Press and hold the ALARM button to enter alarm time setting mode. The Alarm Hour will flash. Use the + or J”C/’F button to set the Hour. Press and release the ALARM button.
- ALARM MINUTE: The Alarm Minutes will flash. Use the + or J’CI” F button to set the Minutes. Press and release the ALARM button to exit.
- ALARM ACTIVATION:
- Press and release the ALARM button once to show Alarm Time. . Press and release the ALARM button repeatedly to activate or deactivate the Alarm.
- SNOOZE:
- When the alarm sounds, press the SNOOZE button to trigger a snooze alarm for ’10 minutes. The snooze icon Zz will flash when the snooze feature is active. To stop the alarm for one day, press the ALARM button, while in snooze mode.
USB CHARGE PORT:
- The integrated USB charging port (on the side) will charge devices when the Wireless Weather Station is plugged into a power outlet. Note: This is a power output
(charging) port only. This port will not supply power to the Wireless Weather Station. Connect your existing USB charging cord for your external device to the USB charging port on the side of the wireless Weather Station to begin to charge. Charging times will vary. Note: Check that your device will charge with the USB cord it came with.
MIN/MAX TEMPERATURE/HUMIDITY DATA:
- The Wireless Weather Station shows daily minimum and maximum temperatures each day starting at midnight (12:00 AM). The station automatically resets the min/maximum temperatures at midnight (12:00 AM).
- View MAX data: Press and release the MIN/MAX button once to view maximum temperature and humidity values for indoor and outdoor data.
- View MIN data: Press and release the MIN/MAX button twice to view minimum temperature and humidity values for indoor and outdoor data.
- Reset MIN/MAX data: Hold the MIN/MAX button for 5 seconds to reset all min/max values.
- HEAT INDEX: Heat index combines the effects of heat (temperature) and humidity to determine how hot it feels to a human being. Note: Heat index will be the same number as the temperature until the temperature is above 80 degrees F (26.7’C).
- View Heat index: Press the HEAT/DEW button once and the Heat index will show instead of the ambient temperature.
- DEW POINT: The dew point is the saturation point of the air or the temperature to which the air has to be cooled in order to create condensation.
- Note: The Dew Point is generally lower than the temperature reading. View Dew Point: Press the HEAT/DEW button twice and Dew Point will show instead of the ambient temperature.
WEATHER FORECAST ICONS:
- The Wireless Weather Station predicts weather conditions for the next 12 hours based on the change of atmospheric pressure with 70-75% accuracy.
- Note: As weather conditions cannot be 100% correctly

- Note: As weather conditions cannot be 100% correctly
CARE AND MAINTENANCE:
- Do Not Mix Old and New Batteries.
- Do Not Mix Alkaline, Standard, Lithium or Rechargeable Batteries.
- Do not expose the Wireless Weather Station to extreme temperatures, vibration, or shock.
- Keep the Wireless Weather Station dry.
- Clean Wireless Weather Station with a soft damp clot
- Do not use solvents or scouring agents.
- The Wireless Weather Station is not a toy. Keep it out of reach of children.
- The Wireless Weather Station is not to be used for medical purposes or for public information but is designed for home use only.
- The specifications of this product may change without prior notice.
- improper use or unauthorized opening of housing will void the warranty.
- If the unit does not work properly, change the batteries and/or check the a/c cord connection
TROUBLESHOOTING

For more manuals by JLR Gear visit, ManualsLibraryy
JLR Gear Smart Gear Wireless Weather Station-FAQs
Why is my Smart Gear weather station not reading the outdoor temperature?
If the outdoor temperature is not displaying after 3 minutes or appears inaccurate, check if the batteries in the outdoor sensor are fresh and correctly installed.
Why is my weather station’s temperature sensor not working?
Try moving the sensor closer to the display unit or relocating it to reduce interference. Ensure the sensor is clean, dry, and protected from extreme weather conditions.
How do I set up Smart Gear?
Attach the device to an item like a purse or remote control, then download the app and create an account. The Smart Gear tracker helps you locate items easily and efficiently.
What does the TX button do on a weather station?
The TX button sends a transmission signal to the base unit. Use it if the remote sensor has lost communication with the display.
Why does my weather station keep losing signal?
Wireless signals can be affected by RF or EMI interference, distance, or physical barriers. Occasional signal loss is normal, but repeated dashes on the display for over 5 minutes indicate a complete signal loss.
What sensor measures the outside temperature?
The Ambient Air Temperature Sensor measures the outdoor temperature and is usually placed near the front bumper in vehicles. It helps automatic HVAC systems regulate interior temperature.
How do I pair my Smart Gear weather station?
1. Open the battery cover on the outdoor transmitter to access the TX button.
2. Press and hold the TX button for 3 seconds to send a signal.
3. On the weather station, press and hold the CH button for 3-5 seconds to search for the transmitter.
What is the TX button used for?
The TX button allows you to send a wireless transmission signal to sync the remote sensor with the base unit.
What is an RTD?
An RTD (Resistance Temperature Detector) is a sensor that measures temperature by changing its resistance as temperature fluctuates. RTDs provide accurate and repeatable temperature readings over time.

