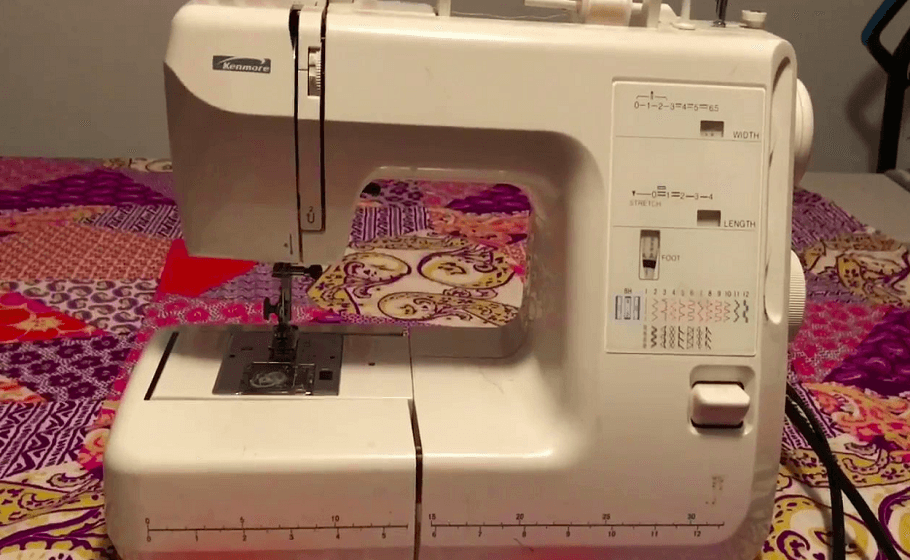
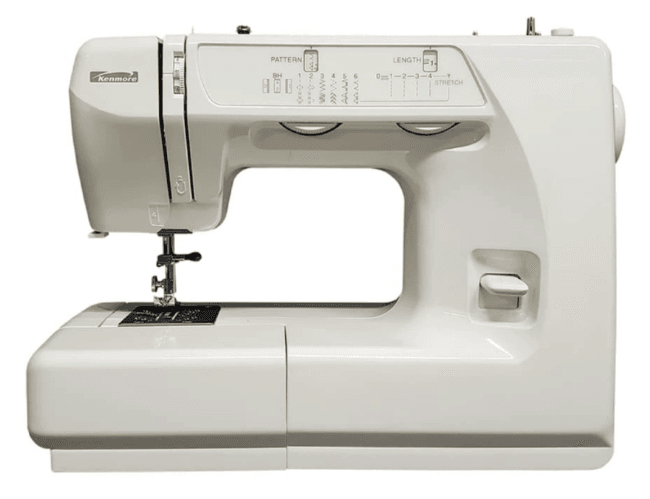
Kenmore 385 Sewing Machine
SECTION 1. KNOW YOUR MACHINE
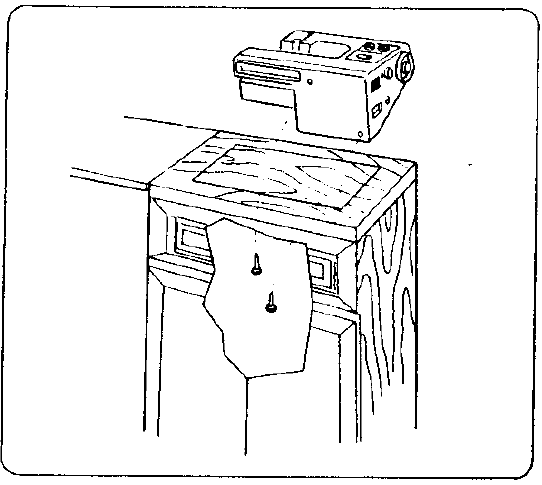
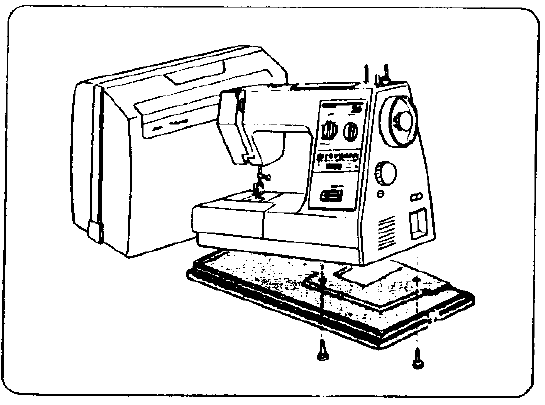
A Portable Case or Cabinet is Available
- A full line of sewing cabinets is available at your nearest Sears retail store or through our general catalog.
- Another option buy a Carrying Case then your Kenmore goes anywhere, can be stored anywhere


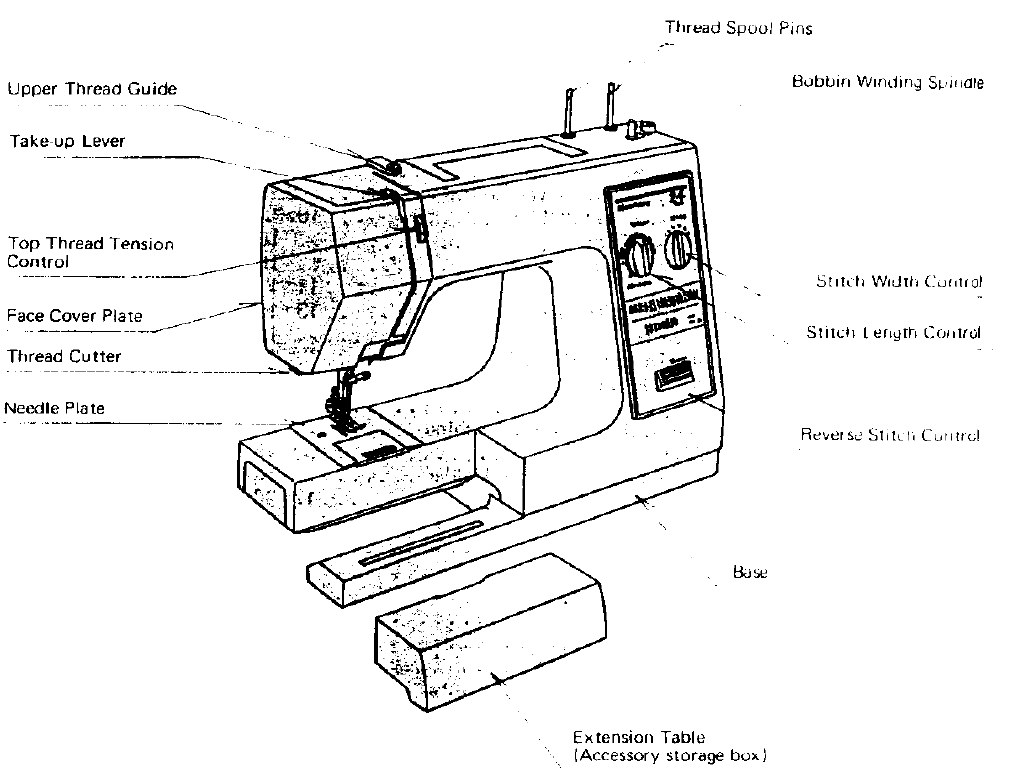
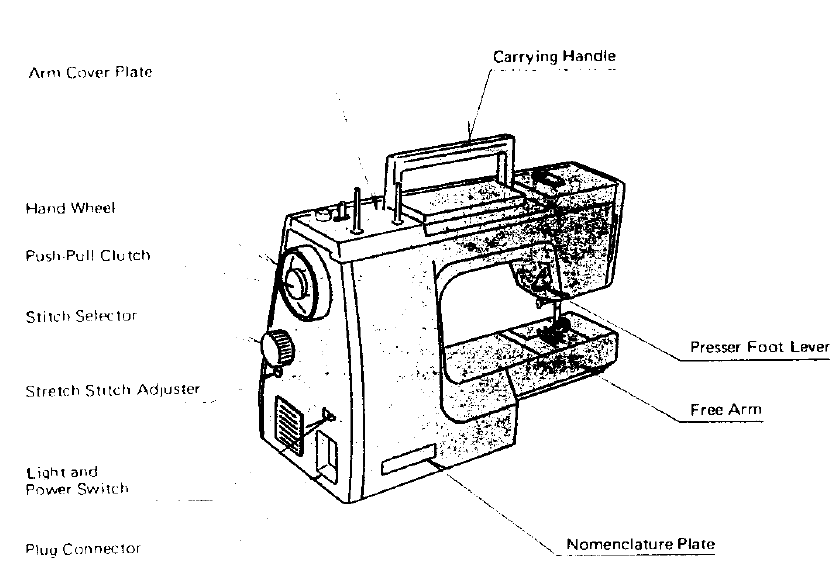
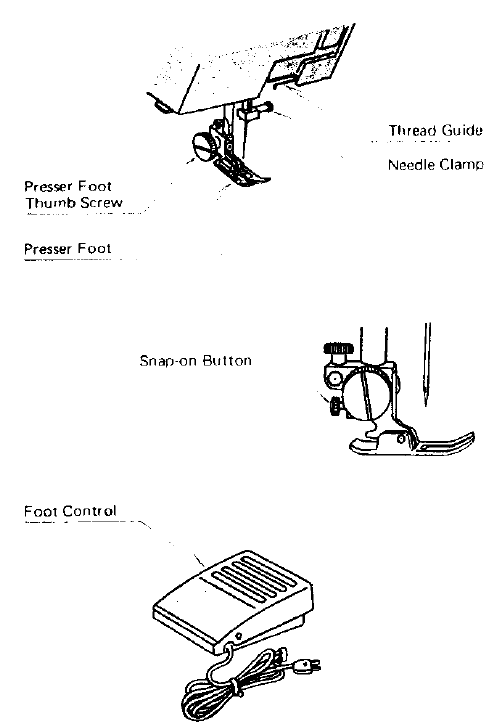
Locate and Identify the Parts
SECTION _2. PREPARE YOUR MACHINE FOR SEWING
Set Up the Machine
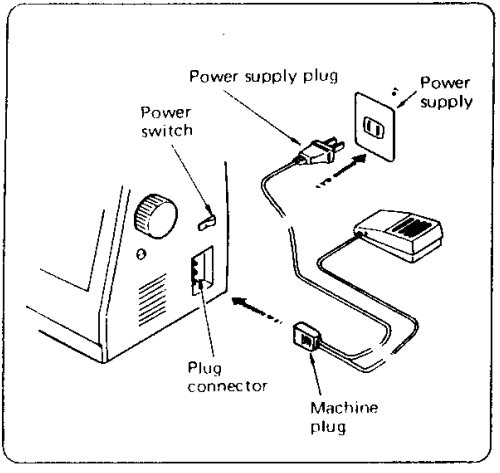
- Plug in the Machine and Switch on the Power

- NOTE:
- Before inserting the plug into your machine, be sure the power switch is OFF.
- Check your outlet to be sure it is a 110 to 120 Volt AC outlet,
- Insert the machine plug into the three-prong outlet, as shown. It will only fit one way,
- Insert the power supply plug into the outlet.
Adjust the Presser Foot Lever
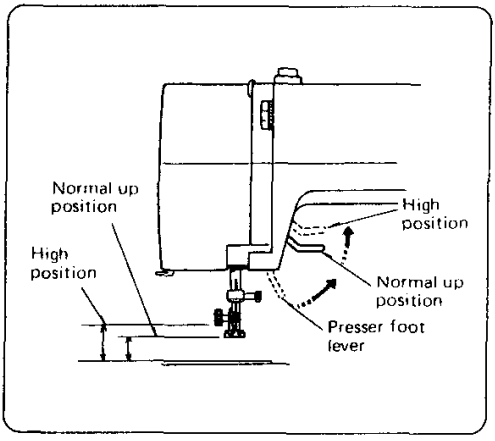
- The Presser Foot Lever raises and lowers your presser foot. You can raise it about 1/4″ higher than the normal up position for easy removal of the presser foot or to help you place heavy fabrics under the presser foot
Set Up the Machine
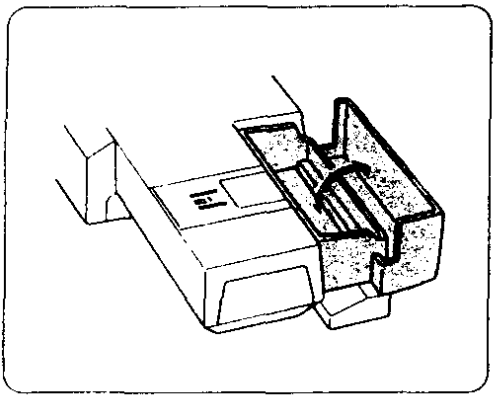
- Accessory Storage Box

- The lid of the accessory storage box lifts open toward you.
- Sewing accessories are conveniently located in the box
- Free-Arm Sewing: the Removable Extension Table
To remove:
To Remove the Extension Table (for free-arm sewing)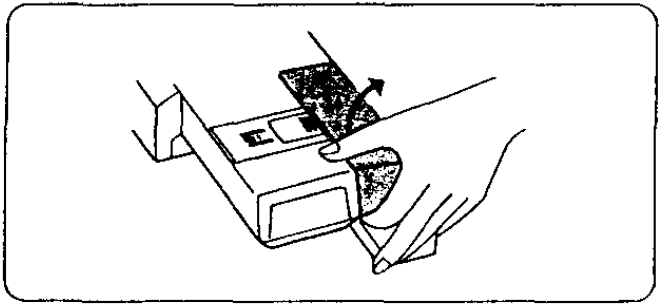
- Grip the table with your index finger and thumb, as shown.
- Pull gently toward you. The extension table will snap out
Know What the Presser Feet Will Do
- Check Your Presser Foot
- Tile Presser feet are an important feature of this machine. You need to know what each foot does in order to use it effectively. Your presser foot is held in place by a Foot Holder. Each presser foot merely snaps on the foot holder, which is seldom removed. If you need to remove or attach the foothold, here is what you can do:
To Attach: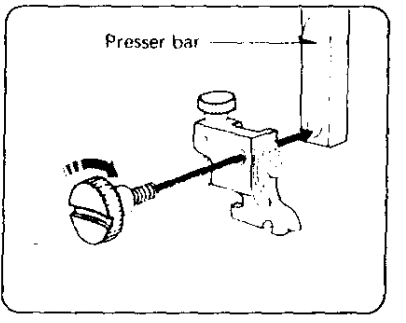
- Match the hole in the foot holder with the threaded hole in the presser bar.
- Fit the foot holder screw into the hole.
- Tighten the screw by turning it toward you.
Presser Foot Types
Zigzag Foot
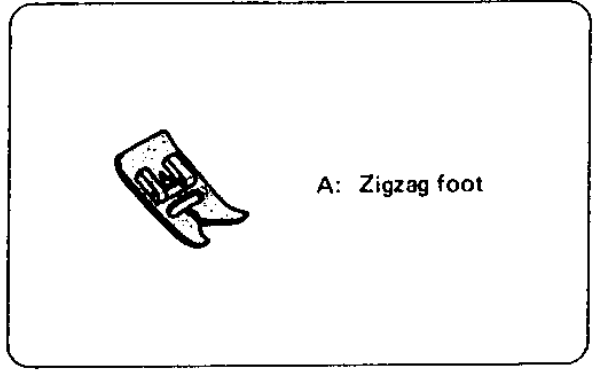
- Use this foot for both straight and zigzag stitching.
- Uses: Zigzag stitching (see page 31), Bar tacking (see page 33), Button sewing (see page 35), Rick-rack stretch (see page 36), Three-step zigzag (see page 37),
Overcast stretch (see page 38), Lacework (see page 40), Two-point shell stitching (see page 5_00), Smocking (see page 51), Stretch patching (see page 51),
Fagoting (see page 52), Herringbone stretch (see page 52), Elastic stretch (see page 53), Box stitching (see page 53), Two-point box stitch (see page 54), Overedging stitch (see page 54).
Presser Foot Types
Buttonhole Foot
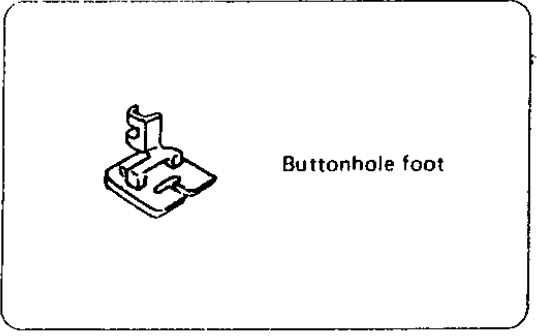
- Use this foot when making buttonholes with a buttonhole attachment system.
- Uses: Buttonhole making (see page44)
Choose Your Needle and Thread
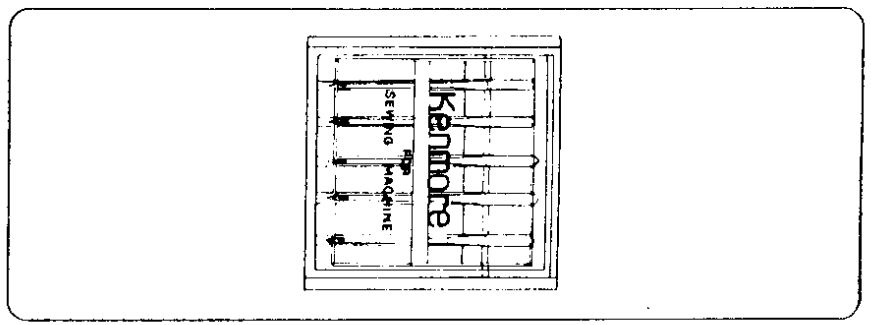
Your choice of needle and thread depends on the fabric you are sewing. In your needle case, you will find the following color-coded needles:
- Blue (11) ………… for stretch fabrics
- Orange (11) ………. for lightweight fabrics
- Red (14) ………… for medium or medium-heavy weight fabrics
- Purple (16) ………. for medium-heavy weight and decorative topstitching on these fabrics (This needle has a larger thread hole for thicker topstitching thread.)
- Green (18) ………. for heavy-weight fabrics and decorative lop stitching on these fabrics
Check Your Needle
- Look for barbed or blunt points.
- A damaged needle can cause permanent snags or runs in knits, fine silks, and silk-like fabrics. Always buy a good-quality thread. It should resist tangling and be strong, smooth, and consistent in thickness.
Prepare the Bobbin
To Remove the Bobbin from the Machine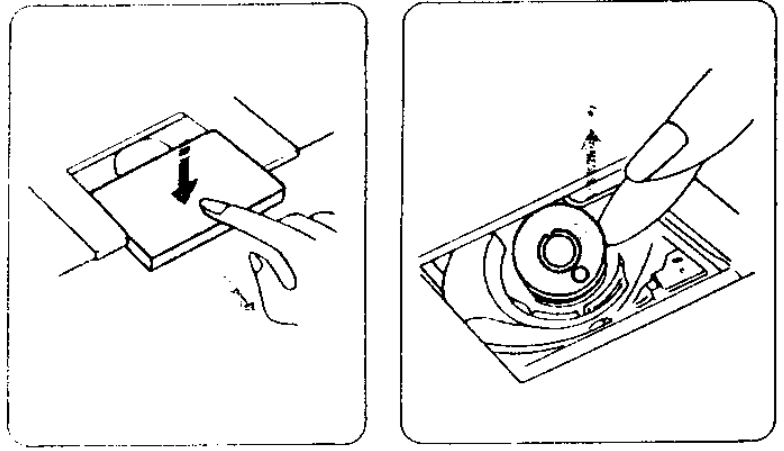
- gently push down on the bobbin cover plate and slide it towards you.
- Set aside.
- Lift c)ut the bobbin, as shown
Wind the Bobbin
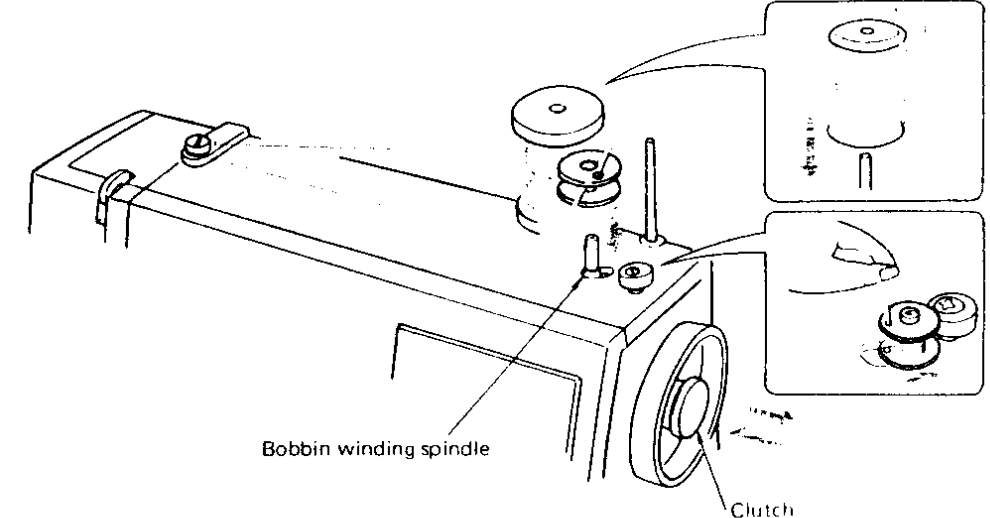
- Put your spool of thread onto the spool pin. with the thread winding in the direction shown.
- Pull the clutch away from the machine to stop the needle from moving while you wind the bobbin.
- Draw thread from spool through bobbin winder tension disc as shown,
- Place the threaded bobbin on the bobbin winding spindle so that the thread comes out on top.
- Push the bobbin winder spindle to the right until it clicks.
- Holding onto the end of the thread, depress the foot control.
- When the bobbin is slightly filled, stop the machine and clip the thread coming from the bobbin.
- Slowly start the machine again and wind the thread until the bobbin stops.
- Push the bobbin winder spindle to the left and clip the thread.
- Remove the bobbin.
- Push in the clutch for the normal sewing operation.
Prepare Your Top Thread
- Thread Your Needle

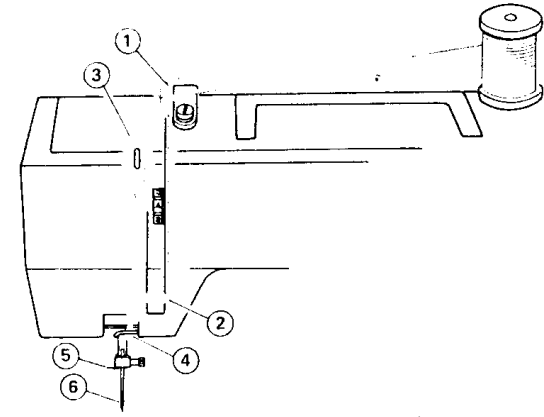
- The numbered steps above follow the numbers on the illustrations. Dotted lines show places where the thread loops and then is pulled tig
Raise the take-up lever to its highest position by turning the hand wheel toward you. Raise the presser foot lever. Place the spool on spool pin as shown, with thread coming from the back of the spool.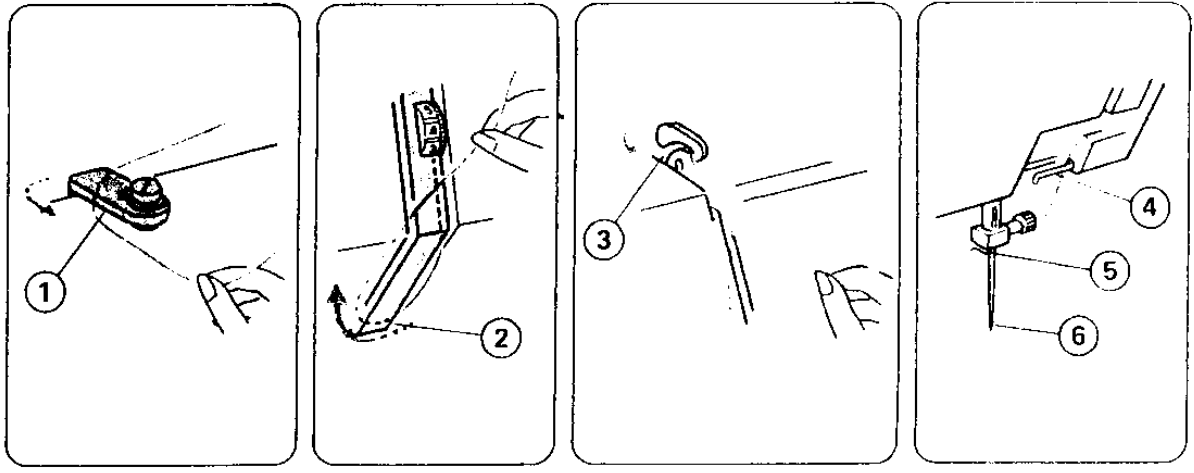
- Draw thread into thread guide using both hands.
- While holding the thread near the spool, draw the thread down into the tension area and then around the check spring holder.
- Firmly draw the thread up and through the take-up lever from right to left.
- Draw the thread down and slip it through the thread guide.
- The thread then is slipped into the needle bar thread guide.
- Thread the needle from front to back.
NOTE: You may want to cut the end of the thread with sharp scissors for easier needle threading
For Zigzag Stitch
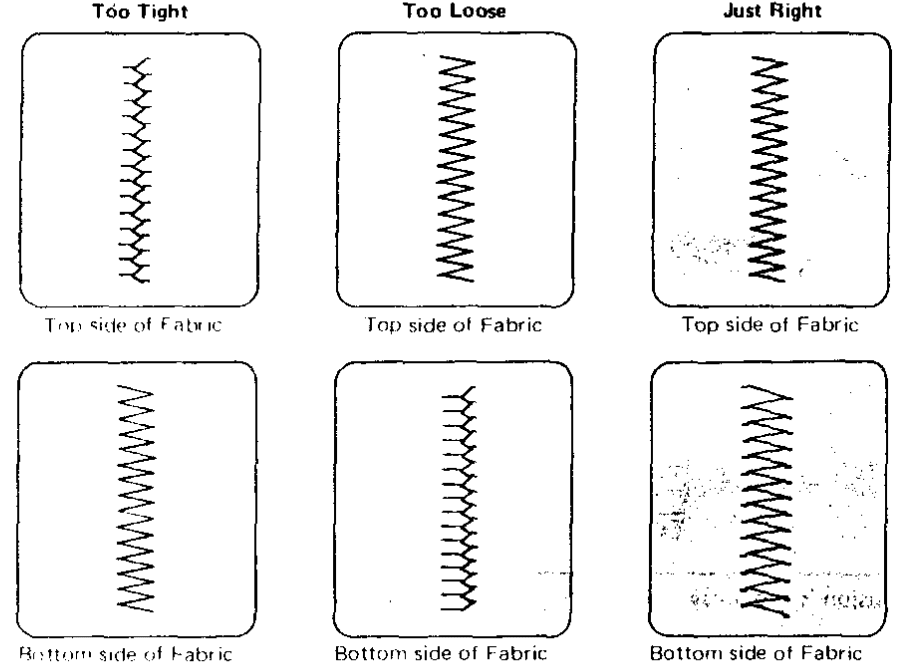
- In the correct zigzag stitch, the bobbin threads will not show on the top side of fabric and the top threads will show slightly on the bottom side. See below for the correct appearance. To match this appearance, adjust your top tension.

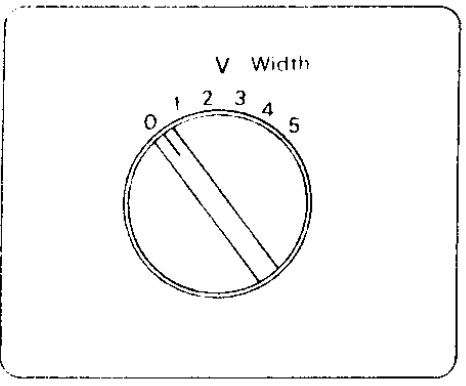
Stitch Width Control
- The stitch width control regulates the width of the stitch you select, The higher the number, the wider the stitch.

- The stitch length control regulates the length of the stitch and also has a stretch stitch setting. The higher the number, the longer the stitch.
- 0 means no feed.
- To select Stretch Stitches, set this control at Stretch Stitch.
- NOTE: When you select decorative stitches (green) or built-in buttonholes (blue), make sure that you do not set the stitch length control at “Stretch Stitch”.
- Study the orange, green, yellow, and blue sections around this control. These are recommended zones of stitch length and are color-coded to the stitches pictured on the stitch indicator panel.
SECTION 3. LEARN THE STITCHES
Decorate with a Geometric Pattern
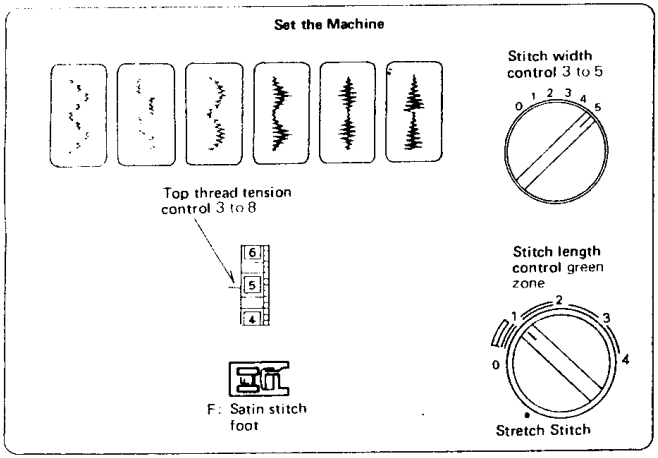
- Tile Stitches and their Uses These stitches are purely decorative. You can sew one row or several or vary the stitch width and length for special effects. Experiment on a scrap of fabric to see what special effects are possible.
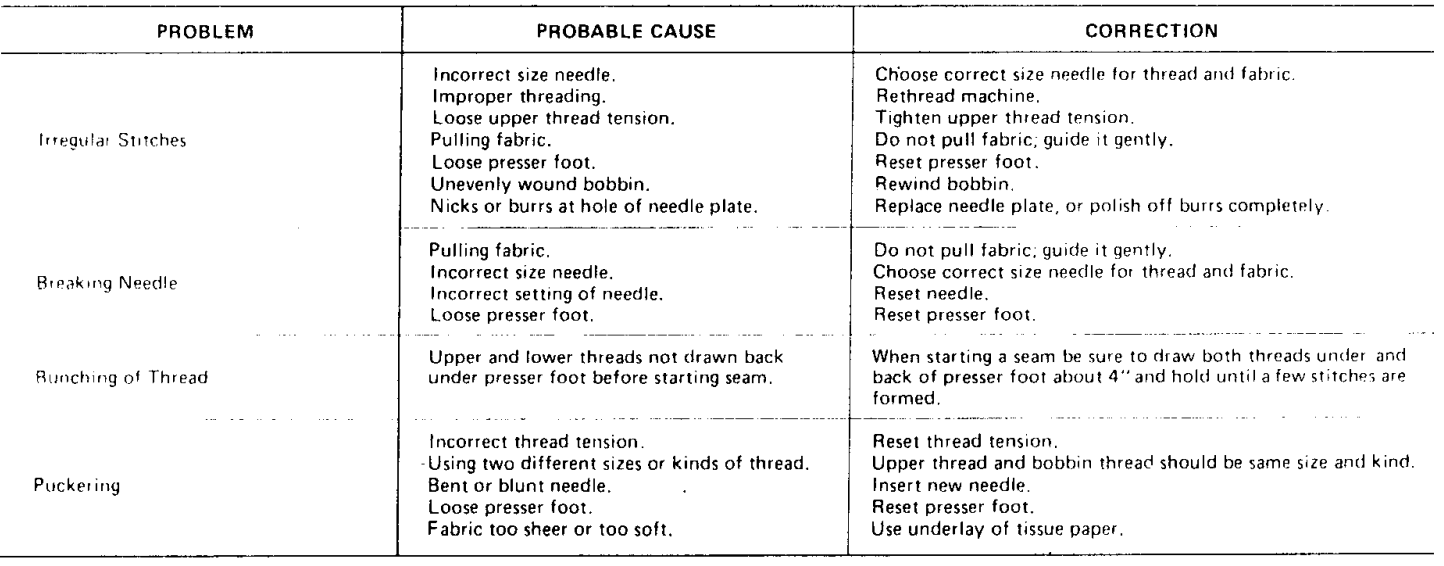
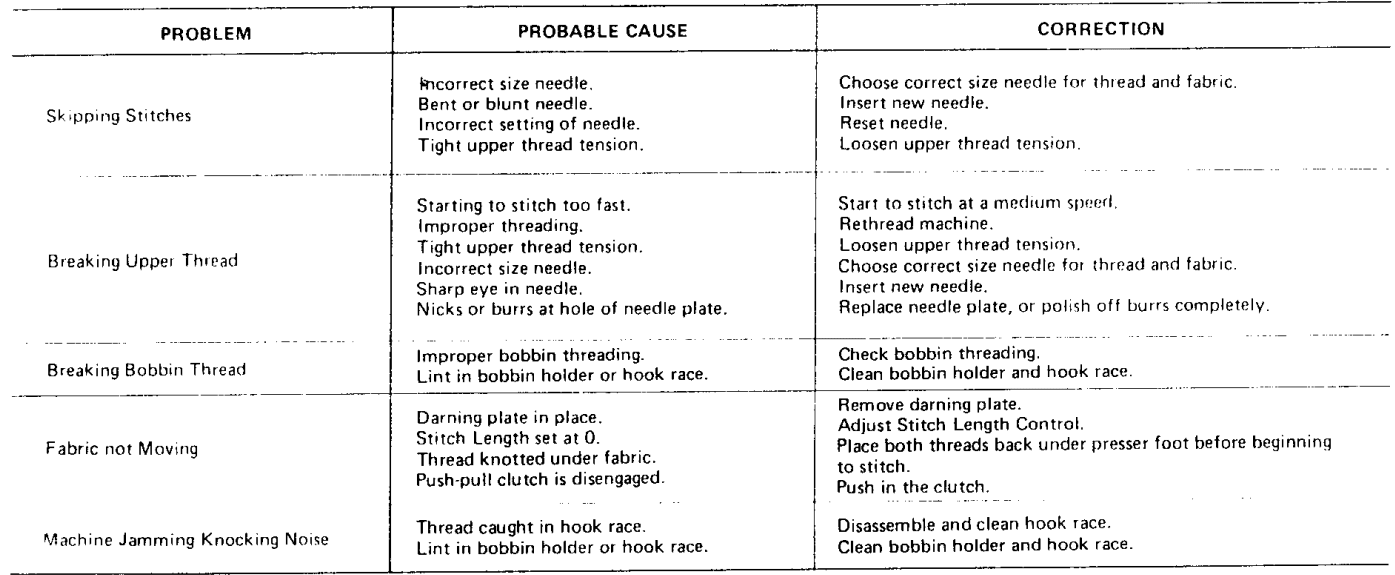
PERFORMANCE PROBLEMS CHART
What to Do When
For more manuals by Kenmore visit, ManualsLibraryy
Kenmore 385 Sewing Machine-FAQs
What type of bobbin does the Kenmore 385 use?
The Kenmore 385 uses plastic bobbins for its drop-in horizontal bobbin system. Metal bobbins are typically used in older or vertical bobbin machines.
What oil should I use for my sewing machine?
Recommended sewing machine oils include Sailrite® Sewing Machine Oil and Super Lube® Multiuse Synthetic Oil. Avoid using household oils like Vaseline.
How do I adjust the bobbin tension on my Kenmore sewing machine?
Turn the large screw on the bobbin case in small increments (about 15-minute turns, as if on a clock), then test and adjust as needed.
What is the difference between thread and bobbin thread?
The top thread must match the needle size and fabric weight, while the bobbin thread can be lighter or heavier and may need tension adjustments for even stitches.
Who made Kenmore sewing machines?
Kenmore machines were initially produced by White Sewing Machine Company until 1958, then by Janome until they stopped production. The brand is no longer manufactured, and only used models are available.
What is the correct tension setting for my sewing machine?
The default tension for straight-stitch sewing is generally 4 to 4.5 on a dial that usually ranges from 0 to 9.
Why is my sewing machine making loose stitches?
Loose stitches may be caused by weak upper thread tension or tight lower thread tension. Adjust the upper thread tension or loosen the bobbin tension until the stitches are balanced.
Can I sew without a bobbin?
No, unless you have a chain stitch machine, a bobbin is essential for creating secure stitches.
Can I use Vaseline to oil my sewing machine?
No, Vaseline or other household oils can damage the sewing machine. Use a proper sewing machine oil to maintain performance.
What is cross-stitching?
Cross-stitching is a type of embroidery that uses X-shaped stitches to create patterns, often used for decorating fabrics like tablecloths and linens.

