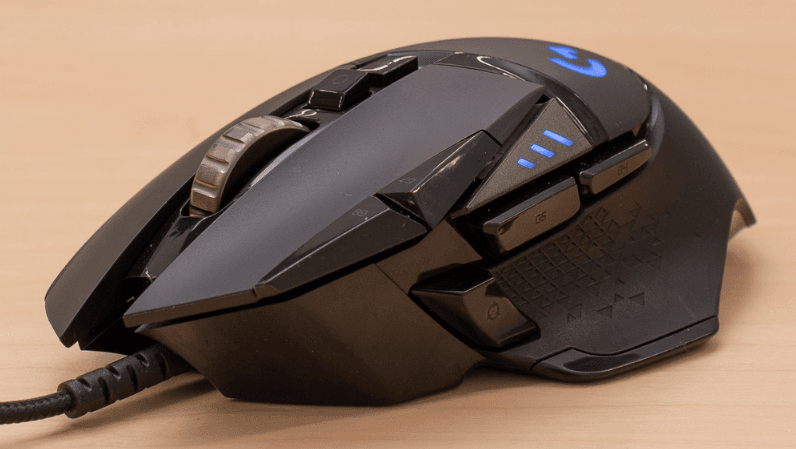
Logitech G502 HERO Wired Gaming Mouse
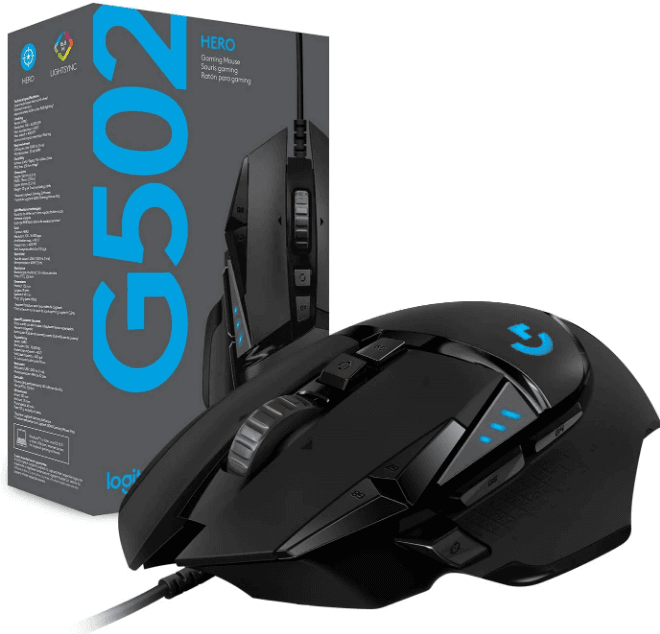
Product Overview
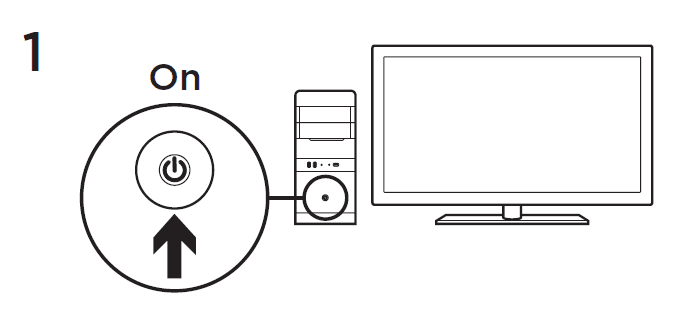
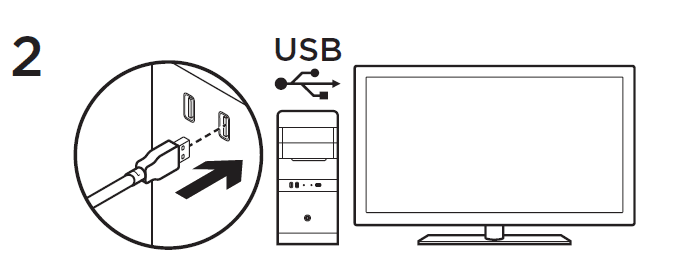
Your G502 is ready to play games. If you would like to customize your G502, refer to the next section.
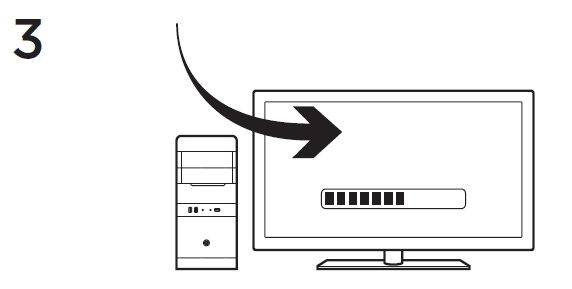
You can customize the three onboard profiles of the G502— button programming, lighting color, lighting effects, and tracking behavior—using the Logitech Gaming Software. Download this free software and learn how to customize the G502 at www.logitechG.com/support/g502-hero
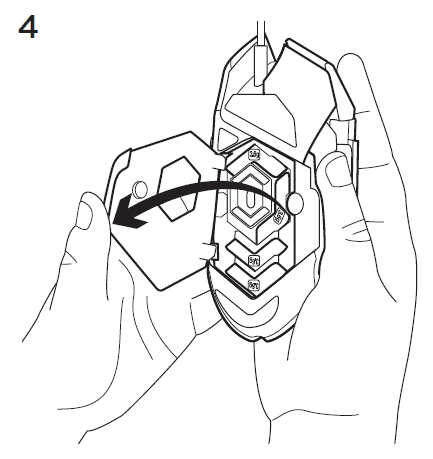
To adjust the weight and balance of your G502, first open the weight door by grasping the mouse firmly in your right hand and pulling the tab down with your left thumb.
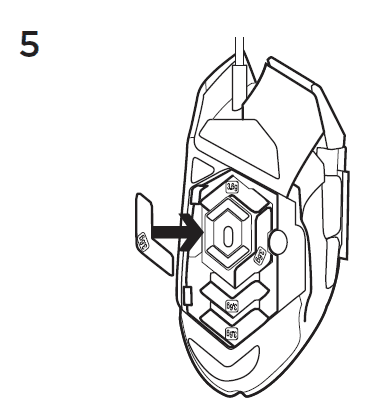
You can place up to five 3.6 gram weights in a number of different orientations. Experiment with different positions for the weights to find an overall weight and balance that feels right for you.
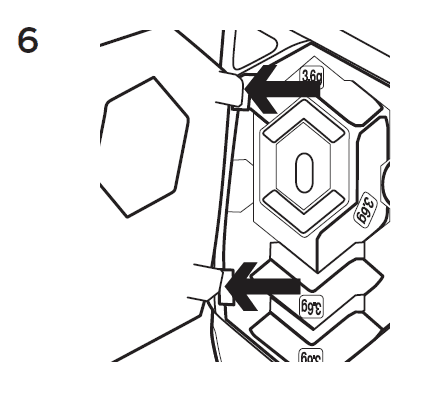
After inserting the weights, close the weight door by inserting the tabs on the weight door into the slots on the left side of the mouse and rotating the door down until the magnet holds the weight door firmly closed.
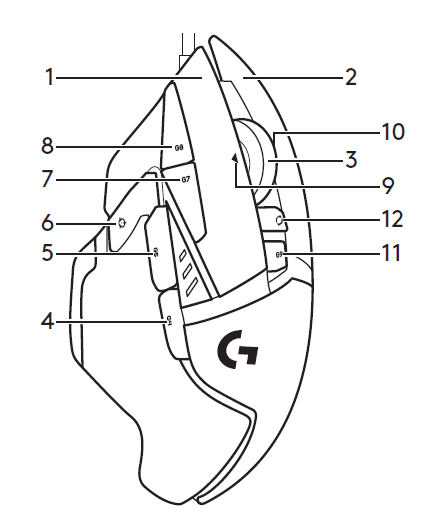
11 fully programmable buttons
- Left (Button 1)
- Right (Button 2)
- Wheel click (Button 3)
- Back (Button 4)
- Forward (Button 5)
- DPI Shift (Button G6)
- DPI Down (Button G7)
- DPI Up (Button G8)
- Scroll left (wheel tilt left)
- Scroll right (wheel tilt right)
- Profile select (Button G9)
- Wheel mode shift (not programmable)
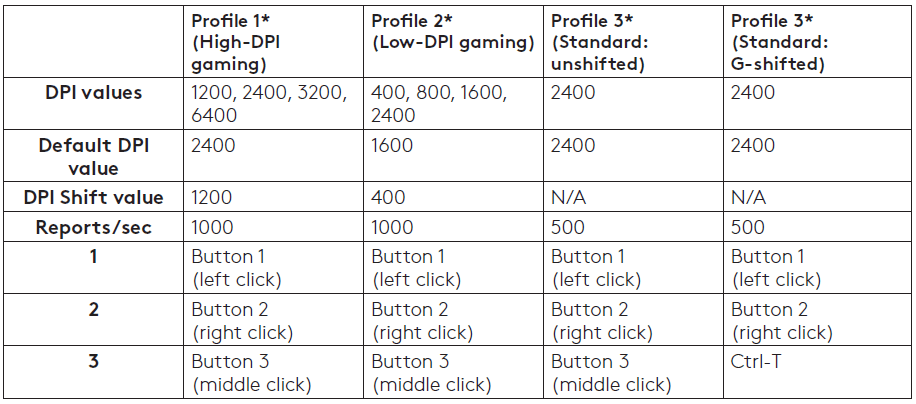
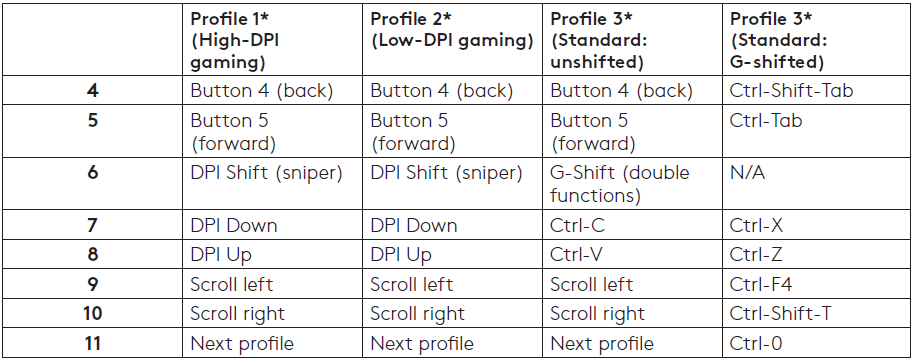
Onboard profiles
The G502 has three preconfigured profiles, one each for high sensitivity gaming, low sensitivity gaming, and standard mouse usage. Use Button 9 (see mouse drawing) to rotate through these default profiles. When you change profiles, the DPI indicator lights will change color to blue for three seconds and will indicate the new mode as shown here:
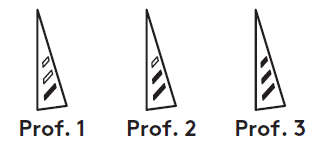
DPI indicators
DPI values are shown using the three LEDs indicated in the mouse drawing. The image below shows which DPI value is being indicated by the LED panel.
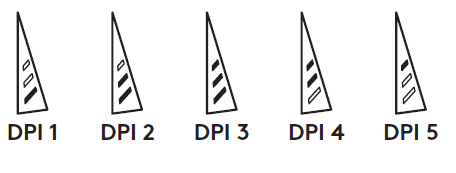
Hyperfast Scroll Wheel
The G502 features Logitech’s exclusive dual-mode hyperfast scroll wheel. Click the button right below the wheel (Button G12) to switch between the two modes.
Tips
Weight and balance tuning is very much an exercise in personal preference. Generally speaking, more weight makes it easier to control high DPI settings, while less weight makes low-DPI gaming less fatiguing.
Centering weights along an imaginary line between your thumb and right-side grip finger(s) will help maintain optimal front-to-back balance.
The effects of changing weights may not be immediately apparent. After changing the position or number of weights, give yourself some time to experience the difference before changing them again.
Try the default profile settings in practice games before changing these settings.
Advanced gamers can customize each game according to their specific button configuration and sensitivity switching needs. The Logitech Gaming Software stores this information and applies it automatically when the game is detected.
If the mouse doesn’t work
- Unplug and re-plug the USB cable to ensure a good connection.
- Try the mouse USB cable in another USB port on the computer.
- Use only a powered USB port.
- Try rebooting the computer.
- If possible, test the mouse on another computer.
- Visit www.logitechG.com/support/g502-hero for more suggestions and assistance.
For more manuals by Logitech, visit ManualsLibrary
Logitech G502 HERO Wired Gaming Mouse- FAQs
What are the main features of the Logitech G502 HERO?
The G502 HERO features a HERO 25K sensor for ultra-precise tracking, 11 programmable buttons, customizable RGB lighting, and mechanical switches for fast response. It offers exceptional performance for gaming and productivity.
How many programmable buttons does the G502 HERO have?
The G502 HERO has 11 programmable buttons. You can customize them using Logitech G HUB software to assign commands, macros, or game controls.
Can I use the G502 while charging?
Yes, the G502 Lightspeed Wireless version can be used while charging via the included USB cable.
Is the Logitech G502 HERO rechargeable?
The G502 HERO is a wired mouse and does not require recharging. However, the G502 Lightspeed Wireless is rechargeable via USB or compatible with the Powerplay wireless charging mat (sold separately).
Does the G502 use batteries?
The wireless G502 has a built-in rechargeable battery. No external batteries are required. The wired G502 HERO operates solely via the USB connection.
What’s the difference between G502 and G502 HERO?
The G502 HERO is an upgrade of the older G502 Proteus Spectrum. It features a more advanced HERO sensor, wider DPI range, better tracking accuracy, and lower lift-off distance.
What is a DPI shift button?
The DPI shift button allows you to instantly change your mouse sensitivity on the fly—perfect for switching between fast movements and precision aiming.
What grip style suits the G502 HERO?
The G502 HERO is best suited for claw or palm grip users due to its ergonomic shape and button layout.

