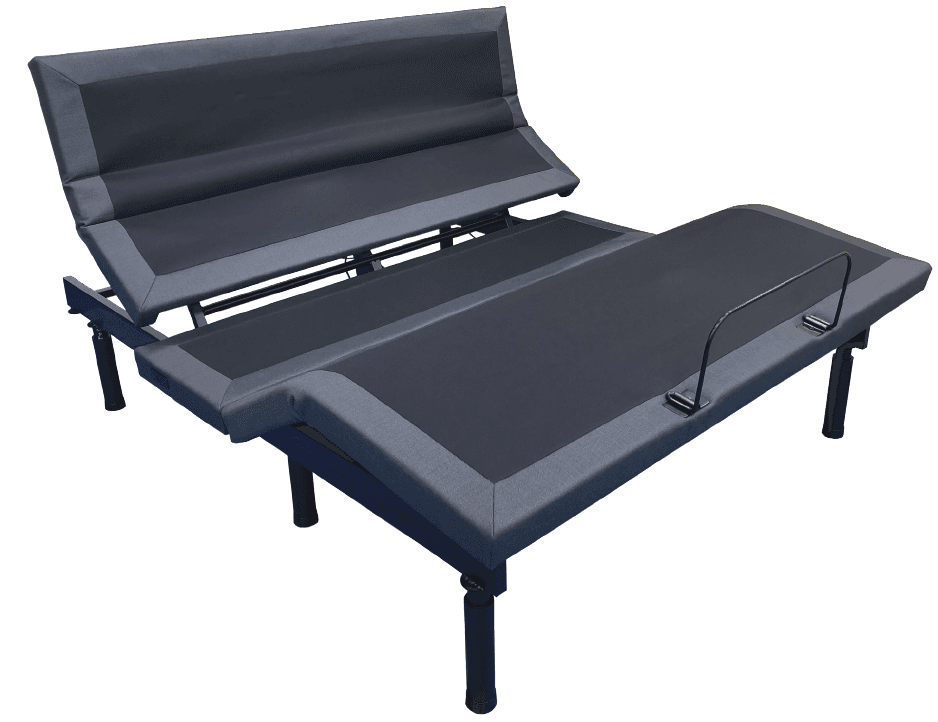
Mattress Firm 900 Adjustable Power Base
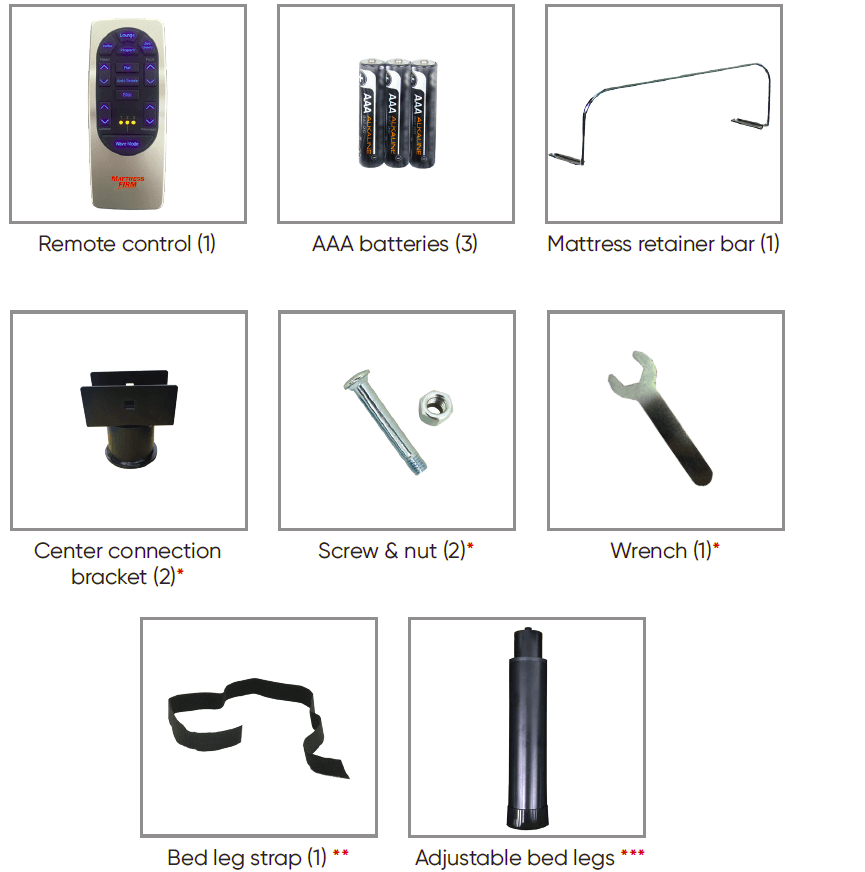
Parts List
- Before discarding any packing materials, check the adjustable bed carton and verify all items in the parts list are included

- Only available with Queen, King, and Cal King models.
- Only available with Twin XL and Split Cal King models.
- Twin, Twin XL, Full, Full XL, and Split Cal King models have four (4) bed legs. Queen, King, and Cal King have six (6) bed legs
Installation Guide
- NOTE: For safety reasons, lifting of the adjustable bed must always be performed by two (2) people; and the unit should always be on a flat surface before opening.
Setting up your adjustable bed
FOR TWIN, TWIN XL, FULL, FULL XL, AND SPLIT CAL KING MODELS
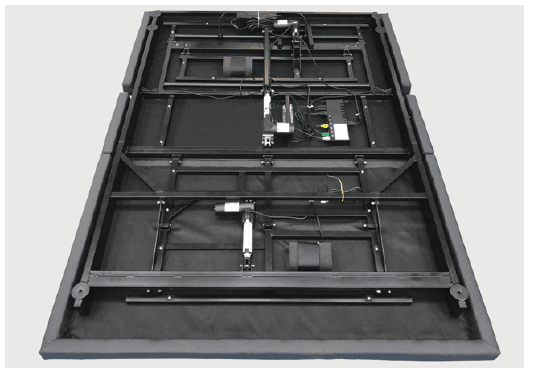
- Lift the adjustable bed out of the shipping carton carefully, and put it on a flat floor with the top side facing downward.

- Remove all accessory boxes and cut the ties from inside the adjustable bed.
FOR QUEEN, KING, AND CAL KING MODELS
- Lift the two separate sections of the adjustable bed out of the shipping carton carefully, and put them on a flat floor with the top side facing downward.
- Remove all accessory boxes and cut the orange ties from inside the adjustable bed.

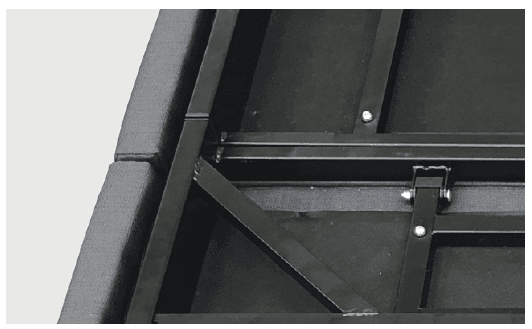
- Move the head and foot sections of the bed together. Make sure the bars and frames are properly aligned at the center.

- To connect the head and foot sections, put the center connection bracket over one end of the parallel bars between the head and foot sections. Line it up with the pre-drilled holes on the bars.

- Thread the screw through the center connection bracket and into the bars to keep it in place.

- Thread a nut at the end of the screw, and tighten it with the wrench.
- Repeat steps 4 to 6 to place the second center connection bracket on the other end of the parallel bars.
Attaching the bed legs
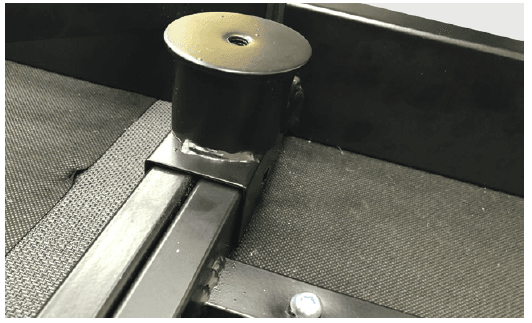
- Take out the adjustable bed legs from the accessory box.
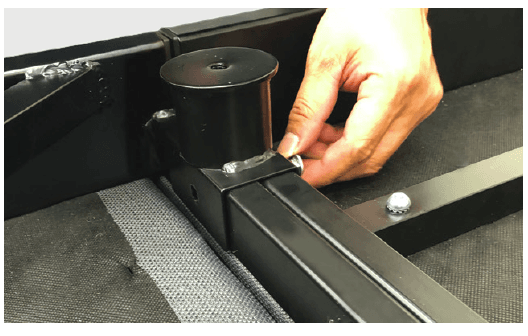
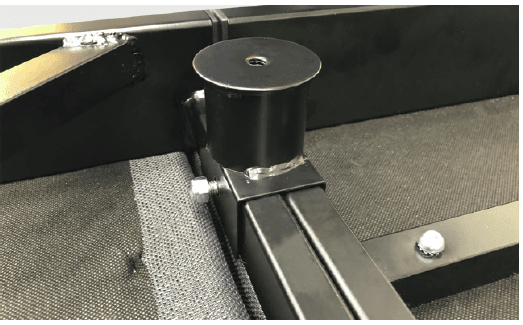
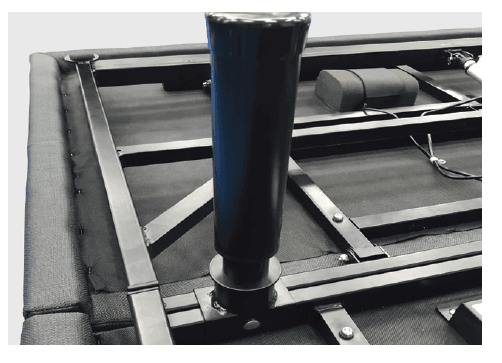
- Thread the bed legs into the pre-drilled holes on the adjustable bed by turning them in a clockwise direction.
- Tighten the legs securely to the adjsutable bed.
- Adjust the legs to the desired height by turning it either clockwise or counterclockwise.
- NOTES:
- Do not overtighten the bed legs.
- Make sure all legs are adjusted to the same height

- NOTES:
Setting up the electronics
FOR QUEEN, KING, AND CAL KING MODELS
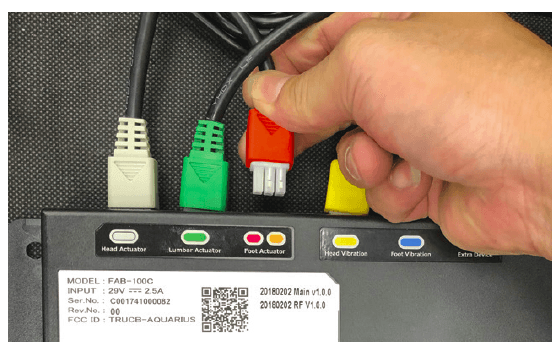
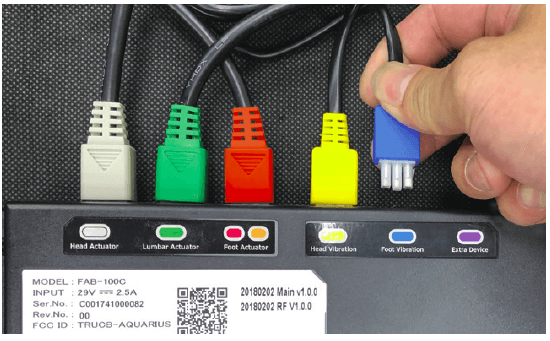
- Plug the cord for the foot lift into the control box. Insert it into the port labeled “Foot Actuator” (with red & orange label).

- Plug the cord for the foot massage into the control box. Insert it into the port labeled “Foot Vibration” (with blue label).

FOR ALL MODELS
- Remove and extend the power cord from the adjustable bed.
- Rotate the adjustable bed over carefully so the top side is now facing upward.
- NOTE: Do not rest the adjustable bed on its side. The weight may damage the legs.

- NOTE: Do not rest the adjustable bed on its side. The weight may damage the legs.
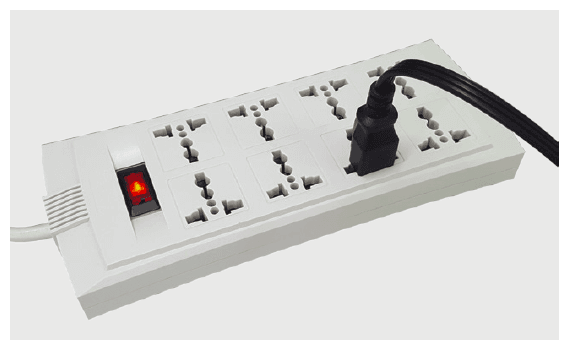
- Plug the power cord into a working and grounded electrical outlet.
- NOTE: For optimal safety, using a surge protector (not included) is highly recommended.
Attaching the mattress retainer bar
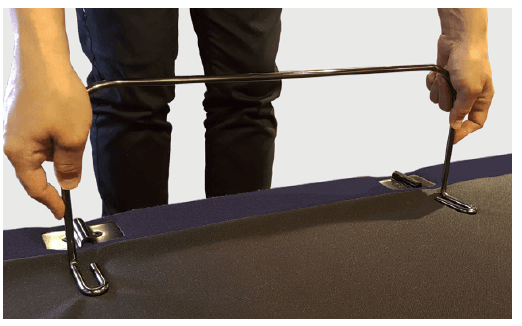
- Align the open ends of the retainer bar with the “loop” retainer anchors located at the foot of the bed.
- Slide the retainer bar into the anchors allowing the ends to glide into the loop. If the adjustable bed is set up without a headboard, place your mattress on the adjustable bed surface. Your adjustable bed installation is now complete. If a headboard is to be installed, see “Assembling the headboard bracket.”

Installing the bed leg strap (optional)
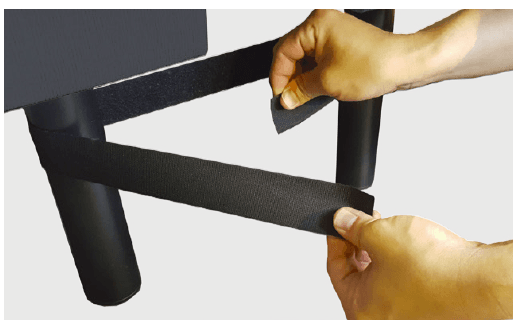
To help prevent adjustable bed separation when using 2 Twin XL or 2 Split Cal King adjustable beds, use the bed leg strap.
- Wrap the bed legs (front or back) together tightly using the bed leg strap.
- Fasten the strap to prevent movement & maintain stability

Assembling the headboard bracket (optional)
- Using the remote control, raise the head section of the adjustable bed to its full height.
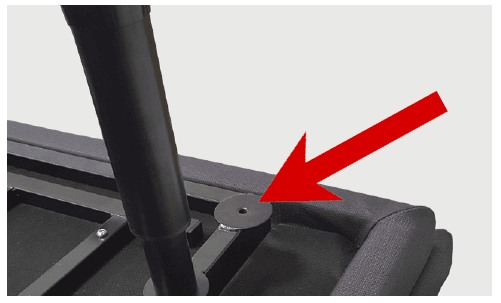
- Locate the first round panel under the head section of the bed. The second round panel is for the bed leg.

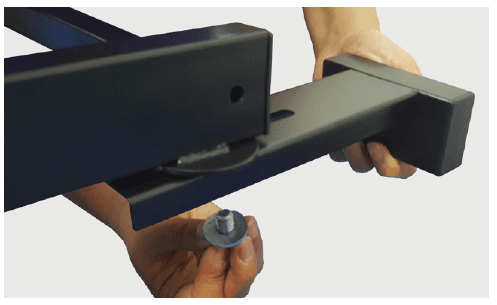
- Position the inner headboard bracket underneath the first round panel. The bracket opening should be facedown under the bar.
- Insert a retainer bolt fitted with a washer into the slot under the inner headboard bracket and through the round panel. Tighten the bolt using the Allen key wrench.

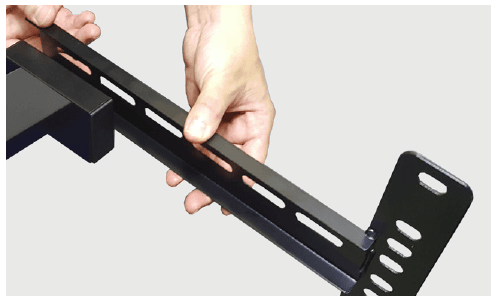
- Place the open side of the outer headboard bracket onto the exposed square tube of the inner headboard bracket to create a tight fit.
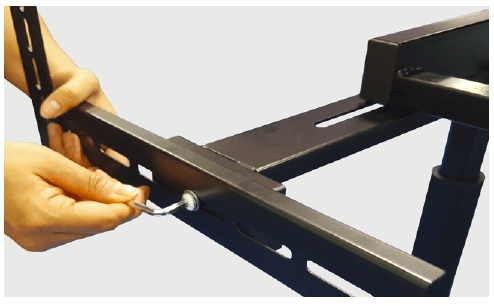
- Insert a retainer bolt fitted with a washer through the outer headboard bracket and into the inner headboard bracket. Tighten the bolt with an Allen key wrench. Leave loose enough for adjusting.
- Repeat steps 2 to 6 to install the brackets on the other side of the head section of the adjustable bed. When the headboard brackets are assembled, make sure there is a space of 1.5 inches (38.1 mm) to 2 inches (50.8 mm) between the edge of the adjustable bed and the headboard brackets.

- Securely fasten the headboard bolts (not included with your parts box) to the end of the headboard bracket assembly.
- If you need to adjust the headboard brackets, unscrew the bolts holding the outer headboard bracket and move them the necessary distance. Reinstall the bolts and tighten securely. Place your mattress on the adjustable bed surface. Your adjustable bed and headboard installation is now complete.

Remote Control Guide
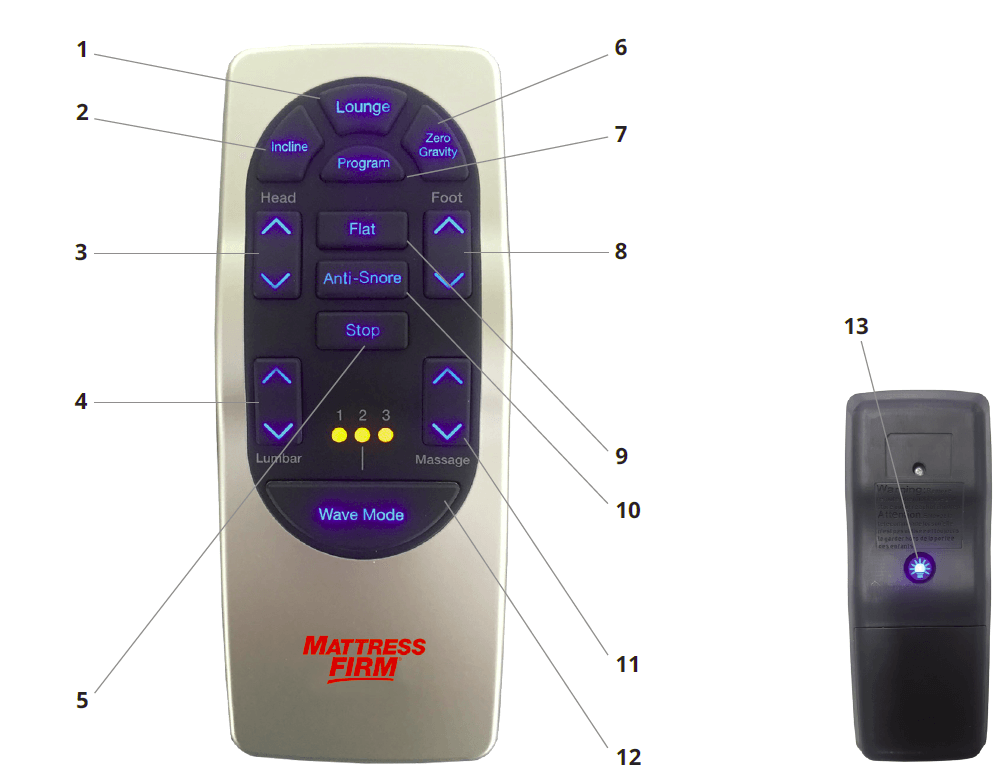
Head, Lumbar, and Foot Position Adjustments (3, 4, 8)
- Press the UP
 or DOWN
  button to raise or lower the head, lumbar, and foot sections of your adjustable bed. The “Head Tilt” feature allows you to further bend the head section of the bed for improved neck comfort and better body contour when you’re propped at a higher angle.
Presets
- Lounge (1)
Press this button to activate the lounge position. This preset raises the head and foot sections slightly to help remove stress and tension from your lower back. - Incline (2)
Press this button to activate the incline position. This preset raises the head section to an ideal position for watching TV, reading, or laptop use. - Zero Gravity (6)
Press this button to activate the zero gravity position. This preset position elevates the legs slightly higher than the chest, in effect, allowing the blood to flow back to the heart to help reduce stress and fatigue. - Program (7)
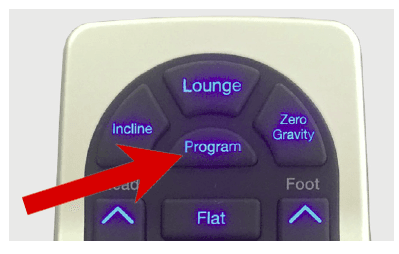
Press this button together with a preset button to override factory default presets with your customized presets. For more information, see ” Customizing the preset buttons” on page 11. - Flat (9)
Press and hold this button to return the bed to a flat position. - NOTES:
- If the massage motors are on and the Flat button is pressed, the motors will stop operating during the lowering of the bed.
- Make sure your bed is in a flat position before using it. Press the FLAT button on the remote control for over 1.5 seconds after plugging in the power cord.
- Anti-Snore (10)
Press this button to gently raise the head section and allow easier air intake which can help reduce snoring.
Massage
- Start Massage (11)
Press the UP button to activate the massage feature on the head and foot sections of the bed. Intensity starts at level 3. Press the UP
  or DOWN
  button to gradually increase or decrease the intensity of the massage.
 - NOTES:
- Decreasing the massage to the lowest intensity level stops any active massage.
- This feature has an Auto Shutoff Timer that automatically turns off the massage after 15 minutes of continuous use.
- Wave Modes (12)
Press this button to activate and select from different massage feels. The LED lights indicate the mode you have selected. You can also press this button to turn the head and foot massages on. Wave mode intensity starts at level 4. - Stop Massage (5)
Press this button to disable any active massage. - Under Bed Light (13)
Press this button to turn the under bed lighting on, helping you safely navigate in and out of bed during the night. The under bed light has seven (7) colors. Press this button multiple times to change colors. Press and hold to turn the under bed light off.
Understanding the remote control features
- The adjustable bed uses BLE (Bluetooth® Low Energy) remote control system.
- The buttons are backlit when pressed to aid in the visibility of the remote control in low-light environments.
- It is not necessary to face the receiver when operating the remote control. Remote signal is best transmitted within 9 feet (3 meters) of the bed.
- NOTE: The bed may show minor intermittent performance because of typical radio frequency interference. This is normal in the operation of the bed, not a defect.
Customizing the preset buttons
You can store new head and foot positions by customizing the preset buttons: Incline, Lounge, and Zero Gravity. These can be reprogrammed with your desired positions at any time. For safety reasons, the Anti-Snore and Flat buttons cannot be customized.
- Move the head and/or foot sections to your desired position.
- Press and hold the Program button and any of the preset buttons at the same time for 2.5 seconds. The new bed position is now stored in your selected preset button overriding the factory default. To restore the presets to their factory settings, see “Resetting your system” on page 12.

Synchronizing two beds for tandem operation
Your adjustable bed is pre-programmed to your remote. However, to operate two adjustable beds together, you must pair both to one remote control. Make sure your first adjustable bed (Bed A) is plugged in before focusing on your second adjustable bed (Bed B). To complete the pairing, do the following:
- Plug Bed B to a grounded electrical outlet. A surge protector is recommended.
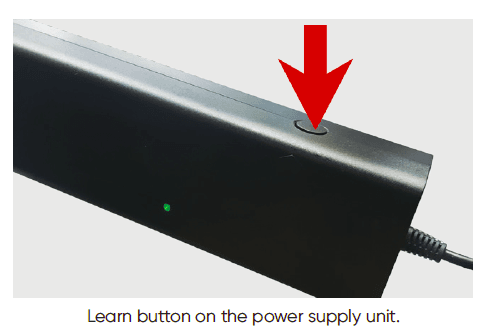
- On the power supply unit or control box, press and hold the Learn button for three (3) seconds. The indicator LED will blink three (3) times then turn off. At this time, the control box is in pairing mode.

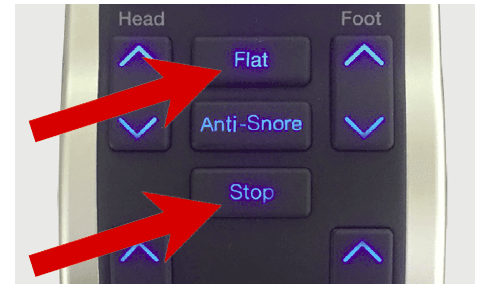
- On the remote control, press and hold the Flat and massage Stop buttons for four (4) seconds. When the pairing process is successful, the indicator LED on the control box or power supply will blink once and then remain on. This ends the pairing mode. Bed A and Bed B now function using Remote A. Pairing of the two adjustable beds for tandem operation is complete.

- NOTE: When doing a tandem operation, both Bed A and Bed B should be plugged into a grounded and working electrical outlet
Special Functions
Using the mounted USB ports
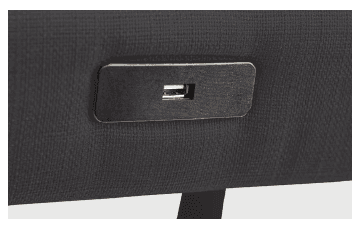
- The convenient USB ports located on each side of your adjustable bed provides easy access for charging today’s tech devices.

Activating the emergency power down feature
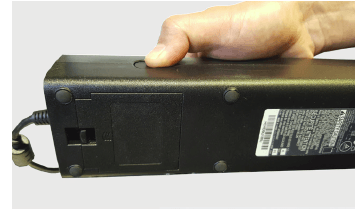
The power supply unit on your adjustable bed supports the emergency power down feature if a power failure occurs while the head, lumbar, and/or foot sections are raised
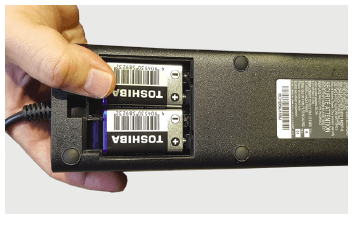
- Locate and remove the cover on the 9V battery compartment in the power supply unit.

- Install two (2) alkaline 9V batteries (not included with the adjustable bed).
- Replace the battery cover.

- When the 9V batteries are installed and a power failure occurs, press and hold the button on the power supply unit until the bed returns to a flat position.
- NOTE: The two (2) 9V batteries are for single use only. After lowering the adjustable bed once during a power failure, replace with a new set of batteries.
Connecting your bed to a smart device
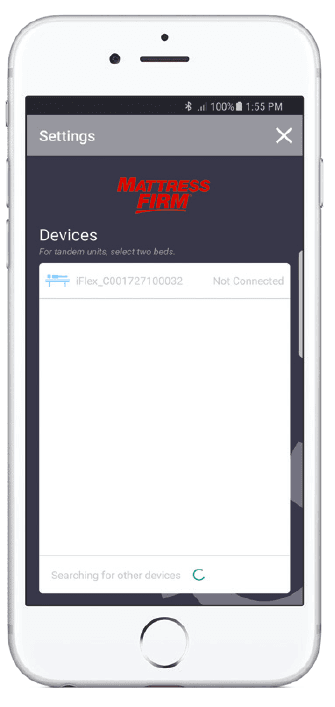
Your adjustable bed is equipped with the Bluetooth technology that enables your iOS or Android smart device to interact with your bed through the Mattress Firm 900 mobile application.
- Make sure that your adjustable bed is plugged to a working and grounded electrical outlet and the control box is on.
- Download and install the Mattress Firm 900 mobile application from the App Store or Play Store.

- For iOS users, turn on your Bluetooth. For Android users, turn on your Bluetooth and Location settings.
- Open the app, and then navigate to the Settings screen. From the list of visible devices, select your adjustable bed.
- Once connected, use the controls on the Lifts/Presets and Massage screens of your app to operate your adjustable bed.
- NOTE: The remote control cannot be used while the adjustable bed is connected to the application.
Troubleshooting
In the event the adjustable bed fails to operate, investigate the symptoms and possible solutions below.
For more manuals online by Mattress Firm, visit ManualsLibraryy
Mattress Firm 900 Adjustable Power Base-FAQs
How can I reset the Mattress Firm 900 adjustable bed?
To reset the Mattress Firm 900 adjustable bed, unplug the bed from the power source, wait for a few seconds, and then plug it back in. This can help reset the controls and return the bed to a flat position.
Why is my adjustable bed base not working?
If your adjustable base isn’t working, check the connections under the bed to ensure the wires are secure and that nothing obstructs the base’s movement. Additionally, check if the green LED light on the control box is illuminated. If not, confirm that the input and power cords are properly connected.
Why is my mattress remote not working?
If the remote is not functioning, start by replacing the batteries. If that doesn’t resolve the issue, check for any dirt or debris on the sensors of the remote or the bed. You can also try resetting the remote by holding the power button for about 10 seconds.
How do I fix my adjustable bed?
To fix your adjustable bed, begin by checking the power connections, and remote batteries, and ensure there are no obstructions in the bed’s mechanism. If necessary, reset the bed by following the reset procedure provided in the manual to resolve minor glitches.
How can I reset my remote control?
To reset your remote, first remove the batteries. Then, press and hold the power button for three seconds. Reinsert the batteries, ensuring the correct polarity, and check if the issue is resolved.
How do I unlock my adjustable bed?
To unlock your adjustable bed, find the lock button on the remote. Press and hold this button for a few seconds to unlock the bed and regain control of the adjustments.
Can I use the adjustable bed without a remote?
Yes, some modern adjustable beds can be controlled using a smartphone app. If your model supports this feature, you can adjust the settings via the app. Alternatively, some beds come with a wired controller as a backup in case the wireless remote is not functioning.
How do I make my bed step by step?
To make your bed, follow these steps:
Start with the bed skirt.
Add the mattress pad or topper.
Place the mattress protector on top.
Put on the fitted sheet.
Decide whether to use a top sheet.
Place the comforter or duvet on top.
Fluff up the pillows.
Finish by adding throw blankets and extra pillows for a decorative touch.
Why did my remote suddenly stop working?
Low battery, pairing issues, or problems with the infrared sensor are the most common reasons for a remote malfunction. Try pressing the power button while pointing the remote at the device. If the LED indicator doesn’t blink, the remote batteries may need replacing.
Where can I find the reset settings for my adjustable bed?
To reset your adjustable bed’s settings, refer to the user manual for specific instructions. Typically, you must press and hold a specific button or combination of buttons on the remote to initiate the reset.

