Primo Water 601234 Hot-Cold Water Dispenser
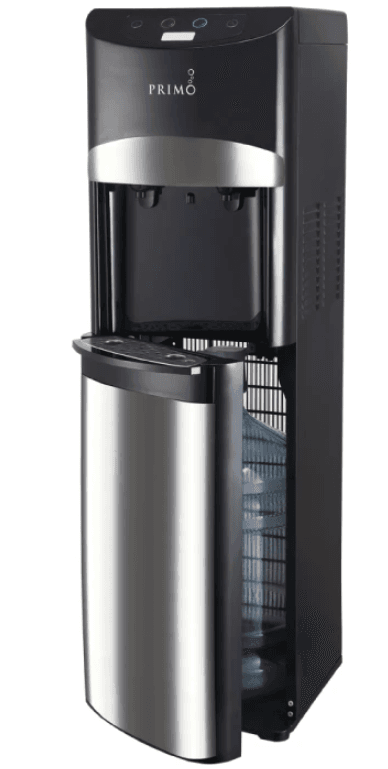
QUICK START GUIDE

- Place the dispenser on the floor in your desired location. If the surface is uneven, rotate the back feet to level out the dispenser.

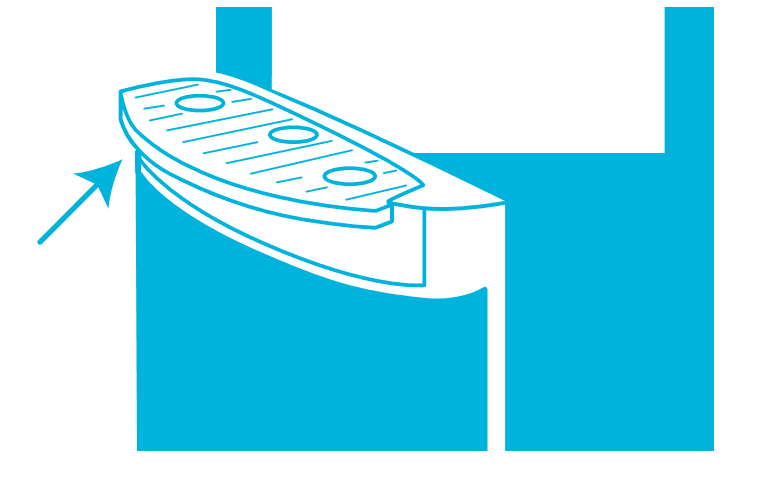
- Slide the drip tray into place.

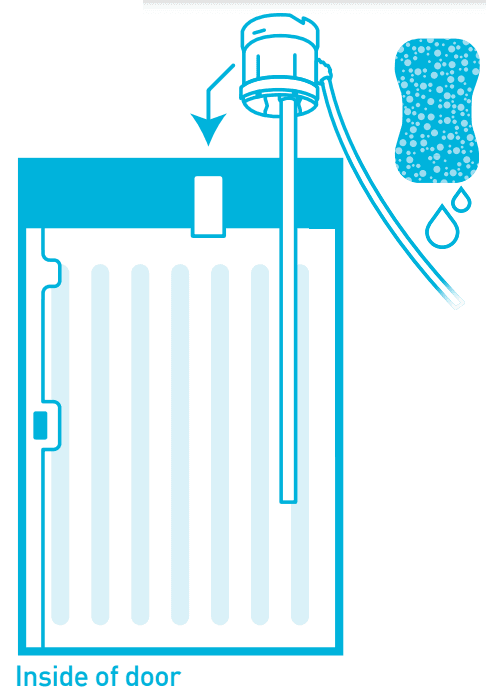
- Clean the probe with a damp cloth and dish soap. (Visit www.primowater.com for detailed cleaning instructions.) Place the probe assembly on the hanger inside the door to keep it clean.

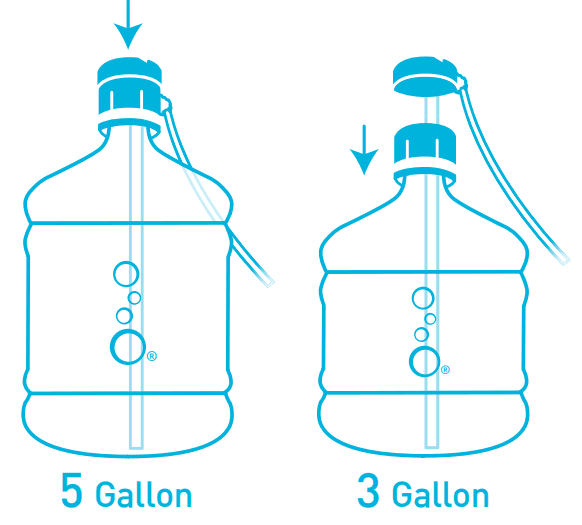
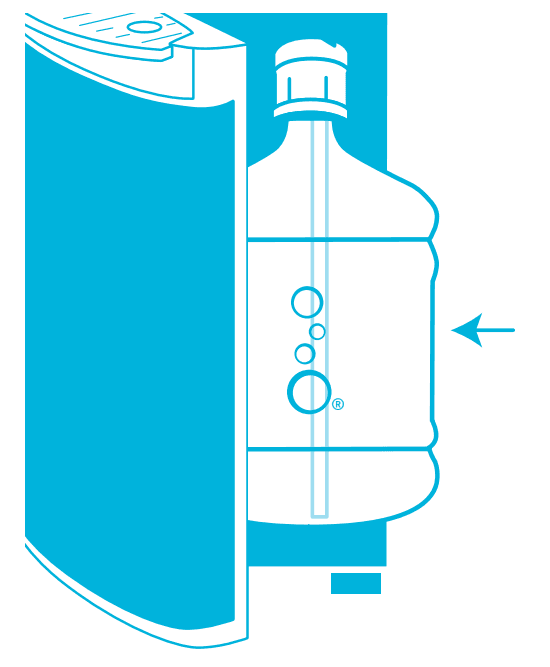
- Grab a bottle of Primo® water and fully remove the cap. Insert probe assembly into the bottle. Press firmly to secure assembly over the bottle opening. For 3 and 4-gallon bottles, squeeze the tabs on the top of the probe assembly to separate the probe cap from the collar and press the collar securely over the bottle opening.

- Slide the bottle inside the cabinet and close the cabinet door.

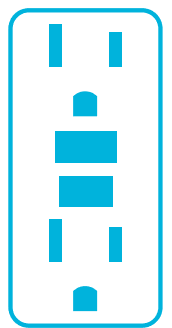
- Plug the dispenser into a ground fault circuit interrupting (GFCI) outlet. You will hear the dispenser begin to pump water to fill the internal hot and cold tanks.

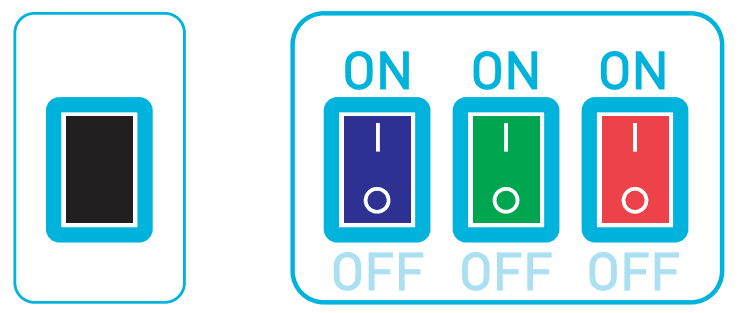
- Turn on desired functions by flipping the switches on the back of the dispenser to the ON position.
- Blue – nightlight
- Green – chills water
- Red – heats water
- Black – activates self-sanitization (press and hold for 5 seconds)

- Once the dispenser has stopped filling the internal tanks, dispense and dispose of at least 1 quart (approximately 2-pint glasses] of water.

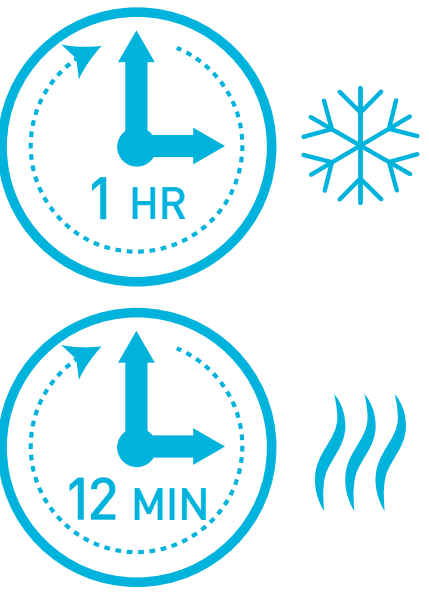
- Your water will be ready to dispense fully chilled in approximately 1 hour or piping hot in approximately 12 minutes.
- Register your dispenser at www.primowater.com to activate your warranty.
OPERATING INSTRUCTIONS
DISPENSING COLD WATER
- Water will take approximately 1 hour after initial set up to become completely chilled. The cooling light will stop flashing once the water has been fully chilled.
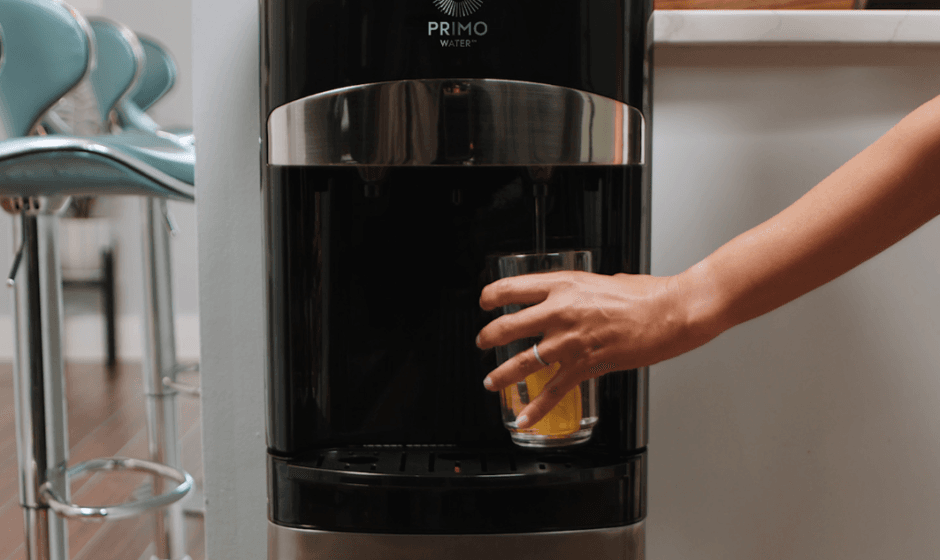
- Press the blue cold water button to unlock, then depress the silver dispensing control to dispense cold water. Release to stop dispensing. If you haven’t depressed the silver dispensing control after 3 seconds, the cold water button will return to the locked position.
DISPENSING HOT WATER
- Water will take approximately 12 minutes after initial set up to reach its hottest temperature. The heating light will stop flashing once the water has been fully heated.
- Press the red hot water button to unlock, then depress. The silver dispensing control is used to dispense hot water. Release to stop dispensing. If you haven’t depressed the silver dispensing control after 3 seconds, the hot water button will return to the locked position.
CAUTION: This unit dispenses water at temperatures that can cause severe burns. Avoid direct contact with hot water. Keep children and pets away from the unit while dispensing. Never allow children to dispense hot water without proper and direct supervision. Disable the heating feature by switching the heating convenience switch on the back of the unit to the off position or unplug the unit.
REPLACING THE BOTTLE
When your bottle is empty, the empty bottle light will flash. To prevent freeze-up or over-heating, the dispenser will not heat or cool water when the bottle light is flashing. Replace the bottle as soon as possible to re-enable cooling and heating.
- Open the dispenser cabinet door and slide the empty bottle out of the cabinet.
- Remove the probe assembly from the empty bottle and place it on the probe hanger.
- Set the empty bottle aside.
- Remove the entire plastic cap from the new bottle.
- Place probe into the bottle and slide the collar down until it clicks into place. Press on the top of the probe until the tube touches the bottom of the bottle. For 3 and 4-gallon bottles, squeeze the tabs on the top of the probe assembly to separate the probe cap from the collar and press the collar securely over the bottle opening.
- Slide the bottle into the cabinet and close the door.
CLEANING & MAINTENANCE
For best taste, performance, and hygiene, clean your cabinet, controls, bottle probe, and spout each time you replace your water bottle. Use a clean, soft cloth and food-grade sanitizer or bleach. Empty and clean the drip tray as needed. Visit www.primowater.com for detailed cleaning instructions.
The self-sanitizing feature will automatically begin a cycle every 24 hours following the time of the first
cycle. To begin the first cycle, press and hold the black switch on the back of the dispenser for 5 seconds.
Unplugging the dispenser will reset the time that sanitization begins.
Note: The self-sanitization cycle takes 45 minutes to complete. We do not recommend dispensing or drinking water during this cycle as it may have a slight smell from the harmless ozone. This smell will completely dissipate a couple of minutes after the cycle is complete. We recommend setting the sanitization cycle to begin during a period when the dispenser will not be in use, such as overnight or when staff will not be in the office.
For additional assistance or instructional videos for maintaining and operating your dispenser visit our customer support page at www.primowater.com or call us at 1-866-429-7566.
Our US-based customer service team would be happy to help!
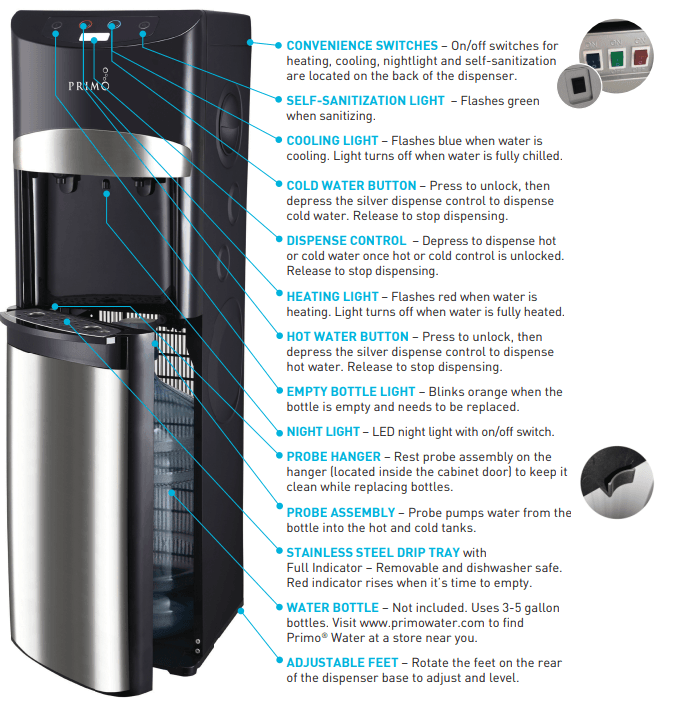
FEATURES
For more manuals by Primo Water, visit ManualsLibraryy
Primo Water 601234 Hot-Cold Water Dispenser-FAQs
How do I use the hot water feature on my Primo dispenser?
Press the hot water button to unlock, then press the silver dispense control to release hot water. Release the control to stop dispensing.
Why isn’t my Primo water dispenser dispensing cold water?
The issue may be due to the reservoir tank freezing into a block of ice. Turn off the green cooling switch on the back or unplug the dispenser for 24-48 hours to let the tank thaw. Afterward, it should work properly.
How do I make the water colder in my Primo dispenser?
Push the top side of the green cooling switch to activate the cold water function. Leave the switch in the off position (bottom side pushed in) if you don’t need cold water.
What does the blinking light on my Primo dispenser mean?
1. A green light below the wavy lines icon indicates the dispenser is heating water.
2. A blinking red light below the bottle icon means the bottle is empty and needs replacement.
How long does it take for Primo to cool water?
Once the cooling switch is activated, it takes approximately 1 hour to completely cool the water.
How can I fix a Primo dispenser that isn’t dispensing cold water?
Turn all switches to the off position and unplug the dispenser. Wait a few minutes, plug it back in, and turn the switches back on. Allow one hour for the water to cool. If the issue persists, contact customer service.
How can I acclimate to cold water for better use?
Gradually increase your exposure to cold water by immersing yourself waist-deep and lowering your body until fully submerged. You can also try cold baths or showers for gradual acclimatization.
What causes a dispenser to stop cooling water?
This could be due to issues with the thermostat or the cooling elements. Check the thermostat settings and ensure they are correct. If this doesn’t resolve the issue, the cooling elements may need servicing or replacement.

