RCA RPJ104 Multimedia Projector Bluetooth
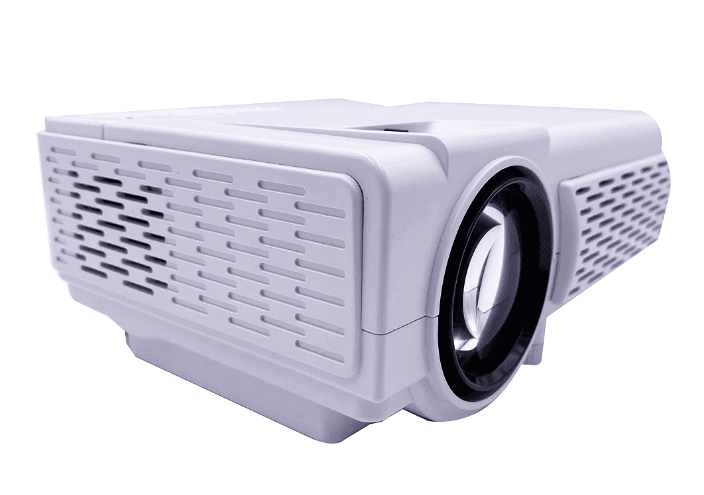
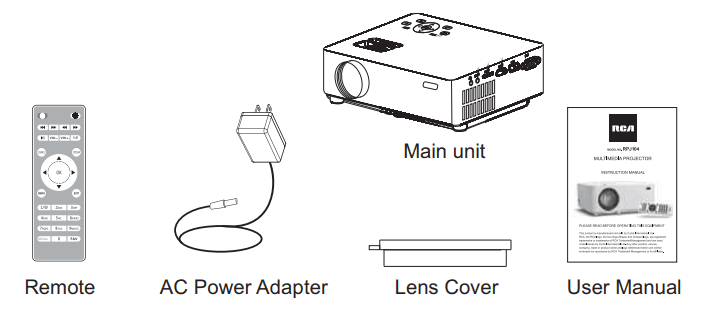
In The Box
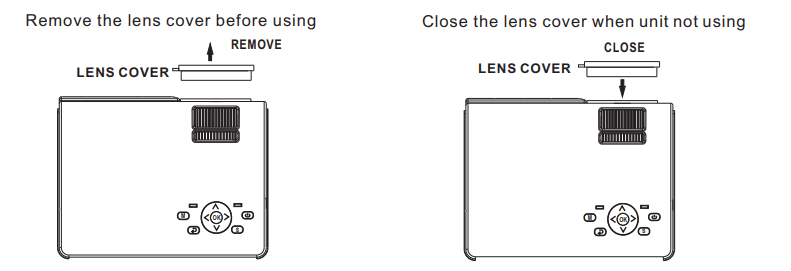
Remove & Close The Lens Cover
Placing Your Projector
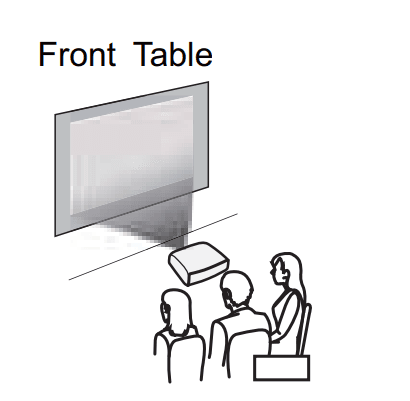
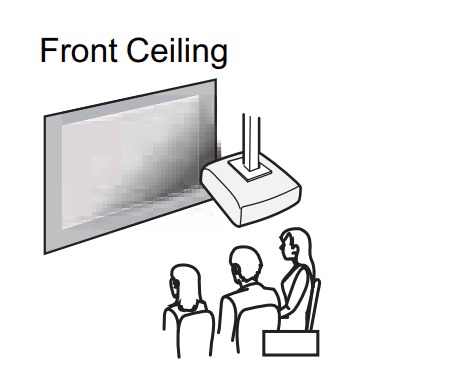
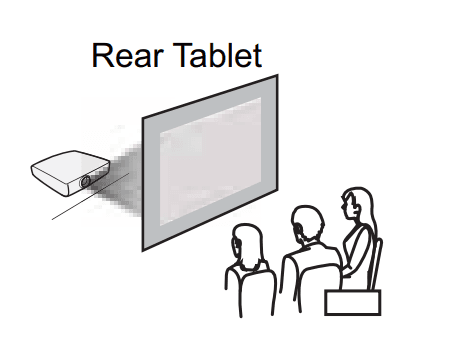
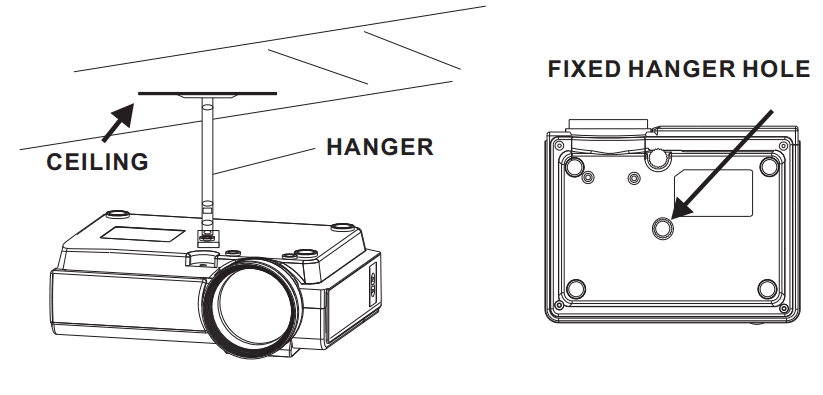
Your projector can be installed in four different configurations ( see picture below):
- Front Table: Select this location with the projector placed near the floor in front of the screen. This is the most common way to position the projector for quick setup and portability.

- Front Ceiling: Select this location with the projector suspended upside-down from the ceiling in front of the screen. NOTE: A projector mount is required to install the projector in a ceiling.

- Rear Table: Select this location with the projector placed near the floor behind the screen. NOTE: A special rear projection screen is required.

- Rear Ceiling: Select this location with the projector suspended upside-down from the ceiling behind the screen. NOTE: A projector mount is required to install the projector in a ceiling. A special rear projection screen is required.

To Reduce Image Distortion
It is recommended to move the projector as close to the center of the screen.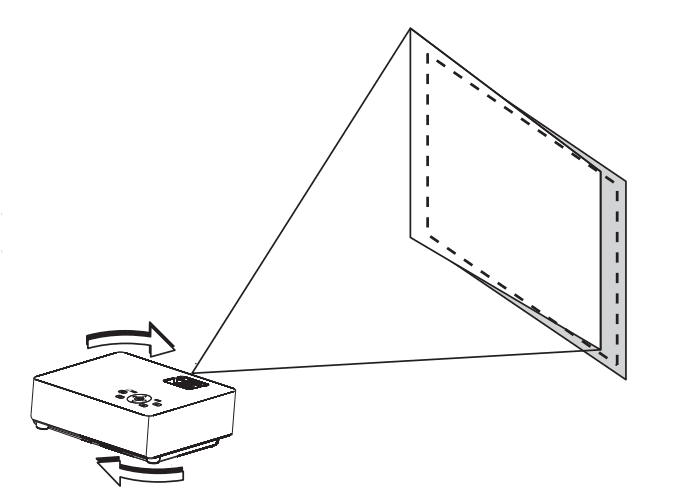
Distance Between The Projector And Screen
Measure the distance between the projector and where you want to position the screen. This is the projection distance.


Placing Your Projector On Ceiling,
When installing the projector in the ceiling, please purchase a projector mount recommended by an installation professional and follow the instructions that come with the mount.
Before installing the projector in the ceiling, please check to make sure the ceiling structure can support the weight of the projector and the mount. If in doubt, please ask the advice from an installation professor.
NOTE: Projector mount and screw(s) not included
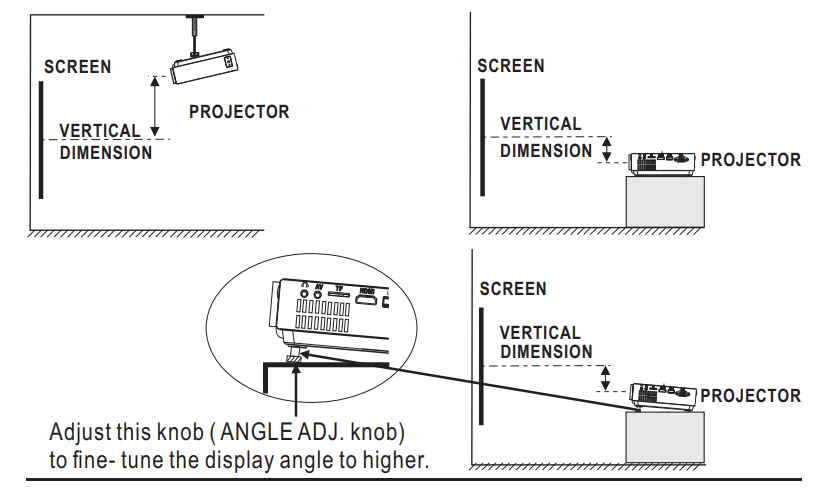
Adjust The Vertical Location
Follow the below picture to adjust the vertical location.
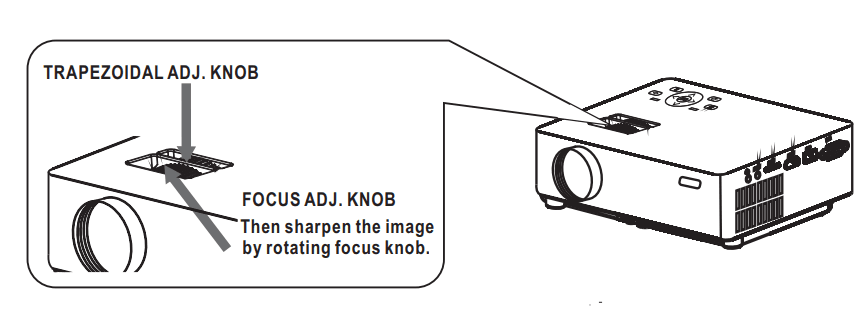
Adjust The Focus And Keystone
Follow the below picture to adjust the focus and trapezoidal screen.
Adjust the focus by turning the knob while observing the image pixels near the center of the screen. Optimal focus is obtained when the pixels are clearly visible. Depending on the projected screen size, the focus near the screen edges may be less sharp than the screen center.
A keystone image is created when the projector beam is projected onto the screen at an angle. Keystone correction will restore the distorted image to a rectangular or square shape.
Controls Of Remote

Install / Remove Battery Of Remote
Remove the battery compartment cover on the back of your remote by carefully sliding to open. The battery cover can then be lifted away. Fit the correct batteries (not included), referring to the polarity markings. Finally, replace the cover.
NOTES
- Batteries shall not be exposed to excessive heat such as sunshine, fire
- Be sure that the batteries are installed polarity correctly.
- Do not mix old and new batteries. • Only same or equivalent type batteries as recommended are to be used.
- Do not dispose of batteries in fire, batteries may explode or leak. Do not try to recharge a battery

Controls Of Projector

- NETVIGATOR
 Buttons
 - LENS
- FOCUS ADJ. Knob
- TRAPEZOIDAL ADJ. Knob
- POWER on Indicator
- DC IN jack
- POWER
 Button
 - SOURCE
 Button
 - RETURN
 Button
 - MENU
 Button
 - STANDY indicator
- IR Window ( Rear Side)
- IR Window ( Front Side)
- ANGEL ADJ. Knob
- EAR PHONE Jack
- AV OUT Jack
- TF Card Slot ( Micro SD Card )
- HDMI Port
- USB Port
- VGA Port
Install Power Adapter
Follow the below picture to connect the power adapter
Connect the small end of the adapter FIRST. Plug the adapter body into a power outlet.

Main Operation
 Press the button to turn on the unit; press again to turn it off.
 / SOURCE – Press the button to select the input source.
 / MENU – Press the button to enter the projector menu.
 – Press the buttons to select the screen item of the projector menu.
 / EXIT – Press this button to exit the projector menu.
 – Press the buttons to fast search forward and rewind on USB / TF.
 – Press the buttons to search the next or previous file on USB / TF.
 Press the buttons to select the correct sound.
 – Press the button to play/pause the connect USB / TF card.
 – Press the button to rotate/mirror the projector screen
 – Press the button to select image scale.
 – Press to mute the audio sound of your projector. Press again to resume.
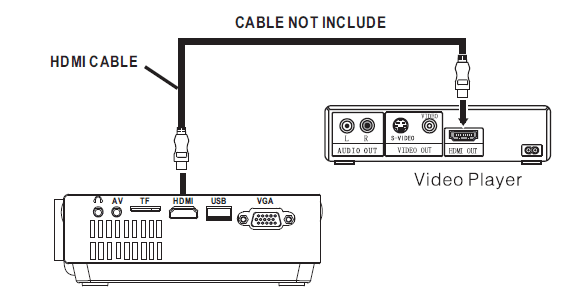
Connect HDMI to Show The Image On the Projector Screen
Follow the picture below to connect the HDMI cable and device.
- Turn off the unit before connecting the HDMI cable.
- After connecting, press the
 button to turn on the unit, and the power indicator will light GREEN
 - Press the
 / SOURCE button to HDMI mode, and the video of the HDMI device will show on the projector screen.
 - Press the
 button to turn off the unit’s power.
Specifications
- Bluetooth version: 4.0
- Brightness Output: 2000 lumens
- Light Source Type: LED
- Display Native Resolution: 800 x 640
- HDMI Input Supported Video Resolution: 1080p , 1080i , 720p, 576i , 480p, and 480i
- Power Consumption Operating 36W; Standby 0.8W
- Power Input Connect Included Adapter: DC 12V, 2.5A
- Display Color: 16.7K
- Projection Size: 30-100 inch
- Signal Port Video: / VGA / HDMI
- Weight: 0.9 KG
- Dimension: 207 x 160 x 85 mm
LIMITED PRODUCT WARRANTY
This quality product is warranted to be free from manufacturer’s defects in material and workmanship, provided that the unit is used under the normal operating conditions intended by the manufacturer.
Should you have any problem with this product, please and it is highly recommended to visit our website at www.curtisint.com before you take any other steps as we have additional copies of instruction manuals, operating manuals and trouble shooting tips on our website which gives you the answer on most of the questions you could have in operating the unit.
TERMS OF WARRANTY
Service Dept. warrants this product to be free from defects in materials and workmanship for 90 days on its and 90 days on labor. If you originally purchased your product more than 90 days ago, a repair fee may apply.
Nothing within this warranty shall imply that C.l. will be responsible or liable for any damage to any items placed in this product, whether due to any defect of the product or its use, whether proper or improper.
EXCLUSIONS
Save as herein provided, C.I. Service Dept. (Canada) or C.I. Service Dept. (USA), there are no other warranties, conditions, representations or guarantees, express or implied, made or intended by C.l. or its authorized distributors and all other warranties, conditions, representations or guarantees, including any warranties, conditions, representations or guarantees under any Sale of Goods Act or like legislation or statue is hereby expressly excluded. Save as herein provided, C.I.
Service Dept. (Canada) or C.I. Service Dept. (USA), shall not be responsible for any damages to persons or property, including the unit itself, howsoever caused or any consequential damages arising from the malfunction of the unit and by the purchase of the unit, the purchaser does hereby agree to indemnify and save harmless C.I. from any claim for damages to persons or property caused by the unit.
TO OBTAIN REPAIRS UNDER THE TERMS OF THIS WARRANTY
- The original purchaser must present a copy of the original bill of sale and the service warranty card.
- Any alterations, abuse, misuse, battery corrosion, or accidental damage voids the warranty.
- The warranty does not cover cabinets and accessories.
- No warranty or insurance contained or set out shall apply when damage or repair is caused by power failure, damage in transit, or when moving the unit, improper power supply, use for commercial or industrial purposes, service calls resulting in customer education, etc.
- The defective product should be mailed to: Canada U.S.A C.I. Service Dept. Curtis International Ltd 315 Attwell Drive c/o Lotus International Company Toronto, ON 6880 Commerce Blvd. M9W 5C1 Canton MI 48187 U.S.A. For service assistance and product information, please call 1-800-968-9853. If mailing the product, the freight must be prepaid, and a money order for $7.00 should be included to cover the cost of insurance and the return of the product.
- C.L. reserves the right to repair or replace the parts that have become defective.
- To begin the warranty repair process, please note that you MUST obtain a return authorization number prior to returning your product for warranty-based support. This can be placed under the 1-800-968-9853 contact line.
For more manuals by RCA, visit ManualsLibraryy
RCA RPJ104 Multimedia Projector Bluetooth-FAQs
Does the RCA RPJ104 projector support Wi-Fi?
Yes, the RCA RPJ104 projector supports Wi-Fi connectivity, allowing you to stream movies and connect to smart devices wirelessly.
Can I connect my smartphone to the RCA projector?
Absolutely! You can connect your phone using an HDMI/MHL cable or a wireless USB adapter to stream content directly.
How does Bluetooth work on this projector?
The projector uses Bluetooth in two ways:
1. Media streaming: You can wirelessly mirror content from phones, tablets, or laptops.
2. Audio output: You can pair it with Bluetooth speakers or soundbars for better sound quality.
Can I connect my phone without Wi-Fi?
Yes, you can use a USB-C to HDMI adapter to connect your phone to the projector using a cable—no Wi-Fi needed.
How does Wi-Fi work on a projector?
Wi-Fi projectors like this one use a built-in wireless receiver to connect to a source device via a dongle or internal Wi-Fi chip, allowing for wireless streaming and screen mirroring.
How do I watch Netflix on the RCA projector?
Connect your phone to the projector via HDMI (using an adapter if needed), set the input to HDMI, open Netflix on your phone, and start watching.
How can I connect my phone if it doesn’t support Bluetooth?
Use a USB-C to HDMI adapter and an HDMI cable to link your phone directly to the projector for a stable, wired connection.
Why does my RCA projector say “No Device”?
This message usually appears when the input source isn’t connected properly. Double-check all cables and ensure the projector is set to the correct input mode.
How do I watch live TV using the projector?
You can connect your TV to the projector using a VGA or HDMI cable, or use a component cable with RCA jacks for signal transmission.

