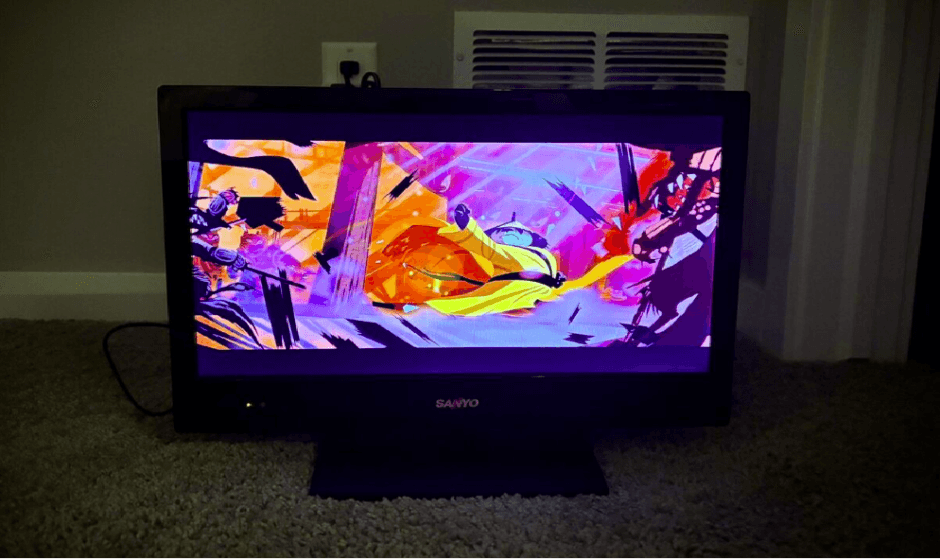
Sanyo DP26649 26 inches HDTV LCD
POSITIONING THE LCD HDTV
- Always use a firm-flat surface when positioning your HDTV. Do not position the unit in a confined area. Allow adequate space for proper ventilation.
STAND REMOVAL AND WALL MOUNTING (OPTIONAL)
- Tools Needed: Phillips screwdriver
- IMPORTANT NOTE: Place HDTV face down on a padded or cushioned flat surface to protect the screen and finish. Wall mounting of the HDTV must be performed by a skilled person
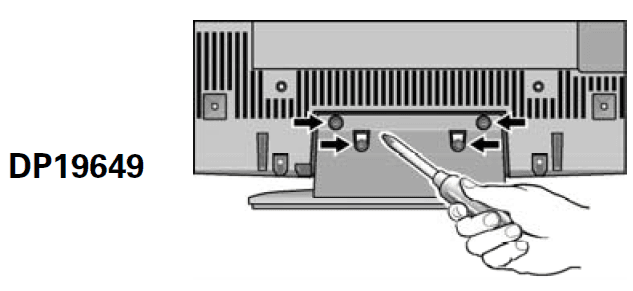
- Remove the four (4) screws securing the foot stand.
- CAUTION: Hold the stand firmly as you remove the last screw.
- Use the screws you removed when detaching the stand to secure the HDTV to a wall mounting kit (not included.)
- VESA standard interface: 100 x 100
- Mounting screws measurements: M4 (4mm) Diameter, Length—10mm (maximum)

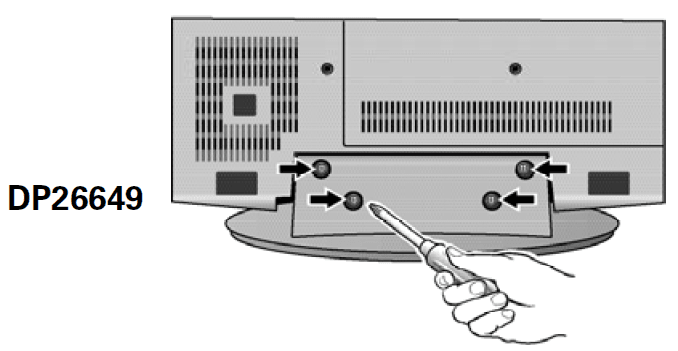
- Remove the four (4) screws securing the foot stand.
- CAUTION: Hold the stand firmly as you remove the last screw.
- Use the screws you removed when detaching the stand to secure the HDTV to a wall mounting kit (not included.)
- VESA standard interface: 200 x 200
- Mounting screws measurements: M6 (6mm) Diameter, Length—16mm (maximum)

GETTING STARTED
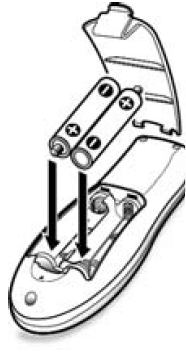
Install batteries in the remote control ( 2 “AA”, not included)
PRECAUTIONS
To ensure safe operation, please observe the following precautions:
- Replace both batteries at the same time. Do not use a new battery with a used battery.
- There’s a risk of explosion if a battery is replaced by an incorrect type.
- Do not expose the Remote Control unit to moisture or heat.
- Be sure to match the “+” and “–” signs on the batteries with marks inside the remote control.

ANTENNA CONNECTION FOR OFF-AIR SIGNALS OR CABLE
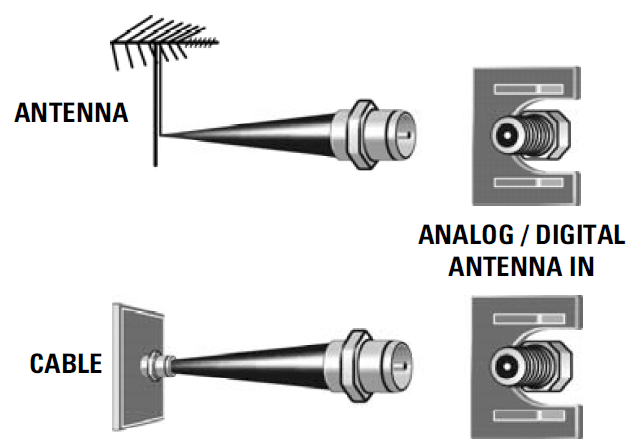
- NOTE: The tuner in this HDTV can receive digital and analog off air signals from an antenna. It can also receive analog or ClearQAM cable channels from
a direct Cable TV connection.
REMOTE CONTROL OPERATION
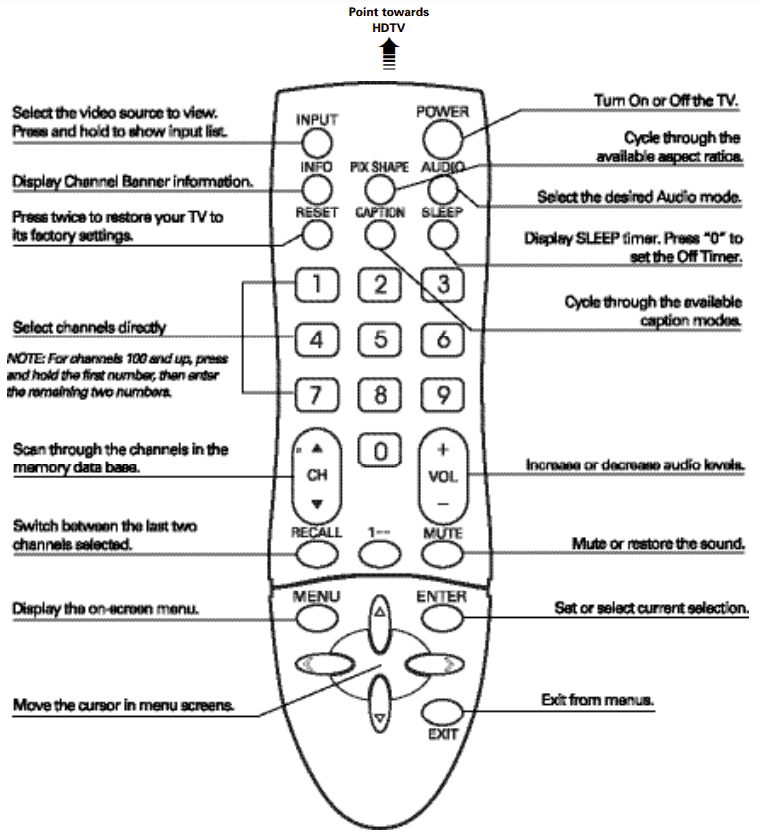
- NOTE: For full function descriptions please see On-Screen Menu Operation instructions starting on pg. 11.
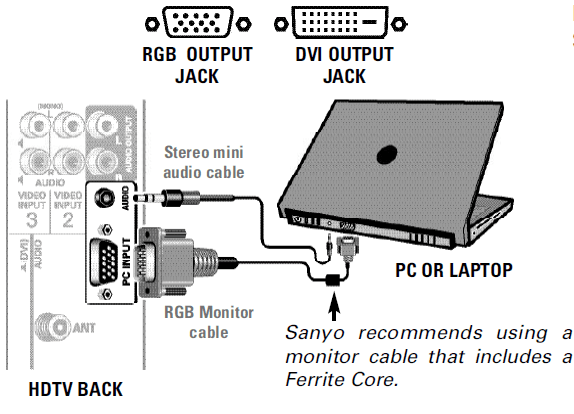
PC CONNECTIONS AND SETUP
- To avoid an “Out of Range” condition please set your PC’s output resolution to one compatible withyour HDTV. See page 3.
- NOTE: If the computer has only DVI Output, a DVI to RGB converter will be required (not included.)

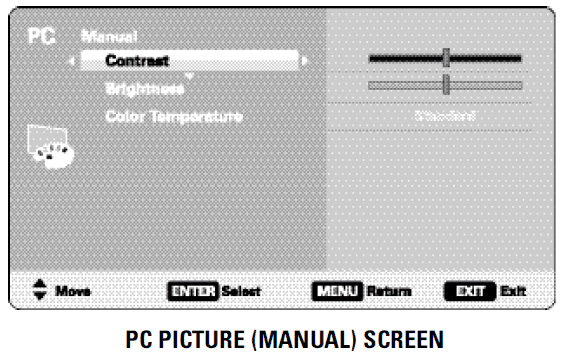
PC Picture
- Standard – Sets predetermined values to the Picture parameters.
- Manual – Adjust the screen’s Contrast, Brightness and Color Temperature settings.

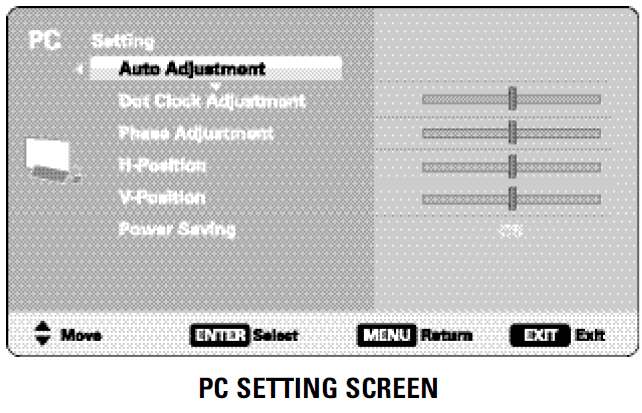
PC Setting
- Auto Adjustment – Automatically adjust display position, dot clock and phase.
- Dot Clock – Adjust the Dot frequency to match your computer’s Dot frequency.
- Phase – Adjust this parameter when the picture appears to flicker or is blurred.
- H-Position – Move the image horizontally
- V-Position – Move the image vertically
- Power Saving – Enable the HDTV to turn to Standby Mode when the computer is not in use

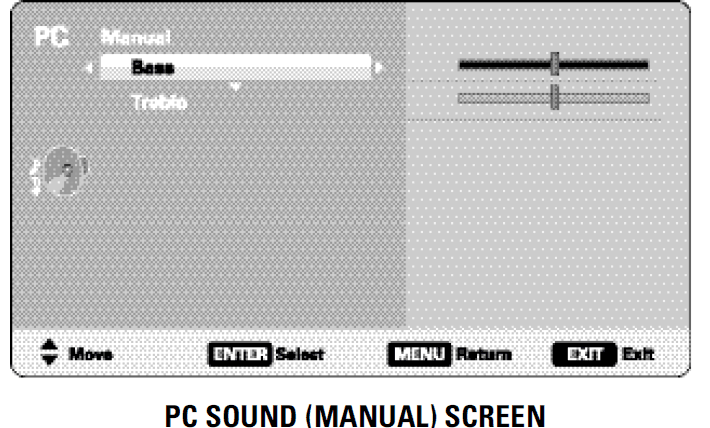
PC Sound
- Standard – Sets predetermined values to the Sound parameters.
- Manual – Adjust the HDTV’s Bass and Treble settings.
- NOTE: These settings do not affect normal TV viewing.

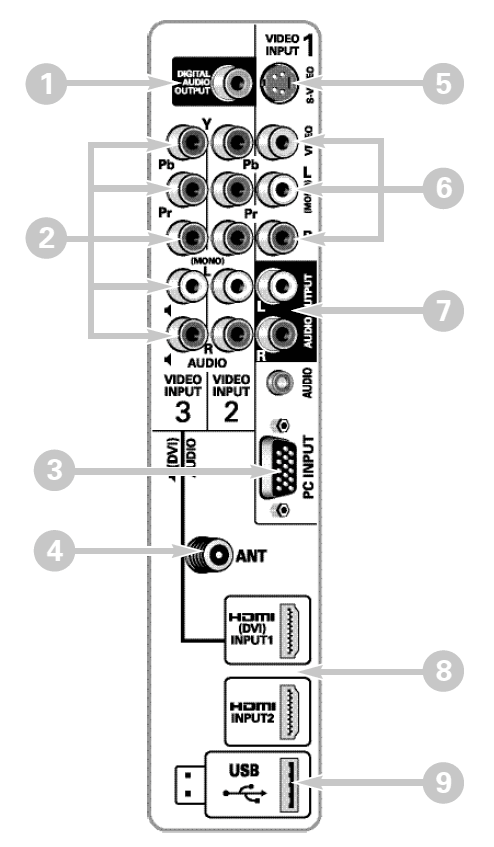
BACK PANEL JACKS
- Digital Audio Output (Coaxial)
- Component Video Input (VIDEO2 or VIDEO3)
- Green (Y), blue (Pb), and red (Pr) Video inputs plus the white and red Audio inputs.
- PC Input and Stereo Audio (Mini)
- MONITOR RGB (D-SUB)
- AUDIO R/L (Stereo Mini Jack)
- Analog / Digital Antenna Input
- S-Video Input (VIDEO1)
- NOTE: An S-Video connection will override a connection to the Video1 (yellow) input jack.
- AV Input (VIDEO1 – Composite)
- Yellow (Video), plus white and red (Audio) input jacks.
- Stereo Audio Out (L/R) Jacks
- HDMI (INPUT1 or INPUT2)
- An all digital AV interface that accepts uncompressed video signals for the very best picture possible.
- NOTE: A DVI conection is possible via the HDMI (DVI) INPUT1 using an appropriate adapter and connecting the audio to the VIDEO3 Audio jacks.
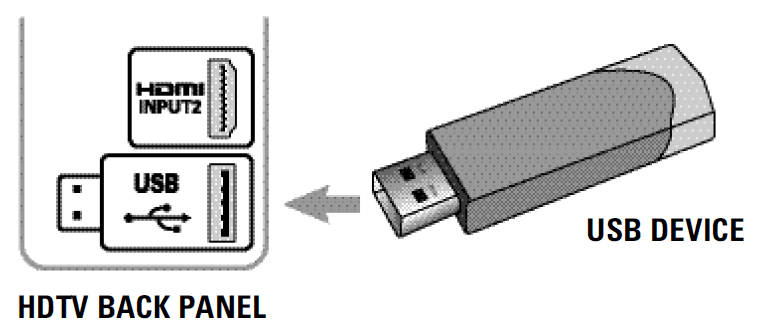
- USB Input
- View pictures stored in a USB device.


- View pictures stored in a USB device.
AUDIO / VIDEO CONNECTIONS
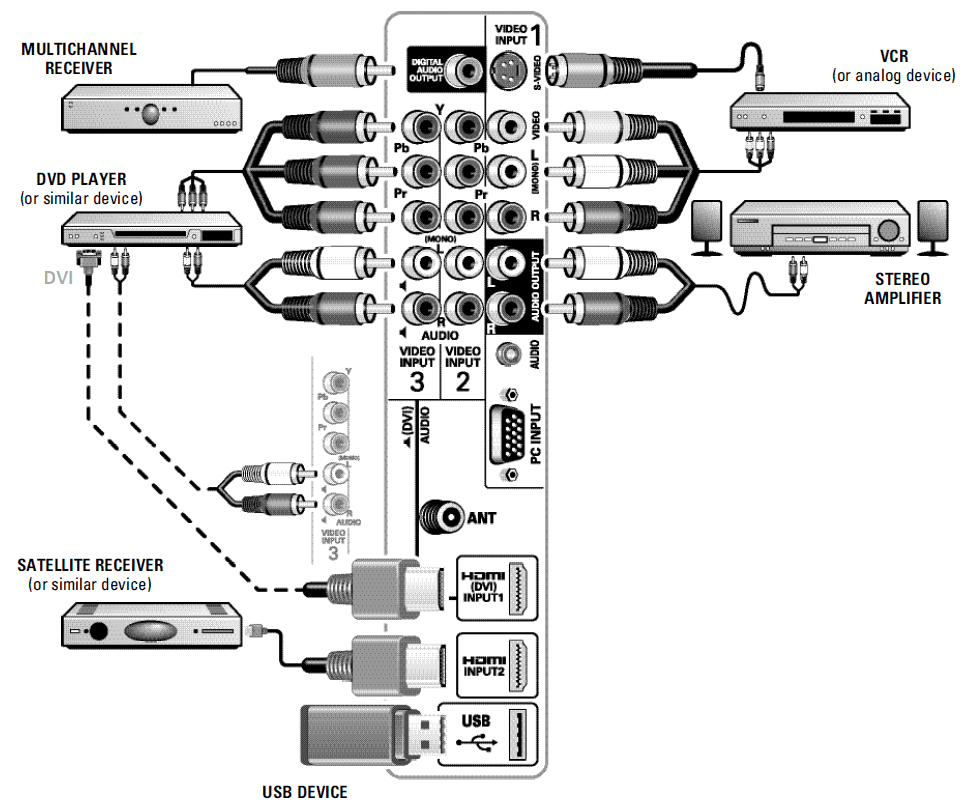
- Digital Audio Output is used to hookup a multichannel receiver with the use of a phono-type digital audio cable.
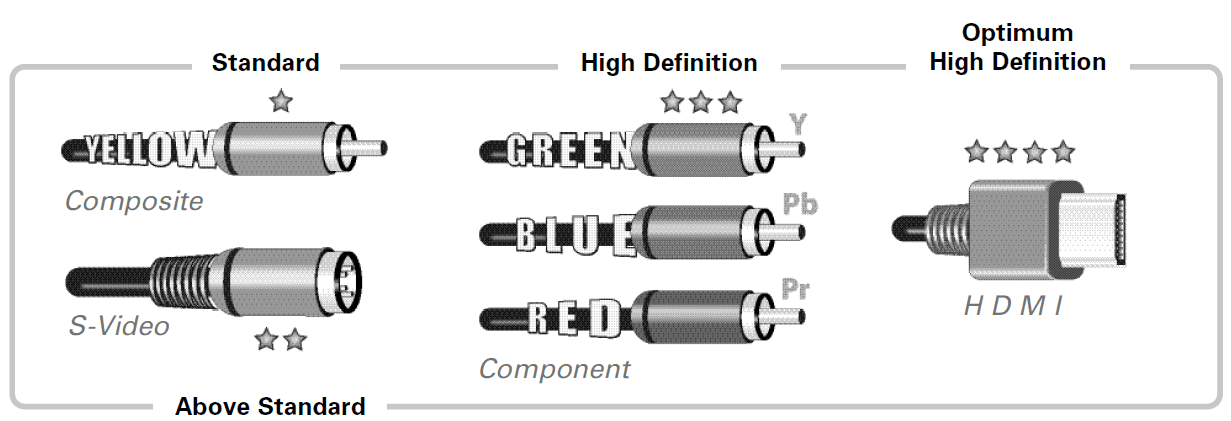
- Component connections will accept SDTV, EDTV and HDTV video signals. Use them for great image quality from digital devices
- Composite connections are used to hookup your analog equipment such as a VCR or an older DVD player.
- S-Video connection can replace the yellow Video connection for enhanced video.

- USB input jack is used to connect a USB mass storage device to watch JPEG images
- Audio Output L/R are used to hookup an external stereo Amplifier. (Do not connect external speakers directly to the HDTV.)
- HDMI INPUT1 & 2 are used to hookup HD digital devices such as a Blu-ray player, HD Cable Box, HD Satellite Receiver or Videogame System.
- HDMI (DVI) INPUT1 can be used to hookup a DVI device with the use of an appropriate adapter. (VIDEO3 Audio L/R jacks need to be hooked up to the DVI device as well.)
- NOTE: Audio/Video cables are not supplied
GETTING STARTED— INITIAL CHANNEL SEARCH (FIRST POWER ON)
ON-SCREEN MENU OPERATION
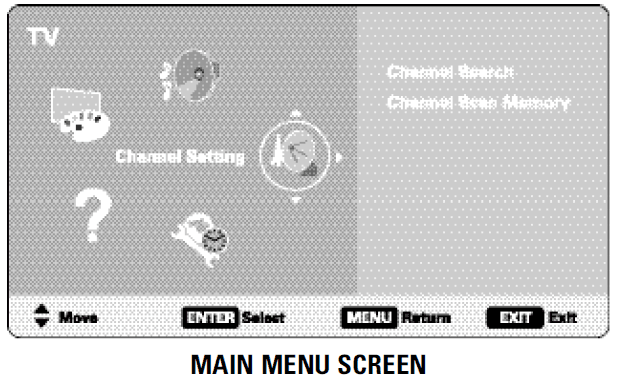
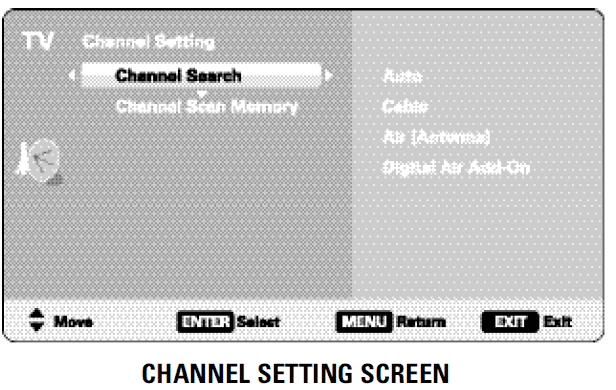
CHANNEL SETTING
 Display the On Screen menu and use the CURSOR
 keys to select Channel Setting. Press ENTER.
CHANNEL SEARCH
- Auto – Searches the detected mode, Cable or Air.
- Cable – Searches for analog and unscrambled (ClearQAM) digital cable channels.
- Air (Antenna) – Searches for analog and digital off-air channels.
- Digital Air Add-On – Searches digital off-air channels adding newly found digital channels to the channel map database

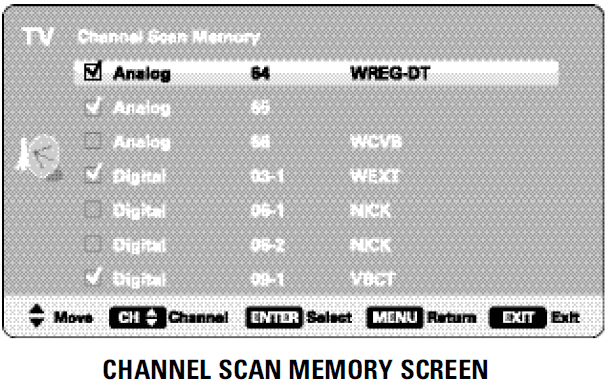
CHANNEL SCAN MEMORY
- Channel Scan Memory lists all Analog and Digital channels found. It also lists Analog channels that were not found, which can be added.

 Move the channel select bar through all channels, enabled and disabled.
 Move the channel select bar through enabled channels, skipping all disabled channels.
 Enable a disabled channel or disable an enabled one.
- NOTE: For information on local digital channels, visit www.antennaweb.org
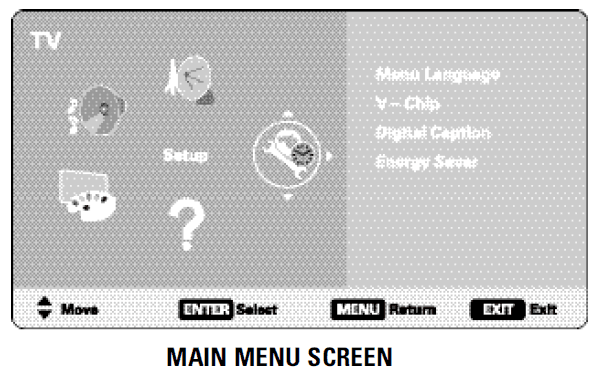
 Display the On-Screen menu and use the CURSOR
 keys to select Setup. Press ENTER.
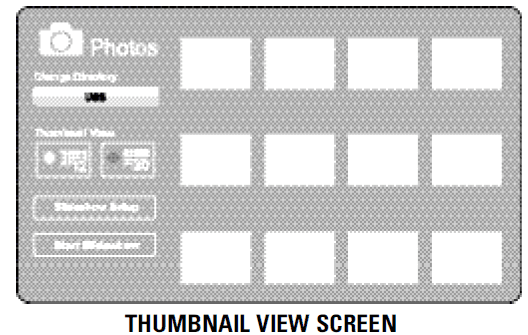
PHOTO VIEWER (USB)
- View pictures on your HDTV with the use of a USB mass storage device

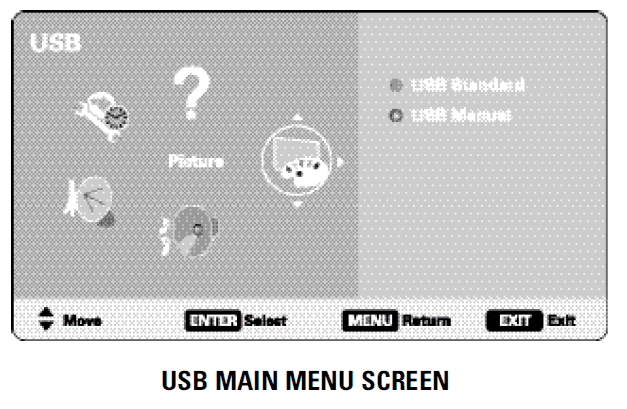
- NOTE: The HDTV switches to USB Input when a USB device is detected

- NOTE: A thumbnail hide icon will appear if a picture cannot be decoded or no thumbnail data is available
USING THE PHOTO VIEWER
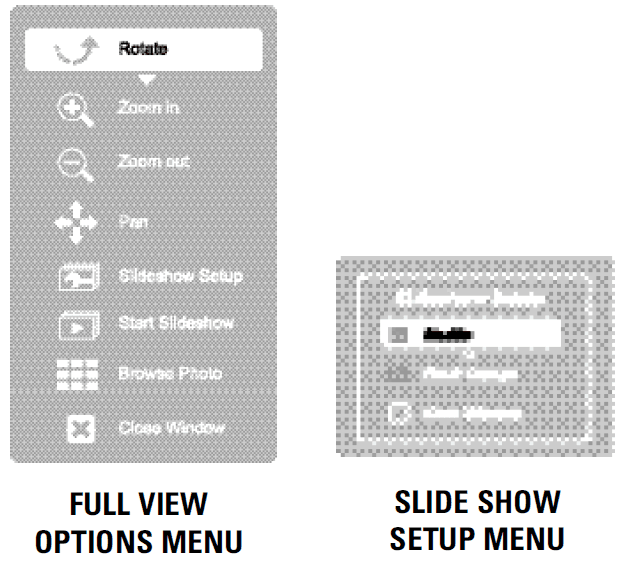
- Press ENTER on a thumbnail photo to enable the Rotate, Full View and Start Slideshow functions.
- Once in Full View mode:
- Use the CURSOR < > keys to change picture. Press ENTER to show the full view options menu.
SLIDE SHOW
- In the Slideshow Setup menu you may turn the Shuffle and Quick Change options ON or OFF.
- Press ENTER on Start Slideshow from the Thumbnail View Screen or from the full view options menu to start the slideshow from the current picture.

JPEG VIEWER USB MENU
- Press MENU when in Full View or Slideshow mode to display the USB On screen menu.
- Picture Setting – Adjust Color, Tint, Contrast, Brightness, Sharpness and Dynamic Contrast.
- NOTE: Picture Settings are separate configurations from the settings in TV and AV inputs.

For more manuals by Sanyo, visit ManualsLibraryy
Sanyo DP26649 26 inches HDTV LCD-FAQs
What is the resolution of the Sanyo DP26649 TV?
The Sanyo DP26649 26-inch HDTV features a resolution of 720p, providing clear and detailed high-definition images. It also includes dual HDMI inputs for easy connection to devices and a PC input to use the TV as a computer monitor.
Is the Sanyo DP26649 a Smart TV?
No, the Sanyo DP26649 is not a Smart TV. However, you can connect external streaming devices to make it “smart” and stream content from services like Netflix or YouTube.
Does Sanyo offer 4K TVs?
Yes, Sanyo offers 4K TVs in their product lineup, such as the 50″ Class 4K Roku Smart TV. However, the Sanyo DP26649 is not 4K, as it is a 720p HDTV.
What is the best TV resolution?
The highest resolution currently available is 8K, which offers four times the pixels of 4K, providing incredibly detailed and sharp images. However, for most users, 4K or 1080p (Full HD) are more than sufficient for excellent picture quality.
Why did Sanyo’s brand fade away?
Sanyo faced financial difficulties in the 2000s due to significant losses from its semiconductor business investments. In 2009, Sanyo was acquired by Panasonic and completely merged by 2011, which led to the discontinuation of the Sanyo brand.
Can a regular TV be turned into a smart TV?
Yes, you can turn a non-Smart TV into a Smart TV by using external streaming devices like Google TV, Apple TV, Amazon Fire Stick, or Google Chromecast, which allow access to streaming services like Netflix and YouTube.
Where is Sanyo TV made?
Sanyo is a Japanese electronics company founded in 1949 and headquartered in Osaka, Japan. Although the brand has merged with Panasonic, its products were originally designed and manufactured in Japan.
How can I check if my TV is UHD or 4K?
You can check the resolution of your TV by looking in the settings menu. If the resolution is listed as 3840 x 2160, then your TV is 4K. Most 4K TVs will display this resolution in the product specifications.
Is Full HD 720p or 1080p?
Full HD (FHD) refers to a resolution of 1080p, which is 1920 x 1080 pixels. It provides more detail than 720p HD, making it the standard resolution for modern HDTVs and computer monitors.
Is Sanyo a well-known brand?
Yes, Sanyo was once a major player in the electronics industry and was a member of the Fortune Global 500. The brand was known for a wide range of electronics before it was fully absorbed by Panasonic in 2011.

