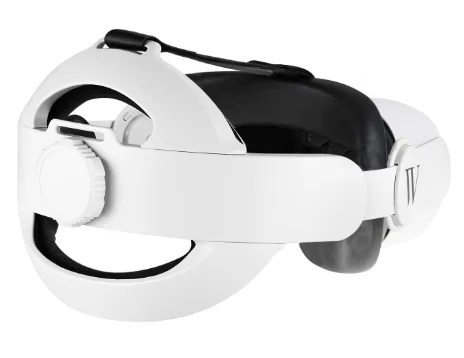
Wasserstein Head Strap for Oculus Quest 2
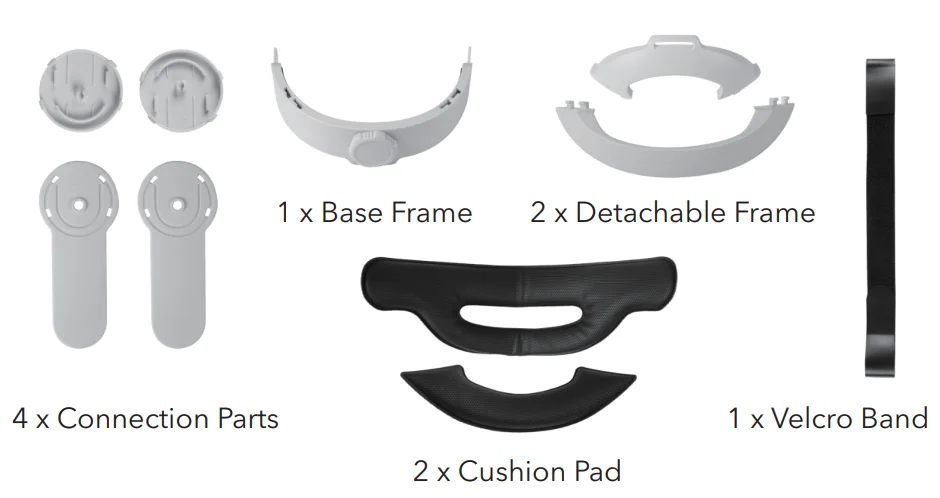
In the Box
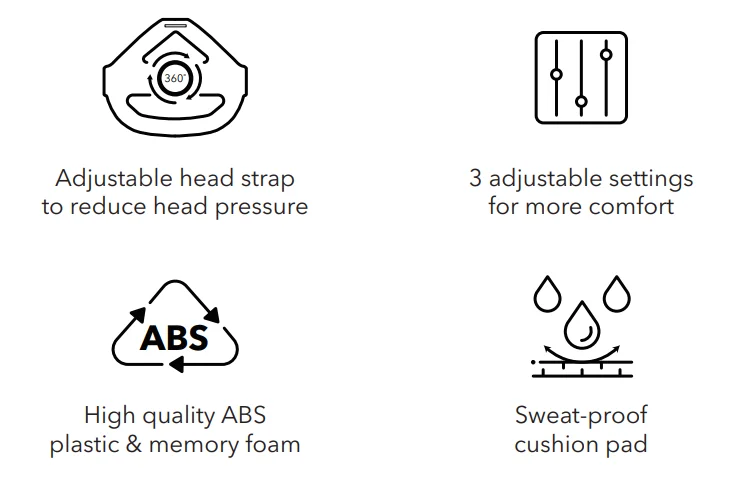
Features
Safety Precaution
To reduce the risk of personal injury, discomfort, or property damage, please ensure that each headset user carefully reads the warnings below before using this VR system.
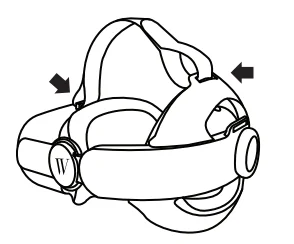
- Before installing, make sure to match the “L” and “R” icons on the buckle and extension arm. Wrong installation may damage the parts and make them difficult to separate.
- This product is not a toy and should not be used by children under the age of 13. The headset is not sized for children, and improper sizing can lead to discomfort or adverse health effects.
- The headset is not for use outdoors. Use of the headset outdoors creates additional and uncontrolled hazards, like uneven and slippery surfaces and unexpected obstacles, such as vehicles.
- Never wear the headset in situations that require attention, such as running, bicycling, driving, or handling hazardous objects, whether indoors or outdoors.
- To reduce the risk of discomfort, the headset should be balanced and centered, and the distance between the lenses (the intra-axial distance, or IAD) should be appropriately set for each user. When properly adjusted, the headset should fit comfortably, and you should see a single, clear image. Re-check the settings before resuming use after a break to avoid any unintended changes to any adjustments.
Introduction to Parts
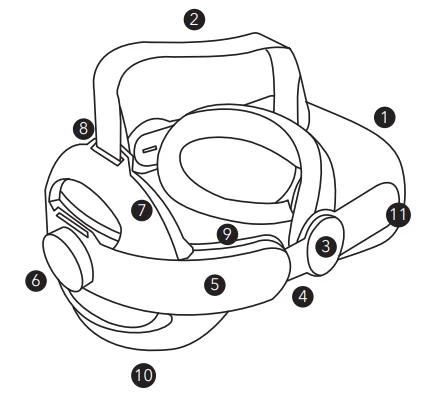
- VR Headset (Not included)
- Velcro Band
- Round + Long Connection Parts
- Retractable Arm Band
- Base Frame
- Base Frame Knob
- Upper Detachable Frame
- Velcro Band Slot
- Cushion Pad
- Lower Detachable Frame
- VR Headset Arm
Installation
Part 1: Attach Connection Parts to Retractable Armbands
Note: Make sure to use the correct parts on each side, matching the L and R parts to each other.
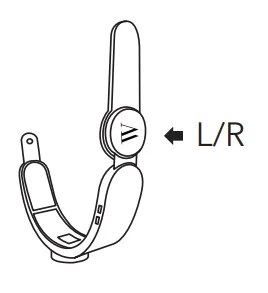
- Turn the base frame knob counterclockwise to extend the retractable arm bands.
- Attach the long connection part to each side using the corresponding round connection parts as shown.
Part 2: Upper and Lower Detachable Frame
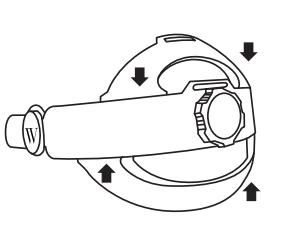
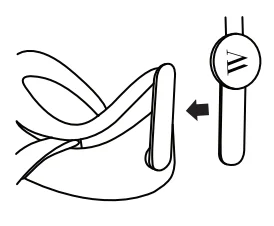
- Place each detachable frame into the designated holes and slide it to the right until a click sound is heard.
- Attach the cushion pads, lined with velcro, to the inner side of the frame.
Part 3: Install with your VR Headset
- Remove the face cushion and the original head strap from the VR headset. Fix the round end of the velcro band into the slot of the VR headset. Fix the flat end side of the velcro band into the velcro band slot from the head strap.

- Put the face cushion back securely, snap the long connection parts to the VR Headset arms. Make sure it holds the VR headset firmly.

- Put the VR headset on and adjust the head strap until you see a clear image by turning the base frame knob and adjusting the length of the velcro band.

Final Product
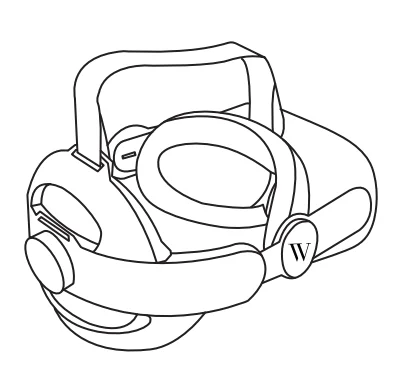
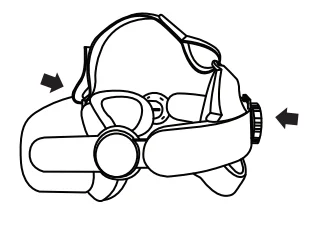
Upper and Lower Detachable Frame Options
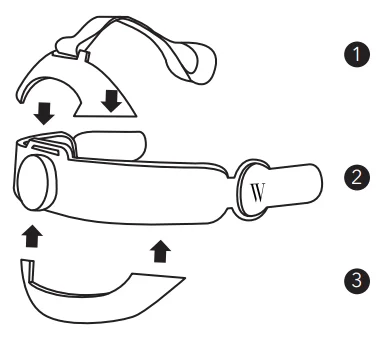
Adjust the head strap to your desired level of comfort by removing the upper detachable frame, as shown in 1, the lower detachable frame, as shown in 2, or both.
For more information, please visit: www.wasserstein-home.com or contact us at: [email protected]
Made in China
For more manuals by Wasserstein, visit ManualsLibraryy
Wasserstein Head Strap for Oculus Quest 2- FAQs
Can I replace the head strap on my Oculus Quest 2?
Yes. The Wasserstein head strap is fully interchangeable with the original Quest 2 strap. You can easily replace it if the old strap is dirty or worn out.
How do I make the Oculus Quest 2 head strap more comfortable?
Loosen the back and top straps, position the headset evenly on your face, and adjust until pressure is evenly distributed. Consider a halo-style or elite strap for additional comfort.
How do I tighten the Quest 2 head strap?
Adjust the Velcro or ratchet mechanism on the strap until the headset fits snugly without pressing too hard on your forehead or temples.
Can I wear glasses with the Oculus Quest 2?
Yes, most standard glasses fit inside the headset. For better comfort and visual clarity, prescription lens inserts are recommended.
Does the head strap affect battery life?
The standard strap does not extend battery life. If you want extra playtime, consider the Elite Strap with built-in battery for longer VR sessions.
How do I clean the head strap?
Use a soft damp cloth for cleaning. Avoid harsh chemicals. Some cloth covers may be machine-washable; check manufacturer instructions.
How do I avoid VR headaches or discomfort?
Adjust the fit, use the IPD (interpupillary distance) setting, limit VR sessions, and ensure proper lighting. A well-fitted head strap reduces forehead pressure and neck strain.
Will the Quest 2 be supported in the future?
Yes. Although the Quest 2 and Pro were discontinued for purchase after December 2024, both will continue receiving software updates and support until December 2026.
Can the head strap reduce sweating in VR?
A properly adjusted strap can improve airflow and reduce pressure points, which helps minimize sweating during long VR sessions.

