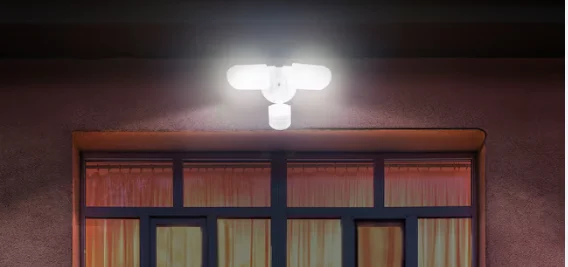
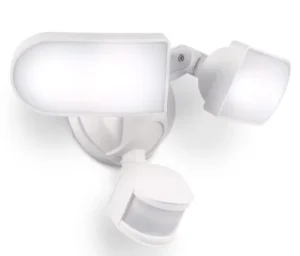
Wasserstein Smart Floodlight
In the Box
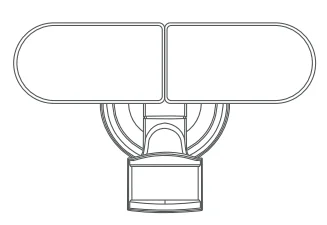
1 x smart floodlight
1 x crossbar
1 x EVA gasket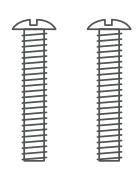
2 x machine screws (M4 * 25mm)
1 x ring and nut set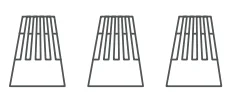
3 x wire nuts
Warnings
- As the temperature changes, the detection distance will be affected.
- Do not mount the near a heat source like an air conditioner, vent, furnace, exhaust, or in a direction facing any reflective object / other nearby light source.
- Shut off power at the circuit breaker or fuse panel before removing the old fixture or installing the new one.
- LEDs can be damaged by static electricity. Before installing, discharge any static from your body by touching a grounded bare metal surface.
- To avoid damage, do not remove the clear lens over the LED module
Safety Instructions
- Please read this entire manual before attempting to assemble, operate, or install the product.
- Floodlight MUST be installed by a qualified electrician.
- Turn the power OFF before installing.
- Do NOT touch or install the fixture near water or if the surrounding area is wet.
- Do NOT remove the protective LED lens.
- Do NOT look directly at lit LEDs for any length of time.
- Do NOT leave bare wires exposed.
- Electrical requirements: 120V, 60 Hz
- Do NOT allow the sensor head to touch the LED head housing. Maintain at least 1 inch of space between the LED heads and the sensor head.
- For proper operation and protection against water damage, the motion sensor adjustment controls MUST be facing
downward. - Do NOT mount below 5 ft.
How to Install
Caution: The floodlight must be installed by a qualified electrician. Your main circuit breaker MUST be turned off before installing.
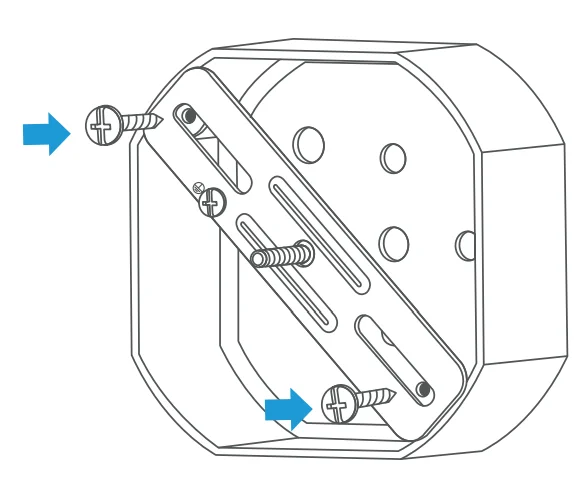
- Attach the crossbar to the junction box using the two machine screws provided.

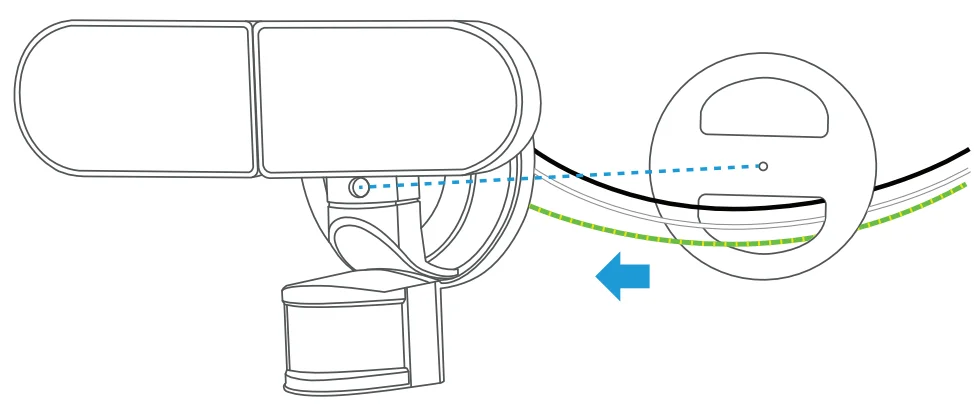
- Remove the protective layer from the EVA gasket and stick it firmly on the back of the floodlight (make sure the long screw at the crossbar goes through the center hole, and the wires go through the gasket opening

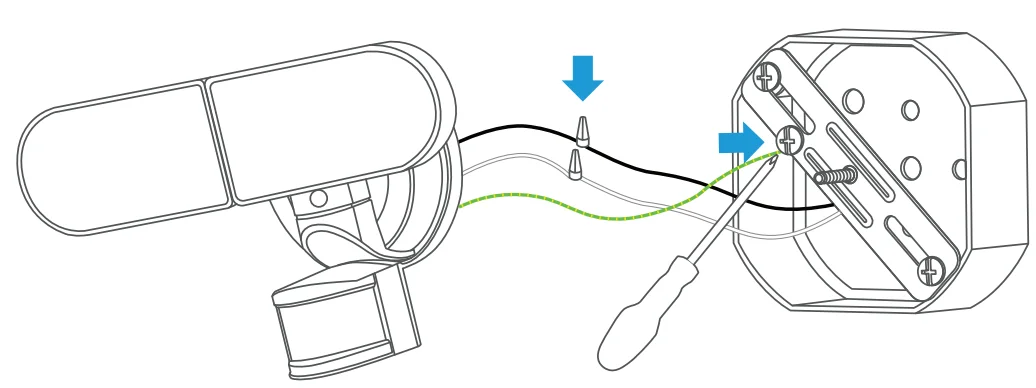
- Connect the yellow/green (ground) wire from the floodlight to the junction box using the ground screw (painted green).
Connect the white wires (neutral) with a wire nut. Connect the black wires (hot) with a wire nut.
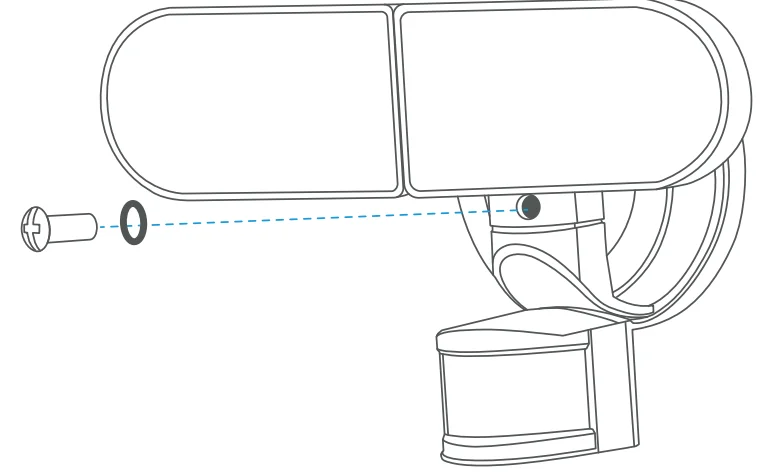
- Carefully place wires into the junction box. Place a floodlight over the crossbar. Mount the floodlight onto the crossbar and secure it with the nut and ring provided.
App Setup
Minimum requirements:
- Smartphone or tablet running iOS 9.0 or later / Android 5.0 or later.
- 2.4 GHz WiFi Network (not compatible with 5 GHz connections).
- Upload speed of at least 2 Mbps.
- Download the App by scanning the QR code or by searching “Wasserstein App” in Google Play or the App Store.

- Sign up for a new account or log in to an existing account.
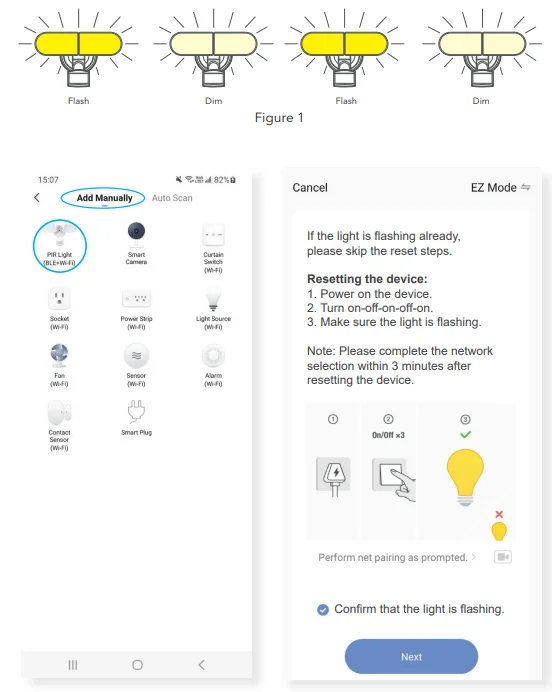
- Click “Add Device” or “+” in the top right corner. You can add your device by selecting “Add Man
Add Manually
- Select “Lighting” – “PIR Light(BLE+WiFi)”.
- Reset the floodlight by turning it on and off in the following sequence: on-off-on-off-on (steps also displayed in your App). Then, your floodlight will flash in intervals (Figure 1)

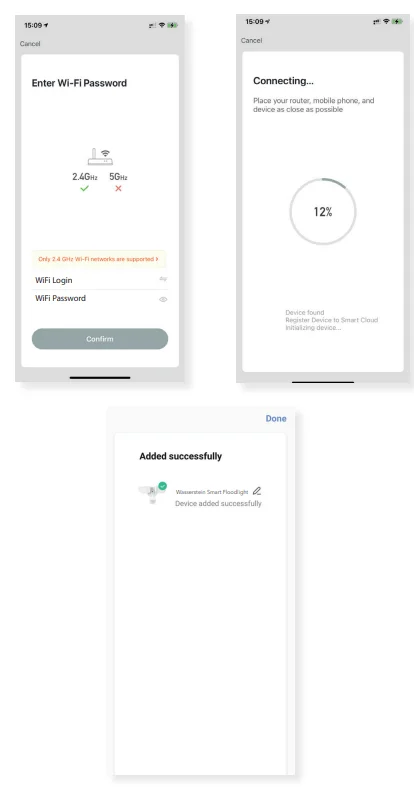
- Enter your WiFi details, and click “Confirm”.
- Wait until your device has been added successfully
Auto Scan
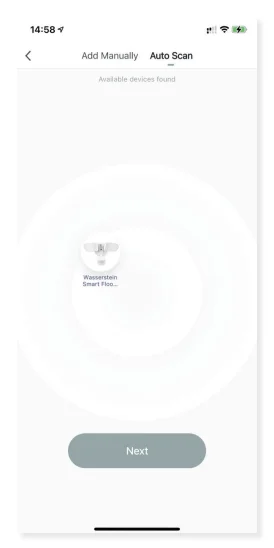
- Reset the floodlight to enable pairing mode. Turn on and off in the following sequence: on-off-on-off-on. Your floodlight will then flash in intervals.
- Wait until your floodlight has been automatically detected.
App Functions
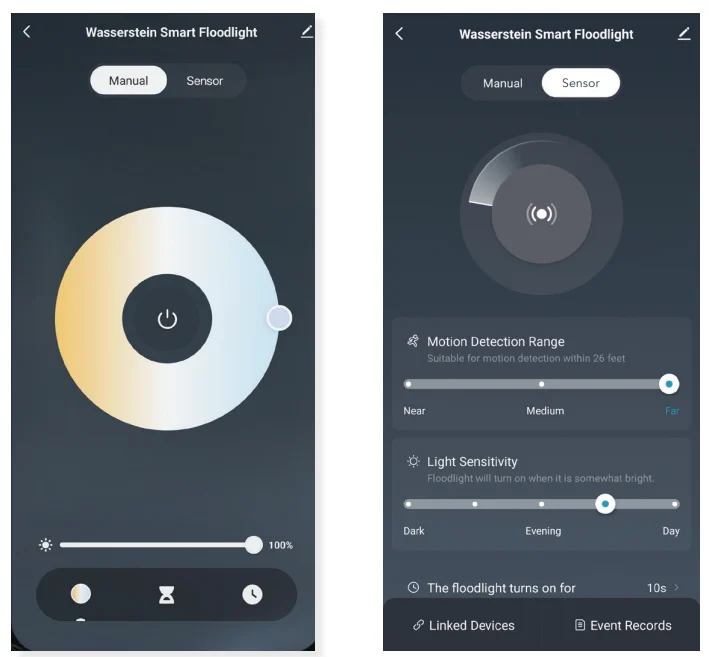
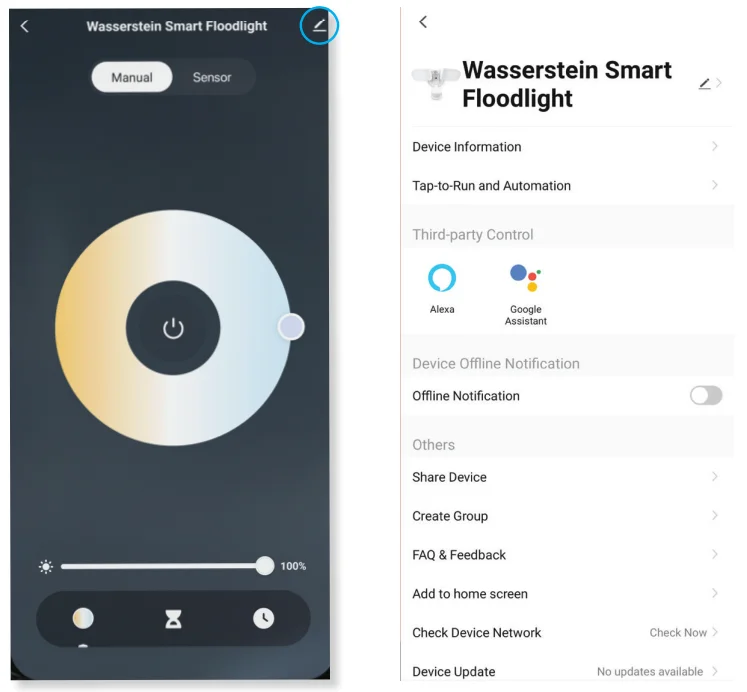
- Settings

- Manual
- On/Off
- Light intensity
- Floodlight color
- Turn on/off timer
- Schedule
- Sensor
- On/Off
- Motion detection range
- Floodlight light sensitivity
- Duration of light flash
- Event records
- Manual
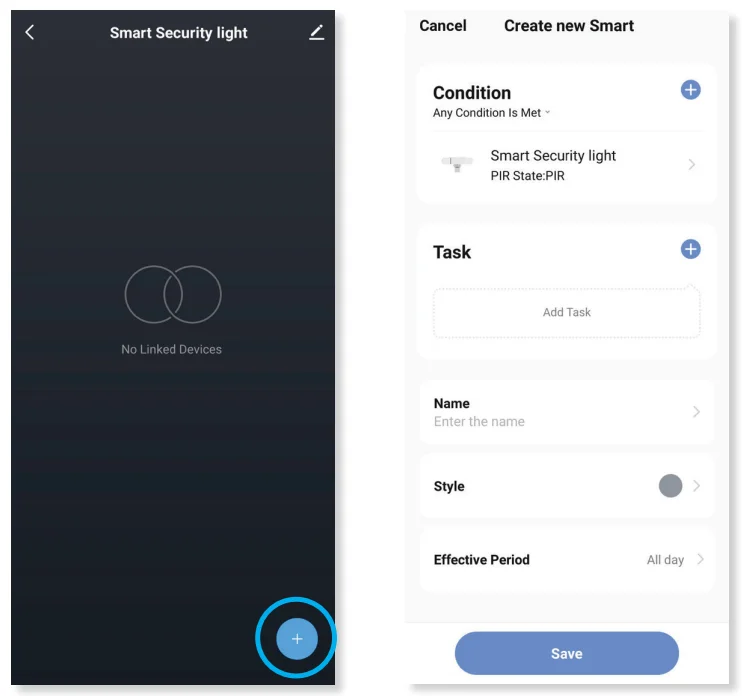
- How to Use Linked Devices: On the ‘Sensor’ page, click “Linked Devices”, then click “+” on the lower right corner to enter the ‘Create New Smart’ page. Here, you can add multiple trigger conditions and tasks for your floodlight to perform

- Third-Party Control (Google Assistant & Amazon Alexa)

Follow the instructions in the App to link to your Google Assistant or Amazon Alexa. Examples of voice commands are also available in the App.
Specifications
- Materials: PC
- Motion detection: 180° / 63 ft
- Color temperature: 3000 – 6500K
- Brightness: 2000 LM
- Power: 100 – 120V AC
- Frequency: 2.4 GHz
- Waterproof rating: IP65
FOR MORE MANUALS BY WASSERSTEIN HOME, VISIT MANUALSLIBRARYY
Wasserstein Smart Floodlight-FAQs
1How do smart floodlights work?
Smart floodlights use motion and light sensors to detect movement or changes in brightness within a certain range. Once motion is detected, they automatically turn on to illuminate the area for a set period, enhancing safety while conserving energy.
What is the main purpose of a floodlight?
Floodlights are designed to brightly illuminate large outdoor areas such as yards, driveways, or building exteriors. Their wide beam angle helps improve visibility and security, especially at night.
How are smart lights controlled?
Wasserstein Smart Floodlights can be managed through a mobile app, smart hub, or voice commands via platforms like Alexa or Google Assistant. This allows you to turn lights on/off, set schedules, or adjust brightness remotely.
Do smart floodlights turn off automatically?
Yes. These lights can be scheduled or set to automatically turn off after a certain time or when no motion is detected, helping to save energy and extend bulb life.
Can smart floodlights work without internet?
Some smart floodlights can still function locally without internet access, especially if connected via Bluetooth, Zigbee, or Z-Wave. However, remote control and cloud-based features will require an internet connection.
What is the lifespan of LED floodlights?
LED floodlights typically last between 25,000 to 50,000 hours, depending on build quality, usage, and weather conditions — much longer than traditional halogen lights.
What are the disadvantages of floodlights?
While floodlights are highly effective, drawbacks may include higher upfront costs, potential glare, and light pollution if not properly installed or aimed.
What is the warranty on Wasserstein Smart Floodlight and solar panels?
Wasserstein offers a three-month limited warranty for products bought directly or from authorized sellers. Products with a “Made for Google” badge include a one-year limited warranty for extra peace of mind.
What can void the product warranty?
The warranty may be voided if the product is misused, altered, or not installed and maintained according to Wasserstein’s guidelines. Always follow the user manual to ensure warranty coverage.
Do smart lights still use electricity when turned off?
Yes, but only a minimal amount — enough to maintain wireless connectivity. This standby power ensures that your smart light can respond instantly to app or voice commands.

