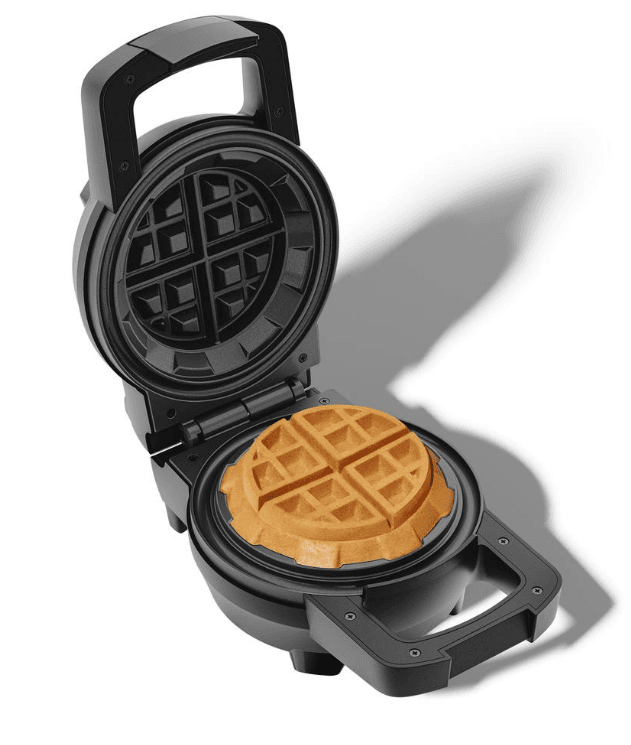
Chefman BIG STUFF Waffle Maker

SAFETY INSTRUCTIONS
IMPORTANT SAFEGUARDS
When using electrical appliances, basic safety precautions should always be followed, including the following:
- READ ALL INSTRUCTIONS.
- Do not touch hot surfaces. Use handles or knobs.
- To protect against electric shock, do not immerse the cord, plugs, or unit body in water or other liquid.
- Close supervision is necessary when any appliance is used by or near children.
- Unplug from the outlet when not in use and before cleaning. Allow the appliance to cool before putting on or taking off parts, and before cleaning it.
- Do not operate any appliance with a damaged cord or plug, or after the appliance malfunctions, or has been damaged in any manner. Contact Chefman® Customer Service for examination, repair, or adjustment.
- The use of accessory attachments not recommended by Chefman®may cause injuries.
- Do not use outdoors.
- Do not let the cord hang over the edge of a table or counter, or touch hot surfaces.
- Do not place on or near a hot gas or electric burner, or in a heated oven.
- Extreme caution must be used when moving an appliance containing hot oil or other hot liquids.
- Always attach the plug to the appliance first, then plug the cord into the wall outlet. To disconnect, turn any control to OFF, then remove the plug from the wall outlet.
- Do not use the appliance for anything other than its intended use.
WARNING: This appliance has a polarized plug (one blade is wider than the other). To reduce the risk of electric shock, this plug is intended to fit into a polarized outlet only one way. If the plug does not fit fully into the outlet, reverse the plug. If it still does not fit, contact a qualified electrician. Do not attempt to modify the plug in any way.
SHORT CORD INSTRUCTIONS
A short power-supply cord is provided to reduce the hazards of entanglement or tripping over a longer cord. Longer detachable power-supply cords or extension cords are available and may be used if care is exercised in their use. If a longer detachable power supply extension cord is used:
- The marked electrical rating of the cord set or extension cord should be at least as great as the electrical rating of the appliance.
- The cord should be arranged so that it will not drape over the countertop or tabletop where it can be pulled on by children or tripped over.
POWER CORD SAFETY TIPS
- Never pull or yank on the cord or the appliance.
- To insert the plug, grasp it firmly and guide it into the outlet.
- To disconnect the appliance, grasp the plug and remove it from the outlet.
- Before each use, inspect the power cord for cuts and/or abrasion marks. If any are found, this indicates that the appliance should be serviced, and the power cord replaced. Please contact Chefman® Customer Support for assistance.
- Never wrap the cord tightly around the appliance, as this could place undue stress on the cord where it enters the appliance and cause it to fray and break.
DO NOT OPERATE THE APPLIANCE IF THE POWER CORD SHOWS
ANY DAMAGE, OR IF THE APPLIANCE WORKS INTERMITTENTLY OR STOPS WORKING ENTIRELY.
CAUTION: To ensure continued protection against the risk of electric shock, connect to properly grounded outlets only.
IMPORTANT: During the first few minutes of initial use, you may notice smoke and/or a slight odor. This is normal and should quickly disappear. It will not recur after the appliance has been used a few more times. This appliance is not intended for use by persons (including children) with reduced physical, sensory, or mental capabilities, or a lack of experience and knowledge, unless they have been given supervision or instruction concerning use of the appliance by a person responsible for their safety.
FEATURES

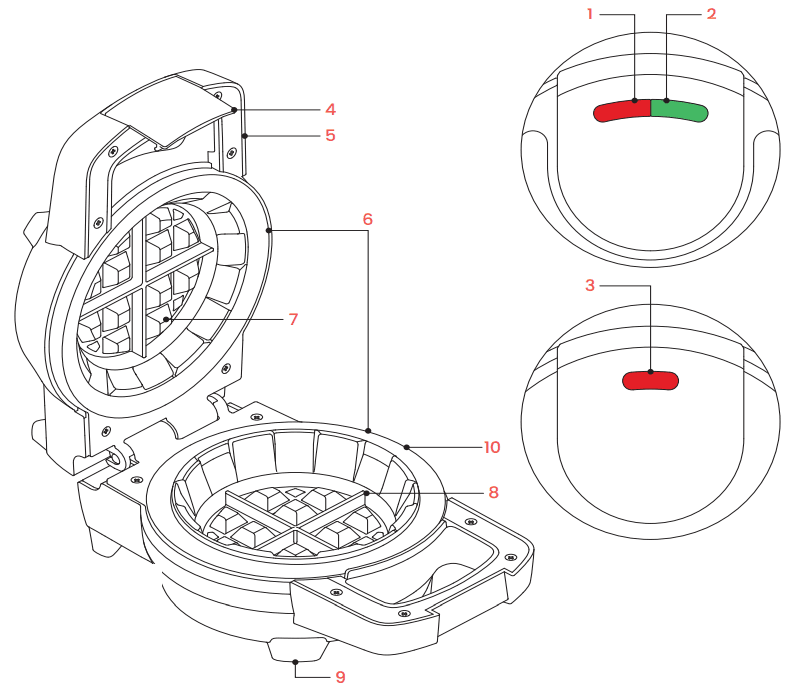
- POWER Light
- READY Light
- Bottom POWER Light
- Locking Latch
- Stay-Cool Handle
- Nonstick Cooking Plates
- Waffle Grids
- Waffle Divider
- Nonskid feet (top and bottom)
- Batter Overflow Channel
OPERATING INSTRUCTIONS
BEFORE FIRST USE
- Remove all packing materials and stickers from the inside and outside of the waffle maker except for the rating label, which should remain on the unit.
- Gently wipe down the exterior and interior with a damp cloth or paper towel to remove any packaging residue. Dry completely. CAUTION: Never immerse the waffle maker, cord, or plug in water or any other liquid; do not use scouring pads or abrasive cleaners, as they can damage the finish.
HOW TO USE THE WAFFLE MAKER
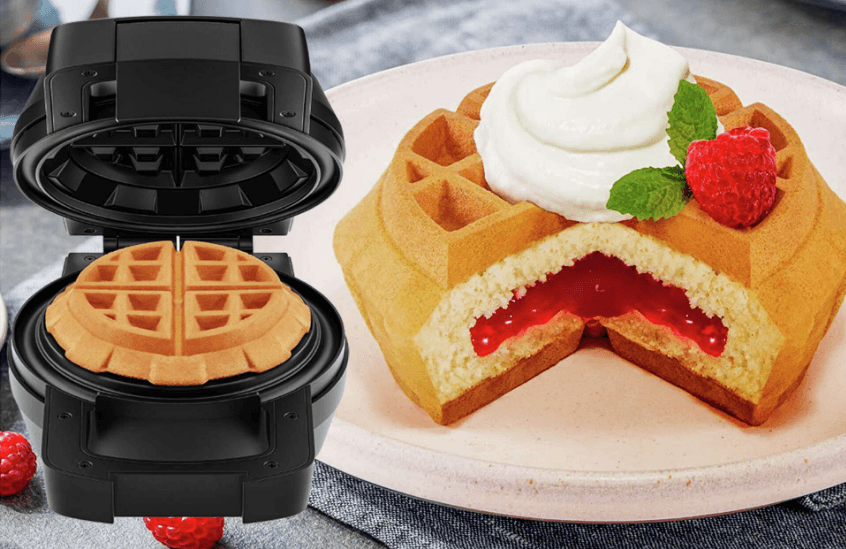
With the waffle maker’s deep cooking plates, it’s easy to make thick, light, and crisp waffles stuffed with your favorite fillings.
- Prepare your waffle batter and preferred filling. See p. 17 for our batter recipe and filling ideas.
- Place the waffle maker on a flat, dry surface with space on all sides. Make sure it is closed and latched, with the word TOP and the dual POWER/READY lights facing up.
- Plug in the waffle maker. The red POWER light will illuminate, and the waffle maker will begin preheating. NOTE: When using the waffle maker for the first time, a slight odor or smoking might occur. This is normal and will dissipate with use.
- When fully heated, after about 5 minutes, the green READY light will illuminate as well, indicating the waffle maker is ready to use.
- Carefully open the lid by gently pulling the bottom of the latch away from the unit. Lift the lid, being careful not to touch the hot interior. If desired, use a non-aerosol spray or brush the plates with a small amount of cooking oil. NOTE: Never use aerosol nonstick spray on the waffle maker’s cooking plates. It will cause a build-up over time, which may cause sticking.
- Add the first layer of batter (about ½ cup) onto the center of the lower cooking plate, making sure it is evenly spread over the entire plate and just covers the top of the waffle grids and divider. Be aware that the batter will rise as it cooks. NOTE: The green READY light will cycle on and off during cooking as the unit maintains temperature.

- Add the filling (about 2 Tbsp) over the center of the first layer of batter, making sure it is evenly spread and not touching the edges of the cooking plate. Fill the plate only about halfway, as it is important to leave enough room to cover the filling with additional batter. Be sure there’s at least a half-inch border around the filling so the waffle seals.
- Pour more batter (about 1/3 cup) over the filling until it covers the filling
completely and reaches just to the rim of the cooking plate. - Close the lid and lock the latch. Then, grasping the handle, flip the waffle maker over 180° so that it is resting upside down with the word BOTTOM and the red POWER light facing up. CAUTION: Hot steam escapes from the sides of the waffle maker during cooking and can potentially cause burns. Keep away from the steam.
- Cook for about 7 minutes before opening the waffle maker to check on the doneness. If the waffle maker resists your attempts to open it, let the waffle cook longer in 30-second increments. If, after opening, you want a darker, crispier waffle, the waffle maker can be closed again to continue the cooking process.

- When cooking is complete, carefully open the lid. CAUTION: Use extreme caution and stand clear of the waffle maker’s interior when opening the lid once the waffle is done, as hot steam will escape and can cause burns.
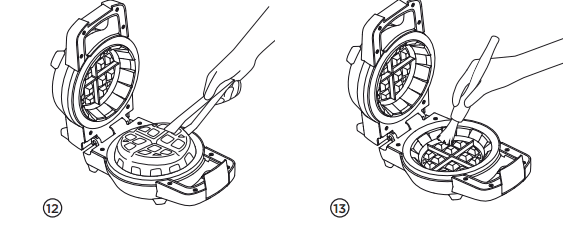
- Use silicone or wooden tongs to remove the cooked waffle. (Do not use metal utensils, as they can scratch the nonstick surface.)
- To make more waffles, brush away any crumbs left on the plates, then close the lid and flip the waffle maker 180° back to its original position (the word TOP and the dual POWER/READY lights facing up). Let the waffle maker reheat until the green READY light illuminates. Repeat steps 5–12.
- When finished making waffles, unplug the waffle maker to turn it off. Let it cool completely before cleaning and storing it in a cool, dry place.

WAFFLE-MAKING TIPS
- When making waffle batter, mix just until large lumps disappear. Overmixing can make waffles tough. For thick batters that do not pour easily, spoon the batter onto the waffle grid and use a heat-resistant spatula to spread it evenly to the edges of the grid.
- If using a waffle mix, stuffed waffles work best with mixes that call for the addition of eggs and oil.
- Fillings such as meats, chicken, and eggs should be fully cooked before using to make waffles, and frozen foods should be fully thawed. The waffle maker does not heat long or hot enough to cook raw food or adequately heat frozen food.
- If using a waffle mix, canned fruits(excluding pie filling), or canned vegetables, drain as much liquid as possible from the can before using it in the waffle maker.
- If using solid food for filling, add the food to the waffle maker and gently press it down with the back of a spoon so it settles into the batter. Cut large foods into smaller pieces so they can properly fit in the cooking plate.
- Do not overfill with fillings. This can cause the batter to leak during cooking or cause the waffle to break apart when removed from the waffle maker. The total amount of filling should generally not exceed about 2 Tbsp. If filling with meat or chicken, use a thinner cut so the proper amount of batter (1/3 cup) can be added to the top. Adding fillings may take some experimenting.
- Traditional waffles without filling can be made, if desired. Simply pour batter three-quarters of the way to the rim of the cooking plate (about 1 cup) and cook for approximately 7 minutes.
- Do not open the waffle maker during the five minutes of cooking, as the waffle may separate. If the waffle maker resists your attempts to open it after cooking, allow the waffle to cook longer in 30-second increments.
- Cook longer for crispier waffles and shorter for softer waffles. Always make sure the waffle is cooked all the way through.
- If you do not have silicone or wooden tongs, wooden chopsticks are a handy tool for removing waffles from the waffle iron.
- Waffle yield will vary based on the brand of waffle mix or the recipe used. A full batch of regular waffles will differ from the number of stuffed waffles produced due to their greater thickness and volume.
- If not serving waffles right away, keep them warm in a 200°F oven. Set a wire rack on a baking sheet and transfer waffles to the rack so air can flow beneath, keeping the waffles crisp. Unstuffed waffles can be placed directly on the oven rack.
CLEANING AND MAINTENANCE
With its nonstick plates, the waffle maker is super easy to clean.
- Unplug the waffle maker when done and let it cool completely before cleaning.
- Use a soft bristle brush, such as a pastry brush, or a paper towel to brush away crumbs from the plates.
- The waffle maker does not disassemble for cleaning. Gently wipe down the interior plates and the exterior (if necessary) with a damp cloth or paper towel. The waffle maker is not dishwasher safe.
- To remove batter that has cooked onto the plates, pour a small amount of cooking oil onto the hardened batter. Allow to sit for 5 minutes, then wipe off with a dry towel or a damp paper towel. CAUTION: Never immerse the waffle maker, its cord, or plug in water or any other liquid; do not use scouring pads or abrasive cleaners, as they can damage the finish.
- Always allow all parts to dry completely.
- Close the lid and lock the latch. The cord can be loosely wrapped around the bottom of the waffle maker, and the waffle maker may be stored upright to save space.
RECIPES
BIG STUFF WAFFLE BATTER
This homemade waffle batter creates light and fluffy waffles that are perfect for sweet or savory fillings. If you would rather use a mix, use one that calls for the addition of egg and oil for best results.
Makes 4 waffles
- 3 cups all-purpose flour
- 3 Tbsp. sugar
- 4 tsp. baking powder
- 1 tsp. kosher salt
- 2 cups whole milk
- 3 large eggs
- 6 Tbsp. unsalted butter, melted and cooled
- 2 tsp. Pure vanilla extract
In a large bowl, whisk the flour, sugar, baking powder, and salt. In a quart-size measuring cup, measure out the milk, then add the eggs, butter, and vanilla, and whisk to combine. Add the wet ingredients to the dry and whisk until completely combined. Let batter sit for 5 minutes (about the time the waffle maker takes to heat) before using.
FOR MORE MANUALS BY CHEFMAN, VISIT MANUALSLIBRARYY
Chefman BIG STUFF Waffle Maker-FAQs
How do I know when my waffles are done?
Watch for steam escaping from the waffle maker—when it slows or stops, the waffles are ready.
Should I preheat the waffle maker?
Yes! Preheat for 10–20 minutes for even cooking and crispier waffles.
How much batter should I use?
Pour ¾ cup of batter into the center, letting it spread for even filling. Adjust based on your preferred thickness.
What’s the best temperature setting?
For golden, crispy waffles, set to 375°F (190°C) and cook for 4–5 minutes.
Why did my waffles stick?
Too much or too little oil in the batter.
Non-stick spray buildup—wipe plates with oil instead.
Undercooking (wait until steam stops).
How do I make crispy waffles?
Use a thicker batter (add cornstarch or whipped egg whites).
Cook until steam stops (no peeking!).
Let waffles cool briefly on a wire rack.
How do I clean the waffle maker?
Unplug and let cool.
Wipe plates with a damp cloth (no abrasive cleaners).
For stuck bits, use a soft brush or damp sponge.
Can I use cooking spray?
Avoid aerosol sprays—they can cause sticky buildup. Use a brush and oil instead.
Why are my waffles soggy?
Too much liquid in the batter.
Opening the lid too soon (let steam escape fully).
Stacking waffles while hot (place on a rack to crisp).
Why do waffles split?
Underbaking (wait until steam stops).
Overmixing batter (stop when just combined).


