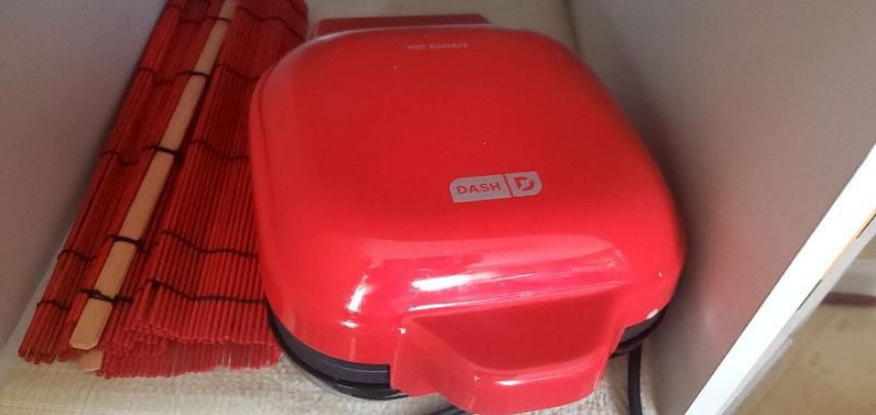
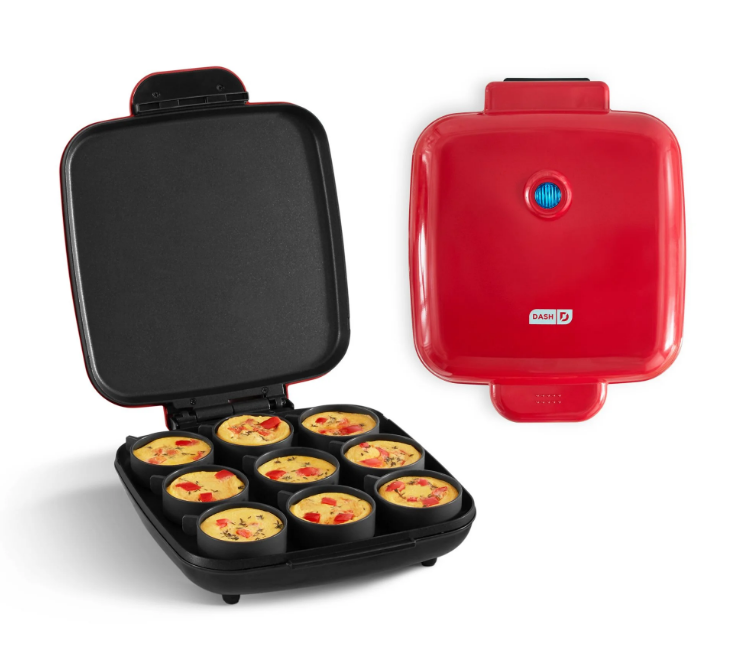
Dash DBBM450 Deluxe Egg Bite Maker
IMPORTANT SAFEGUARDS
When using electrical appliances, basic safety precautions should be followed, including:
- Read all instructions.
- Remove all bags and packaging from the appliance before use.
- Do not use the appliance outdoors or for commercial purposes.
- Never leave an appliance unattended when in use.
- Only use the appliance on a stable, dry surface.
- Make sure the appliance is cleaned thoroughly before using.
- Do not use the appliance for anything other than its intended use. For household use only. Do not use outdoors.
- Close supervision is necessary when any appliance is used by or near children. Children should be supervised to ensure that they do not play with the appliance.
- Do not operate this appliance with a damaged cord, damaged plug, or after the appliance malfunctions, is dropped, or is damaged in any manner. Return the appliance to the nearest authorized service facility for examination, repair, or adjustment.
- For maintenance, excluding cleaning, please contact StoreBound directly at 1-800-898-6970 from 9 AM-9 PM EST Monday-Friday or by email at [email protected].
- Do not place the appliance on or near a hot gas burner, hot electric burner, or in a heated oven. Extreme caution must be used when moving an appliance containing hot oil or other hot liquids. To disconnect, remove the plug from the wall outlet. Do not use the appliance for anything other than its intended use.
- Refrain from using attachments that are not recommended by the appliance manufacturer, as this may result in fire, electric shock, or personal injury.
- Do not let the cord touch hot surfaces or hang over the edges of tables or counters.
- This appliance can be used by persons with reduced physical, sensory, or mental capabilities or a lack of experience or knowledge, if they have been given supervision or instruction concerning the use of the appliance in a safe way and understand the hazards involved.
- This appliance is not a toy. Do not let children use this appliance. Close supervision is necessary when any kitchen appliance is used by or near children.
- Always be sure to unplug the appliance from the outlet prior to moving, cleaning, storing, and when not in use.
- StoreBound shall not accept liability for damages caused by improper use of the appliance.
- Improper use of the appliance can result in property damage or personal injury.
- This appliance has a polarized plug (one blade is wider than the other). To reduce the risk of electric shock, this plug will fit in a polarized outlet only one way. If the plug does not completely fit in the outlet, reverse the plug. If it still does not fit, contact a qualified electrician. Do not attempt to modify the plug in any way.
- Turn the appliance off, then unplug from the outlet when not in use, before assembling or disassembling parts, and before cleaning. To unplug, grasp the plug and pull from the outlet. Never pull from the power cord.
- A short power supply cord is to be provided to reduce the risk resulting from becoming entangled in or tripping over a longer cord. An extension cord may be used if care is exercised in its use. If an extension cord is used, the marked electrical rating of the extension cord should be at least as great as the electrical rating of the appliance. The extension cord should be arranged so that it will not drape over the countertop or tabletop where it can be pulled on by children or tripped over unintentionally. If the appliance is of the grounded type, the cord set or extension cord should be a grounding-type 3-wire cord.
- To avoid burns, use extreme caution when removing accessories.
- When not in use, always unplug the unit. Do not store any materials other than the manufacturer’s recommended accessories in this appliance.
- Do not allow the appliance to be covered by or touch flammable materials such as curtains, draperies, or walls, when in operation. Do not store any items on top of the appliance when in operation. Do not operate under wall cabinets.
- Do not clean with metal scouring pads.
- Do not attempt to dislodge food when the appliance is plugged into an electrical outlet.
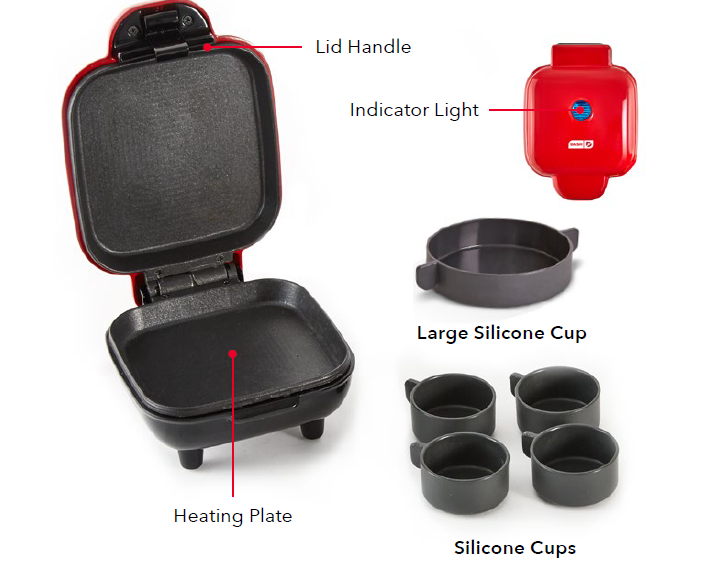
PARTS & FEATURES
BEFORE USING YOUR DELUXE EGG BITE MAKER
- Remove all packaging materials.
- Check that the Deluxe Egg Bite Maker has no visible damage and that no parts are missing.
- Before using the appliance for the first time or before using it after prolonged storage, wash and dry the appliance and any accompanying accessories.
- Be sure to remove any dust from the Heating Plate and Silicone Cups.
Using Your Deluxe Egg Bite Maker
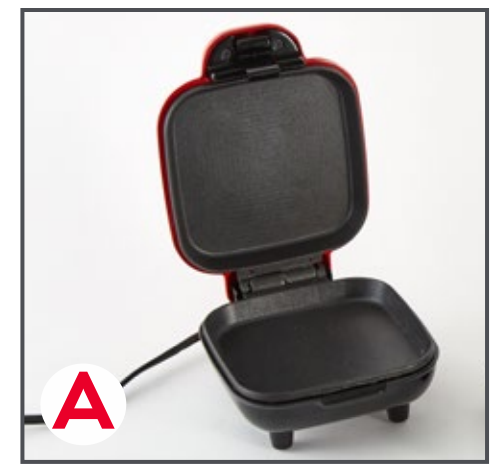
- Set the Deluxe Egg Bite Maker on a stable, flat, heat-resistant surface (photo A). Note: You do not need to preheat your Deluxe Egg Bite Maker, but doing so can decrease the cooking time.

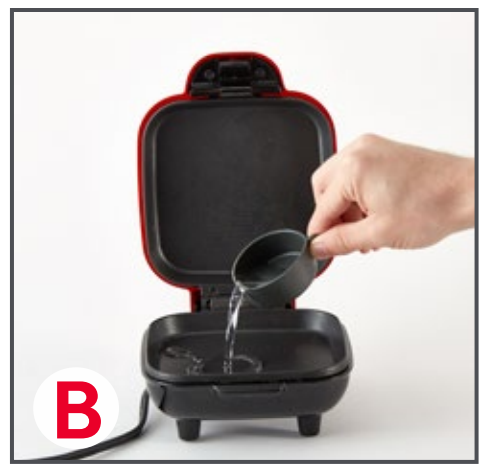
- Fill one of the small Silicone Cups with water, and pour it onto the Heating Plate (photo B). The water will heat and become steam, which will allow the egg bites to cook evenly and maintain a soft, creamy texture.

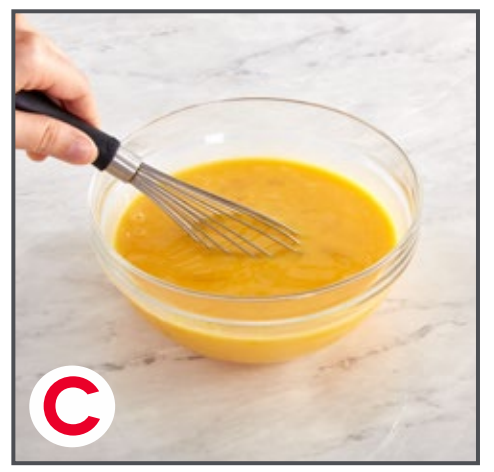
- Whisk your egg together with the ingredients in a small bowl (photo C). See the Recipe Guide on page 21 for ideas. The Large Silicone Cup holds about 2 large eggs, and the four smaller Silicone Cups hold about 2 large eggs.

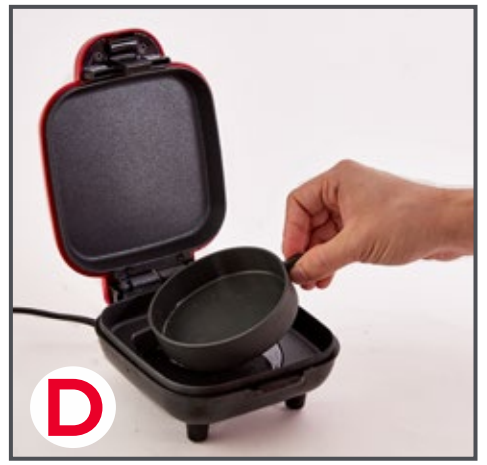
- Place the Large Silicone Cup into the water on the Heating Plate (photo D).

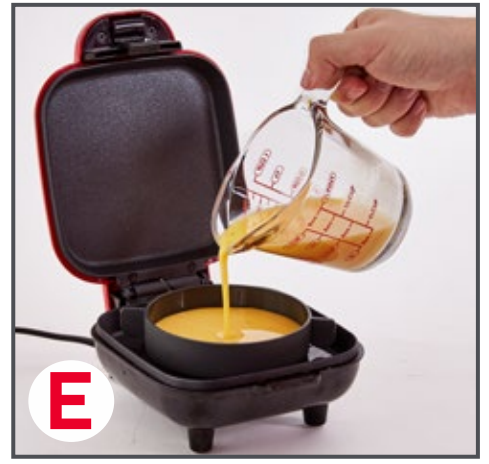
- Fill the Large Silicone Cup ¾ of the way with egg mixture and ingredients (photo E). This will allow the egg bites to expand as they cook.

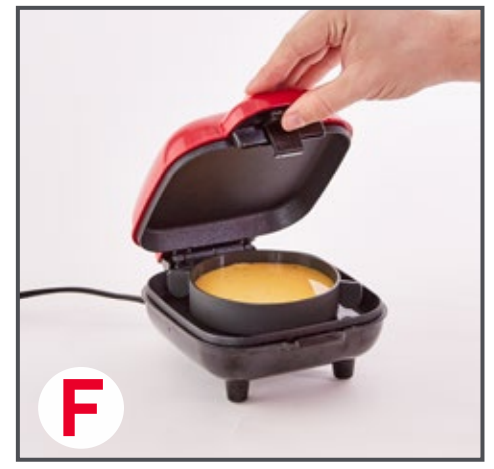
- Plug the Deluxe Egg Bite Maker in and close the lid (photo F). The blue Indicator Light on the lid of the Deluxe Egg Bite Maker will illuminate, indicating the Deluxe Egg Bite Maker is on and heating. When the Deluxe Egg Bite Maker reaches maximum temperature, the Indicator Light will turn off, but this does not mean the Deluxe Egg Bite Maker has turned off.

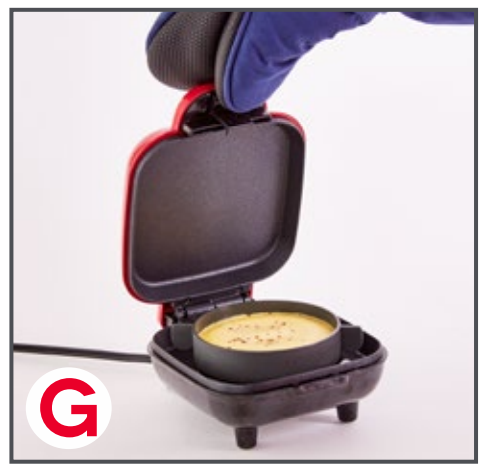
- Allow the egg to cook for approximately 10-12 minutes, or until the water on the Heating Plate has completely evaporated. You can open the Deluxe Egg Bite Maker to check your progress (photo G).

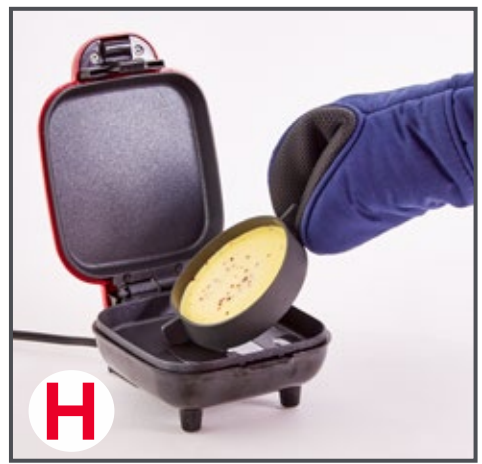
- When eggs are done, unplug the Deluxe Egg Bite Maker to turn it off. Remove the Large Silicone Cup (photo H) and turn it upside down to allow the egg to release. If the egg is stuck, squeeze the Large Silicone Cup gently to release. Do not use force, as this may break or deform the egg.

Or Make Egg Bites!
Egg Bites are delicious as a snack or breakfast on the go! To make egg bites, refer to the instructions on pages 11-14, but switch out the Large Silicone Cup for the four small Silicone Cups (shown below).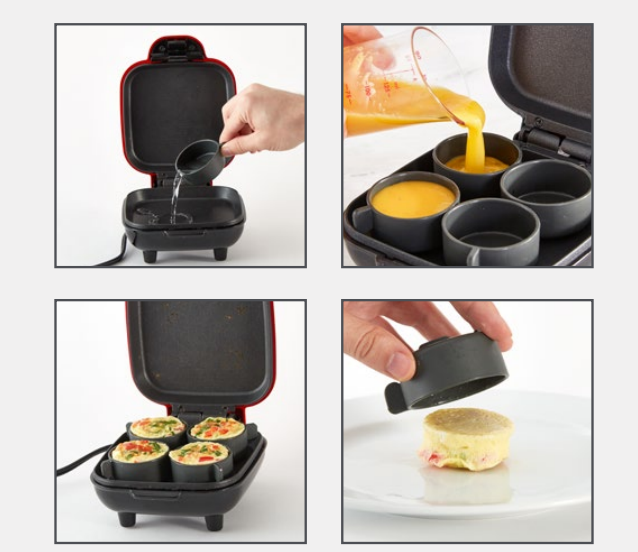
Tips & Tricks
- Be sure not to overfill the Silicone Cups, as this may cause them to spill onto the Heating Plate once the eggs begin cooking. Eggs expand while cooking, so it’s best to fill the Silicone Cups only ¾ full.
 Don’t just limit yourself to eggs; try using the Deluxe Egg Bite Maker to prepare cheesecake bites, custard, or other sweet treats!
 Cooking spray, oil, and butter are not necessary to prevent sticking in the Silicone Cups. However, a thin coating can help ensure your egg bites release cleanly.
- Plugging in the Deluxe Egg Bite Maker to preheat for 2-3 minutes before adding water to the Heating Plate will significantly increase the speed at which the water heats.
Cleaning & Maintenance
- Before cleaning, remove the plug from the wall socket and let the Deluxe Egg Bite Maker cool down completely.
- Thoroughly clean the Deluxe Egg Bite Maker after every use.
- Do not clean the Heating Plate with metal kitchen utensils or abrasive cleaning materials. Using these may damage the Heating Plate’s coating.
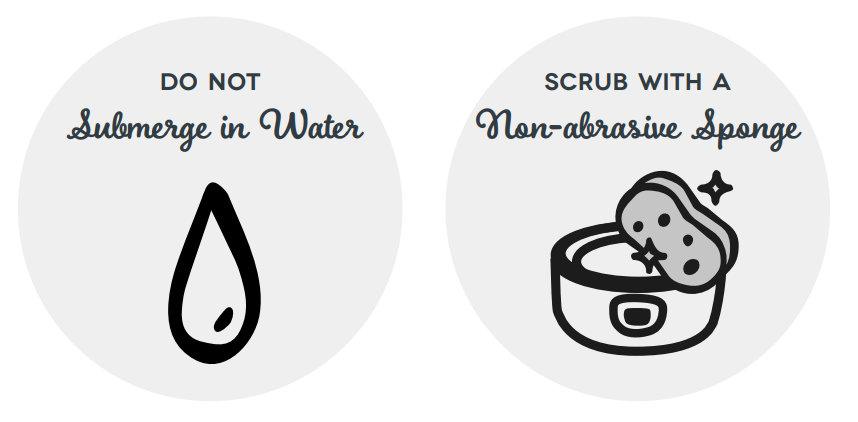
- To clean the exterior of the Deluxe Egg Bite Maker, wipe it down with water, dish soap, and a non-abrasive sponge or soft cloth.
- NOTE: DO NOT submerge the Deluxe Egg Bite Maker in water.
- Clean the Silicone Cups with a soft cleaning brush to remove any food residue.
- Make sure that the Deluxe Egg Bite Maker is unplugged and all parts are clean and dry before storing.

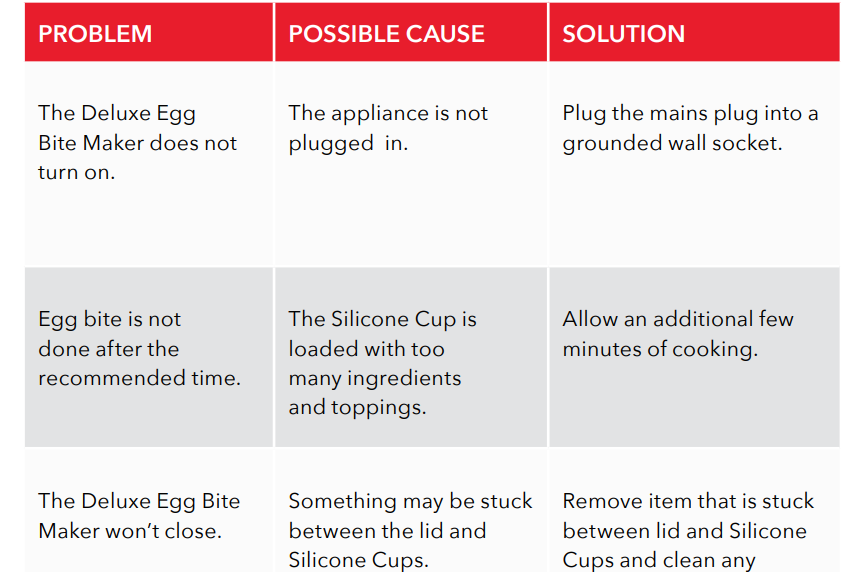
Troubleshooting

Recipe Guide
Cookies N’ Cream Cheesecake Bites
Ingredients:
- 5 Double Stuf Oreo® cookies (see note)
- 8 oz cream cheese, at room temperature
- ¼ cup sugar
- 2 tbsp sour cream
- 1 large egg
- ¼ tsp vanilla extract
Directions:
- Add one small Silicone Cup full of water to the Heating Plate of the Deluxe Egg Bite Maker.
- Lightly spray the inside of the Silicone Cups with a nonstick cooking spray so that the cheesecake bites release cleanly.
- To make the crust, whirl the Oreo® cookies in a food processor until they are fine crumbs that cling together when pressed between your fingers. Set aside. Wipe out the food processor bowl.
- To make the filling, in the food processor, whirl the cream cheese, sugar, and sour cream until blended. Add the egg and vanilla and whisk until the filling is smoothly blended.
- Fill each Silicone Cup with cheesecake mixture to just below the rim. Tap the filled cup on the counter to eliminate air bubbles.
- Measure about 1 tablespoon of crumbs, press until they cling together, then place onto the top of the filled cup. Repeat to fully cover the cream cheese mixture in all the cups.
- Cut foil into 4×4” pieces, coat lightly with nonstick cooking spray. Wrap cups in foil, pinching to tuck it tightly around the sides.
- Plug in the Deluxe Egg Bite Maker and cook the cheesecake bites for 12 minutes.
- Remove the foil and let the cheesecake bites sit for 5 minutes. Run a thin knife around inside cups, then unmold (use a butter knife or a plastic knife so as not to damage the Silicone Cups). Cool cheesecake bites for 15 minutes. Refrigerate for 30 minutes to firm cheesecake bites.
Note: If using regular Oreo® cookies, use 6 cookies and add 1 to 2 tablespoons melted unsalted butter, enough for the crumbs to cling together when pressed between your fingers.
Lemon Cheesecake Bites
Ingredients:
- 4 two-cracker sheets of graham crackers
- 3 tbsp unsalted butter, melted
- 8 oz cream cheese, at room temperature
- ¼ cup sugar
- 3 tablespoons sour cream
- 1 large egg
- 1 tsp grated lemon zest
- ¼ tsp vanilla extract
Directions:
- Add one small Silicone Cup full of water to the Heating Plate of the Deluxe Egg Bite Maker.
- Lightly spray the inside of the Silicone Cups with a nonstick cooking spray so that the cheesecake bites release cleanly.
- For the crust, in a food processor, whirl the graham crackers until they are fine crumbs. Transfer the crumbs to a mixing bowl. Add the butter, working it in until the mixture resembles moist sand and clings together when pressed between your fingers. Set aside. Wipe out the food processor bowl.
- For the filling, in a food processor, whirl the cream cheese and sugar until blended, then blend in the sour cream and lemon zest. Add the egg and vanilla and blend again. Fill each Silicone Cup with cheesecake mixture to just below the rim. Tap the filled cup on the counter to eliminate air bubbles.
- Measure about 1 tbsp of buttery crumbs, press until they cling together, then place onto the top of the filled cup. Repeat to fully cover the cream cheese mixture in all the cups.
- Cut foil into 4×4” pieces, coat lightly with nonstick cooking spray. Wrap cups in foil, pinching to tuck it tightly around the sides.
- Plug in the Deluxe Egg Bite Maker and cook the cheesecake bites for 12 minutes.
- Remove the foil and let the cheesecake bites sit for 5 minutes. Run a thin knife around inside cups, then unmold. Cool cheesecake bites for 15 minutes. Refrigerate for 30 minutes to firm cheesecake bites.
Egg Bite Breakfast Burrito
Ingredients:
- 8 Fiesta Egg Bites
- 1 cup cooked black or pinto beans
- ½ cup shredded cheese
- ¼ cup salsa
- 2 (10”) flour tortillas
- ½ avocado
- 1 tbsp cilantro, shredded
Directions:
- Cook 8 Fiesta Egg Bites following the recipe on page 29.
- Lay flour tortillas on a flat surface. Add beans to the center of the tortilla in a line, along with four egg bites per tortilla. Dice the avocado and add it along the line of the egg bites. Sprinkle on shredded cheese.
- Roll the tortilla by folding the top and bottom in, then wrapping the sides in.
- Grill to heat if desired. Garnish with salsa and shredded cilantro.

Fiesta Egg Bites
Ingredients:
- ¼ cup tomato, diced
- ¼ cup onion, diced
- ¼ cup bell pepper, diced
- 1 tbsp hot sauce
- 4 large eggs
- 2 tbsp cottage cheese
- pinch of salt
- pinch of ground pepper
Directions:
- Combine eggs, cottage cheese, salt, and pepper in a bowl or blender. Whisk or blend until fully combined.
- Add one Silicone Cup full of water to the Heating Plate of the Deluxe Egg Bite Maker.
- Spray the inside of the Silicone Cups with a non-stick cooking spray so that the egg bites release cleanly. Add diced tomato, onion, and bell pepper to the bottom of the Silicone Cups, then pour in the egg mixture so that the Silicone Cups are ¾ full.
- Plug in the Deluxe Egg Bite Maker and cook the egg bites for 10-12 minutes.
Customer Support
Dash values quality and workmanship and stands behind this product with our Feel Good Guarantee™. To learn more about our commitment to quality, visit bydash.com/feelgood. Our customer support teams in the US and Canada are at your service Monday-Friday during the times below. Contact us at 1 (800) 898-6970 or [email protected]. Hawaii! You can reach our customer service team from 3 AM to 3 PM. And also, Alaska, feel free to reach out from 5 AM to 5 PM.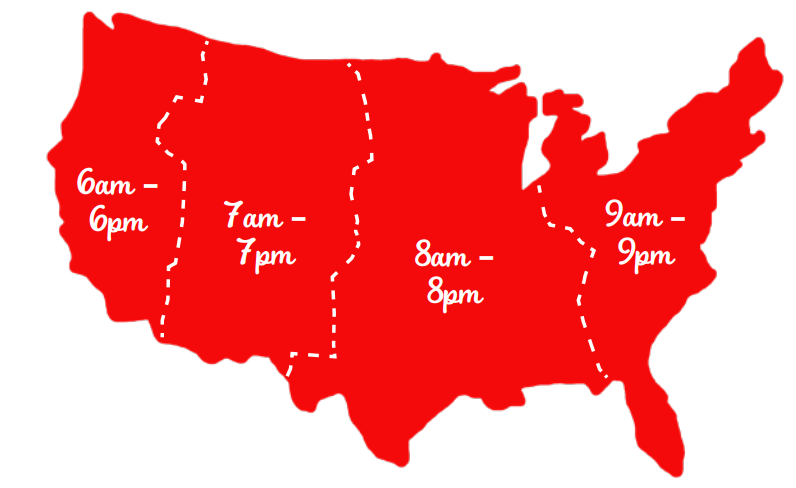
Warranty
STOREBOUND, LLC — 1-YEAR LIMITED WARRANTY
Your StoreBound product is warranted to be free from defects in material and workmanship for a period of one (1) year from the date of the original purchase when utilized for normal and intended household use. Should any defect covered by the terms of the limited warranty be discovered within one (1) year, StoreBound, LLC will repair or replace the defective part. To process a warranty claim, contact Customer Support at 1 (800) 898-6970 for further assistance and instructions. A Customer Support agent will assist you by troubleshooting minor problems. If troubleshooting fails to fix the problem, a return authorization will be issued.
Proof of purchase indicating the date and place of purchase is required and should accompany the return. You must also include your full name, shipping address, and telephone number. We are unable to ship returns to a P.O. box. StoreBound will not be responsible for delays or unprocessed claims resulting from a purchaser’s failure to provide any or all of the necessary information. Freight costs must be prepaid by the purchaser. Send all inquiries to [email protected]. There are no express warranties except as listed above. REPAIR OR REPLACEMENT AS PROVIDED UNDER THIS WARRANTY IS THE EXCLUSIVE REMEDY OF THE CUSTOMER.
STOREBOUND SHALL NOT BE LIABLE FOR ANY INCIDENTAL OR CONSEQUENTIAL DAMAGES OR FOR BREACH OF ANY EXPRESS OR IMPLIED WARRANTY ON THIS PRODUCT EXCEPT TO THE EXTENT REQUIRED BY APPLICABLE LAW. ANY IMPLIED WARRANTY OF MERCHANTABILITY OR FITNESS FOR A PARTICULAR PURPOSE ON THIS PRODUCT IS LIMITED IN DURATION TO THE DURATION OF THIS WARRANTY. Some states do not allow the exclusion or limitation of incidental or consequential damages, or limitations on how long an implied warranty lasts. Therefore, the above exclusions or limitations may not apply to you. This warranty gives you specific legal rights, and you may also have other rights, which vary from state to state.
Repairs
DANGER! Risk of electric shock! The Dash Deluxe Egg Bite Maker is an electrical appliance. Do not attempt to repair the appliance yourself under any circumstances. Contact Customer Support regarding repairs to the appliance.
Technical Specifications
- Model: DBBM450
- Voltage: 120V \~ 60Hz
- Power Rating: 420W
- Stock#: DBBM450\_20220815\_v6
For More Manuals By Dash, Visit ManualsLibraryy.
Dash DBBM450 Deluxe Egg Bite Maker-FAQs.
Q1. How do I use the Dash Deluxe Egg Bite Maker?
Plug in the unit, preheat until the indicator light turns on, then pour whisked eggs or mixture into the silicone cups, close the lid, and cook for about 10 minutes.
Q2. How long does it take to cook eggs in the Egg Bite Maker?
Egg bites usually cook in 8–10 minutes, depending on the ingredients and filling size.
Q3. How much water should I add to the Egg Bite Maker?
Follow the included measuring cup guide. Typically, a small amount of water is poured under the silicone mold to create steam for even cooking.
Q4. Do I need to poke holes in eggs before using the cooker?
Yes, for boiled eggs it’s recommended to prick the larger end with the provided tool to prevent cracking during steaming.
Q5. How do I know when the eggs are done?
When the cooking cycle is complete, the machine will stop heating. Egg bites should look firm and cooked through.
Q6. Can I make sandwiches or other recipes in the Egg Bite Maker?
Yes. Besides egg bites, you can prepare mini omelets, breakfast sandwiches, poached eggs, and even small desserts.
Q7. Can I use muffin liners in the Egg Bite Maker?
Yes, silicone or parchment liners can be used to prevent sticking and make cleanup easier.
Q8. How do I clean my Dash Egg Bite Maker?
Unplug the unit and let it cool. Wipe the heating plate with a damp cloth. Wash the silicone molds, lids, and trays with warm soapy water.
Q9. Does the Dash Egg Cooker turn off automatically?
Yes, once the water evaporates or the cooking cycle finishes, the unit shuts off to prevent overcooking.
Q10. Can I freeze egg bites made in the Dash Egg Bite Maker?
Yes, store cooked egg bites in an airtight container or freezer-safe bag for up to 2 months. Reheat in the microwave before serving.

