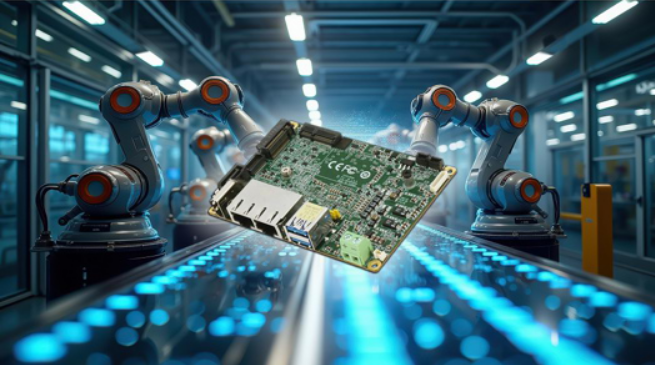
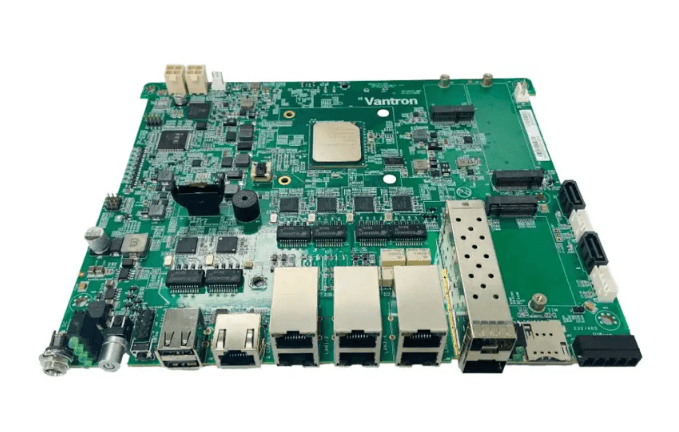
Vantron O3Q10-8231 ATOM-Based Single Board Computer
Introduction
Introduction to Vantron
Vantron offers ARM-and ATOM-based Single Board Computers (SBC) platforms including Cirrus Logic EP9315, Rock Chip RK3128, RK3368, RK3288, RK3399, RK3566, RK3568, NXP i.MX6, i.MX8, LS1023/1043, TI OMAP35xx CortexA8,, and Intel Skylake and Apollo Lake processor boards. In addition to offering the standard SBCs, we also provide professional customized board design services. Our seamless project management, efficient error-free development process, strong fundamentals in technology, sufficient human resources, and on-time delivery will guarantee the success of your project development.
Based on the idea of “Application Ready” products and services, our embedded computers have embedded basic operating systems that include the drivers of their interfaces. So it is easy to use by adding your application software only. It can speed up the Time to Market of your products and save more costs.
Overview
Introduction
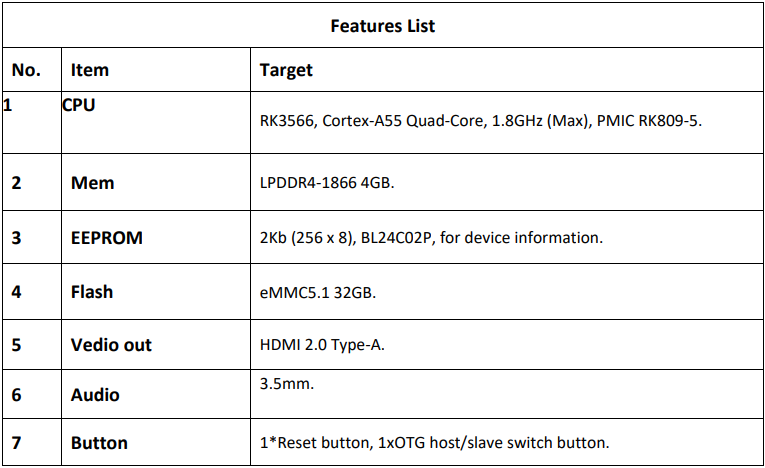
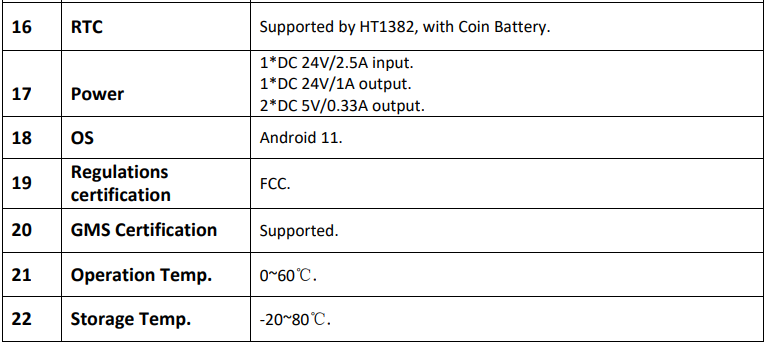
SMART PDM ASSEMBLY (MODEL:10-8231) is a multimedia processor based on Rockchip RK3566 with Android 111. The device is a terminal controller designed for a shower room, supporting a communication interface including CAN, Ethernet, WIFI&BT, RTC, and other features.
Features

Customer Information

Note: For more details, please get in touch with Vantron.
Order Information

Note: For more details, please get in touch with Vantronth Vantron.
Product Description
Product Appearance
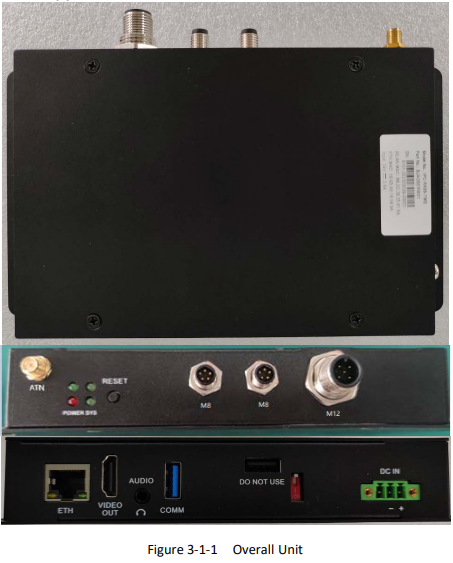
Device Interface

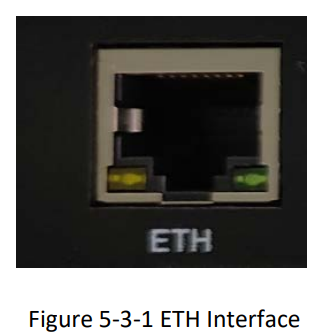
- 10/100/1000Mbps ethernet, RJ45 port with LED.
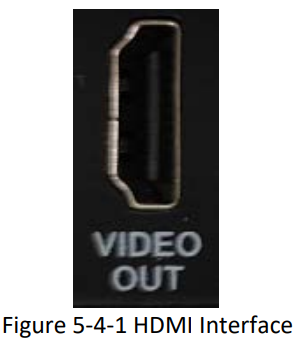
- HDMI 2.0 video output, HDMI TYPE-A port.
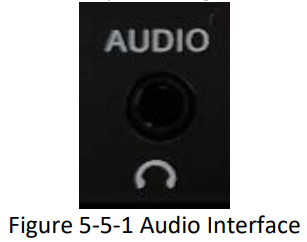
- L/R Audio output, 3.5mm port.
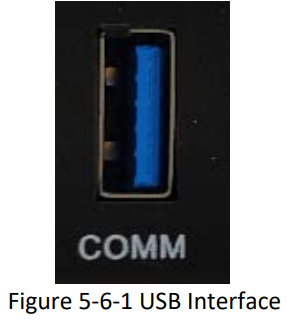
- USB 3.0, USB TYPE-A port.
- USB 2.0 OTG, USB TYPE-A port.
- OTG ID switch.
- DC24V Power input, 1×3×3.81mm phoenix.

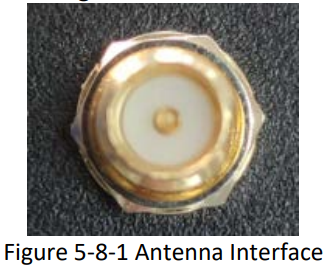
- RP-SMA-J antenna connector, used for WIFI and BT.
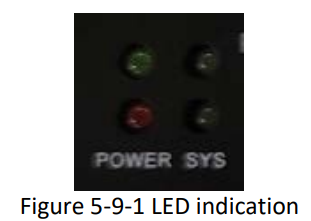
- LED indicators.
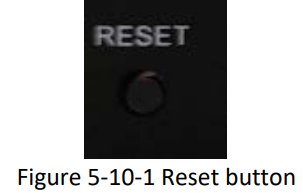
- Reset Button: Press to reset the system.
- CAN-1, M8 connector with [email protected] power output.
- CAN-2, M8 connector with [email protected] power output.
- CAN-3, M12 connector with 24V@1A power output.
Hardware Operation Note
This chapter introduces how to use and install the device.
Operating Environment
When assembling, debugging, and operating the device, please ensure that there are no hazards and that the environment meets the following requirements:
- Operating temperature: -0℃~60℃;
- Operating humidity: 5%-95% RH (No condensation)
Hardware Description
Power Input
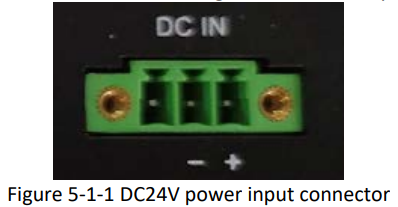
The device is configured with an AC/DC power adapter that supplies DC 24V power. 1×3×3.81mm phoenix terminal is the power input connector. Theoretically, the max. power consumption of the overall unit is 24W, including the 24V/1A output and the 2x5V/0.33A.
Power Output & CAN Interface
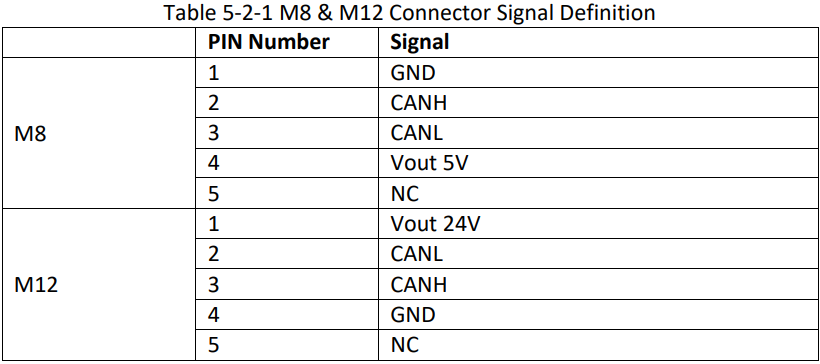
The device supports 3 CAN interfaces, which include M8 with [email protected] power output and one M12 with 24V@1A power output. The mechanical PIN will make sure the pairing is correct. The PIN assignment is shown as follows:
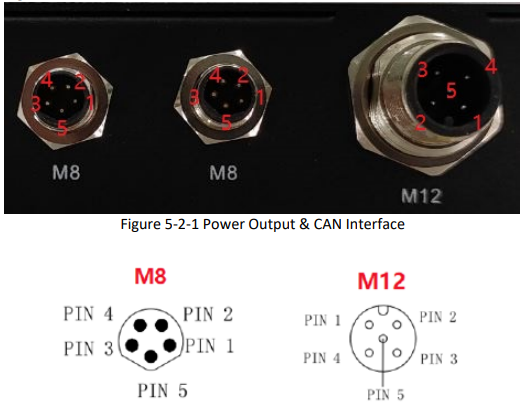
Table 5-2-1 M8 & M12 Connector Signal Definition
ETH Communication Interface
The device supports one ETH data network access of 10/100/1000Mbps, and the connector is RJ45 with LEDs. The green LED indicates the link of 1000Mbps, while the yellow LED indicates the data transmission.
HDMI
The device has an HDMI 2.0 type-A output.
Audio
The device has a 3.5mm audio connector, providing Line OUT audio.
USB3.0 HOST
The device supporUSB 3.03.0 HOST with 1* type-A connector.
USB 2.0 OTG
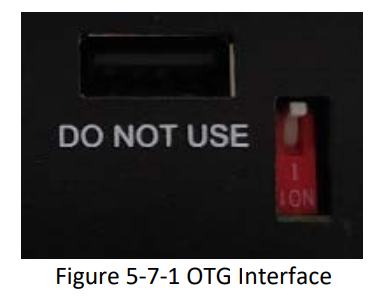
The device suppoUSB 2.00B2.0 OTG interface and can make interactive communications with the peripheral device by using a USB 2.0 Type-A connector. The interface can achieve the switching of HOST and DEVICE through the OTG ID DIP switch.
DIP switch is dialed to the upper of USB2.0 OTG interface (HOST), which can be connected to the peripheral device (such asa mouse, keyboard, and USB disk). DIP switch is dialed below the USB2.0 OTG interface (Device), which can perform programming and read the device information.
WIFI&BT
The device supports WIFI 802.11a/b/g/n/ac, Bluetooth 5.0 for wireless Internet, hotspot, and file transfer. Besides, the device is configured with 2.4G&5GHz dual-frequency rod antenna, which is connected to the device through an SMA connector.
LED
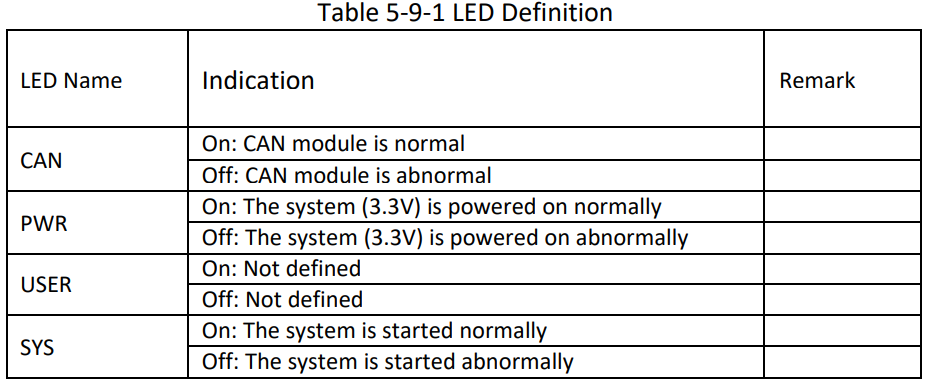
The device has 4 LEDs, of which 3 LEDs serve as indicators and 1 LED is custom.
Button
The device has 1 button used for RESET. The RESET button is shown as follows:
Software Note
The software loading system is pre-installed in SMART PDM ASSEMBLY (MODEL:10-8231). Please refer to the software manual for more software information.
Tips
![]()
Waste Disposal
It is recommended that you disassemble the device before abandoning it in conformity with local regulations. Please ensure that the abandoned batteries are disposed of according to local regulations on waste disposal. Do not throw batteries into fire (explosive) or put them in a common waste canister. Products or product packages with the sign of “explosive” should not be disposed of like household waste, but delivered to a specialized electrical & electronic waste recycling/disposal center. Proper disposal of this sort of waste helps avoid harm and adverse effects on the surroundings and people’s health. Please contact local organizations or recycling/disposal centers for more recycling/disposal methods of related products.
Comply with the following safety tips:
![]() Do not use in a combustible and explosive environment
Do not use in a combustible and explosive environment
Keep away from combustible and explosive environments for fear of danger.
![]() Keep away from all energized circuits..
Keep away from all energized circuits..
Operators should not remove the enclosure from the device. Only the group or person with factory certification is permitted to open the enclosure to adjust and replace the structure and components of the device. Do not change components unless the power cord is removed. In some cases, the device may still have residual voltage even if the power cord is removed. Therefore, it is a must to remove and fully discharge the device before contact to avoid injury.
![]() Unauthorized changes to this product or its components are prohibited
Unauthorized changes to this product or its components are prohibited
In the aim of avoiding accidents as far as possible, it is not allowed to replace the system or change components without permission and certification. Please contact the technical department of Vantron or local branches for help.
![]() Pay attention to caution signs.
Pay attention to caution signs.
Caution signs in this manual remind you of possible danger. Please comply with the relevant safety tips below each sign. Meanwhile, you should strictly conform to all safety tips for the operating environment.
![]() Notice
Notice
Considering that reasonable efforts have been made to assure the accuracy of this manual, Vantron assumes no responsibility for possible missing contents and information, errors in contents, citations, examples, and source programs.
Vantron reserves the right to make necessary changes to this manual without prior notice. No part of this manual may be reprinted or publicly released.
FCC compliance statement
This device complies with part 15 of the FCC Rules. Operation is subject to the following two conditions:
- This device may not cause harmful interference, and
- This device must accept any interference received, including interference that may cause undesired operation.
Changes or modifications not expressly approved by the party responsible for compliance could void the user’s authority to operate the equipment.
Exposure to radio frequency energy
The radiated output power of this device meets the limits of the FCC radio frequency exposure limits. This device should be operated with a minimum separation distance of 20 cm (8 inches) between the equipment and a person’s body.
NOTE: This equipment has been tested and found to comply with the limits for a Class B digital device, pursuant to part 15 of the FCC Rules. These limits are designed to provide reasonable protection against harmful interference in a residential installation. This equipment generates, uses, and can radiate radio frequency energy and, if not installed and used according to the instructions, may cause harmful interference to radio communications. However, there is no guarantee that interference will not occur in a particular installation. If this equipment does cause harmful interference to radio or television reception, which can be determined by turning the equipment off and on, the user is encouraged to try to correct the interference by one or more of the following measures:
- Reorient or relocate the receiving antenna.
- Increase the separation between the equipment and receiver.
- Connect the equipment to an outlet on a circuit different from that to which the receiver is connected.
- Consult the dealer or an experienced radio/TV technician for help.
Appendix A: How to Contact Us
If you have any problems or want to know more about our products, visit www.vantrontech.com or contact us.
US Office: Vantron Technology, Inc. Address: 48434 Milmont Ave., Fremont, CA 94538-7324 Tel: 925-621-8758
Email: [email protected]
China Office: Chengdu Vantron Technology Co., Ltd.
Address: 4th-6th Floor, 1st Building, No.9, 3rd Wu Ke East Street, Wu Hou District, Chengdu 610045, China
Tel: 86-28-8512-3930/3931, 8515-7572/6320
Email: [email protected]
For more manuals by Vantron, visit ManualsLibraryy
Vantron O3Q10-8231 ATOM Based Single Board Computer- FAQs
What is the primary power input requirement?
The board requires a +12V DC input via the designated power connector. Ensure your power supply can provide stable and sufficient current for your connected peripherals.
What operating systems are supported?
The O3Q10-8231 is compatible with various Linux distributions (e.g., Ubuntu, Yocto Project) and Microsoft Windows 10/11 IoT Enterprise. Always use the OS images and drivers provided by Vantron for guaranteed compatibility.
How do I connect to the board for the first time?
The most common method is via the RS232 Debug Console Port. Use a null-modem cable to connect the COM header to your PC and a terminal emulator (like PuTTY) with the correct baud rate (typically 115200) to access the BIOS or OS command line.
What are the available display output interfaces?
The board supports dual independent displays through:
1x LVDS Interface
1x HDMI Port
1x Embedded DisplayPort (eDP)
How do I enable booting from a specific device (e.g., SATA, eMMC)?
Configure the boot order within the BIOS/UEFI setup utility. You can access the BIOS by pressing the specified key (often Del or F2) during the initial boot sequence when connected via the debug console.
What is the function of the Watchdog Timer?
The Watchdog Timer is a critical feature for unattended operation. It automatically reboots the system if the software hangs or fails to send a periodic “keep-alive” signal, ensuring high reliability in embedded applications.
How can I expand storage?
Beyond the onboard eMMC, you can add storage via:
The mSATA slot for an SSD.
The SATA 3.0 connector for a 2.5″ drive.
External storage via the USB 3.0 ports.
Where can I find drivers and technical documentation?
All essential drivers, a detailed pinout diagram, and the full hardware manual are available for download on the official Vantron product support page for the O3Q10-8231. Never use drivers from unofficial sources.

