
Sunbeam SB1818 Compact Sewing Machine
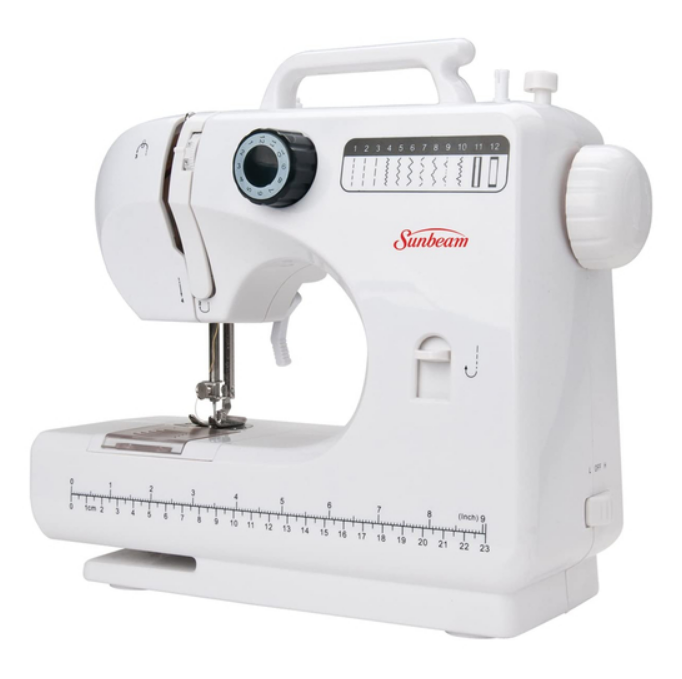
Accessories
- Foot control
- 2 spools of thread
- 2 bobbins
- Needle threader
- Needle

For Your Safety
- Use this machine only as recommended in this manual.
- Do not leave the unit unattended, especially near children.
- To avoid electric shock, remove the adapter before cleaning or after use.
- Keep fingers away from all inside electrical parts, especially around the needle.
- Never operate the machine if it has a damaged power cord or has been dropped into water.
- Do not use the machine outdoors.
Operating Instructions
Winding the Bobbin

- Place a spool of thread on the spool pin. (Figure 1) (Make sure the machine needle is not threaded at this time.
- Place the metal bobbin on the bobbin winder spindle, making sure to insert it into the slot. (Figure 2) (Note: It is important to use metal bobbins only. The bobbin case is magnetized and works only with metal bobbins.
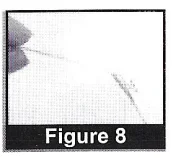
- Lead the thread from the spool pin through the thread guide (Figure 3) and to the bobbin. Wind a small amount of thread around the bobbin by hand. (Figure 4)
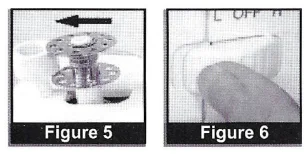
- Move the bobbin to the right until it clicks into place. (Figure 5)
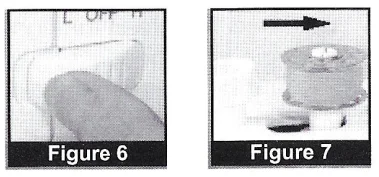
- Select a speed control switch. This will start winding the bobbin. (Figure 6)
- When you have the desired amount of thread on the bobbin, move the switch to OFF to the right, clicking it into
place. (Figure 5)
Threading the machine
Make sure that the power switch is off.
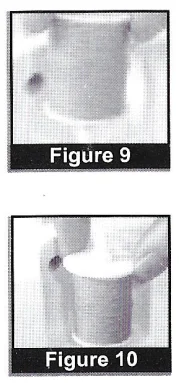
- Place a spool of thread on the Spool Pin with the thread end facing rear. (Figure 9)
- Clamp the reel cover over the Spool Pin so that the thread remains in place. (Figure 10)
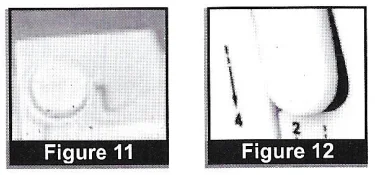
- Loop the thread around the outside of thread guide 1. (Figure 11)
- Guide the thread into Groove 2, and pull toward the chrome take-up lever. (Figure 12)
- Feed the thread through the hole in the chrome take-up lever and pull straight down to the needle. (Figure 13)
Connecting the Bobbin

- Remove the bobbin cover. (Figure 15).
- Place the bobbin in the bobbin case, making sure the thread unwinds in a clockwise direction. Allow about 4 inches of thread to extend from the case. (Figure 16
- Pull approximately 4 inches of needle thread from the machine. (Figure 17)
- Raise the presser foot. Hold the needle thread with your left hand while turning the handwheel toward you (counterclockwise) with your right hand. (Figure 18)
- Keep turning the handwheel until the needle goes down through the plate and comes up again. When the needle rises, it will bring up a loop of bobbin thread.
- Pull on the loop to bring the end of the bobbin thread out and away from the bobbin case. (Figure 19). Pull both the bobbin thread and the needle thread toward the back of the presser foot. (Figure 20)
- Pull both the bobbin and top thread toward the back of your presser foot. (Figure 20)
How to sew

- Turn the hand wheel counter-clockwise till the needle is at its highest position. (Figure 21)
- Lift the presser foot. Place the fabric beneath the presser foot at the exact spot where you want to begin sewing. (Figure 22)
- Lower the presser foot onto the fabric. (Figure 23) Select a stitch pattern. Make sure the power switch is ON. Lower the needle into the fabric. Press down on the foot control and begin sewing. The sewing speed depends on the pressure applied to the paddle: the harder you press, the faster the needle moves. Guide the fabric gently with your hands.
- When done, switch the power OFF.
- Turn the hand wheel anti-clockwise till the needle is at its highest position. Lift the presser foot. Gently ease the fabric away from beneath the presser foot.t
- Snip the threads with the thread cutter. (Figure 24)
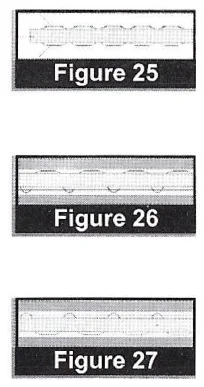
- If the upper thread on your sewing machine is too loose, the lower thread on your fabric will look like a straight line. To correct this, gradually turn the thread tension dial downward (numbers higher) to increase the tension until the stitches are smooth and even. (Figure 26)
- If the lower thread on your sewing machine is too loose, the upper thread on your fabric will look like a straight line. To correct this, gradually turn the thread tension dial upward (numbers lower) to decrease the tension until the stitches are smooth and even. (Figure 27)
Using the Free Arm
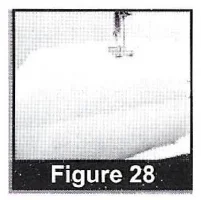
To sew sleeves, cuffs, or other narrow garments, use the free arm.
- Raise the presser foot.
- Position the narrow garment around the free arm. (Figure 28)
- Lower the presser foot and follow the regular sewing instructions.
Replacing the Needle
To replace the needle, follow these steps:
Caution: Make sure the machine is unplugged before replacing the needle.
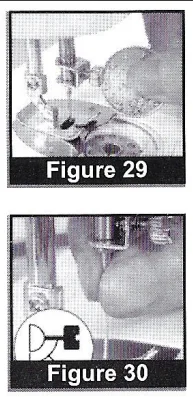
Ensure the power is off. Turn the handwheel toward you until the needle is in its highest position.
- Hold the old needle with one hand while loosening the needle clamp screw with the other. When the needle is loose, remove it from its clamp. (Figure 29)
- Insert a new needle in the clamp with the flat side toward the right. When the needle is firmly in place, tighten the needle clamp screw. (Figure 30)
Features
Stitch patterns
This sewing machine offers a choice of 12 stitches: 3 straight, 7 zigzag, and 2 buttonhole stitches. The 12 stitches are illustrated to the right of the stitch pattern knob. (Figure 31) Turn the stitch pattern knob to the number that corresponds to your desired stitch. (Figure 32)
Buttonhole stitch
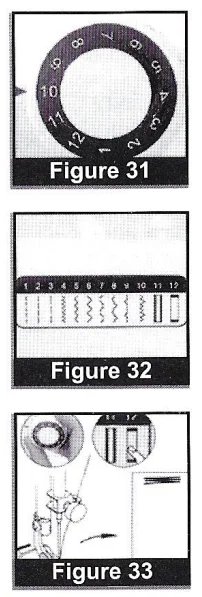
- Select #12 on the stitch pattern knob. Place fabric beneath the presser foot at the exact spot of the f buttonhole.
- Turn the switch ON. Sew about 3-4 stitches at low speed and turn the switch OFF. (Figure 33)
- Select #11 on the stitch pattern knob. Turn the switch ON. Sew several stitches until you reach the desired length of the buttonhole. Make sure you sew in a straight line.
Accessories drawer
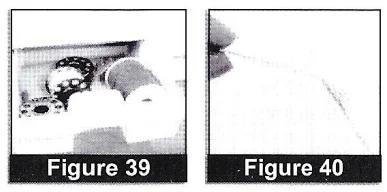
The accessories drawer has a designated space for bobbins, threads, and needles. (Figure 39)
Thread cutter
Use the handy thread cutter on the left side of the sewing machine to snip threads after threading or sewing. (Figure 40)
Troubleshooting Guide
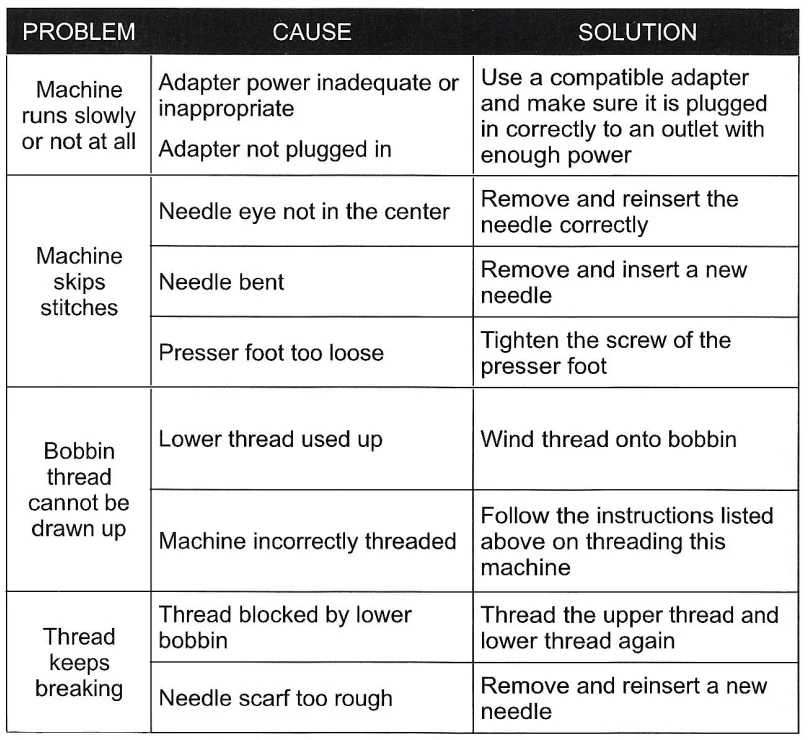
FOR MORE MANUALS BY SUNBEAM, VISIT MANUALSLIBRARYY
Sunbeam SB1818 Compact Sewing Machine-FAQs
What is the Sunbeam SB1818 sewing machine best for?
It’s perfect for beginners and small household sewing projects like clothes, crafts, and simple repairs.
Is this machine easy to use for beginners?
Yes. It’s lightweight, compact, and comes with straightforward controls ideal for learning basic sewing techniques.
How many stitches does it offer?
It includes multiple built-in stitches suitable for basic and decorative sewing.
Can it sew thick fabrics like denim or leather?
It can handle light layers of denim, cotton, and similar fabrics. Heavy-duty leather or multiple denim layers may not be suitable.
Does it need regular oiling?
Yes, lubrication with proper sewing machine oil helps maintain smooth operation. Do not use WD-40 or cooking oils.
How often should it be serviced?
For regular home use, a tune-up once a year is recommended. More frequent use may require servicing twice a year.
What are common problems with compact sewing machines?
Typical issues include skipped stitches, thread breakage, or uneven stitching. Following the manual and proper threading usually resolves these.
What accessories come with it?
It usually includes bobbins, needles, a foot pedal, thread spool holder, and sometimes a small accessory kit.
Can it be used for small craft projects?
Yes, it works well for items like bags, pillows, simple costumes, and children’s clothes.

