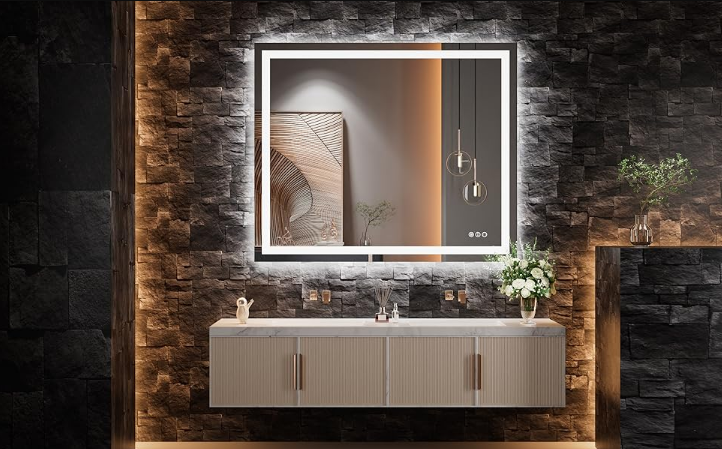
Amorho B08PJGHQYW LED Mirror
Package
- Wall mount pendants*2
- Expansion bolts*4
- Screws*4
- User manual*1
Please check whether all the accessories are in the package before installation.
Install Tools Needed( not included)
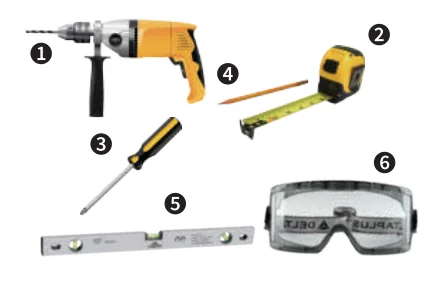
- Drill
- Tape measure
- Phillips screwdriver
- Maker pen
- Spirit level
- Goggles
Installation Steps
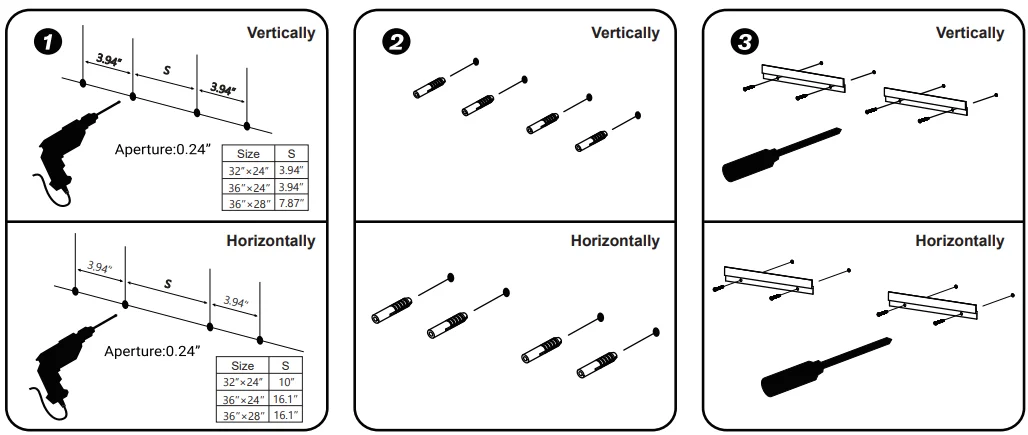
- Use a tape measure, a spirit level, a marker pen, and an electric drill according to the distance to locate.
- After drilling the hole, knock the expansion bolt into the hole.
- Screw the hanger delivered to the corresponding position. (Pay attention to the direction upwards)

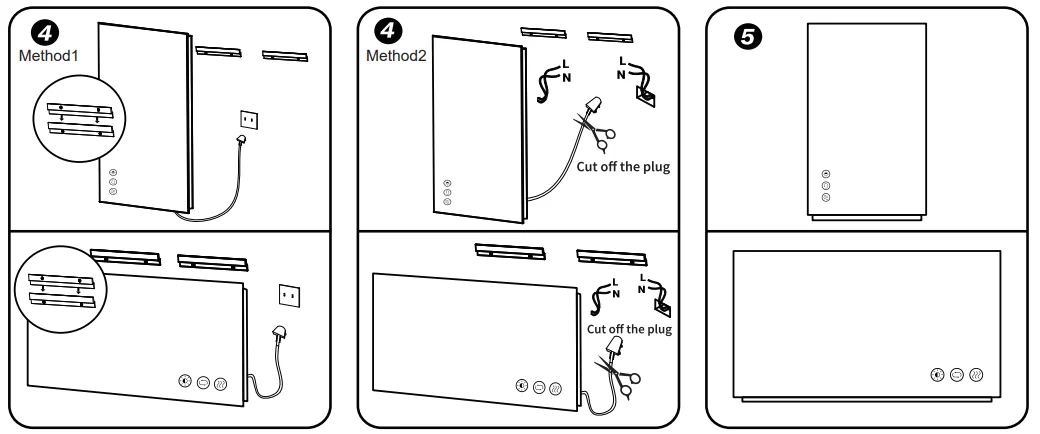
- Method 1: Plug-in Equipped with a US 2-prong plug. It can be used with wall sockets.
- Method 2: Wall Switch Control. Cut off the plug, and connect the mirror’s wire to the wall switch’s wire. (L-L N-N).
- Clip the lamp to the wall via fixed parts. Turn on and works, installation finished.

Lighting & Control
The integrated light source and system do not support customers in replacing them. Please do not change by yourself.
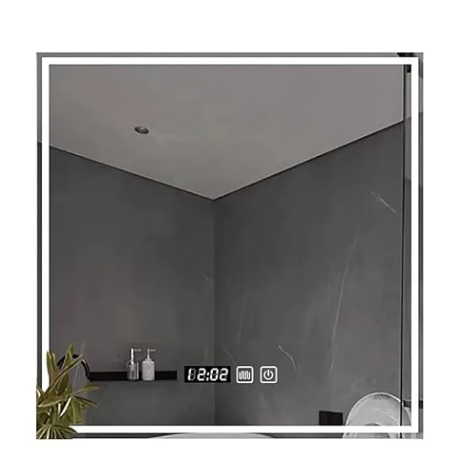
The lights(and defogger)are controlled by a touch sensor on the mirror surface to turn on/off and adjust brightness and color temperatures. Keeping the mirror lights on, you can also control them on & off with a wall switch.
Key 1: DIM Light Switch

- Short-touch: Turn on/off the lights.
- Long-touch: Adjust the brightness stepless.
- Double-touch: Adjust 3 lighting modes (Only front light, only backlit, and double lighting strips), and recycle after turning on the lighting strips. Only internal and external luminous models are supported.
Key 2: Color Temperature

- Click to change color temperature(3000K/4000K/6000K), long-press could change the color temperature from 3000 K to 6000 K.
Key 3: Defog Switch

- Press to control the defog function ON/OFF. [Defog time need: Winter(S-10 Mins) Summer(2-3Mins)]
Memory Function
Remember your last settings for the LED mirror, making it easier to use.
About Power Auto Off
To help you save energy, the LED mirror has been designed with a particular function. The power (light/defogger) will be auto off after an hour of use (start timing for the last operation).
Electrical Safety Instructions installation must be a professional who is a qualified/registered electrician. If you have no experience with installation, please do not try it by yourself. We will not be responsible for it.
Warning
Read these instructions carefully before and during the installation process to ensure that your product is installed safely and correctly.
Cut off the power supply before installation and maintenance. According to IEEE regulations, the installation of the bathroom must comply with the appropriate area. This product is suitable for zone 2 and outside zone, not suitable for zone O O or zone L. Although this product has iP44 protection, it is only suitable for USO.
Cleaning Note
- Turn off the mirror power when cleaning.
- Do not use abrasive or solvents when cleaning the mirror. We suggest using a soft, damp cloth to wipe off water spillages.
- Do not submerge the mirror in water.
NEED HELP?
If you have any questions (product damage, missing accessories, installation method, etc), please contact us in time through the Amazon order or below methods. Answer within 24 hours.
Email: [email protected]
About Installation
- Please wear suitable goggles when drilling.
- Be careful whenusingi:: power tools near the water.
Recommendations for residual current devices (RCD)
- Be careful with hidden cables or pipes.
- If you need to drill on the surface of the tile, please be careful to prevent the drill bitslippinc: off. Stick a piece of tape on the wall to prevent the drill bitshift before marking the fixing holes.
- Do not place very hot or cold Items on or near the glass surface, unless adequately insulating materials are used to prevent such items from touching the glass mirror glass nominal thickness of 154mm. If the mirror glass is broken, please contact us in time ([email protected]).
- This product should be kept away from curtains and other fabrics. Do not cover the mirror with anything because the energized product will be heated. We recommend that you lose it after using it. Please do not open it for a long time.
- It will be more dangerous if installed incorrectly. (Please keep this user manual for future reference.)
About Wiring
This product is manufactured to the Class I category and requires an earth connector. Also, we will provide an additional 1.5m US 2-pin plug for easy connection with existing wall sockets.
About Working Status
When the touch switch backlight is blue, it means the function is on; when the touch switch backlight is white, it means the function is off.
Closed state; (when defogging is needed, it is not suitable to run for a long time)
For more manuals by Amorho, visit ManualsLibraryy
Amorho B08PJGHQYW LED Mirror- FAQs
1. What is an LED mirror used for?
LED mirrors combine style and function, offering bright, even lighting that’s perfect for grooming, makeup, and dressing. They also add a modern touch to bathrooms and bedrooms.
2. How does an LED mirror get power?
LED mirrors can be powered by plugging into a wall outlet, hardwiring into your home’s electrical system, or using built-in rechargeable batteries—depending on the model.
3. Do LED mirrors need to be hardwired?
Not always. Some models are plug-in and easy to install, while others are hardwired for a cleaner, cord-free look. Hardwired mirrors usually require professional installation.
4. Do all LED mirrors need electricity?
Most LED mirrors need electricity to operate, but some portable or compact models are battery-powered for convenience.
5. How much power does an LED mirror use?
A typical LED mirror consumes between 15 and 30 watts, depending on its size and brightness. It’s very energy-efficient compared to regular lighting.
6. How long does an LED mirror last?
LED mirrors generally last 30,000 to 50,000 hours, which means years of use before replacement is needed.
7. How long does it take to charge an LED mirror?
Charging usually takes 4 to 8 hours, depending on the model and charger type. Some mirrors can be used while charging.
8. Can I leave my LED mirror on all night?
Yes, it’s safe. LED lights generate minimal heat and are energy-efficient, making them safe for extended use.
9. Do LED mirrors need a switch to operate?
Most LED mirrors have a built-in touch sensor or traditional switch for turning the lights on and off easily.
10. Are LED mirrors energy-efficient?
Yes, LED mirrors use very little electricity and convert most of their power into light rather than heat, reducing energy waste.

