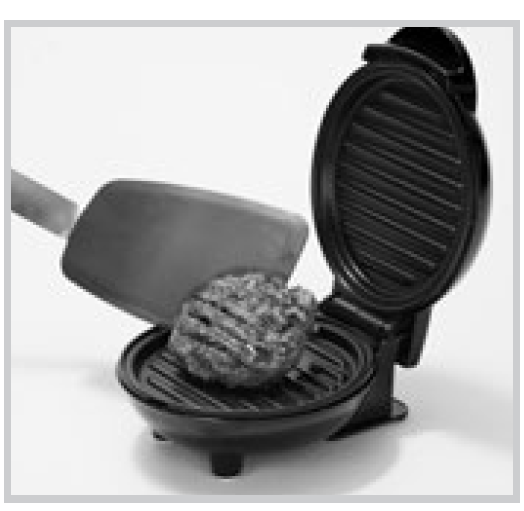
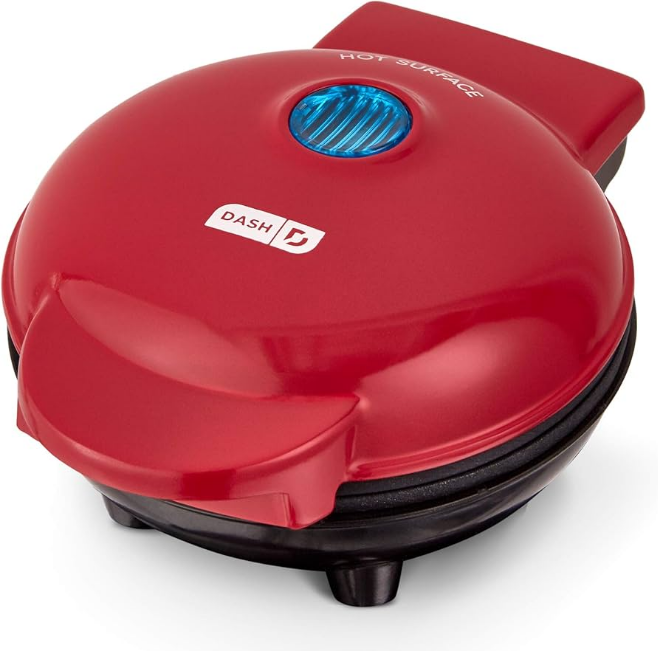
Dash DMG001 Mini Maker Portable Grill Machine
IMPORTANT SAFEGUARDS
When using electrical appliances, basic safety precautions should be followed, including:
- FOR HOUSEHOLD USE
- Read all instructions carefully.
- Remove all bags and packaging from the appliance before use.
- Never leave an appliance unattended when in use.
- Make sure the appliance is cleaned thoroughly and dried before using.
- Do not use the appliance for anything other than its intended use. Do not use outdoors.
- WARNING: Hot surfaces! Never touch the Cooking Surface or Cover while the appliance is in use. Always lift and lower the Cover by the Cover Handle.
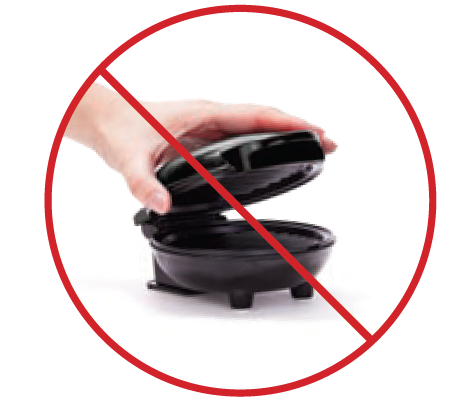
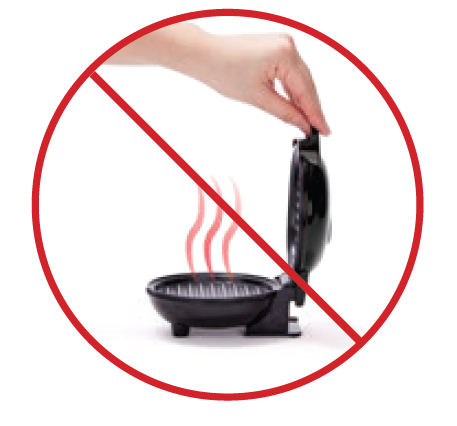
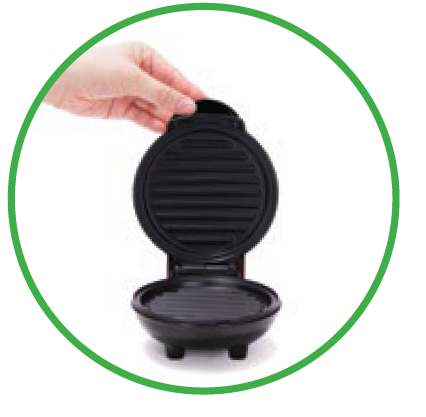
- Do NOT lift the Cover so that your arm is over the Cooking Surface, as it is hot and may cause injury. Lift from the side.
- To prevent the risk of fire, electric shock, or personal injury, do not put a cord, plug, or appliance in or near water or other liquids. The Mini Maker Grill is NOT dishwasher safe.
- Never use abrasive cleaning agents to clean your appliance, as this may damage the Mini Maker Grill and its non-stick Cooking Surface.
- Do not operate this appliance with a damaged cord, damaged plug, or after the appliance malfunctions, is dropped, or is damaged in any manner. Return the appliance to the nearest authorized service facility for examination, repair, or adjustment.
- DO NOT use the Mini Maker Grill near water or other liquids, with wet hands, or while standing on a wet surface.
- For maintenance other than cleaning, please contact StoreBound directly at 1-800-898-6970 from 7 AM – 7 PM PST Monday–Friday or by email at [email protected].
- Do not use metal utensils on the Cooking Surface as this will damage the non-stick surface.
- This appliance is not intended for use by persons (including children) with reduced physical, sensory, or mental capabilities, or a lack of experience and knowledge, unless they are provided with supervision and instruction concerning use of the appliance by a person responsible for their safety.
- Do not place the appliance on or near a hot gas burner, hot electric burner, or in a heated oven.
- Be cautious when moving an appliance containing hot oils or other hot liquids. Refrain from using attachments that are not recommended by the appliance manufacturer, as this may result in fire, electric shock, or personal injury.
- Allow Mini Maker Grill to cool completely before moving, cleaning, or storing.
- Close supervision is necessary when any appliance is used by or near children.
- Do not let the cord touch hot surfaces or hang over the edge of tables or counters.
- Always be sure to unplug the appliance from the outlet prior to moving, cleaning, storing, and when not in use.
- Store Bound shall not accept liability for damages caused by improper use of the appliance.
- Improper use of the Mini Maker Grill can result in property damage or even personal injury.
- This appliance has a polarized plug (one blade is wider than the other). To reduce the risk of electric shock, this plug will fit in a polarized outlet only one way. If the plug does not completely fit in the outlet, reverse the plug. If it still does not fit, contact a qualified electrician. Do not attempt to modify the plug in any way.
- A short power supply cord is to be provided to reduce the risk resulting from becoming entangled in or tripping over a longer cord.
- An extension cord may be used if care is exercised in its use.
- If an extension cord is used, the marked electrical rating of the extension cord should be at least as great as the electrical rating of the appliance.
- If the appliance is grounded, the extension cord should be a grounding 3-wire cord. The extension cord should be arranged so that it will not drape over countertops or tabletops where it can be pulled on by children or tripped over unintentionally.
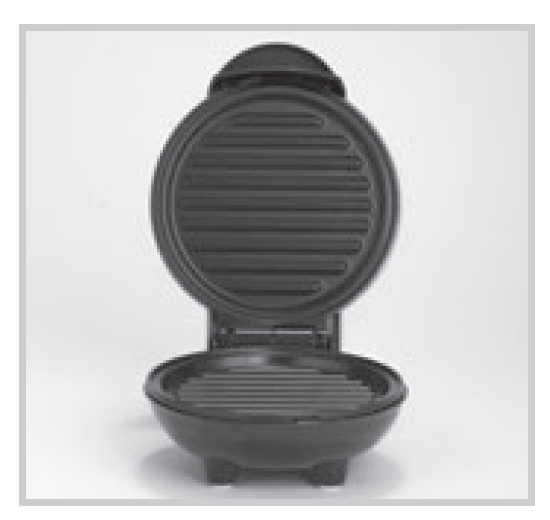
Parts & Features
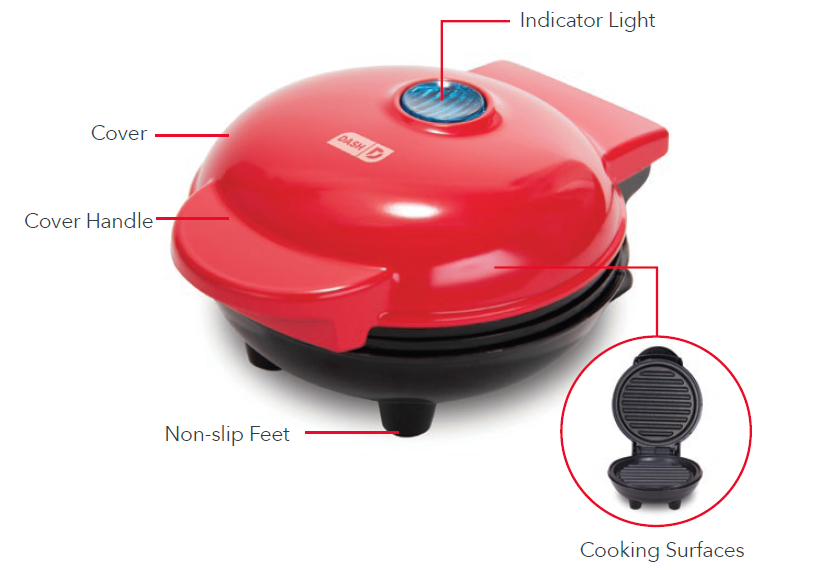
Using your mini maker grill
Before first use, remove all packaging material and thoroughly clean your Mini Maker Grill.
- Never touch the Cooking Surface or Cover while the appliance is in use.

- DO NOT lift the Cover so that your arm is over the Cooking Surface, as it is hot and may cause injury.

- Always lift and lower the Cover by the Cover Handle. Lift from the side.

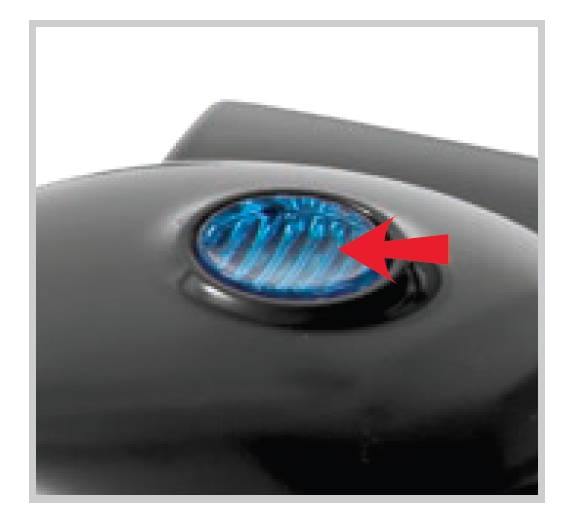
- Place the appliance on a stable and dry surface. Plug the cord into a power outlet. The Indicator Light will illuminate, signaling that the Mini Maker Grill is heating up.

- Once the Cooking Surface reaches the optimal cooking temperature, the Indicator Light will automatically shut off. Now, you’re ready to get cooking!

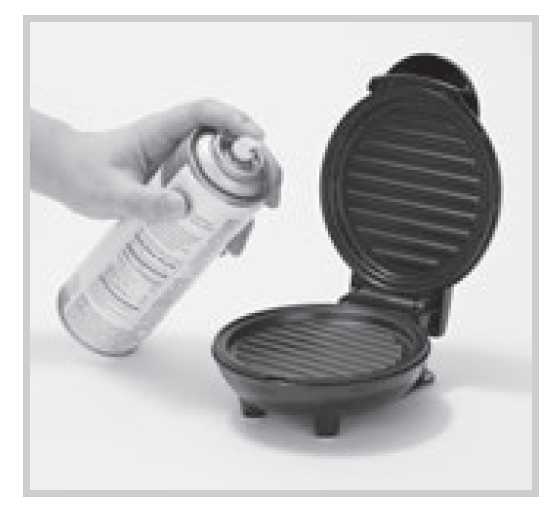
- Carefully lift the Cover by the Cover Handle and spray both Cooking Surfaces with a small amount of cooking spray.

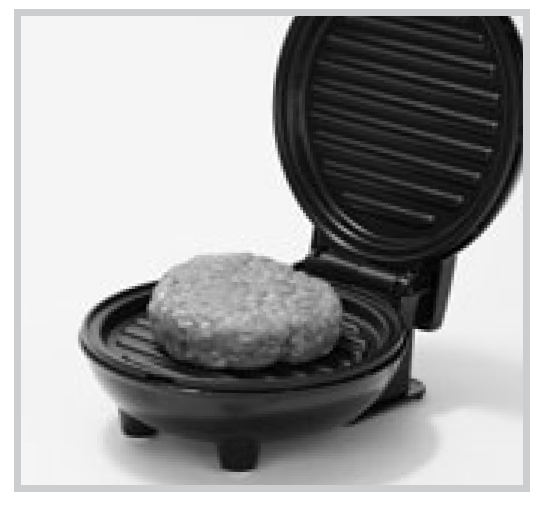
- Place food onto the Cooking Surface and close the Cover.

- Once food is cooked to your preference, carefully remove it from the Cooking Surface with a heat-resistant nylon or silicone cooking utensil. Do not use metal utensils to remove or place food on the Cooking Surface, as this will damage the nonstick surface.

- When you have finished cooking, unplug your Mini Maker Grill and allow it to cool before moving or cleaning.

Cleaning & maintenance
Always allow the appliance to cool completely before moving, cleaning, or storing. Do not submerge the appliance in water or any other liquids. Never use abrasive cleaning agents to clean your appliance, as this may damage the Mini Maker Grill. In order to keep your Mini Maker Grill in pristine working order, thoroughly clean the appliance after each use. This will prevent the build-up of food or oil.
- Unplug the Mini Maker Grill and allow it to cool completely.
- Using a damp, soapy cloth, wipe down the Cooking Surface and Cover. Thoroughly rinse the cloth and wipe again.
- Thoroughly dry the Mini Maker Grill before storing.
- If there is food burned onto the Cooking Surface, pour on a small amount of cooking oil and let it sit for 5 to 10 minutes. Scrub the surface with a sponge or soft-bristle brush to dislodge food. Use a damp, soapy cloth to wipe down the Cooking Surface. Thoroughly rinse the cloth and wipe again. If any food remains, pour on more cooking oil and let it sit for a few hours, then scrub and wipe clean.
- Never use abrasive cleaning agents to clean your appliance, as this may damage the Mini Maker Grill and its non-stick Cooking Surface.
Troubleshooting
While our products are durable, you may encounter one or more of the problems listed below. If the issue is either not solved by the solutions recommended below or not included on this page, please contact our Customer Support Team at 1-800-898-6970 or [email protected].
1. The light on the Mini Maker Grill keeps shutting off.
This is normal. During the cooking process, the heating element will automatically turn on and off to regulate the temperature and ensure that the Cooking Surface does not get too hot or cold. When this occurs, the Indicator Light turns on and off.
2. How do I know when the Mini Maker Grill is heated and ready to use?
When the Mini Maker Grill reaches the optimal temperature, the Indicator Light shuts off, and that means you’re ready to get cooking!
3. There is no On/Off Button. How do I turn the Mini Maker Grill off and on?
To turn on, simply plug in the power cord. When you’re done cooking, turn off the Mini Maker Grill by unplugging it.
4. When using my Mini Maker Grill, the Cover gets very hot. Is this normal?
Yes, this is completely normal. When using your Mini Maker Grill, always lift and lower the Cover by the Cover Handle. To prevent personal injury, do NOT lift the Cover so that your arm is over the Cooking Surface, as it is hot and may cause injury. Lift from the side.
5. I am cooking meat on the Mini Maker Grill, and there is juice on the Cooking Surface. What do I do?
Carefully dab the Cooking Surface around the meat with a paper towel or napkin. If there is a lot of juice, remove the food from the surface with heat-resistant plastic or silicone tongs and set aside. Then, wrap a paper towel around the tongs and use this to wipe the Cooking Surface and soak up the juices. When finished, return the food to the Mini Maker Grill and continue cooking.
6. After using my Mini Maker Grill a few times, the food is starting to stick to the surface. What is happening?
There is probably a buildup of burnt food residue on the Cooking Surface. This is normal, especially when cooking with sugar. Allow the appliance to cool fully, pour on a small amount of cooking oil, and let sit for 5–10 minutes. Scrub the Cooking Surface with a sponge or soft-bristle brush to dislodge food. Use a damp, soapy cloth to wipe down the Cooking Surface. Rinse the cloth and wipe again. If food remains, pour on more cooking oil and let sit for a few hours, then scrub and wipe clean.
7. The Indicator Light will not turn on, and the Cooking Surface is failing to heat.
- Ensure that the power cord is plugged into the power outlet.
- Check to make sure the power outlet is operating correctly.
- Determine if a power failure has occurred in your home, apartment, or building.
RECIPE BOOK Mini Maker Grill
SAUSAGE, EGG & CHEESE BREAKFAST SANDWICH
INGREDIENTS:
- 1 English muffin
- 1 sausage patty
- 1 egg
- 1 slice cheddar or American cheese
- 2 slices of tomato
DIRECTIONS:
Toast an English muffin in the Mini Maker Grill. Then, cook the sausage patty. Place the patty and cheese on the English muffin. Break an egg onto the Cooking Surface and cook for one minute. Place the egg on your sandwich and top with tomato slices and the other half of the English muffin.
GRILLED CHEESE ENGLISH MUFFIN
INGREDIENTS:
- 1 English muffin
- 2 slices of cheddar or American cheese
- 2 tsp butter
DIRECTIONS:
Place two slices of cheese inside the English muffin and lightly butter the outside. Place the sandwich inside the Mini Maker Griddle and cook until the cheese is melted and the bread is toasted.
Customer support
We welcome and value all concerns and questions from our customers. Please do not hesitate to contact us for product support, warranty, and maintenance-related questions directly at: 1(800)-898-6970 from 7 AM – 7 PM PST, Monday-Friday, or by email at [email protected]. Feel free to give us a call any time during the hours below: 1 (800) 898-6970. Hey Hawaii! You can reach our customer service team from 5 AM to 5 PM HAST. And also, Alaska, feel free to reach out from 6 AM – 6 PM UTC.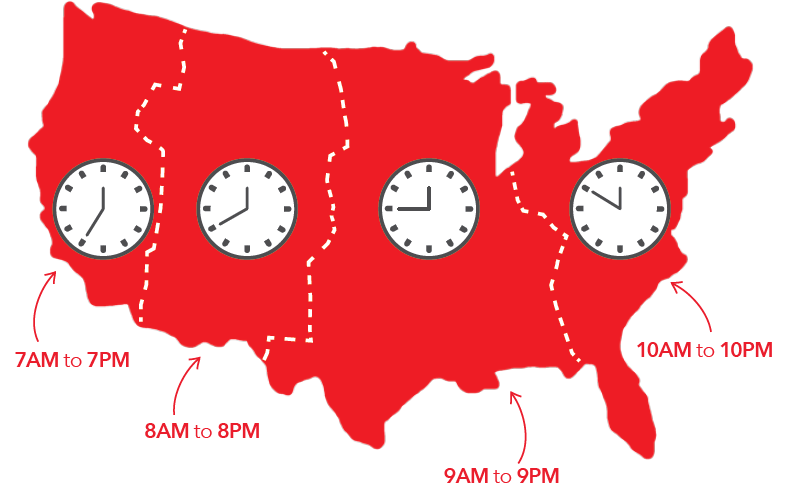
Warranty
STOREBOUND, LLC – 1-YEAR LIMITED WARRANTY Your StoreBound product is warranted to be free from defects in material and workmanship for a period of one (1) year from the date of the original purchase when utilized for normal and intended household use. Should any defect covered by the terms of the limited warranty be discovered within one (1) year, StoreBound, LLC will repair or replace the defective part. To process a warranty claim, contact Customer Support at 1-800-898-6970 for further assistance and instructions. A Customer Support agent will assist you by troubleshooting minor problems. If troubleshooting fails to fix the problem, a return authorization will be issued. Proof of purchase, indicating the date and place of purchase, is required and should accompany the return.
You must also include your full name, shipping address, and telephone number. We are unable to ship returns to a P.O. box. StoreBound will not be responsible for delays or unprocessed claims resulting from a purchaser’s failure to provide any or all of the necessary information. Freight costs must be prepaid by the purchaser. Send all inquiries to [email protected]. There are no express warranties except as listed above. REPAIR OR REPLACEMENT AS PROVIDED UNDER THIS WARRANTY IS THE EXCLUSIVE REMEDY OF THE CUSTOMER. STOREBOUND SHALL NOT BE LIABLE FOR ANY INCIDENTAL OR CONSEQUENTIAL DAMAGES OR FOR BREACH OF ANY EXPRESS OR IMPLIED WARRANTY ON THIS PRODUCT EXCEPT TO THE EXTENT REQUIRED BY APPLICABLE LAW.
ANY IMPLIED WARRANTY OF MERCHANTABILITY OR FITNESS FOR A PARTICULAR PURPOSE ON THIS PRODUCT IS LIMITED IN DURATION TO THE DURATION OF THIS WARRANTY. Some states do not allow the exclusion or limitation of incidental or consequential damages, or limitations on how long an implied warranty lasts. Therefore, the above exclusions or limitations may not apply to you. This warranty gives you specific legal rights, and you may also have other rights, which vary from state to state.
REPAIRS
DANGER! Risk of electric shock! The Dash Mini Maker Grill is an electrical appliance. Do not attempt to repair the appliance yourself under any circumstances. Contact Customer Support regarding repairs to the appliance.
TECHNICAL SPECIFICATIONS
- Voltage 120V \~ 60Hz
- Power Rating 350W
- Stock#: DMG001\_20170615\_V3
For More Manuals By Dash, Visit ManualsLibraryy.
Dash DMG001 Mini Maker Portable Grill Machine-FAQs
Q1: What is the Dash Mini Maker Grill?
The Dash DMG001 Mini Maker Grill is a compact electric grill designed for quick and easy meals. With 4” dual non-stick cooking surfaces, it evenly grills burgers, sandwiches, paninis, grilled cheese, and more in minutes.
Q2: How do I use the Dash Mini Maker Grill?
Simply plug in the unit, allow it to preheat, place your food on the non-stick surface, and close the lid. The indicator light shows when it’s ready to cook.
Q3: How do I clean the Dash Mini Maker Grill?
Always let the grill cool completely before cleaning. Wipe the cooking plates and cover with a damp, soapy cloth, then wipe again with a clean damp cloth. Do not submerge the appliance in water.
Q4: Can I wash the Dash Mini Grill with water?
No. Never place the grill in water or any liquid. Only use a damp cloth to clean the surfaces.
Q5: What type of food can I cook on this mini grill?
You can prepare burgers, grilled cheese, quesadillas, paninis, breakfast sandwiches, small steaks, and more.
Q6: What is the cooking temperature of the Dash Mini Grill?
The grill heats quickly and reaches high temperatures, typically between 400–450°F, making it suitable for grilling small meals evenly.
Q7: Is the Dash Mini Grill safe to store after use?
Yes. Once cooled and cleaned, the compact design makes it easy to store in a cabinet, drawer, or even upright on a countertop.
Q9: Do I need oil for cooking on the grill?
The dual non-stick plates usually don’t require oil. However, lightly brushing with oil or butter can enhance flavor and prevent sticking for some foods.

