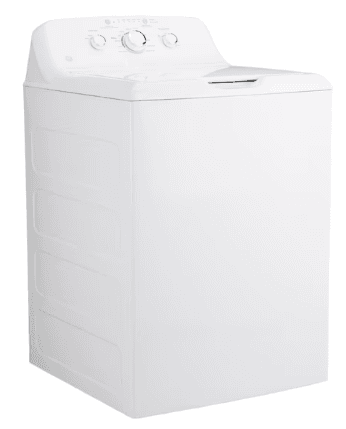
GE Appliances GTW330ASKWW Top Loading Washer
PROPER INSTALLATION
- This washer must be properly installed and located in accordance with the Installation Instructions before it is used.
- Ensure that the hot water hose is connected to the “H” valve and the cold water hose is connected to the “C” valve.
- Install or store where it will not be exposed to temperatures below freezing or exposed to the weather, which could cause permanent damage and invalidate the warranty.
- Properly ground washer to conform with all governing codes and ordinances. Follow details in the Installation Instructions.
Getting started
Step 1
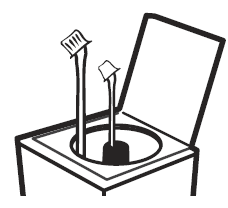
- Add fabric softener to the fabric softener dispenser (on some models); see page 12.
- Add the manufacturer’s recommended amount of detergent. GE Appliances recommends the use of High Efficiency detergents such as
 in your energy-efficient washer. Place detergent pods in the bottom of the wash basket before adding clothes
Step 2
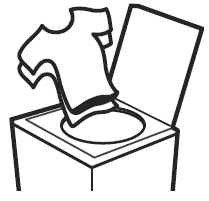
- Loosely add items around the agitator. Overloading may negatively impact wash performance. See page 14 for suggested loading
examples. - Close lid.
- NOTE: The unit will not start with lid open if Precise Fill is selected except on Bulky Items cycle.
Step 3
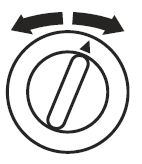
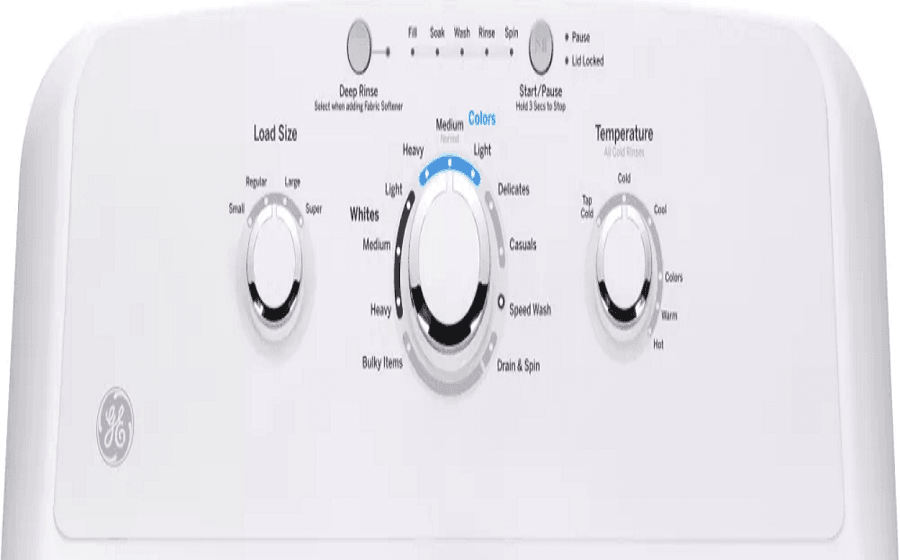
- Select wash cycle.
- Select wash options, including Deep Rinse option (on some models) when using fabric softener.
- Select options
Step 4
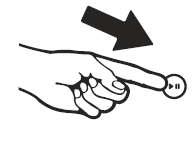
- Press Start
Controls
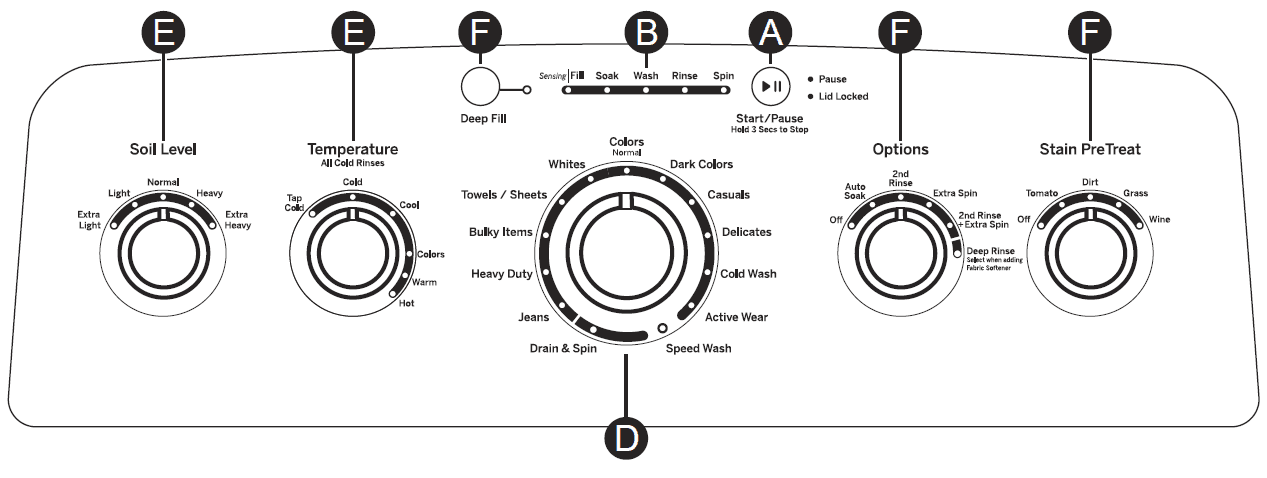
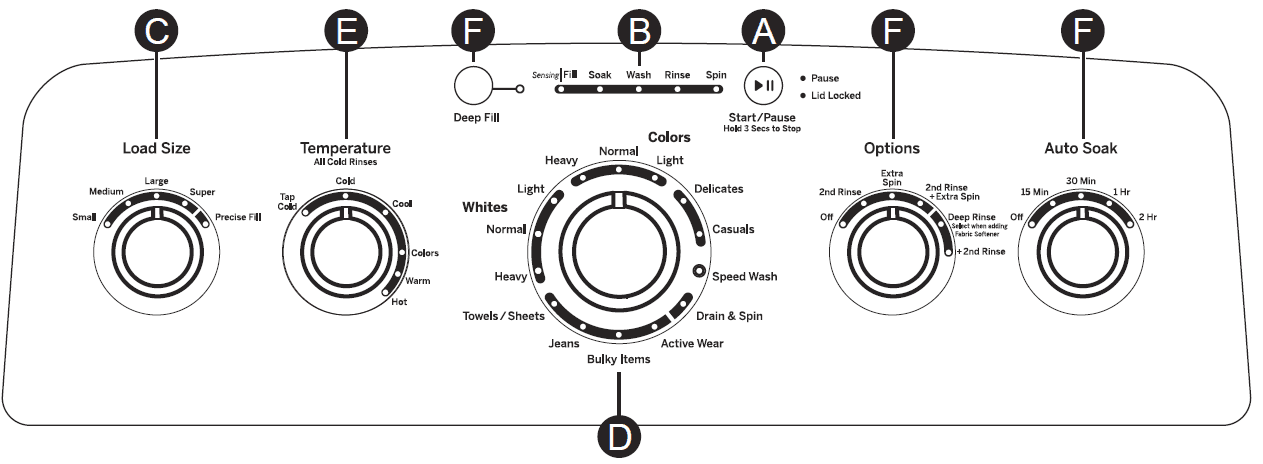
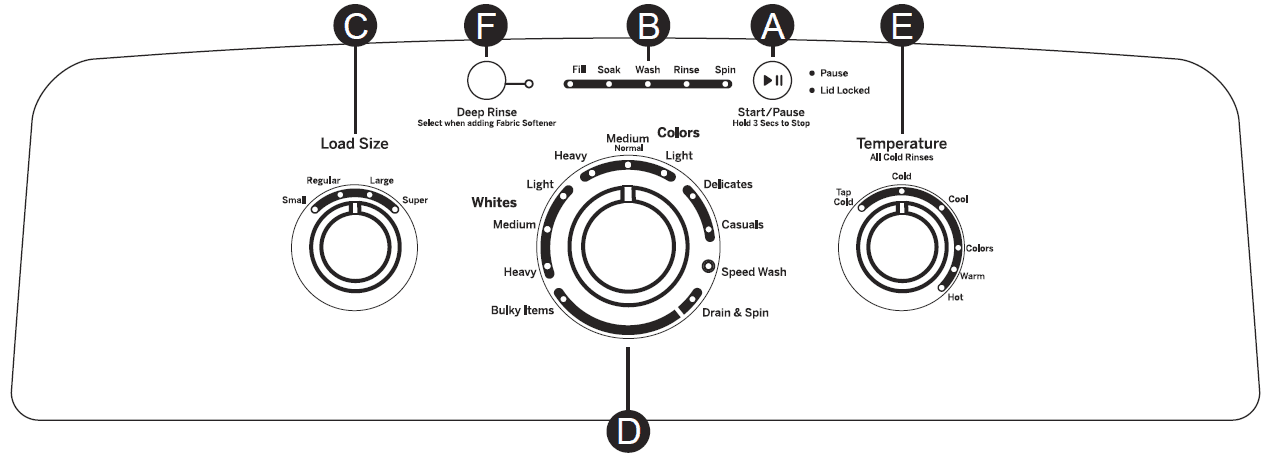
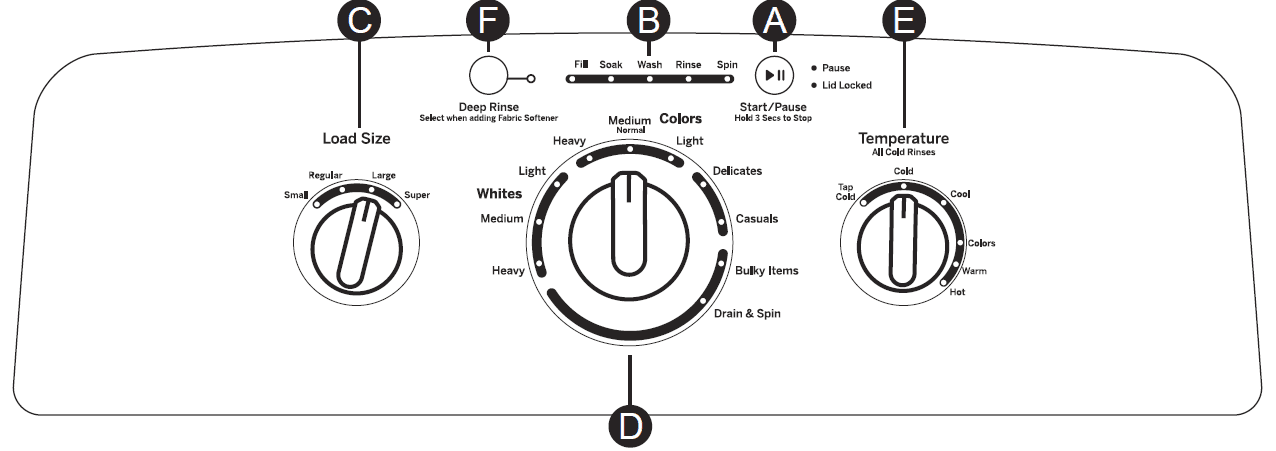
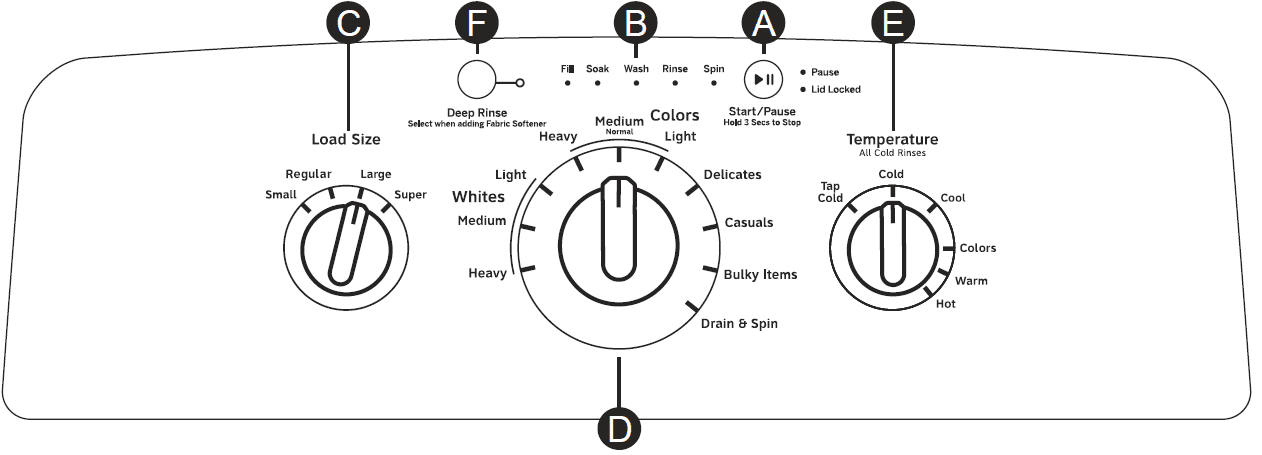
Start/Pause
- Press Start to begin the cycle. NOTE: If the lid is closed, the lid will lock only during the load sensing portion of the cycle (when the Precise Fill selection is made or models which do not have a load size selection) and during spin portions of the cycle. Lid will unlock after load sensing and spin.
- Pressing Pause will unlock the lid (if locked at that time), pause the cycle and the Pause indicator light will blink. To continue the cycle, press Start again. If water remains in the machine, select the Drain & Spin cycle to drain basket and spin water out of the washer basket.
- NOTE: Machine will automatically cancel and drain when water is present and the lid is left open for 15 minutes or the unit is left in a paused state for 24 hours with the lid closed. Select cycle and press Start to begin new cycle.
Cycle Status Lights
- Shows whether the washer is in the Fill, Soak, Wash, Rinse or Spin portion of the cycle. If an out-of-balance condition is detected by the washer, the Spin light will blink during the remaining portion of the cycle and will stay illuminated for a short time after cycle completion. When this occurs, the washer is taking actions to correct the out-of-balance condition and complete the cycle normally. In some cases, the washer may not be able to balance the load and spin up to full speed. If you notice the load is more wet than normal at the end of the cycle, redistribute the load evenly in the wash basket and run a Drain & Spin cycle.
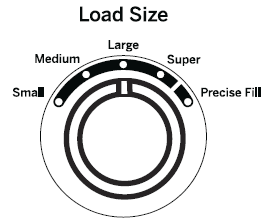
Load Size (on some models)
- Add detergent to the bottom of the basket and fabric softener to the dispenser (on some models) prior to loading clothes. Loosely load items in the washer basket. Overloading may negatively impact wash performance. Adjust the load size accordingly. Make the load selection

Cycle Options
Stain PreTreat (on some models)
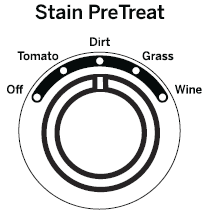
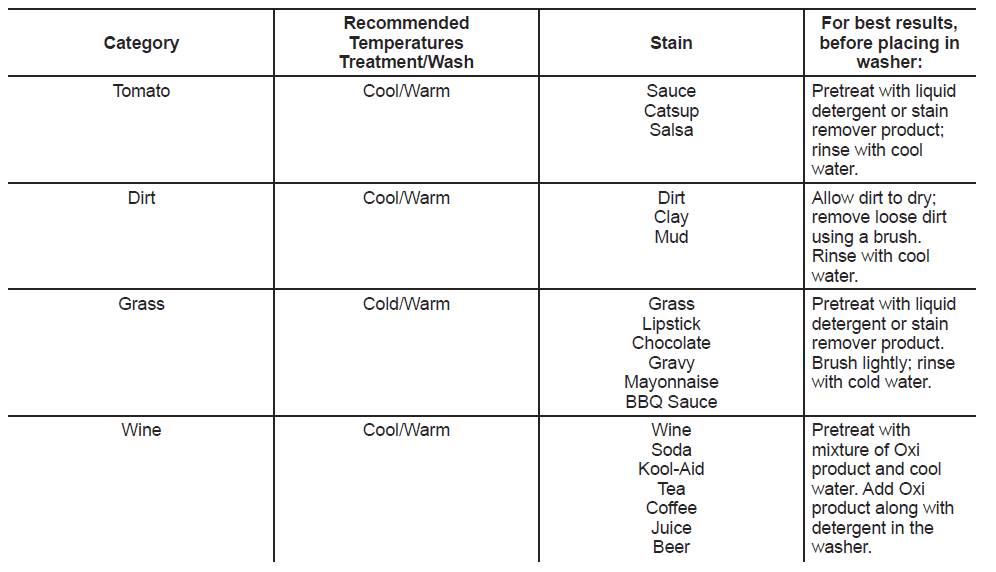
- The Stain PreTreat feature allows you to indicate what stains are on the garments in your load. This feature incorporates a patent pending treatment method. An initial water fill is performed at a temperature tailored to the stain type selected and to an amount that enables a concentrated cleaning step. A stain scrubbing period, followed by an active soak, is conducted to effectively treat the stain. Then additional water is added to the selected temperature and the wash phase is conducted for the cycle selected. This feature can be applied to most wash cycles as described in the cycle guide.
- To use Stain PreTreat:
- Select the desired wash cycle.
- Select the stain to be treated under the Stain PreTreat options.

Stain PreTreat Guide
Proper Use of Detergent
- Using too little or too much detergent is a common cause of laundry problems. Use less detergent if you have soft water, a smaller load or a lightly soiled load. For spots, apply pre-treatment to items as recommended on the product label. Application should be made in the basket to prevent overspray which may cause the coloring on the lid or graphics to fade.
- Place detergent pods in the bottom of the wash basket before adding clothes. GE Appliances recommends the use of High-Efficiency detergents such as
 in your energy-efficient washer. HE detergents are formulated to work with low-water wash and rinse systems. HE detergents reduce the oversuding problems commonly associated with regular detergents.
 - When using high-efficiency or concentrated detergents, consult the product label to determine the amount required for optimum performance. Excessive detergent will negatively impact wash performance.
Installation Instructions
PARTS SUPPLIED
- Drain Hose

- Cable Tie

- Owner’s Reference Guide

- Drain Hose Clip

- Clamp

LOCATION OF YOUR WASHER
DO NOT Install the Washer:
- In an area exposed to dripping water or outside weather conditions. The ambient temperature should never be below 60°F (15.6°C) for proper washer operation.
- In an area where it will come in contact with curtains or drapes.
UNPACKING THE WASHER
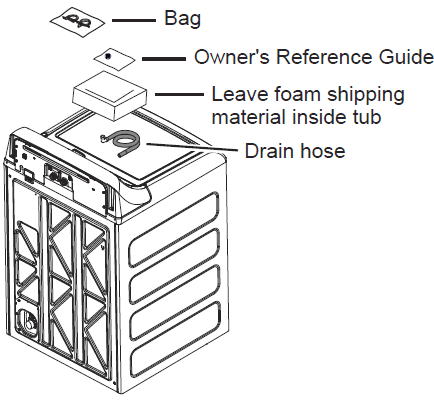
- After the machine is in the home, remove outside packing material/carton from washer. Remove bag (containing clamp, cable tie and drain hose clip), drain hose and Owner’s Reference Guide from tub.
- NOTE: Leave foam shipping material inside tub opening to hold tub in place during the rest of installation

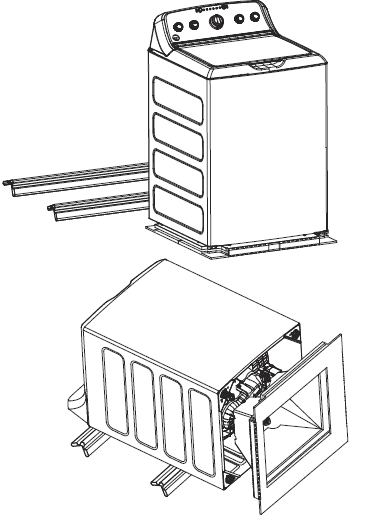
REMOVE THE BASE
- Remove base from unit by placing foot on side of base and tipping unit back on corner post. Remove base and bring the washer back upright

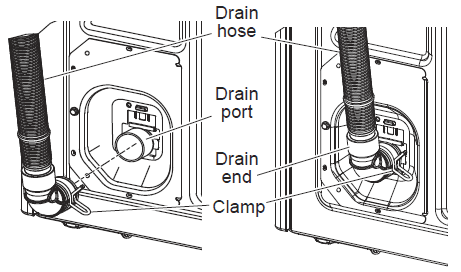
CONNECT DRAIN HOSE TO WASHER
- Connect drain hose to drain port on back of washer. Open clamp with pliers and slide onto hose end. Holding clamp open, push hose end onto drain port until fully seated. Release clamp between locating ribs on hose end. Outlet of hose end should be oriented vertically.

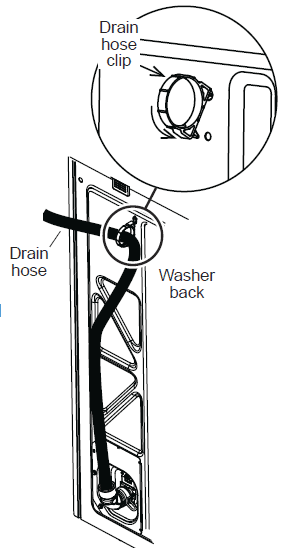
CONNECT TO DRAIN
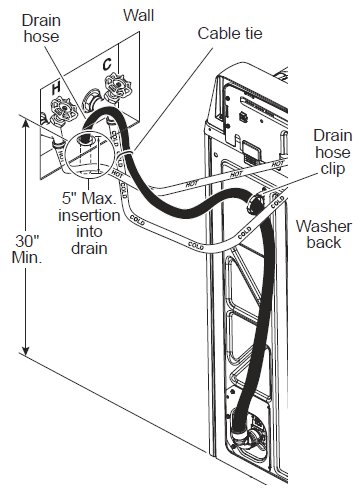
- Install drain hose clip on rear panel of washer. Route drain hose through clip and insert free end into drain opening of your home

- NOTE: If longer drain hose is required, order drain hose extension kit, GE Appliances part number WH49X301. Connect additional
drain hose (contained in kit) to original hose with hose clamp (contained in kit). - If water valves and drain are built into wall, fasten drain hose to one of the water hoses with a cable tie provided

- NOTE: Placing the drain hose too far down the drain pipe can cause a siphoning action. No more than 5″ of hose should be in the drain pipe. There must be an air gap around the drain hose. A snug fit can also cause a siphoning action.
CONNECT POWER AND INSTALL
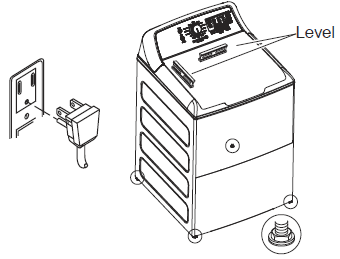
- Make sure large dial control (on some models) on washer is pushed in to the OFF position. Insert plug of electrical cord into a 115V, 15- or 20-amp wall receptacle. Move washer into final position. Place level on flat top side edges of washer. Adjust all four leveling legs until washer is level left-to-right and front-to-back. Remove level.
- Open tub lid. Remove and discard tub shipping material (see Step 1). Remove plastic protector sheet from control panel face.

FINAL CHECKLIST
Before starting the washer, check to make sure:
- Main power is turned on.
- The washer is plugged in.
- The water faucets are turned on.
- The unit is level and all four leveling legs are firmly on the floor.
- The shipping foam and cardboard are removed.
- The drain hose is properly tied up.
- There are no leaks at the faucet, drain line or washer.
- Run the washer through a complete cycle.
- Check for water leaks and proper operation.
- Place these instructions in a location near the washer for future reference.
For more manuals by General Electric, visit ManualsLibraryy
GE Appliances GTW330ASKWW Top Loading Washer-FAQs
What is the capacity of the GE GTW330ASKWW washer?
The washer has a capacity of 3.8 cubic feet.
Why does my GE washer keep shutting off?
The washer may shut off due to an imbalance in the load, a broken shock, or a mechanical issue preventing it from reaching the maximum spin speed. The washer will attempt to redistribute the load and try again, adding time to the cycle.
How do I use the drain and spin option on my GE washer?
Turn the large center knob to the “Drain & Spin” option, located at the bottom right of the cycle selector. Start the cycle, and the washer will only drain and spin.
How long does a GE top-load washer cycle take?
The shortest cycle, Quick Wash, takes about 12 minutes. A regular cycle typically lasts 35–43 minutes.
Why is my GE washer dripping water when turned off?
A dripping washer may indicate that the water valve or water valve assembly needs replacement.
Why does my GE washer stop after the wash cycle?
If the washer stops mid-cycle and there is still water in the tub, the drain pump could be defective or obstructed, preventing proper water drainage.
Why does my GE washer make clicking noises during the cycle?
Clicking or ticking noises during a gentle cycle are caused by the clutch mechanism and are normal. These sounds may occur throughout the cycle except when the washer is filling.
What is the shortest wash cycle on the GE GTW330ASKWW washer?
The shortest wash cycle is the Quick Wash, which takes approximately 12 minutes.

