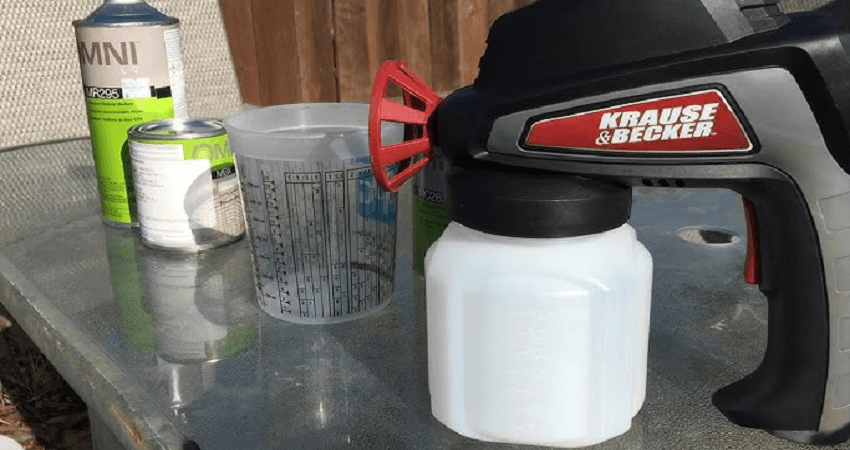
Harbor Freight Krause & Becker 60600 Paint Sprayer
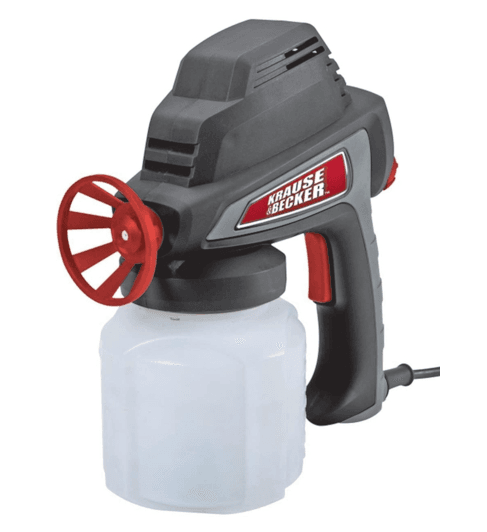
Grounded Sprayers
Sprayers With Three Prong Plugs
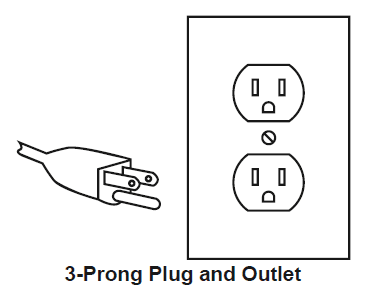
- Sprayers marked with “Grounding Required” have a three-wire cord and three-prong grounding plug. The plug must be connected to a properly grounded outlet. If the sprayer should electrically malfunction or break down, grounding provides a low resistance path to carry electricity away from the user, reducing the risk of electric shock. (See 3-Prong Plug and Outlet.)
- The grounding prong in the plug is connected through the green wire inside the cord to the grounding system in the sprayer. The green wire in the cord must be the only wire connected to the sprayer’s grounding system and never be attached to an electrically “live” terminal. (See 3-Prong Plug and Outlet.)
- The sprayer must be plugged into an appropriate outlet, properly installed, and grounded by all codes and ordinances. The plug and outlet should look like those in the preceding illustration. (See 3-Prong Plug and Outlet.)
Extension Cords
- Grounded sprayers require a three-wire extension cord. Double Insulated sprayers can use either a two or three-wire extension cord.
- As the distance from the supply outlet increases, you must use a heavier gauge extension cord. Using extension cords with inadequately sized wire causes a serious voltage drop, resulting in loss of power and possible sprayer damage. (See Table A.)
- The smaller the gauge number of the wire, the greater the capacity of the cord. For example, a 14 gauge cord can carry a higher current than a 16 gauge cord. (See Table A.)
- When using more than one extension cord to make up the total length, ensure each cord contains at least the minimum required wire size. (See Table A.)
- If you are using one extension cord for more than one sprayer, add the nameplate amperes and use the sum to determine the required minimum cord size. (See Table A.)
- If you are using an extension cord outdoors, make sure it is marked with the suffix “W-A” (“W” in Canada) to indicate it is acceptable for outdoor use.
- Make sure the extension cord is properly wired and in good electrical condition. Always replace a damaged extension cord or have it repaired by a qualified electrician before using it.
- Protect the extension cords from sharp objects, excessive heat, and wet areas.
| RECOMMENDED MINIMUM WIRE GAUGE FOR EXTENSION CORDS* (120/240 VOLT) | |||||
| NAMEPLATE AMPERES (at full load) | EXTENSION CORD LENGTH | ||||
| 25’ | 50’ | 75’ | 100’ | 150’ | |
| 0 – 2.0 | 18 | 18 | 18 | 18 | 16 |
| 2.1 – 3.4 | 18 | 18 | 18 | 16 | 14 |
| 3.5 – 5.0 | 18 | 18 | 16 | 14 | 12 |
| 5.1 – 7.0 | 18 | 16 | 14 | 12 | 12 |
| 7.1 – 12.0 | 18 | 14 | 12 | 10 | – |
| 12.1 – 16.0 | 14 | 12 | 10 | – | – |
| 16.1 – 20.0 | 12 | 10 | – | – | – |
Before You Begin
Familiarize yourself with the Paint Sprayer and its functions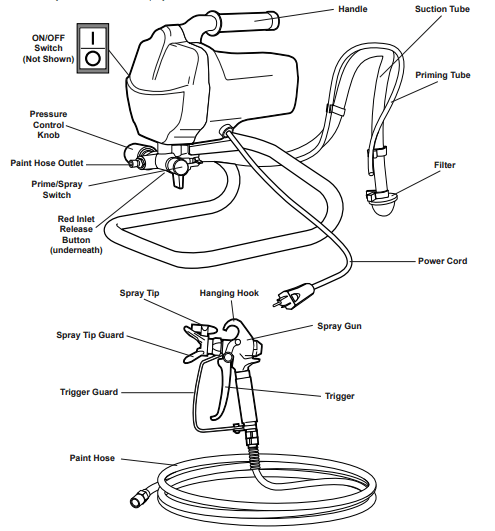
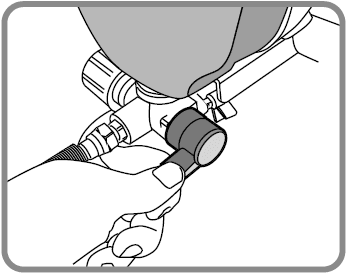
Prime/Spray Switch
This switch toggles the unit between priming mode and spraying mode.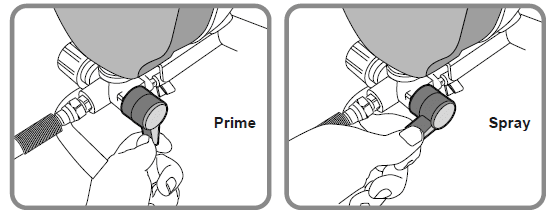
Nozzle
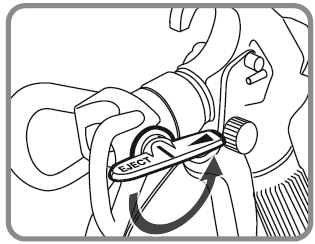
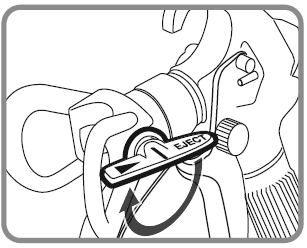
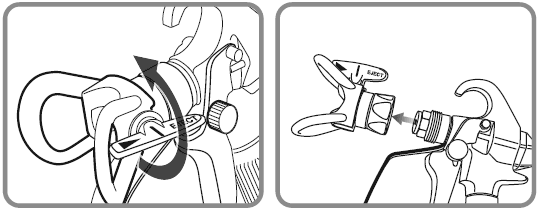
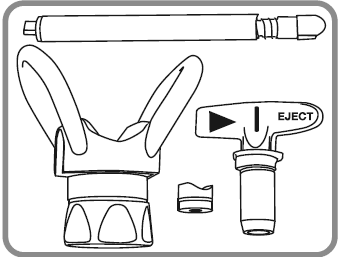
The nozzle is reversible and removable to make cleaning and unclogging easier. Turn to the Spray position to use the spray gun. Turn to the Clean (Eject) position to clean the nozzle.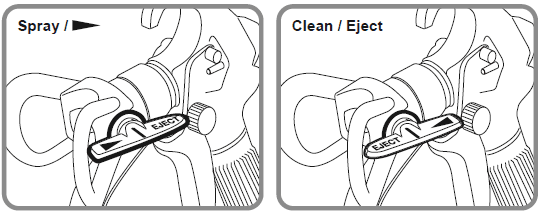
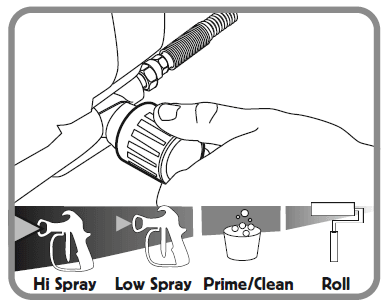
Pressure Control Knob
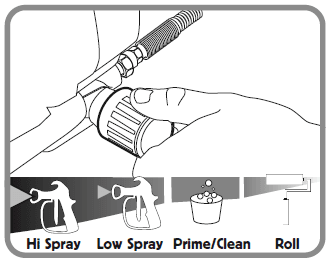
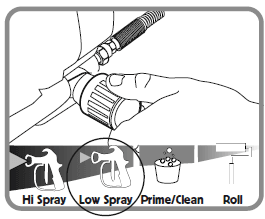
The Pressure Control Knob can be adjusted for High-Pressure Spraying, Low-Pressure Spraying, Priming/Cleaning, or Rolling. Align the Pressure Control Knob with an indicator on the Sprayer Housing to set the function.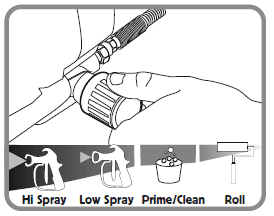

Setup
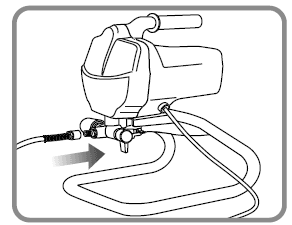
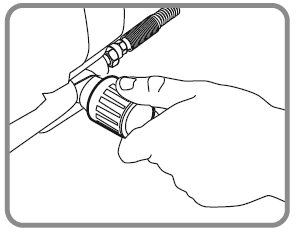
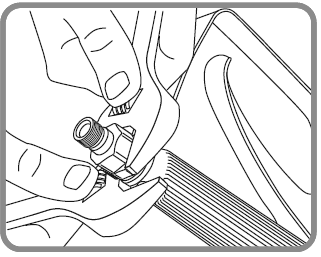
- Attach the Paint Hose to the Paint Hose Outlet and tighten it with a wrench.

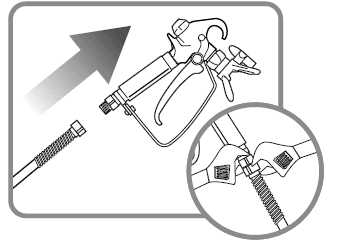
- Attach the Paint Hose to the Paint Gun and tighten it with two wrenches.

- Turn the Pressure Control Knob to Low Pressure Spray setting.

- Turn the Prime/Spray switch to Prime mode.

- Adjust the Pressure Control Knob to the Prime/Clean setting.

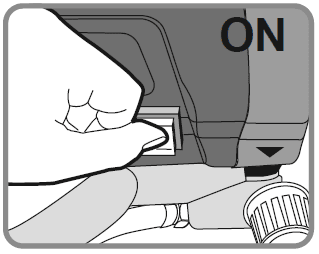
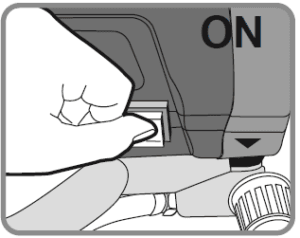
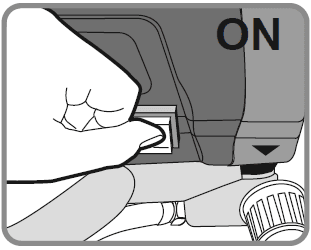
- Plug in the Sprayer and turn on the power.

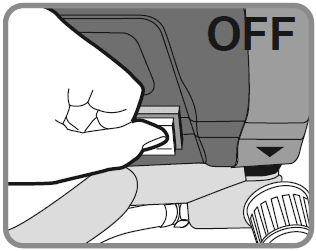
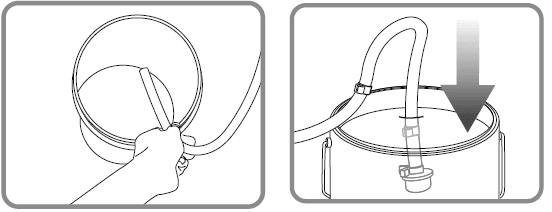
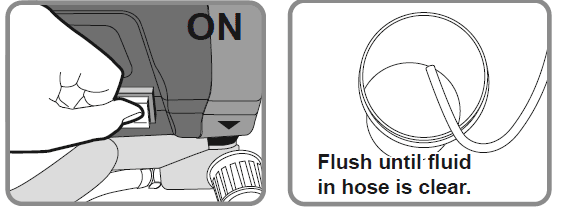
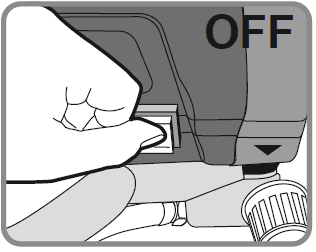
- Sprayer will start pumping and water or flushing solvent as well as air bubbles will be purged from the system. Let fluids discharge from the Priming Tube into the waste bucket for 30 to 60 seconds then switch the Power to Off.

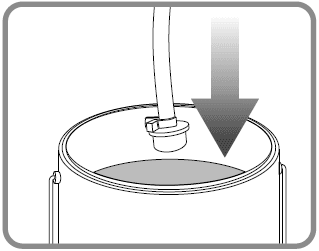
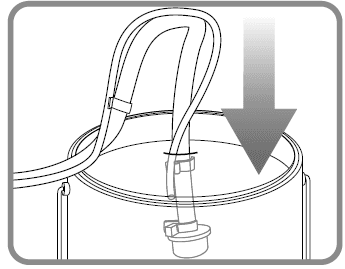
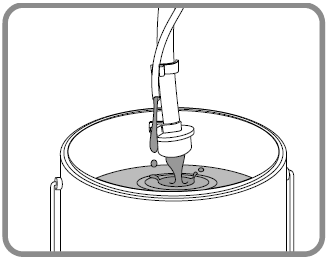
- Remove the Suction Tube from water or flushing solvent and submerge it in a paint pail.

- Switch the Power On.

- Paint should work itself from the Suction Tube to the Sprayer to the Priming Tube until the paint discharges from the Priming Tube.

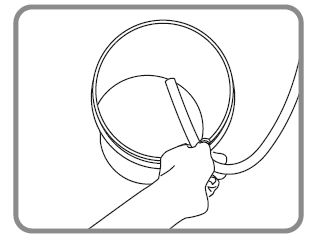
- Switch the power off. Remove the Priming Tube from the waste bucket clip to the Suction Tube and submerge it in the paint pail.

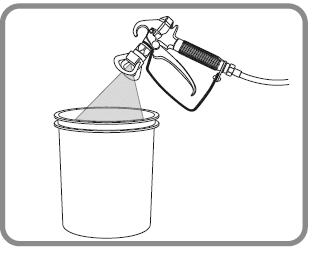
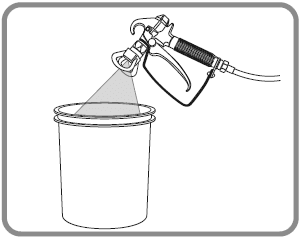
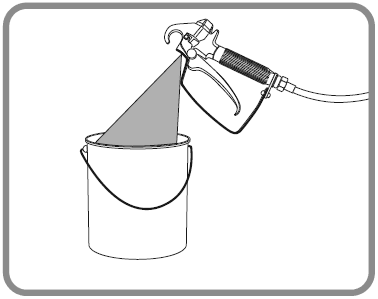
- Switch Power On. Point the gun into a waste bucket and pull the trigger.

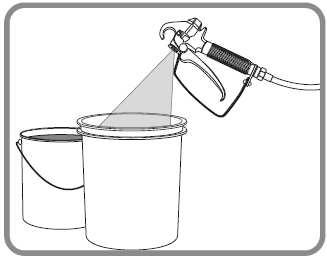
- Turn the Spray/Prime Switch to Spray mode and continue to spray into the waste bucket.
- Stop spraying. If the motor stops, the pump and tubes are primed. If it does not stop, repeat the priming steps.
- Start Painting.
Painting
Before painting, ensure the Sprayer has been primed (see Priming and Startup steps) and verify that the Nozzle Tip is aligned properly.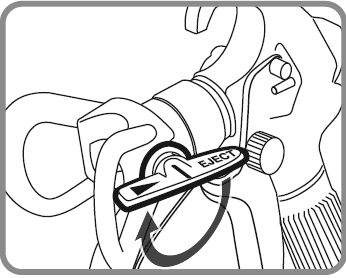
- Once primed, adjust the nozzle to the Spray setting.

- Start spraying at the lowest setting on the Pressure Control Knob and increase pressure as needed by turning clockwise to create a good spray pattern.
- Practice the Painting Techniques that follow on a scrap workpiece before painting your workpiece.
Painting Techniques
Before painting, ensure the Sprayer has been primed (see Priming and Startup steps) and verify that the Nozzle Tip is aligned properly. Keep the gun approximately 1 foot from the surface.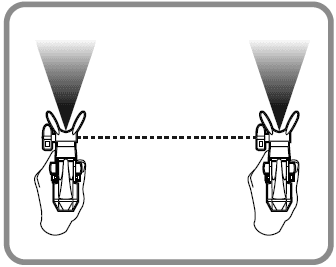
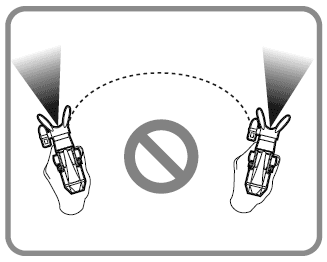
- Keep the gun straight and move the arm across at a steady rate while staying one foot from the surface.

- Do not fan the gun or the paint will be uneven.

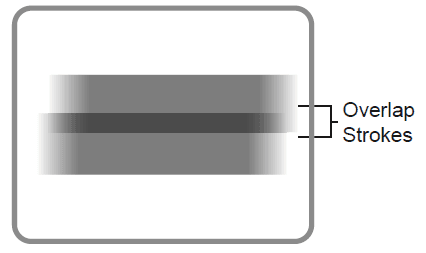
- Overlap strokes by half, always aim the stroke at the bottom edge of the last stroke.
Clearing Spray Tip
Occasionally, the Spray Gun Tip will become clogged with paint. Follow these instructions to clear the Spray Gun Tip.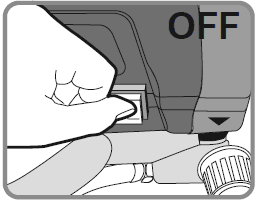
- Switch the power off.

- Adjust the nozzle to reject the setting.

- Turn Spray/Prime Switch to Spray mode

- Turn the power on.

- Spray into a waste bucket until the clog clears.
- Release Trigger.

- Adjust the nozzle to Spray mode.
Cleaning
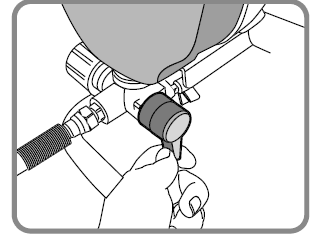
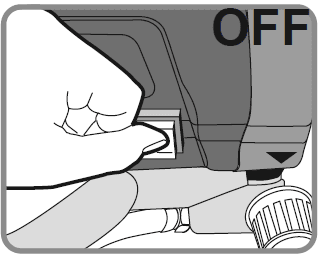
- Turn the power off and turn the Prime/Spray switch to Prime mode to relieve pressure.

- Unthread the Spray Tip and remove it.

- Drain paint from Tubes.

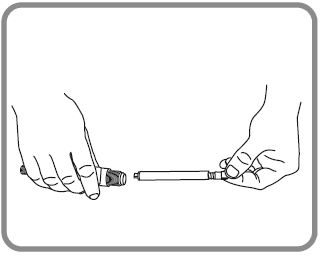
- Separate tubes.

- Place Priming Tube in an empty waste bucket and submerge the Suction Tube in water or flushing fluid.

- Plug in the Sprayer and turn on the power. The sprayer will start pumping and water or flushing solvent as well as air bubbles will be purged from the system. Let fluids discharge from the Priming Tube into a waste bucket until the fluid is clear.

- After the fluid in the Priming Tube is clear, switch the Power to Off.

- Turn to Spray mode and switch power to on.

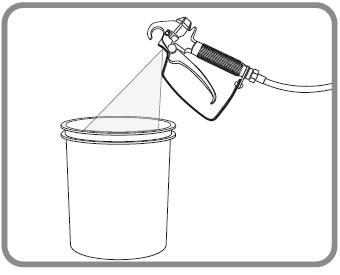
- Spray paint into a paint pail.

- Change to waste bucket as paint thins.

- Turn to Prime mode.

- Continue to flush until clear.

- Release the trigger, turn the power off, and turn the Prime/ Spray switch to Prime mode to relieve pressure.

- Unscrew the nut from the housing, it is behind the swivel connector.

- Remove filter.

- Clean all parts in warm, soapy water or flushing fluid with a bristled brush.
Long Term Storage
When cleaning for long-term storage (more than 48 hours). The Paint Sprayer mustn’t be stored with any water or water-based material left in the Pump, Hose, Tubes, or Spray Gun. This will corrode the product.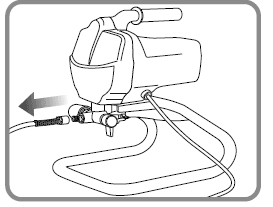
- Remove the paint hose if not already removed.
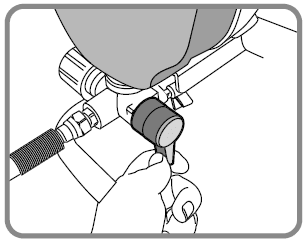
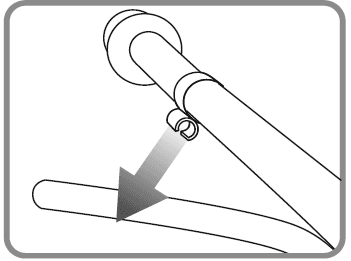
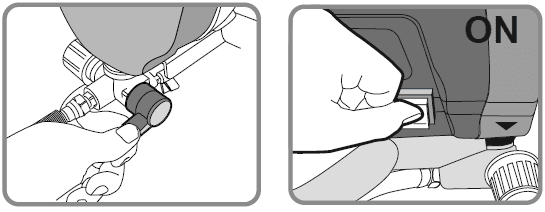
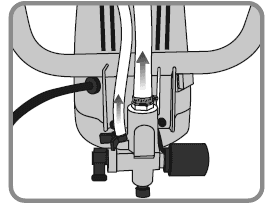
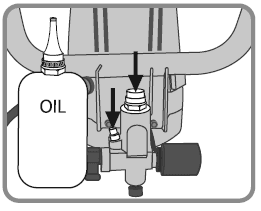
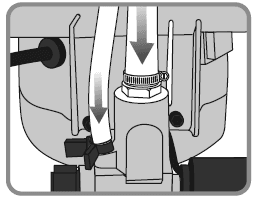
- Turn the unit over and loosen the Clamps from both Tubes, then disconnect the Tubes from the Pump Body.

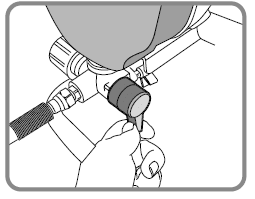
- Add one ounce of light household oil or a pump storage product into each inlet.

- Turn the Prime/Spray switch to Spray.

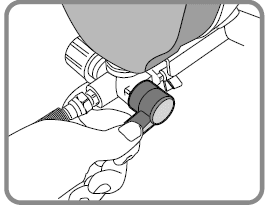
- Turn the Pressure Control Knob to Low/Spray.

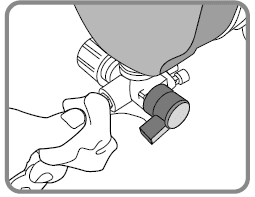
- Hold a rag over the paint hose outlet.

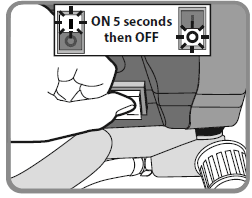
- Switch the Power to ON for five seconds, then turn the power OFF.

- Turn the Prime/Spray switch to Prime, this will keep storage fluids in the sprayer.

- Replace the Tubes and secure them with the Clamps.

- Wipe the sprayer with a clean cloth. Store in a clean dry location out of reach of children.
Troubleshooting
| Problem | Possible Causes | Likely Solutions |
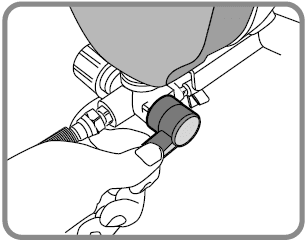
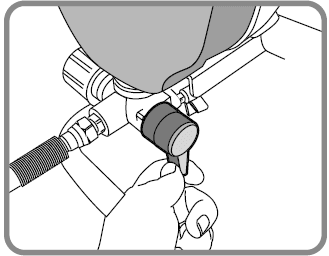
| The pump will not prime. | Insufficient cleaning left the input valve clogged. | Press the red inlet release button underneath the pump to loosen the inlet check ball. |
| Decreased output. | Obstructed trigger. | Clean around the trigger to ensure movement. |
| Inconsistent paint flow, blobs, and splatters. | 1. Clogged Spray Tip or damaged/clogged Fluid Filter. 2. Contaminated paint. | 1. Clean, adjust, or replace the Spray Tip or Fluid Filter.
2. Remove the paint and filter it. |
| The paint surface is bumpy or has an orange-peel texture. | 1. Paint is applied too thick. 2. Incorrect paint volume. 3. Paint the gun too far from the paint surface during spraying. | 1. Paint must be thinned properly before spraying. 2. Adjust Fluid Control Knob. 3. Hold the spray gun closer to the surface during spraying. |
| Paint sags or runs. | 1. Excess thinning of paint.
2. Paint applied too thick.
3. Paint the gun too close to the work surface. 4. Uneven or hesitant motion of spray gun. 5. Excess overlapping of each spray stroke. | 1. Recheck paint viscosity. Add unmixed paint to thicken the mixture. 2. Apply thinner coats, allowing the paint to get tacky between coats. 3. Move the spray gun further back from the paint surface when applying paint. 4. Keep the spray gun moving during painting. Hesitations can cause sags or runs. 5. Overlap each stroke to keep the coverage even, but be aware that you are adding coat thickness by overlapping. |
| Blotchy surface (blushing) or uneven color. | 1. The paint dries too slowly. 2. Uneven paint application.
3. Work material absorbs paint unevenly. | 1. Use less thinner or add a drier. 2. Start each stroke of the work material and overlap each stroke consistently. 3. Use a conditioner or sealer coat before applying the finish coat. |
| Spots on surface with light center (fish eyes). | 1. Paint mixture too thin. 2. Improper primer or incompatible surface. 3. Surface contamination. | 1. Add undiluted paint to thicken the mixture. 2. Check the manufacturer’s recommendations for primer or compatible surfaces. 3. Clean the surface thoroughly with thinner before applying paint. |
| Spots on the surface with a dark center (contamination). | 1. Dust or dirt on the surface.
2. Insufficiently sanded. 3. Raised grain. | 1. Clean the surface with compressed air or tack cloth before painting. 2. Sand wood to a sufficiently fine grit before painting. 3. Wipe the wood surface with thinner to raise grain, then sand with a fine grit to knock off “hairs”. |
Parts List
| Part | Description | Qty |
| 1 | Spray Gun | 1 |
| 2 | Paint Hose | 1 |
| 3 | Base Frame | 1 |
| 4 | Hex Bolt (M6x4) | 2 |
| 5 | Pressure Relief Valve Label | 1 |
| 6 | Housing Cover | 1 |
| 7 | Output Gear Bushing | 2 |
| 8 | Rolling Bearing | 1 |
| 9 | Output Pole | 1 |
| 10 | Gear | 1 |
| 11 | Middle Gear Bushing | 2 |
| 12 | Output Gear | 1 |
| 13 | Pin (5×12) | 2 |
| 14 | Screw | 1 |
| 15 | Paint Outlet | 1 |
| 16 | O-Ring (10×1.8) | 1 |
| 17 | Output Spring | 1 |
| 18 | Mandrel | 1 |
| 19 | Steel Ball (6.4) | 1 |
| 20 | Seal Seat | 1 |
| 21 | Output Pusher | 1 |
| 22 | Pump Body | 1 |
| 23 | Nylon Washer | 1 |
| 24 | Insert Block | 1 |
| 25 | Pressure Relief Valve | 1 |
| 26 | Nylon Ring | 1 |
| 27 | O-Ring (5×1.8) | 1 |
| 28 | Pressure Relief Pole | 1 |
| 29 | Pressure Relief Spring | 1 |
| 30 | Spring Seat | 1 |
| 31 | Pin (3×8) | 1 |
| 32 | Control Valve Seat | 1 |
| 33 | Prime/Spray Valve | 1 |
| 34 | Pin | 1 |
| 35 | Nylon Cable Tie | 1 |
| 36 | Inlet Spring Holder | 1 |
| 37 | Input Spring | 1 |
| 38 | Steel Ball (12.7) | 1 |
| 39 | Input Seal | 1 |
| 40 | Input Washer | 1 |
| 41 | O-Ring (17×1.8) | 1 |
| 42 | Paint Input Adaptor | 1 |
| 43 | Pressure Relief Plug | 1 |
| 44 | Small Clamp | 1 |
| 45 | Large Clamp | 1 |
| 46 | Priming Tube | 1 |
| 47 | Suction Tube | 1 |
| 48 | Clip | 3 |
| 49 | Inlet Pipe Lock Ring | 1 |
| 50 | Filtrate Seat Assembly | 1 |
| 51 | Wire label | 1 |
| 52 | Power Cord | 1 |
| 53 | Locking Ring | 1 |
| 54 | Screw (M4x14) | 2 |
| Part | Description | Qty |
| 55 | Wire Fastening Seat | 1 |
| 56 | Label | 1 |
| 57 | Hex Bolt (M6x10) | 3 |
| 58 | Housing | 1 |
| 59 | Label | 1 |
| 60 | Motor Assembly | 1 |
| 61 | Power Switch | 1 |
| 62 | Pin (3×12) | 1 |
| 63 | Hex Bolt (M5x14) | 4 |
| 64 | Elastic Washer | 4 |
| 65 | O-Ring (12.5×2.65) | 2 |
| 66 | Joint Stopper | 1 |
| 67 | Position Washer | 1 |
| 68 | Wave Washer | 1 |
| 69 | White Seal | 3 |
| 70 | Black Seal | 2 |
| 71 | Copper Washer | 1 |
| 72 | O-Ring (22.5×1.8) | 2 |
| 73 | Connector | 1 |
| 74 | Copper Guide Bushing | 1 |
| 75 | Piston | 1 |
| 76 | Lock Sleeve | 1 |
| 77 | White Seal | 2 |
| 78 | Pressure Control Pin | 1 |
| 79 | O-Ring (8.8×1.9) | 1 |
| 80 | O-Ring (27×2.4) | 1 |
| 81 | Hex Bolt (M3x10) | 1 |
| 82 | Pressure Seal Cover | 1 |
| 83 | Micro Switch | 1 |
| 84 | Micro Switch Cover | 1 |
| 85 | Pressure Control Switch | 1 |
| 86 | Switch Cover | 1 |
| 87 | Pressure Adjusting Spring | 1 |
| 88 | Spring Pusher | 1 |
| 89 | Pressure Control Label | 1 |
| 90 | Pressure Knob | 1 |
| 91 | Pressure Control Bolt | 1 |
| 92 | Label | 1 |
| 93 | Handle Grip | 1 |
| 94 | Handle | 1 |
| 95 | Hex Bolt (M6x30) | 2 |
| 96 | PCB Supporter | 1 |
| 97 | Wire Connector | 1 |
| 98 | Nylon Cable Tie | 1 |
| 99 | Safety Cover | 1 |
| 100 | PCB Assembly | 1 |
| 101 | Tapping Screw | 2 |
| 102 | Power Cord Fixer | 1 |
| 103 | Hex Bolt (M4x20) | 2 |
| 104 | Cup | 1 |
| 105 | Bolt (M5x20) | 1 |
| 106 | Pole Stopper | 1 |
| 107 | Small Gear Washer | 1 |
Specifications
| Electrical Input | 120VAC / 60Hz / 7A |
| Motor | 5/8 HP |
| Max. Working Pressure | 3000 PSI |
| Outlet | 1/4″-NPS M |
| Paint Hose | 25′ Long |
For more manuals by Harbor Freight visit, ManualsLibraryy
Harbor Freight Krause & Becker 60600 Paint Sprayer-FAQs
How do I maintain a spray gun?
Soak the spray gun tip, nozzle, needle, and air cap in a cleaning solution like Simple Green Solution for water-based paints or an approved solvent for solvent-based paints. Repeat as needed to ensure all paint debris is removed.
How do I thin 100% acrylic paint?
You can thin acrylic paint using either water or acrylic medium. Water will break down the binder in acrylic, thinning the paint to a watercolor-like consistency and giving it a matte finish.
What is the paint-to-water ratio for a spray gun?
Mix the paint with 10% of its volume in water. For example, if you’re using one gallon of paint, add 10% of that amount in water to get the right consistency for spraying.
What is the flash point of paint thinner?
Paint thinners like white or mineral spirits have a low flash point of about 40°C (104°F) and can ignite from a small spark, so handle them with care.
How does a hydraulic paint sprayer work?
A hydraulic paint sprayer uses a diaphragm pump to deliver material to the spray gun. The pump builds up pressure, which is then released through the nozzle, spraying the material onto your surface.
How much thinner do I need for 1 liter of paint?
You’ll need 250 ml of thinner for every 1 liter of paint. Mix the thinner with the paint in a fresh container.
What powers a paint sprayer?
Paint sprayers use high-pressure pneumatics, gas, or electricity to evenly pump and spray paint onto the surface of your project.
What is the recommended spray gun angle?
A spray gun should typically be held at a 90–100° angle to the surface, with 100° being ideal for pistol-shaped tools.
What psi should I use for my sprayer?
It’s recommended to operate air induction nozzles at a pressure greater than 30 psi (2 bar). Most nozzles perform best at 60 psi (4 bar).
Does WD-40 remove spray paint?
Yes, WD-40 can remove spray paint. Apply it to the dried paint, let it sit for 5–10 minutes, and then scrub to remove the paint.

