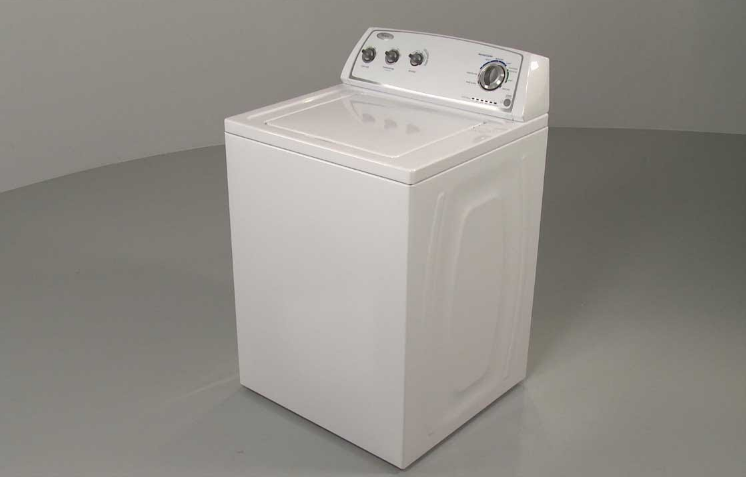
Kenmore Belt Driven Automatic Washers Repair
Safety first
- Be sure to read the entire procedure carefully before attempting the step-by-step testing and/or replacements.
- To help avoid electrical shock, no live electrical tests will be made.
- Make sure you know where the plug fuses or circuit breakers are located within your home.
- Before doing any repairs or testing of parts, disconnect the appliance from the electrical power supply (section 2).
- It is recommended that a separate grounded 120VAC electrical circuit with a 15-amp time delay plug fuse or circuit breaker be used for this appliance.
- Be careful when doing any repairs or testing on this appliance, as there may be sharp edges.
- Replace any damaged, pinched, or frayed “power cord” or “wiring” that may be discovered when disconnecting or reconnecting the appliance.
- Do not use an extension cord.
- Do not cut off the grounding prong if your wall outlet does not accept the 3-prong power cord.
- This appliance must be grounded. Make sure all green ground wires are properly attached.
- When replacing parts or putting things back together, all wiring should be checked to be sure it is not crossing any sharp edges or pinched in some way, which may cause an electrical problem.
- Carefully observe all safety cautions and warnings.
- During or following completion of the repair procedure, the appliance should not be operated unless all panels have been put back in place.
- Use only genuine FSP® (Factory Specification Parts) replacement parts as specified for your model. This FSP trademark is shown on the parts carton, which identifies quality-tested replacement parts.
- Do not attempt to operate your appliance unless it has been properly reinstalled (including electrical power connections and grounding connections) in accordance with the operating and installation instructions supplied for it by SEARS, ROEBUCK and COMPANY. If you are unable to locate these installation instructions, contact your nearest SEARS Service Center.
- If you receive a shock from touching the appliance at any time during normal operation, immediately disconnect (section 2) the electrical power supply. Find the electrical short and repair it, or contact your nearest SEARS Service Center for repair.
- Read all instructions before using the appliance.
- Do not let children or others play, work, or operate your appliance while it is being repaired.
- When discarding an old appliance, always remove the door(s) to prevent accidental entrapment.
- Remember, use your appliance only for the job it was designed to do.
Electrical power supply connections.
Procedure A
TO DISCONNECT ELECTRIC POWER
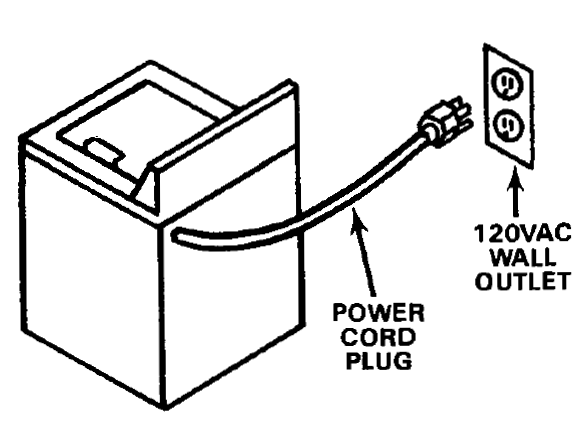
- STEP 1: Pull the power cord plug from the wall outlet.
TO CONNECT ELECTRIC POWER
- STEP 2: Plug the power cord into the wall outlet.

Procedure B
TO DISCONNECT ELECTRIC POWER
- STEP 1:Move the switch to the OFF position.
TO CONNECT ELECTRIC POWER
- STEP 2: Move the switch to the ON position.

TO DISCONNECT ELECTRIC POWER
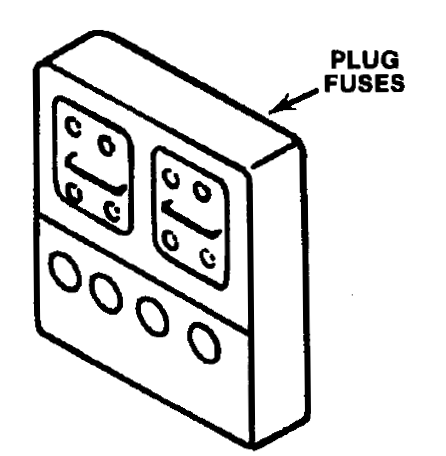
- STEP 1: Unscrew the plug fuse from the household service box.
TO CONNECT ELECTRIC POWER
- STEP 2: Screw the plug fuse into the household service box.

Tool and testing Equipment
These tools are required for servicing any Sears KENMORE® automatic washer.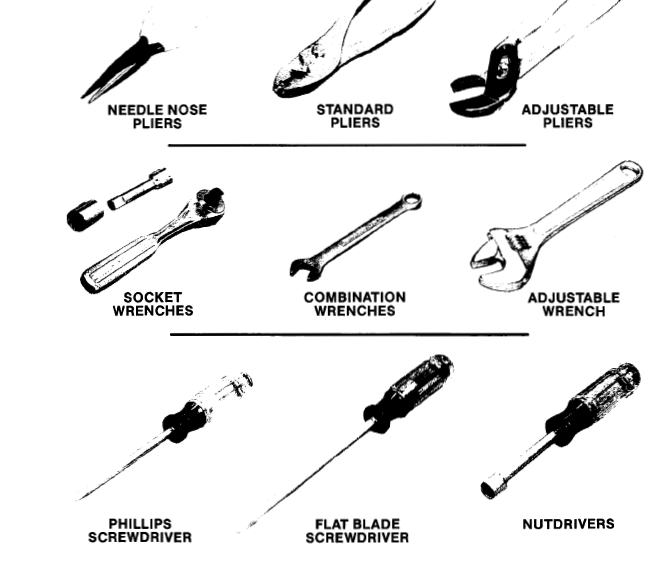
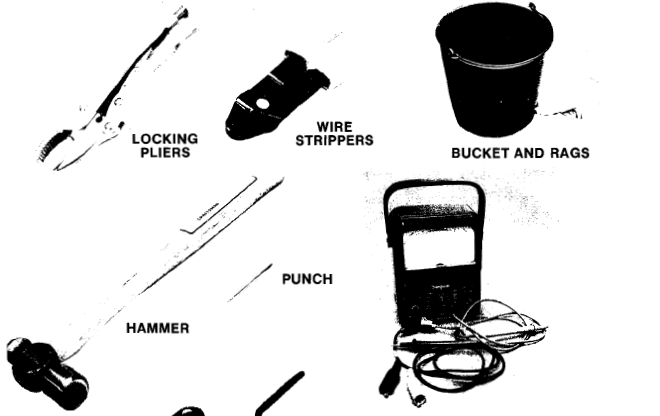

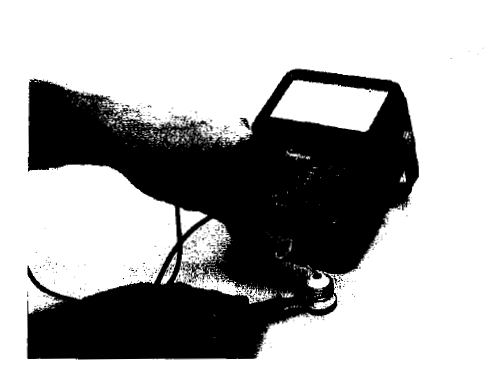
OHMMETER
An ohmmeter is required for checking the electrical parts of the Sears KENMORE® automatic washer. Ohmmeters are usually combined with a voltmeter. This test instrument is called a multimeter, multitasker, or volt-ohmmeter (VOM). Volt-ohmmeters measure the amount of resistance or voltage in an electrical circuit. We will only be using the ohmmeter scale to measure resistance. The definitions we will be using for testing are:
- ZERO RESISTANCE (continuity)-makes contact, the needle moves toward zero (right).
- OPEN CIRCUIT-no contact-needle does not move.
Fuses and Circuit Breakers
Procedure A
Fuse
Plug fuses have a round screw base with a glass window. When the plug fuse has blown, the glass window appears burned or smoky. The fuse must be replaced. Time delay plug fuses may not appear burned or smoky. This type must be checked with an ohmmeter (see testing steps 4-8). It is recommended that a separate grounded 120VAC electrical circuit with a 15-amp, time-delay plug fuse be used for the automatic washer.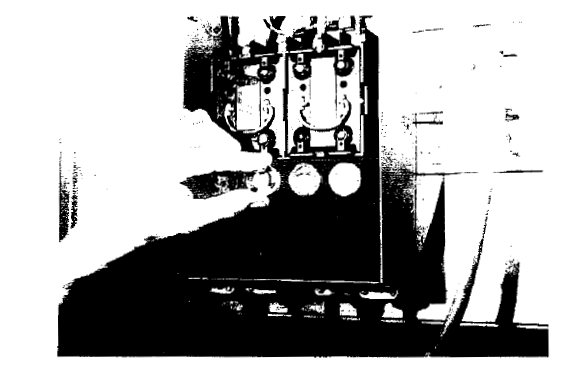
- STEP 1: Disconnect the electrical power supply (section 2).
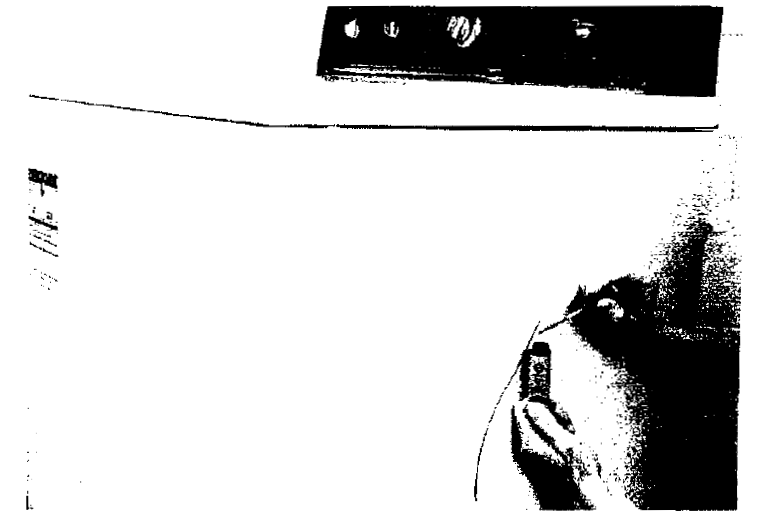
- STEP 2: Plug a properly working table lamp into the 120VAC receptacle that the automatic washer was plugged into. This is to see if you are getting electricity to your automatic washer. DO NOT plug the lamp into a 240VAC receptacle.
- STEP 3: If the lamp does not turn on, remove the plug fuse from the panel and test or replace it with a new 15-amp time-delayed plug fuse.
TESTING
- STEP 4: You must know how to use an ohmmeter.
- STEP 5: Set the ohmmeter scale to the lowest ohms setting and ZERO the meter. See the instructions that came with your ohmmeter.
- STEP 6: Touch one ohmmeter probe to the side threads.
- STEP 7: Touch the other ohmmeter probe to the tip of the bottom of the plug fuse.
STEP 8: The ohmmeter should show ZERO resistance (continuity). If not, the plug fuse is bad and needs replacing. - STEP 9: Replace the plug fuse, and if it still blows, the circuit is still overloaded or there is a short circuit in your household wiring somewhere. Call a qualified electrician for this repair.
- STEP 10: After replacing the plug fuse and the plug fuse does not blow, plug the automatic washer power cord back in (section 2). If the plug fuse blows now, the problem is in your automatic washer. See problem 1 in the Problem Solving Charts, section 9.

Procedure B
Circuit Breaker
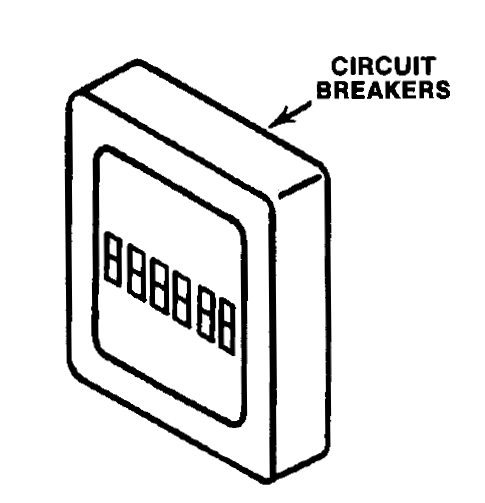
A circuit breaker panel is made up of rows of contacts. Circuit breakers can be snapped in place on this panel. It is recommended that a separate grounded 120VAC electrical circuit with a 15-amp circuit breaker be used for the automatic washer.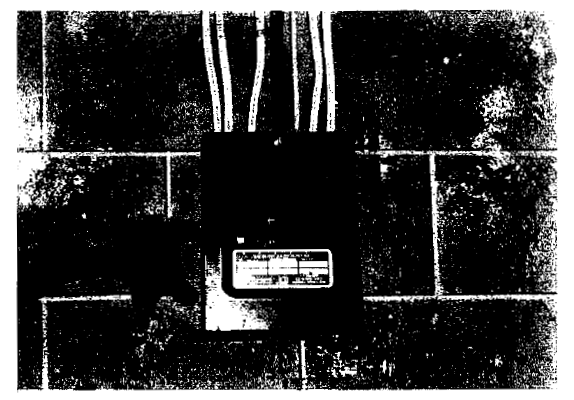
- STEP 1: Disconnect the electrical power supply (section 2).
- STEP 2: Plug a properly working table lamp into the 120VAC receptacle that the automatic washer was plugged into. This is to see if you are getting electricity to your automatic washer. DO NOT plug the lamp into a 240VAC receptacle.
- STEP 3: When this type of breaker trips, the switch moves to a position between ON and OFF. To turn the electrical power back on, move the switch to the OFF position, then back to ON.
- STEP 4: If the circuit breaker still trips, the circuit is still overloaded or short-circuited within your household wiring, or the circuit breaker is weak. Call a qualified electrician for this repair.
- STEP 5: After resetting the circuit breaker and the breaker does not trip, plug the automatic washer power cord back in (section 2). If the circuit breaker trips now, the problem is in your automatic washer. See problem 1 in the Problem Solving Charts, section 9.
Touch-up repairs, preventive maintenance and winterizing
Procedure A
Touch-Up Repairs
Your KENMORE® automatic washer can look like new for many years by following these cleaning instructions.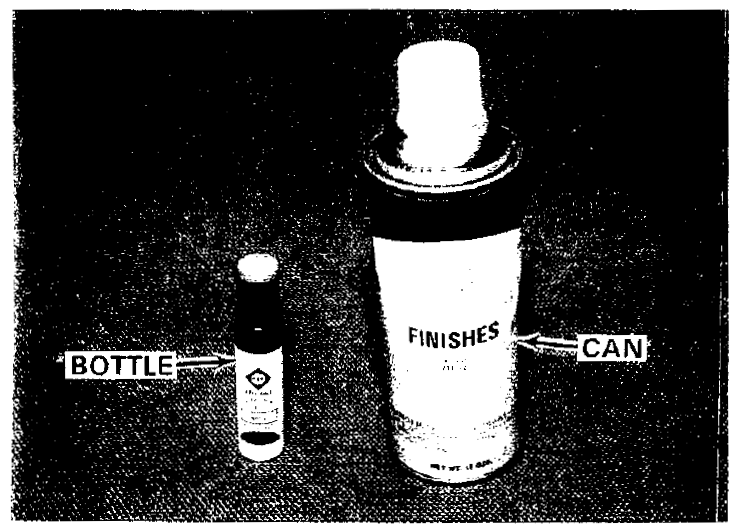
- STEP 1: Disconnect the electrical power supply (section 2).
- STEP 2: To remove dirt and soiled spots, wash them with a mild liquid soap, warm water, and a soft cloth.
- STEP 3: Raise the top (section 11, proc. A).
- STEP 4: Clean the top of the tub ring with mild liquid soap, warm water, and a soft cloth.
- STEP 5: Lower the top (section 11, proc. A).
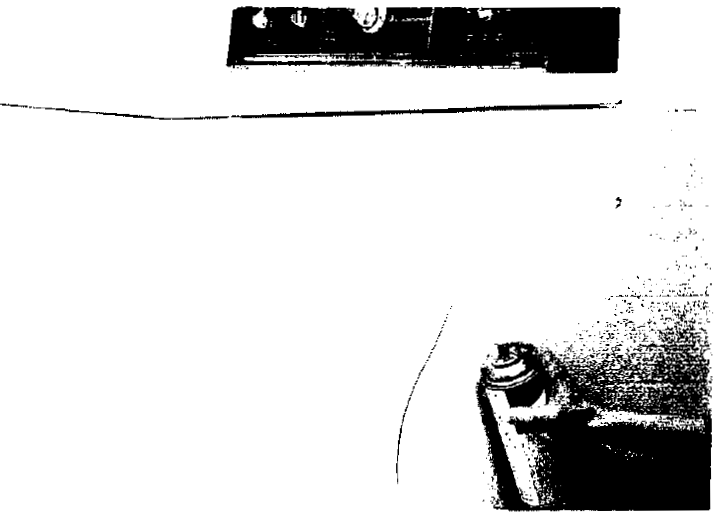
- STEP 6: Leave a space between the washer and dryer. Because of vibration, the two cabinets will rub together, causing scratches and rusting. Scratches do occur, and when they do, there are touch-up paints available in 1/2-oz. bottles or 15-oz. spray cans.
- STEP 7: To repair scratches, remove any wax or dirt using a mild liquid soap, warm water, and a soft cloth. Rinse with clean water.

- STEP 8: On small scratches, the 1/2-oz. A touch-up bottle is recommended.
- STEP 9: On a larger job, the scratched area must be sanded with extra-fine sandpaper until smooth.

Procedure B
Preventive Maintenance
KENMORE® automatic washers are designed and built to rigid specifications that require a minimum of service. Preventive maintenance will even further reduce the amount of service required.
Run a cycle check, using the following procedure:
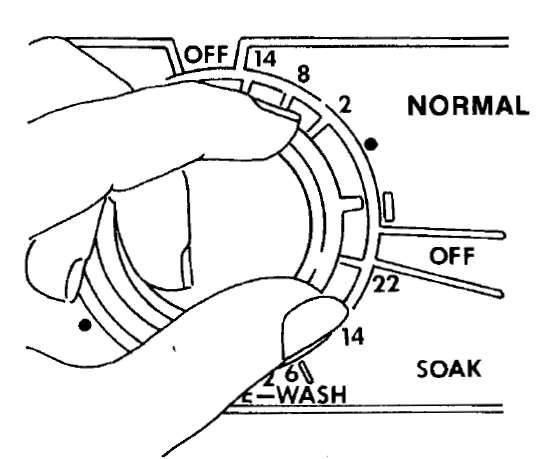
- STEP 1: Start washer in the WASH FILL cycle, noting timer dial alignment and checking fill hoses for leaks.
- STEP 2: Check mixing valve coils and temperature selector switch by selecting various temperatures during the fill cycle.
- STEP 3: Allow the machine to fill in each of your water level selections. This is to check and see if your pressure switch is working properly.
- STEP 4: Allow machine to advance into AGITATION and check for recirculating flow, leaks, filter action, rattles, and squeaks.
- STEP 5: Turn the timer OFF, then manually advance the timer into pump-out. Turn the timer ON and check for complete pump-out, kinked drain hoses, and leaking drain hoses.
- STEP 6: In the SPIN cycle, turn the timer ON. Open the lid quickly, see if the basket quits spinning. This checks to see if the lid switch is working properly.
- STEP 7: If the machine is equipped with the suds saver system, check for operation of the two-way valve and any leaks in the hoses.
- STEP 8: This appliance must be grounded. Make sure all green ground wires are properly attached.
- STEP 9: Drive belt-check for wear and proper tension (section 14, proc. BJ).
- STEP 10: If the machine is equipped with rinse and bleach dispensers, check them for clogging, leaks, and operation.
- STEP 11: Pump-check for leaks.
- STEP 12: Do not use any oil on parts unless the instructions tell you to do so.
Procedure C
Winterizing
Install or store your washer where it won’t freeze. Because some water stays in the washer, freezing can cause a lot of damage. If your washer is stored or moved during cold weather, it’s a good idea to winterize it by following these steps:
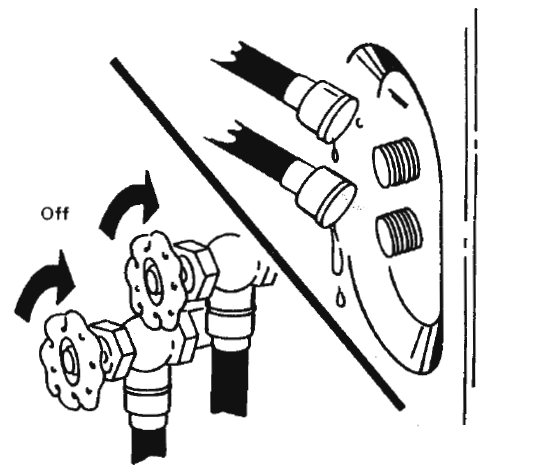
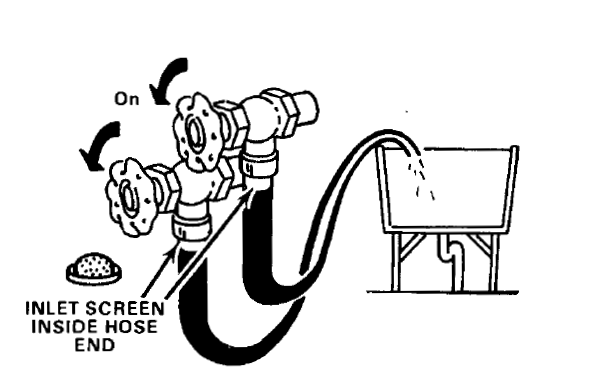
- STEP 1: Shut off both water faucets. Turn the timer knob to fill with a warm wash, warm rinse selection, and turn the machine on for 10 seconds. This will run the water out of the water inlet valve. Disconnect the ends of the hoses from the washer.
- STEP 2: Pour a quart of propylene glycol (nonpoisonous) antifreeze in the basket. This type of antifreeze is used in RVs (recreational vehicles).
- STEP 3: Set the washer for a DRAIN and SPIN. Let it run for about 30 seconds. This mixes the antifreeze with the water left in the washer.
TO USE THE WASHER AGAIN
- STEP 1: Remove the hoses from the faucets and clean the inlet screens if used. Replace the hoses on the faucets.

- STEP 2: Flush the water pipes and hoses.

- STEP 3: Replace the hoses on the back of the washer.

- STEP 4:Turn on the water faucets.
- STEP 5: Pour a cup of detergent into the washer basket. Then run the washer through a complete cycle; it will be ready to use.
TO USE THE WASHER AGAIN
- STEP 1: Remove the hoses from the faucets and clean the inlet screens if used. Replace the hoses on the faucets.
- STEP 2: Flush the water pipes and hoses.
- STEP 3: Replace the hoses on the back of the washer.
- STEP 4: Turn on the water faucets.

- STEP 5: Pour a cup of detergent into the washer basket. Then run the washer through a complete cycle; it will be ready to use.
How your automatic washer works
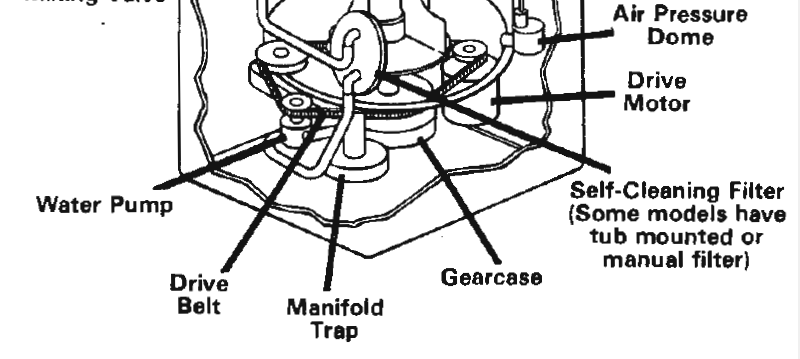
Many people like yourself wash clothes, putting them in the automatic washer, turning control knobs, and setting the timer for the operation they want. But how many people know what is happening inside the automatic washer? Let’s look at how your automatic washer works. All Sears KENMORE® automatic washers FILL (with water), AGITATE (move the clothes), PUMP OUT (remove the water), and SPIN (remove most water from the clothes). Water enters the tub and basket through the inlet hoses, the inlet mixing valve, and the water inlet. As the water rises in the tub and basket, it forces air through the air pressure dome and up a plastic tube to the water level switch. The air pressure then trips the water level switch from FILL to AGITATE.
Agitation is accomplished by a plastic vane agitator located in the center of the basket. This agitator moves back and forth, creating a water motion that forces the clothes to move from top to bottom. During agitation on self-clean filter models, water continuously circulates through the side check valve (if used), filter, water pump, and manifold trap. It goes through a series of water hoses, and then back into the tub and basket. When the automatic washer goes into DRAIN on self-clean filter models, the water leaves the bottom of the tub and basket through the manifold trap, water pump, filter, side check valve (if used), then out the drain.
See section 13, proc. F for your type of water circulation. The basket is put into SPIN. The clothes are spun to remove most of the water from the clothes. The timer is the heart of the automatic washer. It controls the timing of the different cycles. The main drive motor supplies the power for agitation, pumping,and spinning of the automatic washer through a series of pulleys and a drive belt. Shown below is a self-cleaning filter washer; the manual-clean filter is not shown. This is a typical drawing; some parts may not be in the correct position.
Top and Lid Area
Procedure A
Top Access
- STEP 1: Disconnect the electrical power supply (section 2).

- STEP 2: When raising the top, always tape the lid shut. If your model has the triple dispenser, tape this lid shut also.
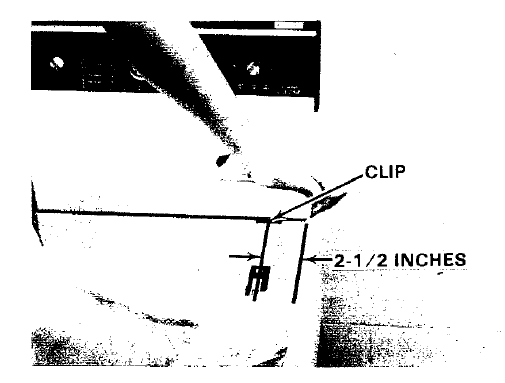
- STEP 3: Using a putty knife, place the blade between the top and the cabinet in one corner, about 2 1/2 inches in from the edge.
- STEP 4: Push in on the putty knife to release the clip while lifting up on the corner of the top. Do the same to the other front corner.
- STEP 5: Slowly raise the top. On the brush manual-clean filter models, there is a hose (located in the right front corner) that needs to be disconnected. Use pliers or a screwdriver, depending on the type of clamp used, then slide the clamp off the housing port and remove the hose.

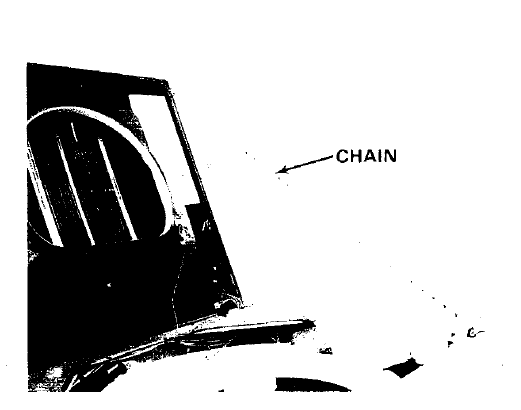
- STEP 6: Lift up on the top. A 36-inch chain with “s” hooks at each end is very useful in supporting the top.
- STEP 7: Place one of the “s” hooks in the corner brace of the top.
- STEP 8:Place the other “s” hook in the corner brace on the cabinet.
- STEP 9: Slowly lower the top, removing the chain.
- STEP 10:On the brush manual-clean filter models, there is a hose (located in the right front corner) that needs to be reconnected. Use pliers or a screwdriver, depending on the type of clamp used. Slide the hose onto the housing port, then slide the clamp onto the housing port.
- STEP 11: Press down on the front corners of the top until it snaps into place.
- STEP 12: Remove the tape from the lid and the triple dispenser if used.
- STEP 13: Reconnect the electrical power supply to the automatic washer. See section 2 for the proper reconnection.
Procedure B
Lid and Hinge Replacement
- STEP 1: Disconnect the electrical power supply (section 2).
- STEP 2: Raise the top (section 11, proc. A).

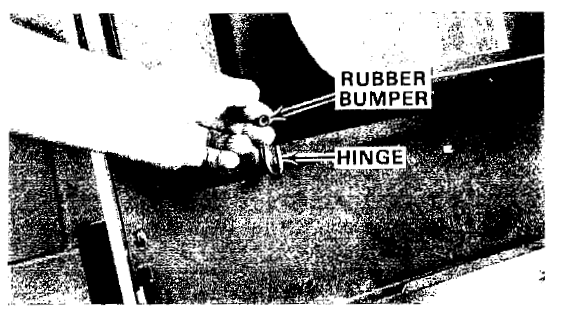
- STEP 3: Remove the rubber bumpers from the lid hinges. Your washer might only have one bumper.
- STEP 4: Lower the top, remove the tape, and open the lid.

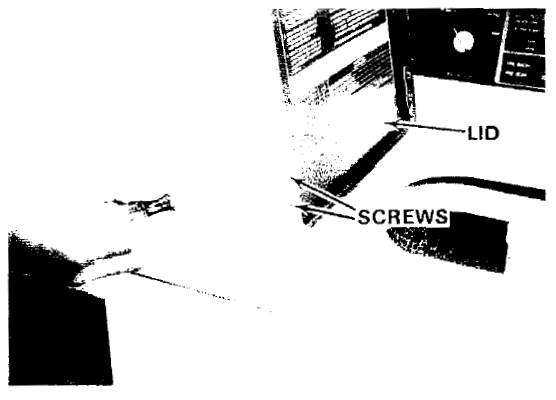
- STEP 5: Using a screwdriver, remove the two screws from the front side of the lid.
- STEP 6: Pull and turn the hinge to remove the top and lid.

- STEP 7: To remove the back hinge, pull and turn the lid toward the back.
- STEP 8: Using a screwdriver, remove the other two screws holding the back hinge.
- STEP 9: Hold the lid while turning the back hinge to remove the top and lid.
- STEP 10: Check and replace the hinge gaskets if they have started to rot or crack.

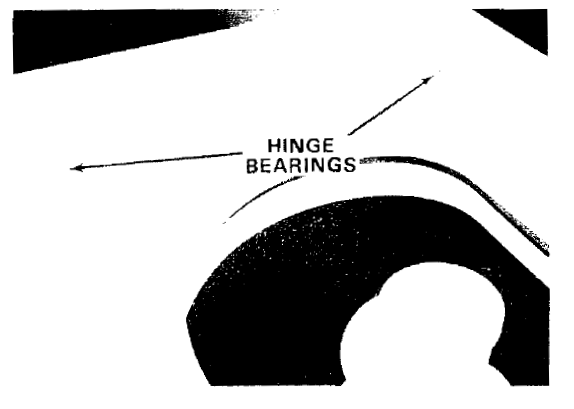
- STEP 11: Replace the plastic bearings in the hole on both sides of the top.
REPLACEMENT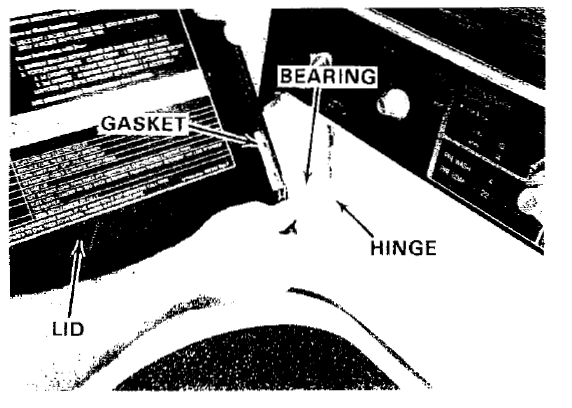
- STEP 12: Insert the back hinge from inside the lid through the bearing, turning it somewhat at the top.
- STEP 13: Place the back gasket between the lid and hinge.
- STEP 14: Using a screwdriver, insert the two screws through the lid, into the hinge, and tighten.
- STEP 15: Turn the lid and hinge all the way into the top.
- STEP 16: Insert the front hinge from inside the lid through the plastic bearing, turning it to the top.
- STEP 17: Place the front gasket between the lid and front hinge.
- STEP 18: Using a screwdriver, insert the two screws through the lid, into the hinge, and tighten.
- STEP 19: Tape the new lid shut.
- STEP 20: Raise the top (section 11, proc. A).
- STEP 21: Place the rubber bumpers on each end of the hinges. Your washer might only have one.
- STEP 22: Lower the top (section 11, proc. A).
- STEP 23: Reconnect the electrical power supply to the automatic washer. See section 2 for the proper reconnection.
For More Manuals By Kenmore, Visit ManualsLibraryy.
Kenmore Belt Driven Automatic Washers Repair-FAQs.
How to replace a Kenmore washer belt?
Unplug the washer and tilt it forward for access.
Remove the old belt from the motor pulley and drum.
Install the new belt, ensuring proper tension.
Reassemble and test the washer.
How much does it cost to replace a washer belt?
Repair costs typically range from $140–$150, including labor.
Can a washing machine work without a belt?
Only direct-drive washers operate without a belt. Belt-driven models will not spin if the belt is broken.
What causes a washing machine belt to break?
Common causes:
Worn pulleys
Improper tension (too tight or loose)
Overloading the washer
How long does a washer belt last?
With normal use, belts last 3–10 years. Inspect annually for wear.
How to tighten a loose washer belt?
Loosen the motor mount bolts.
Adjust tension manually or with a tensioner tool.
Retighten bolts and test spin.
What’s the difference between belt-drive and direct-drive washers?
Belt-drive: Uses a belt/motor system (more maintenance, noisier).
Direct-drive: Motor connects directly to the drum (quieter, fewer parts).
What are common Kenmore washer problems?
Not spinning/draining (often belt-related)
Leaking water
Excessive noise/vibration

