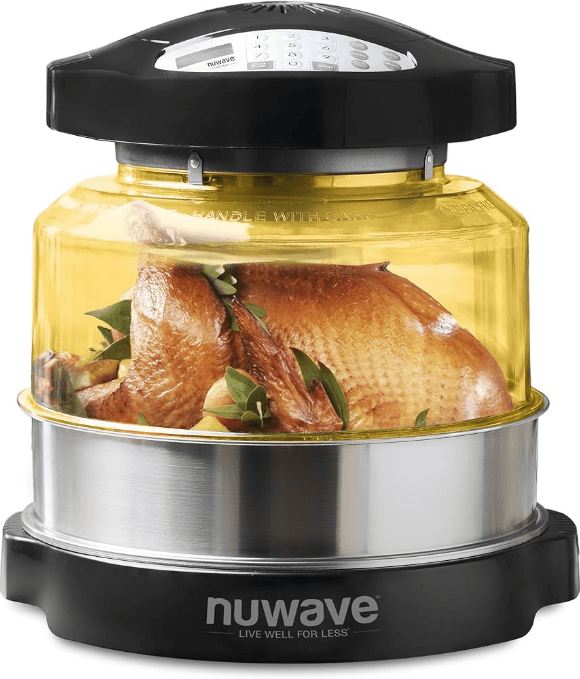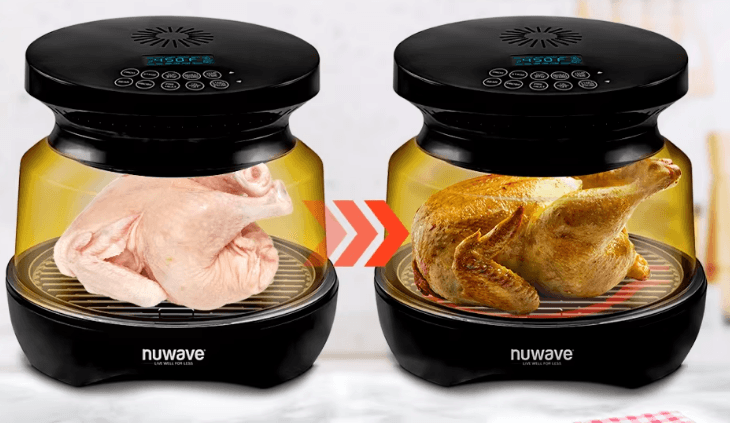
Nuwave Primo Grill Countertop Combo Oven

IMPORTANT SAFEGUARDS
READ ALL INSTRUCTIONS
When using the NuWave Primo™, basic safety precautions should always be followed, including the following:
- Read all instructions, safeguards, and warnings before using the appliance.
- Do not touch hot surfaces. Use handles or knobs.
- Use the handles on the Power Head or use oven mittens.
- To protect against electrical shock, do not immerse the cord, plugs, or the Primo in water or other liquids.
- Close supervision is necessary when any unit is used by or near children. The Primo is not intended for use by children, persons with reduced physical, sensory, or mental capabilities, or those with a lack of expertise or knowledge of this unit.
- Unplug the Primo from the outlet when not in use and before cleaning. Allow the Primo to cool before cleaning, putting on, or taking off parts.
- Do not operate any appliance with a damaged cord or plug, or after the appliance malfunctions or has been damaged in any manner. Return the appliance to the nearest authorized service facility for examination, repair, or adjustment.
- The use of other accessories that are not intended to be used with the Primo is not recommended. Doing so may damage the Primo and can cause accidents.
- NOT INTENDED FOR OUTDOOR USE. HOUSEHOLD USE ONLY.
- Do not let the cord hang over the edge of the table or counter or touch hot surfaces.
- Do not place on or near a hot gas, electric burner, or in a heated oven.
- The Primo Base will accumulate hot liquids from cooking. Use extreme caution when removing the Base containing hot liquids.
- Never put the Primo against the wall or other appliances. There should be at least 3 inches of free space for the back side, left/right sides, and the upper side of the Primo.
- Do not place anything on top of the Primo.
- Always remove the Dome away from you so the escaping steam is directed away from your face.
- To disconnect, turn the Primo “OFF”, then remove the plug from the wall outlet.
- Do not use the appliance for anything other than its intended use.
- Do not clean with metal scouring pads. Pieces can break off the pad and touch electrical parts, posing a risk of electric shock.
- Use extreme caution when removing the tray or disposing of hot grease.
- The Primo is not intended to be operated by means of an external timer or separate remote-control system.
- Keep the manual handy for future reference.
WARNING
In case of other problems, unplug the unit and contact the Customer Service Department.
1-877-689-2838 • help@nuwavenow.com
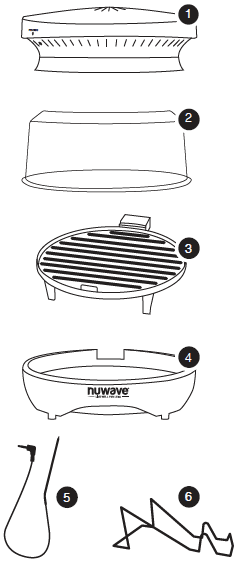
PARTS DESCRIPTION
- Power Head
- Power Dome
- Non-Stick Grill Plate
- Base
- Probe
- Dome Holder
ASSEMBLY GUIDE
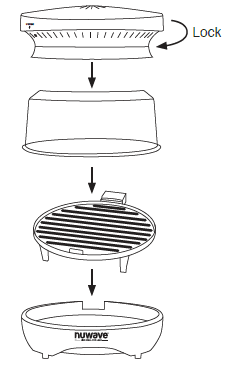
Connecting Power Head to Dome
- Place the Power Head on the rim of the Dome.
- Lock into place by rotating the Power Head clockwise until the locking lugs are engaged.

Assembling the Primo
- Place Base on a firm, stable surface. Do not place on a stovetop.
- Match the cutout of the Base with the plug inlet of the Grill Plate. Place the Grill Plate inside the Base.
- Connect the power cord to the Grill Plate.
- Place food on the Grill Plate.
- Place the Power Dome with the Power Head over to food. Connect to the Base. The dome should fit evenly and securely onto the Base.
- If using the Probe, insert the plug of the Probe into the Power Head (jack). Next, insert the other end of the Probe through a hole in the Power Dome and lift up the Power Head with the Power Dome. Insert the Probe end properly into the food.
- Set cook time and temperature according to recipe requirements.
- Remove the Dome with Power Head and lean it onto the Dome Holder. Do not leave the Dome Holder on for an extended period of time, as warping may occur.

OPERATING INSTRUCTIONS
ON/OFF Function
- Press “ON/OFF” once to turn the Primo on. The LED display will show “360F”, “TEMP”, “TOP 50%”, and “BOTTOM 50%”, indicating the Primo is powered on. 360°F is the default temperature setting.
- Press “ON/OFF” again to turn the Primo off. The LED display will be blank.
START/PAUSE Function
- Press “ON/OFF”. The LED display will show “360F”, “TEMP”, “TOP 50%”, and “BOTTOM 50%”, indicating the Primo is powered on.
- Press “START/PAUSE” to begin cooking. The LED display will show the cooking time countdown, “TIME”, “TOP 50%”, and “BOTTOM 50%”. The “:” will flash, indicating the Primo is now cooking.
- Press “START/PAUSE” during cooking to pause cooking. The “:” will no longer flash, indicating the Primo is no longer cooking. The Primo will remain paused until “START/PAUSE” is pressed to continue cooking or if “ON/OFF” is pressed to turn off the Primo.
When the Primo is finished cooking, “End” will be displayed and the Primo will beep three times.
TEMP/TIME Function
- Press “ON/OFF”. The LED display will show “360F”, “TEMP”, “TOP 50%”, and “BOTTOM 50%”, indicating the Primo is powered on. To adjust cooking temperature, press the “Up” or “Down” arrows until temperature is reached. Temperature will adjust in 5°F increments. To change the temperature faster, hold down the “Up” or “Down” arrows. To adjust cooking time, press “TEMP/TIME”. The LED display will show “00:15”, “TIME”, “TOP 50%”, and “BOTTOM 50%”. Press the “Up” or “Down” arrows until the desired time is reached. Time will adjust in 1-minute increments. To increase or decrease time faster, hold down the “Up” or “Down” arrows.
- Press “START/PAUSE”. The Primo will cook at the adjusted cooking temperature and time. When the Primo is finished cooking, “End” will be displayed, and the Primo will beep three times.
Preheat Function
The Preheat function ensures that the Primo reaches the desired temperature before cooking begins.
- Press “ON/OFF”. The LED display will show “360F”, “TEMP”, “TOP 50%”, and “BOTTOM 50%”, indicating the Primo is powered on. To adjust cooking temperature, press the “Up” or “Down” arrows until the desired temperature is reached. To adjust cooking time, press “TEMP/TIME”. The LED display will show “00:15”, “TIME”, “TOP 50%”, and “BOTTOM 50%”. Press the “Up” or “Down” arrows until the desired time is reached.
- Press “PREHEAT”. The LED display will show the adjusted cooking temperature, “TEMP”, “TOP 50%”, “BOTTOM 50%”, and “PREHEAT”. The Primo will preheat to the set cooking temperature.
- Press “START/PAUSE”. The Primo will begin to preheat. The LED display will show the set preheat temperature and will flash during preheating. Once the preheat temperature is reached, the Primo will start a 5-minute countdown. The LED display will show “ready,” and “5” will flash, indicating there are 5 minutes left to place food in Primo. The Primo will maintain the preheat temperature during the 5-minute countdown. When the countdown ends, the Primo will turn off.
- Remove the Power Head with the Dome and place food on the Grill Plate.
- Return the Power Head with the Dome to the unit and press “START/PAUSE”. This will begin the cooking process at the set temperature and time. When the cooking is finished, “End” will be displayed and the unit will beep three times.
Note: If the Primo Power Head is removed from the Dome, the unit will turn off.
Stage Function
A maximum of 5 stages can be programmed into the Primo.
- Press “ON/OFF”. The display will show “360F”, “TEMP”, “TOP 50%”, and “BOTTOM 50%”, indicating the Primo is powered on. This is Stage 1 cooking. Adjust cooking temperature by pressing the “Up” or “Down” arrows to adjust the desired cooking temperature. Adjust cooking time by pressing “TEMP/TIME”. Press the “Up” or “Down” arrows to adjust the desired cooking time.
- Press “STAGE”. The display will show default cooking temperature “360F”, “TEMP”, and “STAGE 2”. To adjust the cooking temperature for Stage 2, press the “Up” or “Down” arrows to adjust the desired cooking temperature. Adjust cooking time by pressing “TEMP/TIME”. The display will show “TIME”, “STAGE 2”, and “00:00”. Press the “Up” or “Down” arrows to adjust the desired cooking time.
- Press “STAGE” again to program a third stage of cooking. The display will show the default cooking temperature “360F”, “TEMP”, and “STAGE 3”. To adjust the cooking temperature for stage 3, press the “Up” or “Down” arrows to adjust the desired cooking temperature. Adjust cooking time by pressing “TEMP/TIME”. The display will show “TIME”, “STAGE 3”, and “00:00”. Press the “Up” or “Down” arrows to adjust the desired cooking time. A maximum of 5 stages can be programmed. Press “START/PAUSE” to begin cooking. The Primo will cook, following the stages that were programmed.
Example: Cook Stage 1 at 300°F for 17 minutes » Cook Stage 2 at 360°F for 30 minutes » Cook Stage 3 at 400°F for 5 minutes.
- Press “ON/OFF”. Press the “Up” or “Down” arrows to adjust cooking temperature to “300F”.
- Press “TEMP/TIME”. Press the “Up” or “Down” arrows to adjust cooking time to “00:17”.
- Press “STAGE”. Press the “Up” or “Down” arrows to adjust cooking temperature to “360F”.
- Press “TEMP/TIME”. Press the “Up” or “Down” arrows to adjust cooking time to “00:30”.
- Press “STAGE” again. Press the “Up” or “Down” arrows to adjust cooking temperature to “400F”.
- Press “TEMP/TIME”. Press the “Up” or “Down” arrows to adjust cooking time to “00:05”.
- Press “START/PAUSE”.
CARE & MAINTENANCE
Cleaning
Clean the Primo and accessories before first use, after every use, or in between a number of large batches. The Grill Plate has a non-stick coating. Do not use metal utensils or harsh abrasives when cleaning, as this can damage the coating.
- Unplug the appliance and make sure it cools completely.
- Use a damp cloth to wipe the outside of the appliance.
- The Power Dome (disconnected from Power Head), Grill Plate, and Base are dishwasher safe.
Storage
- Unplug the appliance and let it cool down completely.
- Make sure that all the parts are cleaned and dry.
IMPORTANT – Do not immerse the Power Head in water or attempt to cycle through the dishwasher. The outer surface may be cleaned by wiping carefully with a damp dishcloth or sponge. Make sure the unit has cooled completely prior to cleaning.
TROUBLESHOOTING
The Primo was engineered with an automatic shut-off feature to prevent overheating during use. If the unit shuts off to cool itself down, an odor may be detected. Unplug the unit and wait for it to completely cool down. To prevent overheating, do not cook at higher temperatures or cook times not recommended.
| Problem: | Solution(s): |
| The unit does not turn on. | The plug may not be in the outlet. Plug in the unit. |
| The food is cooked unevenly. | Check the cooking process throughout. Turn or rotate as needed to ensure even cooking. |
| The unit is not heating. | Make sure the unit is plugged in. Plug unit back in and see if unit comes up to correct temperature. If unit continues to not heat up, contact Customer Service at 1-877-689-2838 or email help@nuwavenow.com. |
| Error Message: | Solution(s): |
| Er1 | Probe short circuit. |
| Er2 | NTC (Negative Temperature Coefficient) sensor short circuit. |
| Er3 | NTC (Negative Temperature Coefficient) sensor is open. |
| Er4 | NTC (Negative Temperature Coefficient) sensor overheated. |
| Er5 | The top heater is in abnormal condition. |
| Er6 | The bottom heater is in an abnormal condition. |
LIMITED WARRANTY
The NuWave Primo™ Combo Grill
THE MANUFACTURER WARRANTS
The NuWave Primo, including the Power Head, Power Dome, Grill Plate, Base, and Probe, is to be free from manufacturer defects. All electrical components are warranted for 1 year from the date of purchase, under normal household use, and when operated in accordance with the Manufacturer’s written instructions. The Manufacturer will provide the necessary parts and labor to repair any part of the NuWave Primo at the NuWave, LLC Service Department. After the expiration of the warranty, the cost of the labor and parts will be the responsibility of the owner.
THE WARRANTY DOES NOT COVER
The Limited Warranty is voided if repairs are made by an unauthorized dealer and/or the serial number data plate is removed and/or defaced. Normal deterioration of finish due to use or exposure is not covered by this Warranty. This Limited Warranty does not cover failure, damages, or inadequate performance due to accident, acts of God (such as lightning), fluctuations in electric power, alterations, abuse, misuse, misapplications, corrosive-type atmospheres, improper installation, failure to operate in accordance with the Manufacturer’s written instructions, abnormal use, or commercial use. NuWave, LLC reserves the right to void the Limited Warranty, where allowable by law, for products purchased from an unauthorized dealer.
TO OBTAIN SERVICE
The owner shall have the obligation and responsibility to: pay for all services and parts not covered by the warranty; prepay the freight to and from the Service Department for any part or system returned under this warranty; and carefully package the product using adequate padding material to prevent damage in transit. The original container is ideal for this purpose. Include in the package the owner’s name, address, daytime telephone number, and a detailed description of the problem, and your “RGA number.” Call 1-877-689-2838 or email help@nuwavenow.com to obtain the RGA number (Return Goods Authorization number). Provide the cooking system model & serial number and proof of date of purchase (a copy of the receipt) when making claims under this warranty.
Recipes
Roasted Garlic & Rosemary-Studded
Prime Rib of Beef
Serves: 5
Ingredients:
- 5 bone-in prime rib roast (frenched and tied)
- 5 cloves garlic (sliced in half)
- 5 sprigs rosemary (cut in half)
- Sea salt to taste
- Fresh ground black pepper to taste
Directions:
- Let the roast stand at room temperature for 2 hours.
- Cut 10 slits into the top cap of rib roast. Stud each pocket with garlic and rosemary.
- Season heavily with salt and pepper.
- Insert the meat probe in the top center of the roast.
- Roast at 350°F 50/50 until internal temperature of 120°F for medium-rare.
- Let the roast rest for 15 minutes before carving, then serve.
Rustic Italian Pizza
Serves: 4
Ingredients:
- 12 oz refrigerated fresh pizza dough
- 1 c fresh basil leaves
- 6 garlic cloves, sliced thin
- 3 T extra-virgin olive oil, divided
- 4 oz fresh mozzarella cheese, sliced thinly
- 2 vine-ripened tomatoes, cut
- Sea salt to taste
- Fresh ground black pepper to taste
Directions:
- Preheat to 400°F 30/70. (Use pizza stone, optional.)
- Let the dough stand at room temperature for 30 minutes.
- Roll dough into an 11-inch circle on a floured surface. Pierce the entire surface liberally with a fork.
- Brush with olive oil. Top evenly with garlic, tomatoes, mozzarella, and basil.
- Carefully arrange the dough on pizza stone. Bake at 400°F 30/70 for 12 minutes or until crust is browned and crisp. Season with salt and pepper. Cut into 12 slices and serve.
Amish Capon with Roasted Autumn Vegetables
Serves: 4
Ingredients:
- 1 (10- to 15-lb) capon
- Sea salt to taste
- Fresh ground black pepper to taste
- 1 fennel bulb, cut into ¼-inch slices
- 12 patty pan squashes
- 3 heirloom carrots, peeled, cut into
- 2-inch cubes
- 2 T extra-virgin olive oil
- 8 sprigs fresh flat-leaf parsley
- 3 sprigs fresh rosemary
Directions:
- Rinse the capon under cold water and pat dry with paper towels. Season the insides and outside with salt and pepper.
- Spray the grill with cooking spray. Place the bird in the center of the grill.
- Insert the probe into the thickest part of the breast. Cook at 360°F 50/50. Cook until internal temperature reaches 165°F.
- Remove the birds from the grill, loosely tent with foil, and let rest 30 minutes before carving or serving.
- For the vegetables, toss in olive oil. Season with salt and pepper.
- Place into round roasting pan. Cook at 360°F 50/50 for 7 to 9 minutes until soft and slightly caramelized. Add parsley and rosemary. Toss to infuse flavors then serve.
For more Manuals by Nuwave, visit ManualsLibraryy
Nuwave Primo Grill Countertop Combo Oven-FAQs
How much power does the Nuwave oven use?
The Nuwave Pro Plus 2 operates at 1500 watts, offering powerful cooking performance with user-friendly digital controls.
What can I cook with the Nuwave oven?
The Nuwave oven supports a wide range of cooking methods including baking, air frying, grilling, roasting, toasting, dehydrating, slow roasting, reheating, warming, and more.
How do I adjust the power level on the Nuwave oven?
Use the power level dial located on the front of the oven’s power head. Turn it to select a power setting from 1 to 10 (HI).
What is the “Warm” setting on the oven?
The “Warm” setting keeps food at a safe serving temperature, usually between 170°F and 200°F. If unavailable, you can use a low heat setting like 200°F–250°F manually.
What does “PH” mean on the Nuwave display?
“PH” stands for Preheating. It appears while the oven is reaching the selected cooking temperature. Once ready, the cooking timer will begin.
What temperature range does the Nuwave oven support?
The Nuwave oven allows precise temperature control from 50°F to 450°F, adjustable in 5°F increments.
How does the Nuwave oven cook food?
It uses a combination of conduction, convection, infrared, and direct contact heat to cook food evenly inside and out.
Is the Nuwave oven a convection oven?
Yes, models like the Nuwave Bravo XL feature convection heating, circulating hot air for faster and more even cooking.
What kind of waves are used in a microwave oven?
Microwave ovens use electromagnetic waves to heat food by causing water molecules to vibrate and produce heat internally.
Is the Nuwave oven safe to use?
Yes, Nuwave ovens and compatible cookware are safe and eco-friendly, featuring materials like Duralon Blue Healthy Ceramic Non-Stick Coating that are oven- and induction-safe.


