Tribit BTH71 X-Free Go Wireless Headphones
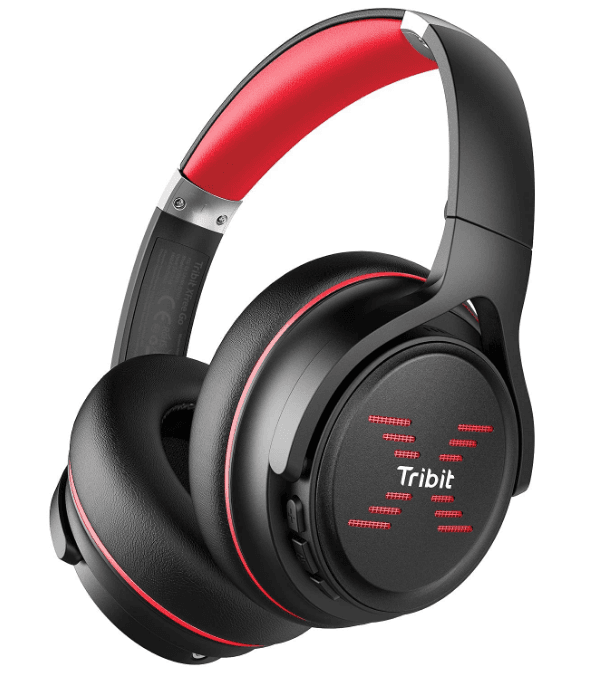
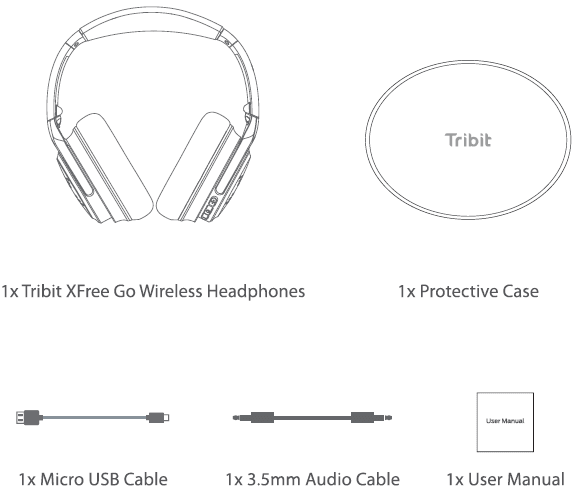
Package Contents
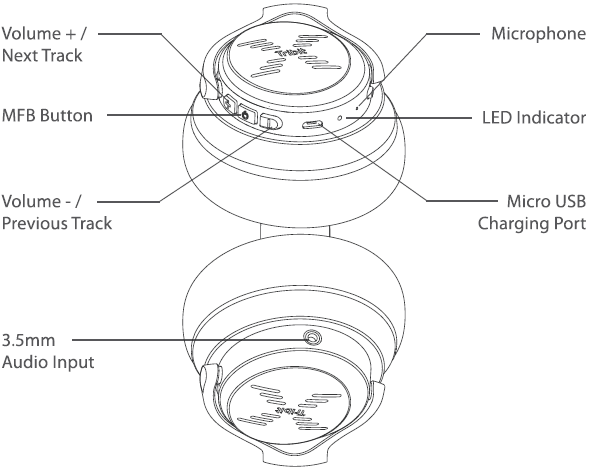
Product Diagram
Turn On/Off
- To power on the headphones, press and hold the MFB button for 2 seconds. The LED Indicator will flash blue for 1 second.
- To power off the headphones, press and hold the MFB button for 4 seconds. The LED indicator will flash red for 1 second and then will turn off.

Bluetooth Connection
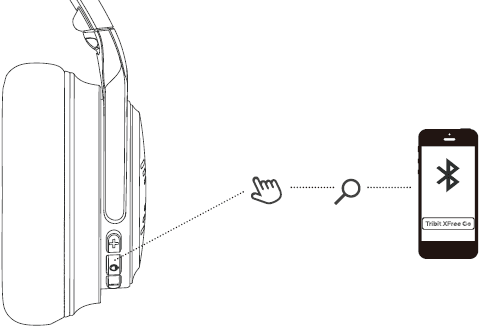
- Press and hold the MFB button for 5 seconds until the LED indicator flashes blue. A moment later, the indicator will flash red and blue alternately to indicate that the headphones have automatically entered pairing mode.
- Activate the Bluetooth function of your phone to search for Bluetooth devices, then click the Tribit XFree Go in the pairing list for connection.

Connect with Two Devices Simultaneously
- Follow the instructions in the above Bluetooth Connection section to pair the headphones with Device A.
- Once paired, disable the Bluetooth function on Device A.
- Pair the headphones with Device Bin the same way with Device A.
- Once paired with Device B, reactivate the Bluetooth function on Device A and select”Tribit XFree Go” in the pairing list.
- Now, you can make and receive calls from either of the two paired devices.
Operation of Buttons
| Volume up | Short press the”+” button |
| Volume down | Short press the”-” button |
| Next track | Press and hold +” button for 2 seconds |
| Previous track | Press and hold the”-” button for 2 seconds |
| Play/ Pause | Press the MFB button once |
| Answer/ End the call | Press the MFB button once |
| Reject the call | Keep the MFB button pressed for seconds |
| Redial the last called number | Press the”+” and”-” buttons simultaneously for 1 second |
| Activate Siri | Press the MFB button twice |
| Clear the pairing list | Press the MFB button and”+” button simultaneously for 4 seconds in the pow er-on state to clear the pairing list, then the headphones will enter pairing state automatically. |
Charge the Headphones
Connect the USB end of the provided charging cable to an SV power outlet ( power adapter is not included), and connect the Micro USB end to the headphones. The LED indicator will glow red during the charging process, then change to green after being fully charged ( within 3 hours).
Customer Service
The headphones have a full 18-month warranty against manufacturing defects starting from the purchase date. For FAQs and more information, please email [email protected].
FCC Statement
Changes or modifications not expressly approved by the party responsible for compliance could void the user’s authority to operate the equipment.
This equipment has been tested and found to comply with the limits for a Class B digital device, pursuant to Part 15 of the FCC Rules. These limits are designed to provide reasonable protection against harmful interference in a residential installation. This equipment generates uses and can radiate radio frequency energy and, if not installed and used in accordance with the instructions, may cause harmful interference to radio communications. However, there is no guarantee that interference will not occur in a particular installation. If this equipment does cause harmful interference to radio or television reception, which can be determined by turning the equipment off and on, the user is encouraged to try to correct the interference by one or more of the following measures:
- Reorient or relocate the receiving antenna.
- Increase the separation between the equipment and receiver.
- Connect the equipment into an outlet on a circuit different from that to which the receiver is connected.
- Consult the dealer or an experienced radio/TV technician for help
This device complies with part 15 of the FCC rules. Operation is subject to the following two conditions: (1) this device may not cause harmful interference, and (2) this device must accept any interference received, including interference that may cause undesired operation.
For more Manuals by Tribit, visit ManualsLibraryy
Tribit BTH71 X-Free Go Wireless Headphones-FAQs
How do I control music and calls on the Tribit headphones?
The on-ear controls are touch-sensitive.
1. Double-tap either earbud to play/pause audio or answer/end calls.
2. Triple-tap to skip to the next track.
3. Press and hold to activate your device’s voice assistant.
Note: These headphones don’t support volume adjustment or previous track via touch.
How do I know when my Tribit headphones are fully charged?
While charging, the LED indicator shows the status. When the LED turns blue, it means the headphones are fully charged. Charging typically takes around 6 hours.
How do wireless headphones work?
Wireless headphones connect to your device (phone, laptop, tablet) via Bluetooth. They use a built-in battery to stream music, make calls, and watch videos without cables.
Is Tribit a reliable brand?
Tribit offers good value for the price. While some users may prefer more premium brands like JBL for sound quality, Tribit headphones are a solid option in the budget-friendly range.
How do I reset or reboot my Tribit headphones?
Press and hold the power button until the LED light flashes (usually red, blue, or green). This indicates the headphones have been rebooted or are in pairing mode.
How can I check the battery level of my Tribit earbuds?
1. Open the charging case with the earbuds inside.
2. The LED lights will indicate the battery status of both the case and earbuds.
Some devices also show battery levels in the Bluetooth settings.
How do I know if my Bluetooth headset is charging or fully charged?
A solid red LED means the headset is charging. Once fully charged, the red light will turn off.
Should I keep my earbuds in the case while charging?
Yes, always store your earbuds in the charging case and keep the case closed while charging for safe and efficient charging.

