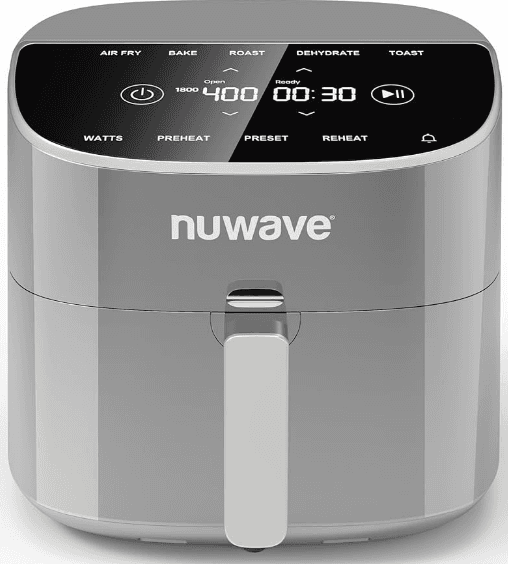
NuWave Brio 8-Qt Air Fryer
IMPORTANT SAFEGUARDS
ALWAYS KEEP THIS MANUAL HANDY FOR FUTURE REFERENCE.
- ALWAYS use great caution when operating the Brio or any appliance. Use the handles or knobs to avoid touching hot surfaces.
- NEVER immerse the cord, plug, or the Brio in water or other liquids.
- NEVER use the Brio if the unit, cord, or plug is damaged in any way, or after the appliance malfunctions. Return the appliance to the nearest authorized service facility for examination, repair, or adjustment.
- ALWAYS supervise children; and people with reduced physical, sensory, or mental capabilities; and those lacking experience and knowledge, to ensure they use the Brio safely.
- NEVER use accessories that are not intended for, or are not approved to be used with, the Brio as doing so may damage the Brio and may lead to accidents.
- NEVER USE OUTDOORS. FOR HOUSEHOLD USE ONLY. Note: This appliance is not intended to be used in the staff kitchens of shops, offices, farms, or other work environments; nor is it intended to be used by guests in hotels, motels, bed and breakfasts, and any other nonresidential
environments. - ALWAYS set up the Brio on a horizontal, even, and stable surface.
- NEVER allow the cord to hand down from tables or counters or allow it to touch hot surfaces.
- NEVER place or use the Brio on or near hot gas or electric burners, in a heated oven, close to flammable materials, space heaters or in any wet environment.
- ALWAYS use extreme caution when moving the Brio. NEVER move or handle the unit while it is running or before it has cooled.
- ALWAYS turn the Brio off before unplugging the unit from the wall outlet.
- ALWAYS keep hands and face away from the steam and hot air released from the air outlet vent during normal operation and from the Base Tray when opening the unit to remove or adjust the food.
- ALWAYS unplug the Brio and contact NuWave Customer Service* if an excess amount of smoke escapes the unit during operation. Note: A small amount of smoke is normal when using the Brio for the first time.
- NEVER put the Brio against the wall or other appliances or allow anything to block the air vents. ALWAYS keep at least 3 inches of free space around the Brio.
- NEVER place anything on top of the Brio.
- ALWAYS unplug the Brio from the wall outlet when it is not in use and before cleaning.
- ALWAYS ensure that the Brio is clean prior to use.
- NEVER operate the Brio with an external timer or separate remote control system.
- ALWAYS allow the Brio to cool before cleaning the unit or attaching or removing parts and accessories.
- NEVER disassemble the Brio or replace any parts without the prior written consent of the manufacturer. Note: If any trouble arises during operation, any service MUST be done by NuWave LLC.
- NEVER use metal utensils with the coated Base Tray and Reversible Rack as doing so can damage the surface.
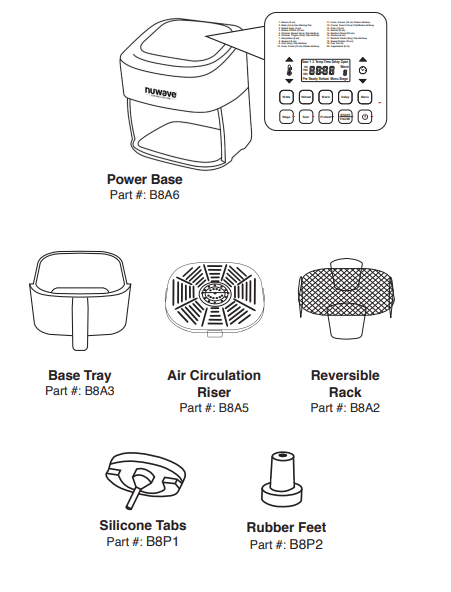
PARTS & ACCESSORIES
ASSEMBLY GUIDE
Assembling the Brio
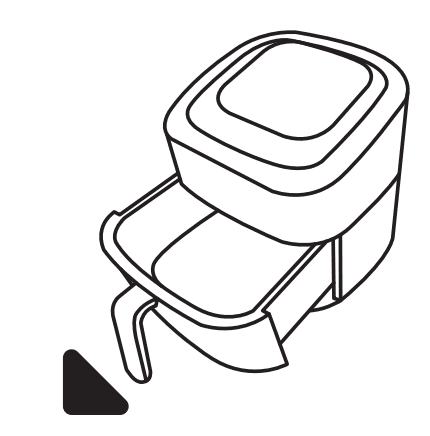
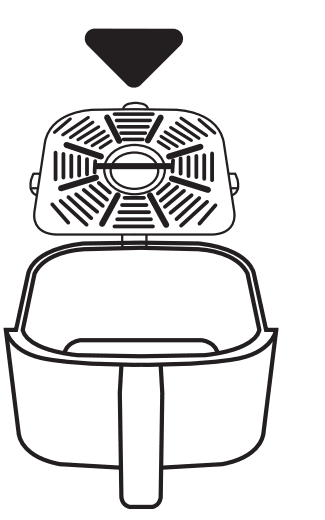
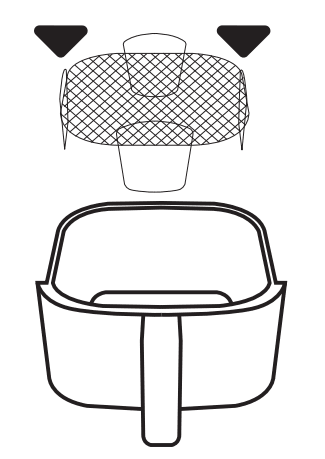
CAUTION: DO NOT use the Brio without the Base Tray. DO NOT touch the inside of the Base Tray, the Reversible Rack, or the Riser immediately after cooking. These parts will be hot. ONLY hold the Base Tray by the handle. Removing the Base Tray, Reversible Rack & Air Circulation Riser
- Using the handle, pull the Base Tray straight out.

- Allow the Base Tray to cool. Grasp the Circulation Riser by the central handle and pull it straight up to remove it from the Base Tray.

- When using the Reversible Rack, allow it to cool and then remove it with the handles.

QUICK START
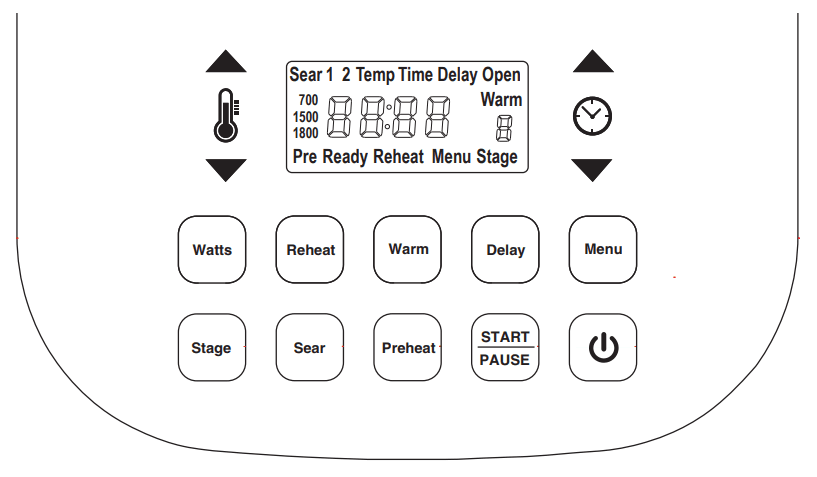
Button Functions
 : The Power button turns the Brio on and off.
- Start/Pause: The START/PAUSE button starts, pauses, and resumes cooking.
- Up & Down Arrows: The arrow buttons adjust the cooking temperatures and times, as well as select different cooking presets.
- Preheat: The Brio will automatically preheat before any function to the set cooking temperature. Press Preheat during the preheat cycle to temporarily turn it off.
- Auto Preheat: The Brio will preheat automatically by default. To cancel the Auto Preheat, press Menu + Preheat.
- Menu: The Brio offers 100 programmed presets and an additional 50 memory slots allowing you to add your own unique recipes. Use the Menu function to recall and save the programmed recipes. Refer to the Quick Start Guide for the list of 100 presets.
- Warm: Keep your food warm after cooking until you are ready to eat. Press Warm and use the Up and Down arrows to adjust the warming temperature and time. Press Warm to cancel the warm cycle. To use Warm as an independent function, press and hold Warm for 1 second and adjust
as necessary. - Delay: Delay is used to delay your cooking start time. Press Delay and use the Up or Down arrows to adjust the Delay time. The time is adjustable up to 24 hours. Press Delay at any time to cancel the Delay function.
- Reheat: Quickly warm through your favorite leftovers. Press Reheat for 1 second and the Brio will automatically begin reheating, defaulting to 350F for 4 minutes are the defaults. The Reheat temperature and time can be adjusted at any time with the Up and Down arrows.
- Sear: Sear is used to cook at high temperatures for a short period of time, directly before and/or after the regular cooking cycle. Use the Up and Down arrows to adjust the temperature and time (up to 30 minutes) before or during the searing cycle.
- Stage: Use the Stage function to program up to 5 different cooking steps, each with its own cooking temperatures and times that are adjustable with the Up and Down arrows.
- Watts: The Brio offers 3 wattage levels (700, 1500 & 1800). Press Watts to change the running wattage the Brio will use. When the Brio is turned off and/or unplugged, the Brio will run at the wattage previously set.
The maximum selectable cooking time differs depending on the selected cooking temperature.
| 50F – 275F | 99:59 (99 hours and 59 minutes) |
| 280F – 345F | 24:00 (24 hours) |
| 350F – 400F | 1:00 (1 hour) |
GENERAL USE
Getting Started
Plug the power cord into an electrical outlet.
- Press the Power button to turn the Brio on and off and to cancel any cooking function.
- Adjust the temperature and time by pressing the Up and Down arrows.
- The default cooking time and temperature is 15 minutes at 350F.
- Press START/PAUSE to begin cooking.
- The Brio will begin preheating at the set cooking temperature.
Note: The Brio will beep 3 times halfway through the cooking cycle to alert you to remove the Base Tray and shake the food (or flip foods like chicken, steak, or fish) to ensure even cooking. Reinsert the Base Tray to continue cooking.
START/PAUSE
Press START/PAUSE to begin cooking. To pause cooking, press START/PAUSE or remove the Base Tray.
- The screen will display “Open” when the Base Tray is removed. It will continue to cook once it is closed.
Up and Down Arrows
- To adjust the cooking temperature, use the Up and Down arrows above and below the temperature icon. It is adjustable in 5-degree increments between 50F and 400F.

- Hold down the Up or Down arrows to adjust the temperature quickly.
Note: The cooking temperature can be adjusted at any time before or during the cooking process. The current set temperature will be displayed.
- Hold down the Up or Down arrows to adjust the temperature quickly.
- To adjust the cooking time, use the Up and Down arrows above and below the time icon. It is adjustable in 1-minute increments.

- Hold down the Up or Down arrows to adjust the cooking time quickly.
Note: The cooking time can be adjusted at any time before or during the cooking process.
- Hold down the Up or Down arrows to adjust the cooking time quickly.
- Use either set of the Up and Down arrows to select different Menu presets.
Preheat
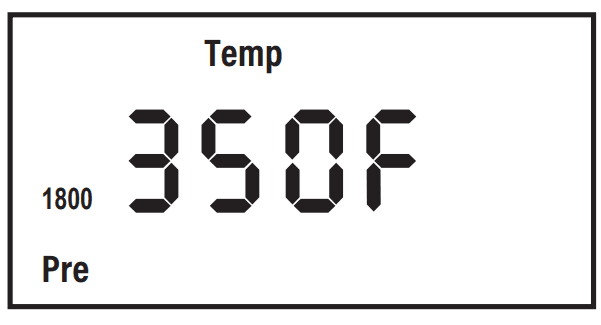
Preheat the Brio to set the cooking temperature before cooking your food for crispier results. The Brio will automatically preheat before all functions. The default cooking temperature is 350F and the range is 50F-400F.
- Press START/PAUSE to begin preheating.
- The cooking temperature can be adjusted before or during the Preheat cycle.
- The Preheat cycle can be canceled anytime by pressing Preheat.
- While the Brio is preheating, the LED display will flash the preheat temperature.
- Once preheated, the Brio will beep twice, display “Ready”, and countdown to 10 seconds and then beep once more.
- During the countdown, place your food into the Base Tray and slide it into the Brio.
- The Brio will begin cooking with the set temperature and time.
- When the Brio is finished cooking, it will beep 3 times and the LED display will show “End”.

Auto preheat
The Brio, by default, will automatically preheat for all cooking functions and certain programmed presets. If at any time you want to turn off the automatic preheat function, press Menu + Preheat. This will deactivate automatic preheating before any cooking. Press Menu + Preheat again to activate it.
If at any time you want to turn off preheat temporarily for the individual cooking cycle, press Preheat.
Menu
Use the Menu function to choose from 100 presets (See the Quick Start Guide for the full list). Slots 101~150 are for your own unique programs (See Advanced Settings for more information).
- Press Menu.
- Use the Up and Down arrows to scroll through the preset numbers until you find the desired presets.
- Once a preset number is chosen, press START/PAUSE to begin cooking. You can make temperature and time adjustments if desired.
- Before cooking, some of the presets are programmed to preheat.
- You can view the current cooking preset number while the program is running by pressing Menu.
View the cooking settings
You can view all cooking functions associated with a preset before or during the cooking process. View the cooking settings before cooking
- Press Menu and find the preset number to review using the Up and Down arrows.
- Once the preset number is displayed, press Stage to review each cooking step.
- Adjustments to the temperature and time can be made for each function at this
time.
- Adjustments to the temperature and time can be made for each function at this
View the cooking settings during the cooking
- Press Stage to review each cooking step.
- Continue to press Stage to scroll through all of the programmed functions for that preset number.
- Adjustments to the temperature and time can be made for each function at this time, but it will not be saved.
Warm
Keep your food warm until you are ready to serve, defaulting to 140F.
- Adjust the cooking temperature and time.
- Press Warm.
- Adjust the Warm temperature and time, if desired.
- Press START/PAUSE to start cooking.
- The Brio will start cooking with the set cooking temperature and time. After that, it will warm at the set Warm temperature.
- Press Warm again to cancel the Warm function at any time.
- During the Warm function, the LED display will flash “Warm”.
Delay
The Delay function is used to delay your cooking start time.
- Press Delay.
- Use the Up and Down arrows to adjust the Delay time.
- The Delay time can be adjusted up to 24 hours.
- During Delay, the (:) will flash, indicating that the Delay time countdown started.
- To stop the Delay function at any time, press Delay.
- The Brio will automatically move on to the next cooking function.
- Once the Delay function is complete, it will automatically start cooking.
ADVANCED SETTINGS
Edit while cooking
- While cooking, press Stage until the function you would like to edit shows in the LED display.
- Adjust the cooking temperature and time.
- If there are more cooking presets that you would like to edit, press Stage until you reach the preset you would like to edit as described above.
- The Brio will continue cooking with the edits that you have made.
- When the Brio has finished cooking, the Brio will beep 3 times and the LED display will show “End”.
- To save your edits, press and hold Menu for 1 second, and “101” will be displayed. Select the preset number (101-150) that you would like to save your edits to and hold Menu again for 1 second.
Note: Once saved, the edited preset will be available for recall. If the cooking process has finished, the preset is no longer editable. If you save a preset to a filled memory slot, the new preset will override the
previous one. Any edits to a preset program (1~100) can only be saved and stored in program numbers 101~150. You cannot save an adjusted preset to its original preset number.
Sear
Sear 1 is ONLY available at the beginning of the cooking process. Sear 2 is ONLY available at the end of the cooking process. Sear 1 & 2 can be used together to sear your food before and after the cooking process. The default temperature and time is 400F for 5 minutes.
- Adjust your cooking temperature and time.
- Press Sear to engage the Sear 1 function.
- Adjust the Sear temperature and time up to a maximum of 400F and 30 minutes.
- Press START/PAUSE to begin. The Brio will start preheating. Once preheated, “Sear 1” and “:” will be flashing.
- Once the Sear 1 cycle is finished, the Brio will automatically go into the regular cooking temperature and time set in Step 1.
- When the Brio has finished cooking, it will beep 3 times and the LED display will show “End”.
Sear 1 & 2
- Adjust your cooking temperature and time.
- Press Sear to engage the Sear 1 function. Adjust the Sear 1 temperature and time, if desired.
- Press Sear again to add the Sear 2 function. Adjust the Sear 2 temperature and time, if desired.
- Press START/PAUSE to begin. The Brio will start preheating. Once preheated, “Sear 1” and “:” will be flashing.
- Once Sear 1 is finished, the Brio will beep once and will begin the regular cooking temperature and time set on Step 1. After, the Brio will beep once again and will then go into Sear 2.
- When the Brio has finished cooking, it will beep 3 times and the LED display will show “End”.
Sear 2
The default temperature and time is 400F for 5 minutes.
- Adjust your cooking temperature and time.
- Press Sear 3 times to engage Sear 2.
- Adjust your cooking temperature and time up to a maximum of 40°F and 30 minutes.
- Press START/PAUSE to begin. The Brio will start preheating.
- Once the main cooking cycle has finished, the Brio will beep once and go into Sear 2 cooking. “Sear 2”, and “:” will be flashing.
- When the Brio is finished cooking, it will beep 3 times and the LED display will show “End”.
Note: The Sear temperature and time can be adjusted at any time.
CLEANING & MAINTENANCE
Cleaning
Clean the Brio after every use or in between batches. The Base Tray and Air Circulation Riser have a non-stick coating. Do not use metal utensils or harsh abrasives when cleaning as these can damage the coating.
- Unplug the appliance and make sure it cools completely.
- Use a damp cloth to wipe the outside of the appliance.
- Clean the Base Tray and inside components with a nonabrasive sponge, hot water, and mild detergent.
Note: Remove the Base Tray and place it on a heat-resistant surface to help cool the appliance faster. If using the dishwasher for the Base Tray, Air Circulation Riser, and Reversible Rack, use the top rack only.
Tip: If there is residual food on the Base Tray, Air Circulation Riser, and Reversible Rack, add some hot water and let them soak separately for about 10 minutes. Then, use a soft cleaning brush to remove any lingering food.
Storage
- Unplug the Brio and let it cool down completely.
- Make sure that all parts are clean and dry.
IMPORTANT – Do not immerse the Brio in water or attempt to clean the appliance in the dishwasher.
TROUBLESHOOTING GUIDE
The Brio is not turning on or working.
- The Brio is not plugged in.
- You did not press the Power button.
- The Base Tray is not properly in the Brio.
Insert the plug into an appropriate grounded power socket. Press the Power button. Place the Base Tray into the Brio.
The ingredients fried in the Base Tray are not completely cooked.
- Too many ingredients were used.
- The cooking temperature is too low.
- The cooking time is too short.
Remove some ingredients from the Base Tray; smaller batches air-fry more evenly. Cook at a higher temperature. Set the Brio to air-fry for a longer time.
The food is fried unevenly.
- Certain types of ingredients need to be shaken or flipped halfway through the cooking process.
The ingredients need to be shaken or flipped halfway through the cooking time.
Fried snacks are not crispy when they come out of the Brio.
- You used a type of snack meant to be prepared in a traditional deep fryer.
Use snacks designed to be baked in a traditional oven, or lightly brush some oil onto the snacks before placing them into Brio for crispier results.
Cannot properly slide the Base Tray into the appliance.
- The Base Tray is overfilled.
Do not fill the Base Tray more than 4/5 full. Push the Base Tray into the Brio until you hear a click.
White smoke is coming out of the Brio.
- You are frying greasy food.
- The Base Tray and Rack contains greasy residue from previous uses.
When preparing greasy ingredients in the air fryer, substantial amounts of oil can smoke and infiltrate the Base Tray. The oil will produce white smoke and the Base Tray might become hotter than usual. This will not affect the final cooking result. White smoke is caused by grease heating up in the Base Tray. Make sure you clean the Base Tray, Riser, and Rack properly after each use.
French fries are fried unevenly in the Brio.
- You did not soak the potato sticks properly before air-frying them.
- You did not use the right potato type, or they were not fresh.
Soak the potato sticks in a bowl of water for at least 30 minutes, remove them, and dry them with paper towels. Use fresh potatoes and make sure they stay firm during air-frying.
French fries are not crispy when they come out of the Brio.
- The crispiness of the fries depends on the amount of oil and water in the fries.
Make sure you dry the potato sticks properly before adding oil. Cut the potato sticks smaller and dry them for a crispier result. Put slightly more oil on the potatoes before placing them in the Brio for crispier results.
| Mensaje de error: | Solución (s): |
| Er1 | El sensor de temperatura NTC está sobrecalentado. Apague la unidad para que se enfríe. Si el Brio no funciona después de que se enfríe, comuníquese con Servicio al Cliente al 1-877-689-2838 o [email protected]. |
| Err1 | El sensor de temperatura NTC tiene un corto circuito. Comuníquese con el Departamento de Servicio al Cliente al 1-877-689-2838 o [email protected]. |
| Err2 | El sensor de temperatura NTC está abierto. Comuníquese con el Departamento de Servicio al Cliente al 1-877-689- 2838 o [email protected]. |
For more manuals by NuWave, visit ManualsLibraryy
NuWave Brio 8-Qt Air Fryer-FAQs
What is the Air Fryer setting used for?
The air fry setting uses hot air circulation and little to no oil to cook food with a crispy texture. It’s great for foods like fries, veggies, and fried chicken, while baking is better for cakes or bread.
Why is my air fryer making so much noise?
The fan inside the air fryer keeps the unit cool while it’s running. The sound, similar to a vacuum cleaner (around 65 dB), is normal and nothing to worry about.
What should I do if my air fryer stops working?
First, unplug it and let it cool. Then check for grease build-up or damage around the heating element. A faulty heating element is a common reason for malfunction.
Do I need to use oil in my NuWave air fryer?
No, oil is not required. However, you can add a small amount for extra flavor if you’d like. Never pour oil directly into the basket.
Is it necessary to preheat the air fryer?
Preheating helps ensure even cooking. Skipping it might cause food to cook unevenly, leaving parts undercooked or overcooked.
Is 200°C hot enough for air frying?
Yes, 200°C is equal to 400°F, which is a typical air frying temperature and works well for most recipes.
What temperature should I use to air fry French fries?
Air fry at 400°F (200°C) for 10–15 minutes, shaking the basket halfway through for even crispiness.
What does Position 1 mean on my NuWave air fryer?
Position 1 refers to the bottom rack level in the fryer. Use different positions based on the food type and cooking method.

