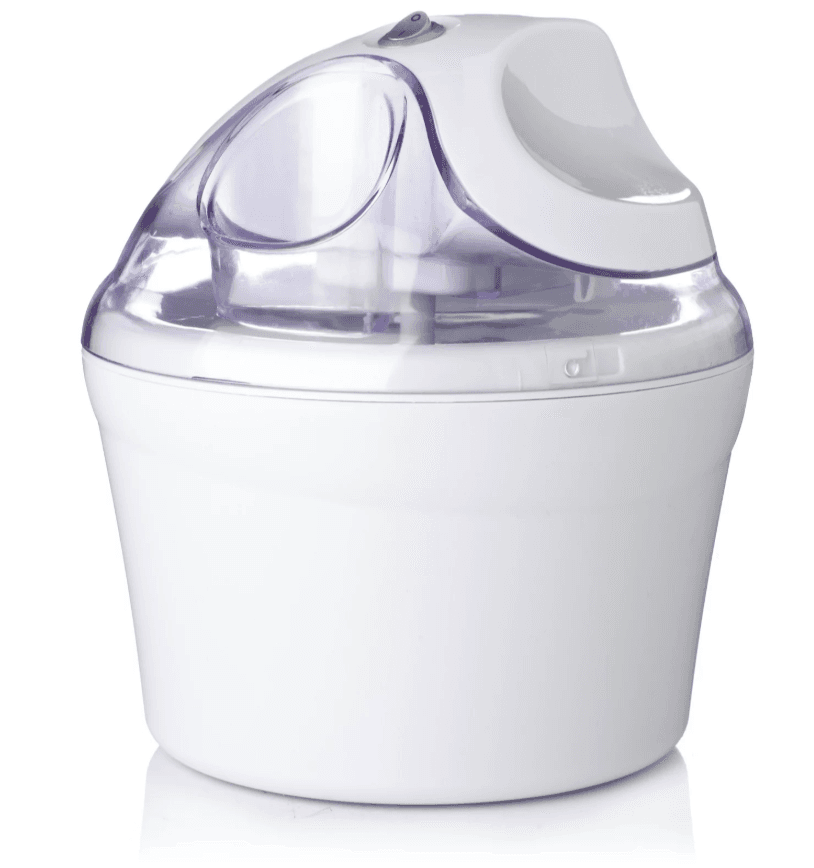
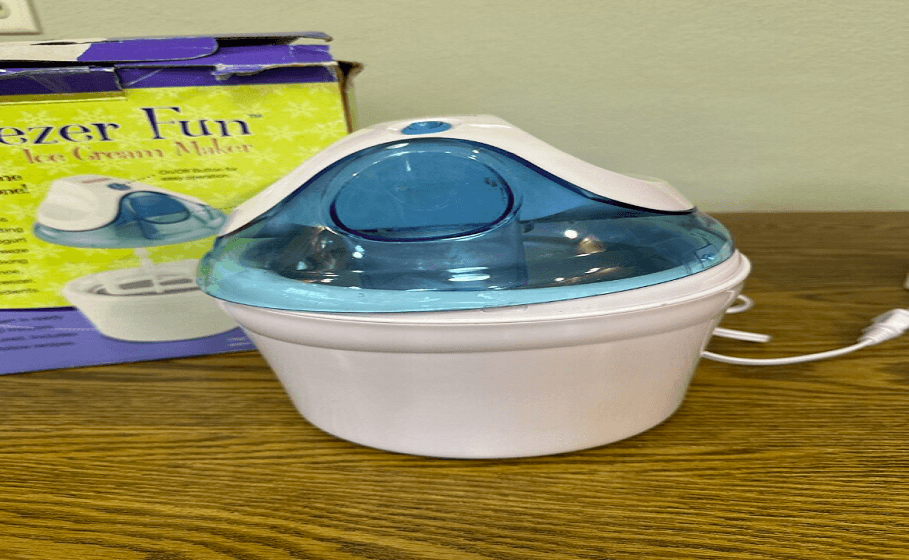
Back to Basics Ice Cream Maker

IMPORTANT SAFEGUARDS
- Read all instructions, including these important safeguards and the care and use instructions in this manual.
- Always unplug from the outlet when not in use and before cleaning. Allow to cool before putting on or taking off parts and before cleaning.
- Close supervision is necessary when this appliance is used by or near children.
- Do not operate any appliance with a damaged cord or plug, after the appliance malfunctions, or has been damaged in any manner. For service information, see the warranty page.
- The use of accessory attachments not recommended by Focus Electrics may cause fire, electric shock, or injury.
- Do not use this appliance outdoors.
- Do not let the cord hang over the edge of the table or counter, or touch hot surfaces.
- Do not place on or near a hot gas or electric burner, or in a heated oven.
- Do not use the appliance for anything other than its intended use.
- To protect against electric shock, do not immerse the cord, plugs, or other electric parts in water or other liquids.
- Do not attempt to repair this appliance yourself.
- A short power-supply cord is provided to reduce risks resulting from becoming entangled in or tripping over a longer cord.
SAVE THESE INSTRUCTIONS
BEFORE THE FIRST USE
- Check all packaging material carefully before discarding. Many accessory parts are contained within the packaging material.
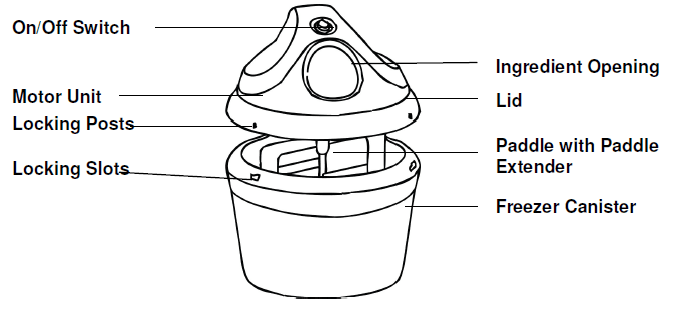
- Remove the outer unit from the lid by pressing the locking tabs on the underside and gently pushing upwards through lid tab holes.
- Do NOT immerse the motor unit in water. To clean, wipe gently with a damp cloth.
- Wash freezer canister, lid, and paddle in warm, soapy water. Rinse thoroughly and dry.

USING YOUR ICE CREAM MAKER
- Freezer Canister Preparation – The freezer canister must be completely frozen before making your recipe. The length of time needed to freeze the freezer canister varies depending on the temperature of your freezer. For convenience, leave the freezer canister in the freezer at all times. Then you are ready to make frozen treats for any occasion.
- In general, freezing time is between 8 and 22 hours. Put the freezer canister in a plastic bag to prevent freezer burn and place it in the back of your freezer where it is the coldest. The freezer canister is filled with liquid. To determine if the freezer canister is completely frozen, shake and listen for liquid movement. You should not hear any liquid within the canister walls. Please consult the following chart for recommended freezing times.
Freezer Temperature Estimated Freezing Time -22°F (-30°C) 8 – 10 hours -13°F (-25°C) 12 – 15 hours 0°F (-18°C) 18 – 22 hours
Making Frozen Desserts
Note: When assembling, dismantling or cleaning, always ensure that the appliance is switched to “OFF” and is not connected to the power supply.
- 1) Prepare recipe ingredients from this manual or use your own recipes prior to assembling the ice cream maker. Liquids increase in volume during freezing
process; therefore, the maximum amount of liquid used must not exceed 3 cups. - 2) IMPORTANT: Do NOT remove freezer canister from freezer until recipe is prepared. It is critical to keep the freezer canister as cold as possible prior to
Assembling the ice cream maker as it begins to thaw immediately upon removal from the freezer. - 3) Assemble the Ice Cream Maker:
- a) Place the motor unit over the lid, lining up the locking tabs over the lid tab holes. Press down firmly to lock in place; there will be a “clicking” sound
When the tabs are locked correctly. - b) Insert the paddle extender into the motor unit opening.
- c) Attach the paddle to the paddle extender by pushing together.
- d) Remove the freezer canister from the freezer. Place the assembled motor and lid over the freezer canister. Align the 3 locking posts on the inside lid
bottom with the 3 locking slots on the outside top rim of the freezer canister. - e) Turn the lid assembly clockwise to lock lid firmly in place.
- f) Insert the plug into the outlet.
- a) Place the motor unit over the lid, lining up the locking tabs over the lid tab holes. Press down firmly to lock in place; there will be a “clicking” sound
- 4) Push the On/Off switch to “ON”.
Note: The Ice Cream Maker must be on before adding ingredients. This prevents the mixture from immediately freezing on the inside of the freezer canister and causing damage to the paddle mechanism. - 5) Slowly pour the prepared ice cream mixture into the freezer canister through the ingredient opening. Note: There should be a minimum of 2 inches (5cm)
between the mixture and the top of the freezer canister to allow for expansion during the freezing process.
HELPFUL HINTS
- Store the freezer canister in the freezer so it is always ready for use. Keep it wrapped in a plastic bag to prevent freezer burn and store in an upright position.
- Homemade ice cream recipes use only fresh ingredients; therefore, they do not have the same consistency as store-bought ice creams, which use gums and
preservatives to make them firmer. If you prefer a firmer consistency, place the frozen ice cream in an airtight container and store it in the freezer for one or
more hours until the desired consistency is achieved. - For recipes that require pre-cooking, prepare the mixture a day ahead and store it overnight in the refrigerator. This will allow the mixture to completely cool and increase the volume.
- Ice cream mixtures may be stored in the refrigerator up to 3 days prior to freezing. Be sure to mix well before adding the mixture to the freezer canister.
- The most common ingredients in ice cream are cream, sugar, eggs, and milk. For the richest flavor and creamiest texture, use a cream containing the highest
percentage of fat. Heavy cream has the highest fat content (approximately 36%), Whipping Cream (30%), Coffee/Light Cream (18%), and Half & Half (10%). Substitutions of milk products (both cream and milk) may be used to reduce the fat content. However, this may change the taste, consistency, and texture of the ice cream. When substituting ingredients, be sure the total liquid measurement remains the same as the original recipe. - Artificial sweeteners may be used to replace sugar in a recipe. Add only to a cooled mixture as heat affects the sweetness.
- The ice cream mixture should be 2 inches (5 cm) from the top of the freezer canister. This allows for expansion during the freezing process.
- For recipes containing alcohol, add the alcohol during the last 2 minutes of the freezing process. Alcohol can adversely affect the freezing process if added earlier.
RECIPES
Basic Vanilla Ice Cream (uncooked)
- 1 cup Whole milk, well chilled
- ½ cup Granulated sugar
- 2/3 cup Half & Half
- 1/3 cup Whipping cream
- ½ tsp. Vanilla extract (or to taste)
- Whisk together the milk and sugar until the sugar is dissolved. Stir in Half & Half, whipping cream, and vanilla. Pour into the freezer canister and freeze as directed.
Basic Chocolate Ice Cream (uncooked)
- 2/3 cup Whole milk
- 1/3 cup Granulated sugar
- 5 oz. Bittersweet or semi-sweet chocolate squares, finely chopped
- 1 1/3 cup Heavy cream
- ½ – ¾ tsp. Vanilla extract
- Combine milk, sugar, and chocolate in a saucepan. Cook over medium heat, stirring constantly, until just bubbly around the edges and the chocolate is melted. Do NOT boil.
- Transfer to a bowl and cool completely in the refrigerator for at least 2 hours.
- Stir in heavy cream and vanilla to taste. Chill for at least 30 minutes.
- Pour into the freezer canister and freeze as directed
Strawberry Sorbet
- 2/3 cups Fresh or individually frozen strawberries (thawed)
- 1/3 cup Granulated sugar
- 2/3 cup Water
- 2 tsps. Lemon juice
- In a medium saucepan, combine the sugar and water. Heat to a boil on medium-high, stirring occasionally. Reduce heat to low, and simmer until sugar is dissolved. Remove the pan from the heat, pour the liquid into a bowl, and cool in the refrigerator for 1 – 2 hours.
- Puree the strawberries with lemon juice in a blender or food processor. Pour into the liquid mixture bowl and stir until blended.
- Pour into the freezer canister and freeze as directed.
PRODUCT WARRANTY
Appliance 1 Year Limited Warranty
- Focus Electrics, LLC (“Focus Electrics”) warrants this appliance from failures in the material and workmanship for one (1) year from the date of original purchase with proof of purchase, provided the appliance is operated and maintained in conformity with the provided instructions Manual. Any failed part of the appliance will be repaired or replaced without charge at Focus Electrics’ discretion. This warranty applies to indoor household use only.
- This warranty does not cover any damage, including discoloration, to any non-stick surface of the appliance. This warranty is null and void, as determined solely by Focus Electrics, if the appliance is damaged through accident, misuse, abuse, negligence, scratching, or if the appliance is altered in any way.
For more manuals by Blogs, visit ManualsLibraryy
Back to Basics Ice Cream Maker-FAQs
How does a manual ice cream maker work?
A manual ice cream maker uses a hand crank attached to a metal canister that sits inside a wooden bucket filled with ice and salt. Turning the crank mixes and scrapes the ice cream mixture as it freezes.
How long does it take to make ice cream with this machine?
It usually takes about 20 to 30 minutes of churning to make ice cream, depending on the recipe and conditions.
Can I overmix the ice cream in the maker?
Yes. Overmixing can cause the texture to become icy. The machine should only churn until the mixture thickens—final freezing happens in your freezer for best results.
How much salt do I need to use with the ice?
Use a ratio of 5 cups of ice to 1 cup of salt. This creates the right cold temperature (8–12°F) to freeze the mixture evenly and smoothly.
Is this the same as an automatic ice maker in a fridge?
No. Manual ice cream makers and refrigerator ice makers are different. Fridge ice makers take about 90 minutes to make a batch of ice cubes, while ice cream makers churn and freeze a dessert mixture.
What is the working principle behind the ice cream maker?
It freezes and churns the mixture at the same time. Churning adds air and prevents large ice crystals from forming, giving ice cream its smooth texture.
What temperature should the ice cream base be before churning?
The base should be heated to about 175°F when preparing it, then fully cooled before adding it to the machine.
Why isn’t my ice cream thickening?
If the freezer bowl isn’t completely frozen, the ice cream won’t thicken. Make sure the bowl is dry before freezing, and freeze it for at least 24 hours before use.


