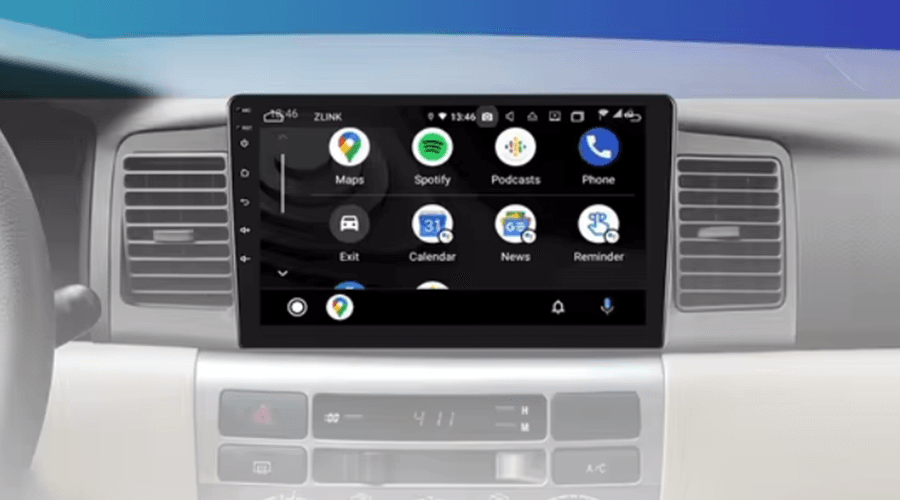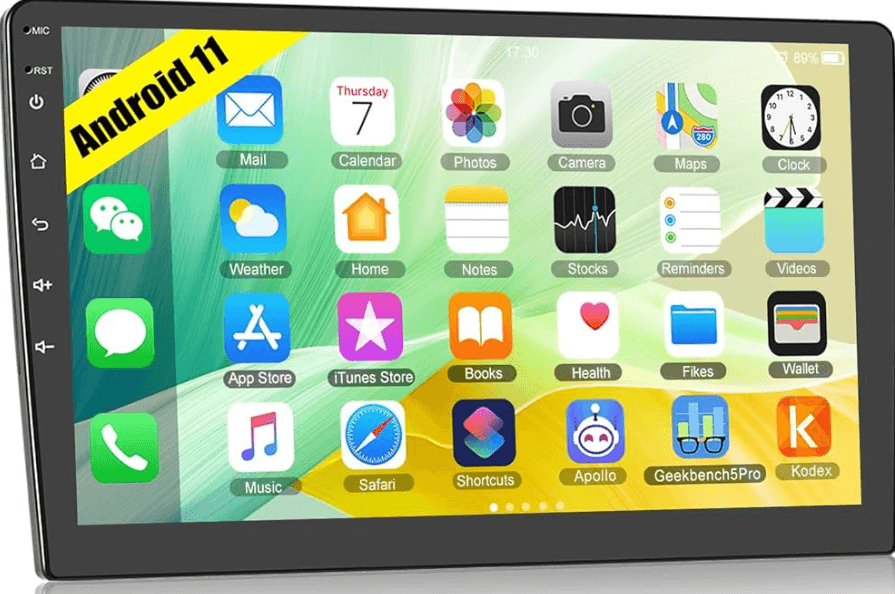
CAMECHO SHA16 Android Auto Car Multimedia Stereo
Instructions for use
For the sake of your safety, please don’t watch the video while driving and operating a machine; Please dispatch the volume to clearly while driving to the voice to the outside world. Before the operation, please read this manual and another manual system, and understand the use of manual and machine-related safety tips and warning signs, after reading in a readily accessible place for ready reference.
- Pay attention to traffic safety in the first place.
- If you encounter difficulty in operating the system, please again after he parked his car in a safe place.
- Don’t let children operate this machine, lest cause personal injury and damage to the machine.
- Please follow the traffic rules when using the satellite navigation function to drive.
- Please do not ban the use of electronic equipment or it is forbidden to use open flame such as gas stations, breweries, and strong electromagnetic interference regions, as it may cause danger.
- Don’t maintenance, or installation of the machine itself. Under the condition of the plug do not install or repair the machine, by not being trained in electronic equipment or vehicle accessories installation personnel or the lack of experience in installation and maintenance of this machine is very dangerous.
- Do not install the machine storage or in direct sunlight place, and don’t put it in another harmful material environment, especially the LCD screen, if the installation of the LCD screen is in the air conditioner near the air duct, please keep cool and hot air blows directly to the machine, otherwise it may damage the machine, even on the bus or personal injury.
- Please do not use sharp objects to paint the screen, and don’t use hard objects to press the screen, it will cause damage to the display or touch screen.
- In order to guarantee the normal operation of the machine, and prevent the occurrence of fire or an electric shock, please don’t expose the machine to damp air, more can’t liquid drying machines.
- Tips and warnings
To emphasize the important information in the user manual, please pay special attention to the label when you see it. It indicates some important warning and prompt information. - Machine Reset
- The first use of the system before or after the replacement battery, the machine must be reset.
- When the machine function is not normal, the machine must be reset.
- Click restore factory settings in the system settings interface, and make sure the machine is in the initial state.
- Use a pointed object, press the RESET button on the panel, or click the system RESET in the system settings, the machine will be RESET to turn it off, back to the factory the initial state.
- Tips and warnings
Installation
As shown in the figure above, there are three ways to install the machine, please choose one of them according to the actual situation. Of course, you can also re-install the new radio using the installation method of the original car radio.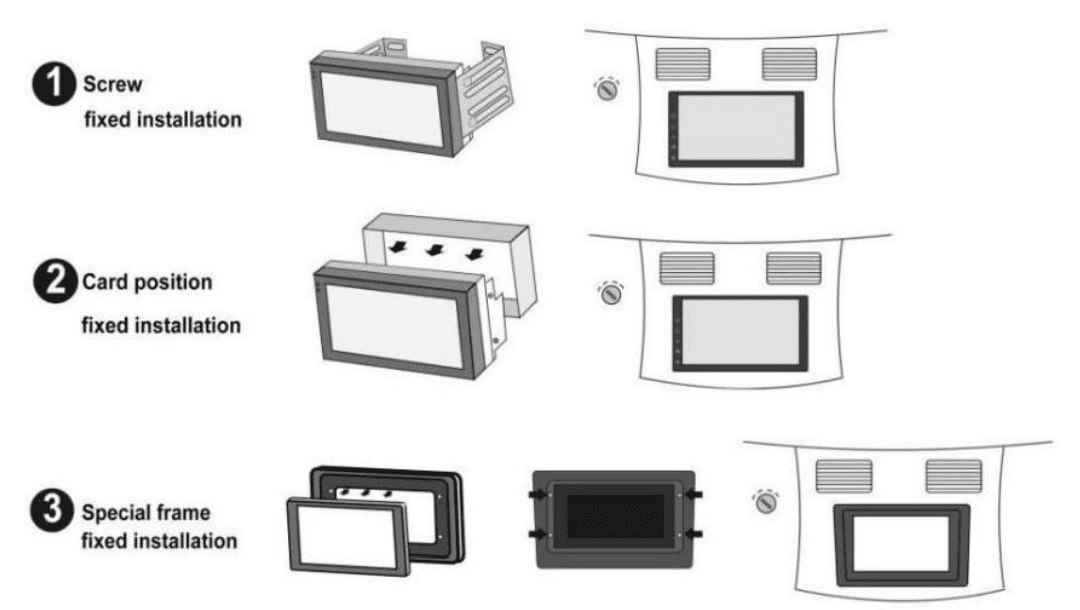
Wiring
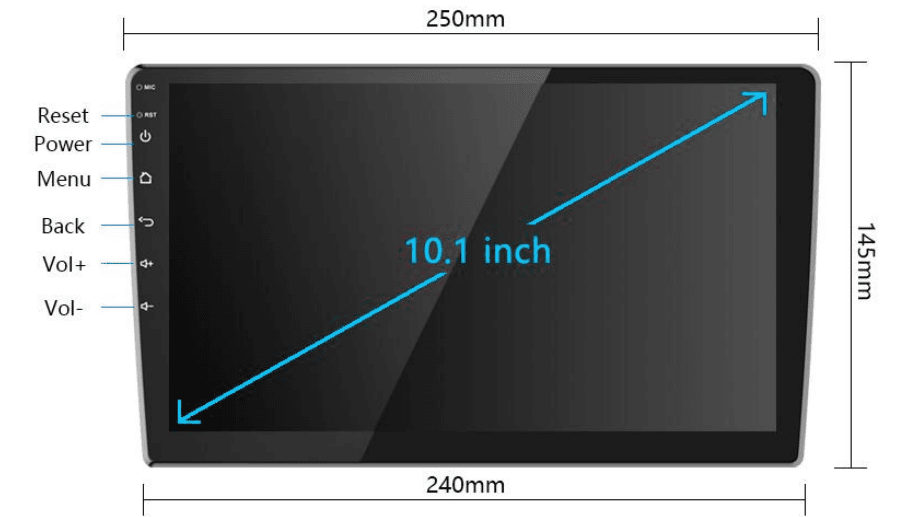
Product Dimension

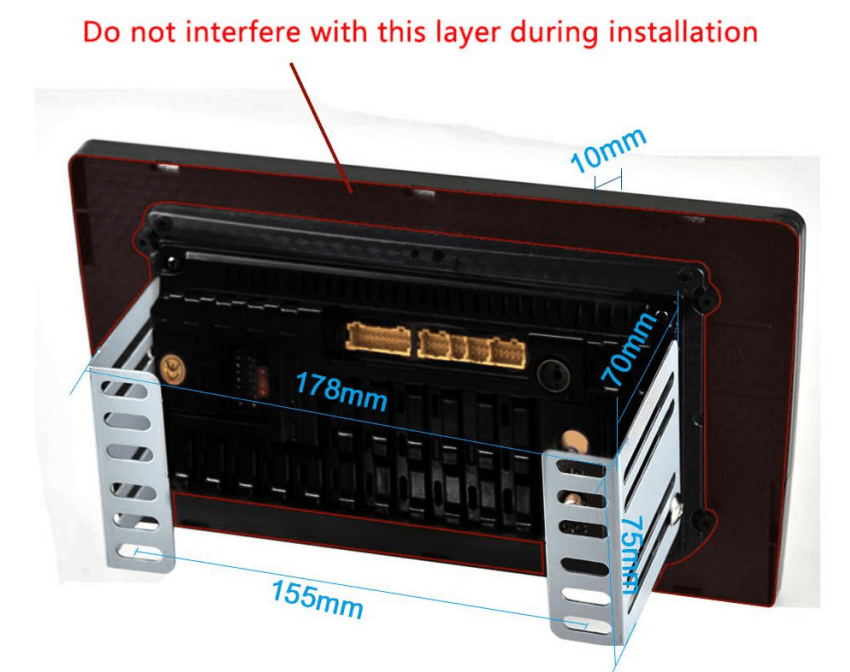
Installation Size

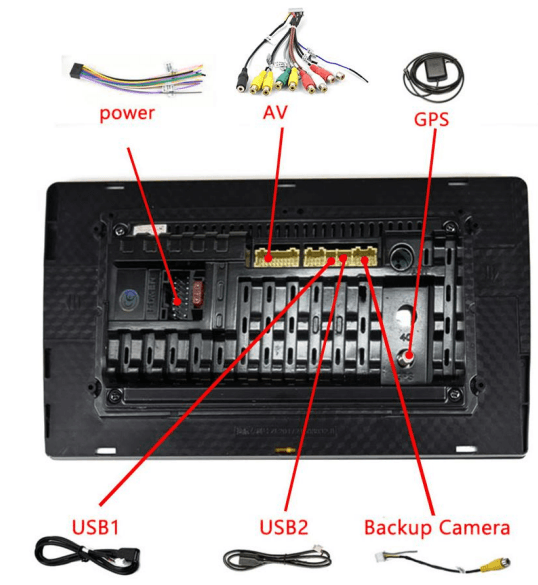
Back interface diagram

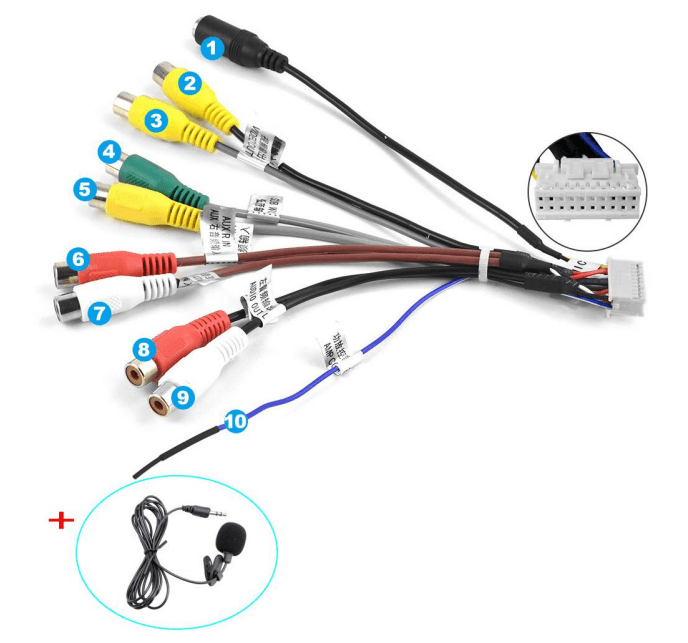
Harness

- MIC
- CVBS IN
- VIDEO OUT
- SUB WOOFER
- VIDEO IN
- AUX R IN
- AUX L IN
- AUDIO OUT R
- AUDIO OUT L
- AMP CONT
Installation Steps
1>How to find the power cord of the car?
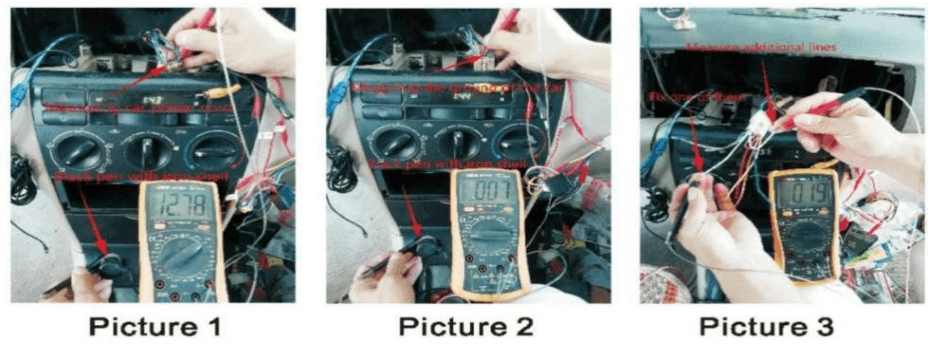
First, turn the car key to the ACC state. Then regulate the Universal Watch to the 20V gear. Connect the black stylus to the power ground (the outer ironclad of the cigar lighter) and use the red stylus to test each wire of the car. Normally a car has two wires about 12V(some cars only have one). That is the positive pole line. How to distinguish the ACC and memory line? Pull out the car key after you find the two positive pole lines. The memory line is the electrically charged one after you nu plug the key. *(Look the Picture 1)
2>How to find the ground wire of the car (negative pole)?
Turn the Universal Watch to the on/off beep gear. Then connect the black stylus to the power ground (the outer ironclad of the cigar lighter) and use the red stylus to test each wire except the two power lines. The energized one is the ground wire(negative pole). Some cars have two ground wires. *(Look the Picture 2)
3>How to find the horn line of the car?
Turn the Universal Watch to the on/off beep gear. Connect the black stylus to any wire except the power cord and ground wire. Then use the red stylus to test each remaining wire. The energized one is the horn wire. Then use the same method to find out the other horn lines. *(Look the Picture 3)
4>How to test whether the unit works properly?
When you get the unit, you’d better test the unit with a battery or power supply before installation. Wire connection method: Twist the red wire and yellow wire together and then connect them to the positive pole. Connect the black wire to the negative pole. Then press the switch to turn on the unit and get a horn to connect to the horn wire. (Two wires connected to the horn are of the same color. The white wire is supposed to be connected to the positive pole and the white one with the black part is connected to the negative pole of the horn. You can make no distinction between the positive and negative poles of the horn.) Then test the function of the unit.
5>How to connect Bluetooth?
Turn on the unit initiate the Bluetooth function of the phone, and then search for the user name of the unit. Click the connect button and the phone will show it is connected. If you want to play music with Bluetooth, press the function transition button to switch to Bluetooth mode and then click songs on your phone. You can also dial numbers on your phone to make a phone call with Bluetooth.
6>How to fix the unit?
Since each car has a different way of fixing the unit and the location of the screws is different, there is no defined way to fix the unit. You may consult the fixing method of the original unit. If it was fixed by tightening screws with the steel angle, you can unload the steel angle of the original unit to both sides of our unit, then use the electrician tape to tighten the steel angle (since the screw hole size is probably unmatched). If the original unit was fixed with an iron frame, you can fix the iron frame of our unit in the car first, and then push the unit to fasten it. If the size does not fit, you can wrap the unit with electrician tape to increase the volume of the unit, and then put it in and fasten it. Or you can think of a better way to fix it, but anyway, you can fix it.
7>How to install the navigation antenna?
First, you should tighten the screws of the navigation antenna and the unit. Then you must fix the navigation antenna module in a place that has sunlight or on the windshield. (That’s very important because poor installation will affect navigation signals.)
8>The default factory mode password?
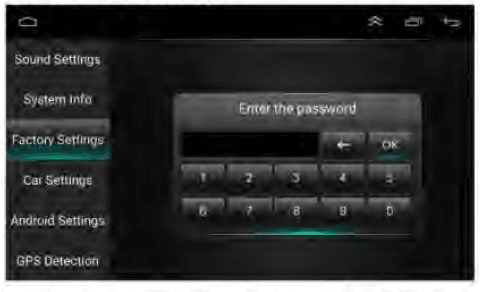
Factory mode password: 8888. (Different products, the password may be different)
9>The default Bluetooth PIN code?
Bluetooth Pin Code: 0000/1234
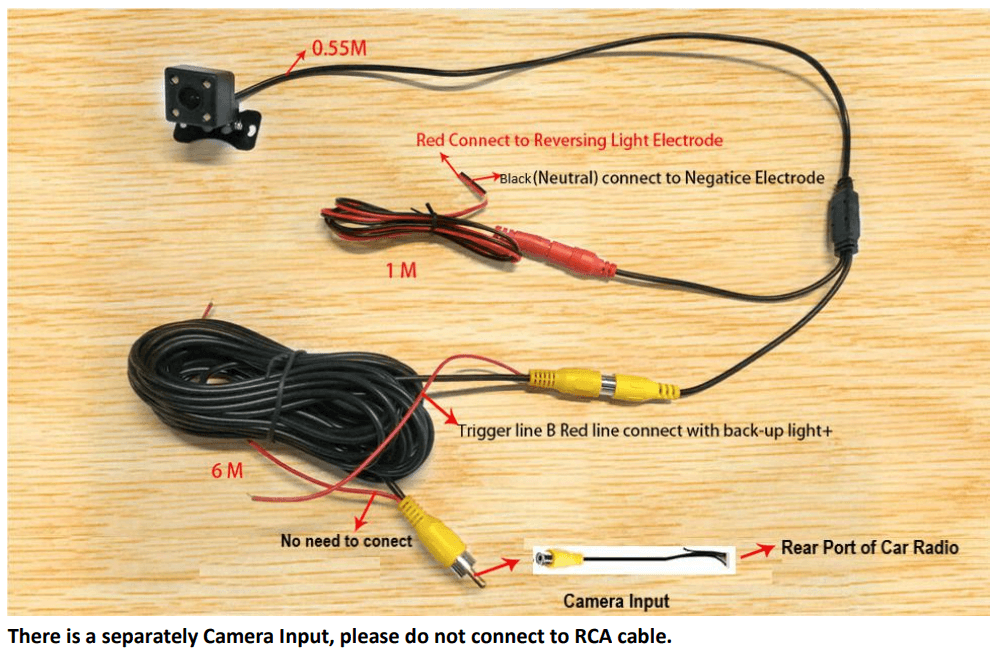
Schematic diagram of reversing camera wiring
There is a separate Camera Input, please do not connect to the RCA cable.
Here are the complete steps of camera wiring.
- Camera power cable: red and black.
- Red connection to reverse the positive light, black to reverse the negative light.
- Camera RCA cable: yellow port.
- Insert it on the radio rear input cable. It’s a single cable with a yellow port with the label “REVERSE/BACK/REAR CAMERA”)
- Trigger Cable
- near the radio: the red wire A — NO Need to connect
- near the camera: the red wire B — connects to car’s rear light positive.
When you pull the rear gear, the device will automatically display the rear view image.
- Monitor (Not Included in the Package)
- Camera Power Source
- Camera (Optional) Co
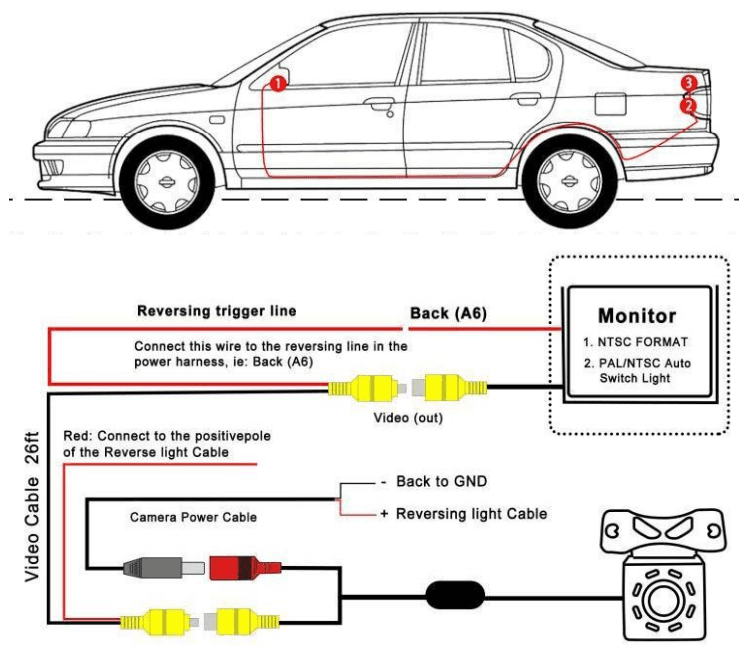
Wiring method:
Preparation tools: tape, screwdriver, wire cutters, plastic prying tool, traction wire.
- Step 1: Insert the original accessory camera wire harness into the rear license plate light hole, and then directly snap it in.
- Step 2: Remove the trunk lining, pull out the waterproof rubber ring, use the tow line to pull the camera cable out of the suitcase, insert the camera wire harness and data connector into the hole of the baffle, and finally reinstall the waterproof rubber ring.
- Step 3: Remove the decorative lining board on the left side of the trunk, plug the data power integrated extension cable with the camera harness, and lead out from the rear trim panel along the original car harness.
- Step 4: Peel off the sealing strip on the left side door of the rear seat, route the cable into the rear cockpit, and pull out the data power integrated plug and the remaining extension cords.
- Step 5: Recover the trunk, and insert the extension cord into the gap of the plastic panel along the rubber strip on the door side, all the way to the cockpit door.
- Step 6: Remove the storage box under the headlights, pass through the top of the OBD interface, and then connect the wiring interface to the navigator interface.
Fixed machine
- Fix the bracket on the left and right sides of the machine with screws, and adjust the position of the bracket according to the actual installation.
- Screw the machine in the mounting position of the central console of the car.
Parameters
| Category | Parameter |
| Motherboard | SHA16 / 23 |
| Memory Configuration | 1G & 2G |
| Storage Configuration | 16G & 32G |
| CPU | 8227L |
| Core | 4 |
| Main Frequency | 1.3GHz |
| Android Version | 11.0 |
| Radio | FM/RDS |
| Communication | WIFI |
| Rear Camera Standard | AHD720 & CVBS |
| Satellite Positioning | GPS |
| Amplifier | 7388 |
| Sound Decoder | ST7729-HiFi |
| Carplay | Wireless car play & Wired car play |
| Android Auto | Wireless Android Auto & Wired Android Auto |
| Bluetooth Version | 4.2 |
| Colorful Lights | White light |
| USB | Dual USB |
| External Microphone | Support |
| Video Output | Support |
| DVR | Support |
| OBD2 | Support |
| DAB+ | Support |
| Split Screen | Support |
| Navigation | Offline Maps & Online Maps |
Introduction to basic functions
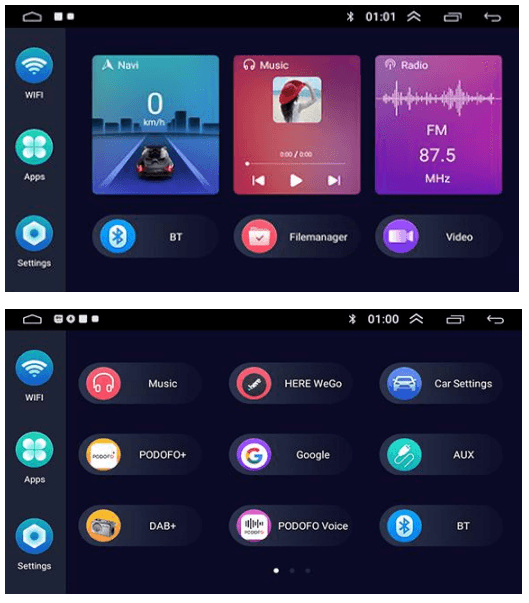
Main interface
Icon Introduction

On Screen – Main Interface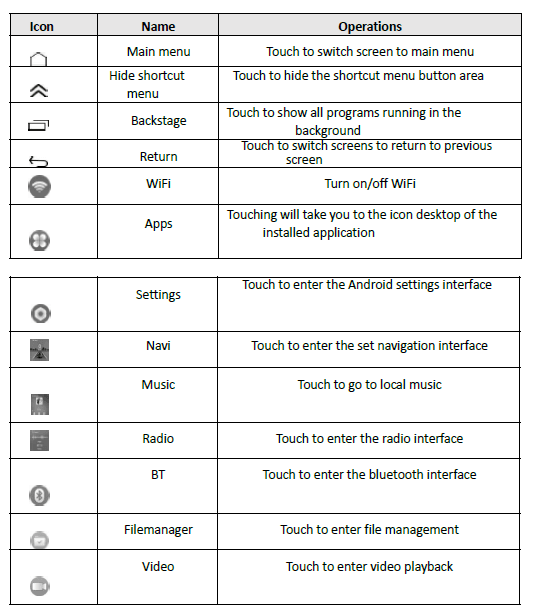
Car Audio settings

Hi-Fi function, high-fidelity sound quality, perfect playback of the original sound field, can perfectly reproduce the sound of music or video, without distortion, bringing you the most authentic sound. Hi-Fi function brings you an immersive experience. Click to enter Sound Effects, you can adjust and set the sound effects, click HiFi, the font turns red, indicating that the HiFi function is being used; click HiFi again, the font turns gray, indicating that the HiFi function is turned off.
Steering wheel control studying
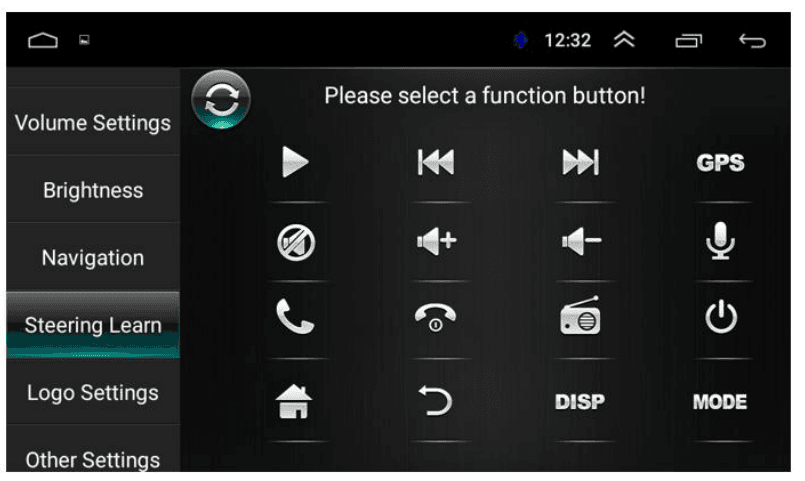
Please press and hold the bottom of the steering wheel button and click the corresponding icon.
Please follow the below steps to connect the wires:
- Find your car steering wheel control button signal wires, it is normally located under your driving wheel.
- The signals have two, one gives “+” voltage and another gives GND voltage.
- Check our unit power cable, there is a wire labeled “keyl” or ” keyl”
- Connect the “+” Voltage wires to the “keyl” or “keyl” wires.
- Connect the GND wire tothe GND wires of our unit.
- Go to this option to learn the steering wheel control function.
- Press the relative function icon on the unit.
- Press your steering wheel control button and there will be a voltage on our unit to memory.
- Step by step to finalize all the buttons.
Car Setting:
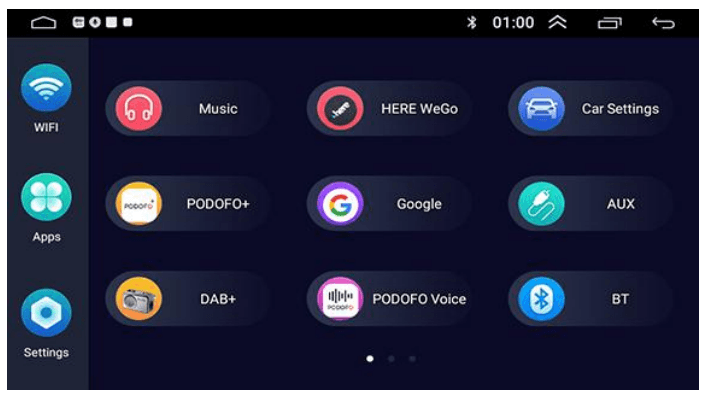
This APP is specially designed for Car Android Device
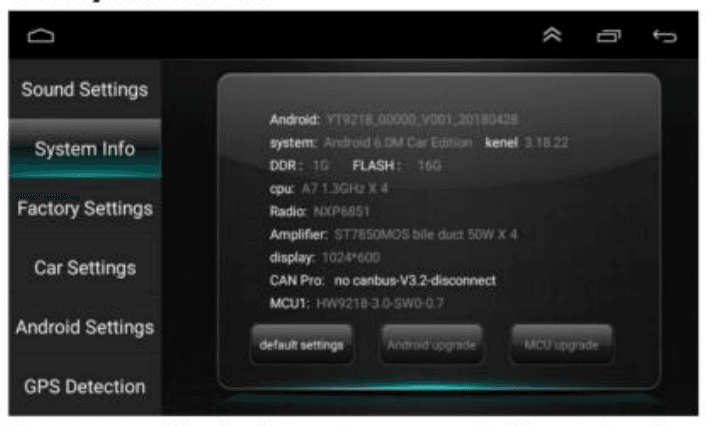
System Info:
Users can check the unit system information here
(The above information is for reference only and is based on actual configuration).
Factory Settings
Users can check the unit system information here (The above information is for reference only and is based on actual configuration).
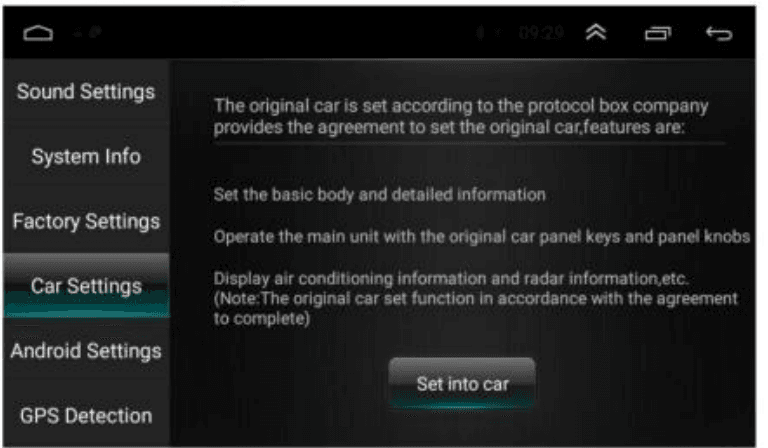
Car Settings
If users want to use the CANBUS to decode the car system do have the original steering wheel control, air conditioner etc, please contact with the sellers to buy the suitable CANBUS Decoding Box and make relative changes.
Android Settings
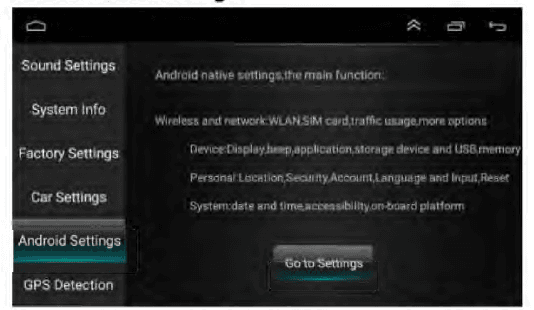
Users Press the “Go to settings” here to go to the android setting mode.
GPS Detection:
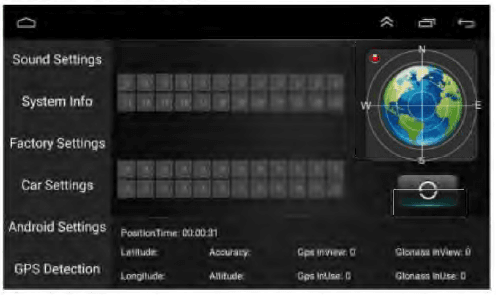 If users can not get the position in the navigation software, users can go here to check the hardware performance. If users can not find the GPS signal, please check if the GPS antenna is placed the right way, make sure the receiver side is up, and the side with stickers is down.
For more manuals by CAMECHO, visit ManualsLibraryy
CAMECHO SHA16 Android Auto Car Multimedia Stereo-FAQs
How does an Android car stereo work?
Android car stereos connect to your phone via Bluetooth and a built-in Wi-Fi network. Once paired, Android Auto launches automatically when you enter your vehicle.
How do I install Android Auto on my car stereo?
Simply plug your phone into the car’s USB port using a compatible cable. Follow the on-screen prompts to complete the setup. You may need to update Android Auto before proceeding.
How can I change Android Auto settings?
Go to Settings > Communication > Android Auto and adjust the settings. You can enable or disable automatic startup when connecting via USB.
What functions does a car stereo have?
A car stereo (or head unit) controls music playback, connects to media sources, and allows users to adjust audio settings.
What can I do with Android Auto?
Android Auto mirrors select phone apps on your car’s display, including GPS navigation, music streaming, messaging, calling, and voice commands.
How do I activate Android Auto?
Connect your Android phone to the vehicle using a USB cable and follow the instructions on the car’s multimedia system. Select “Yes” when prompted.
Can I connect my phone to my car stereo?
Yes, most modern cars have a USB port that allows you to connect your phone for audio playback and Android Auto functionality.
What is the latest Android operating system?
The most recent Android version is Android 15, released on October 15, 2024.

