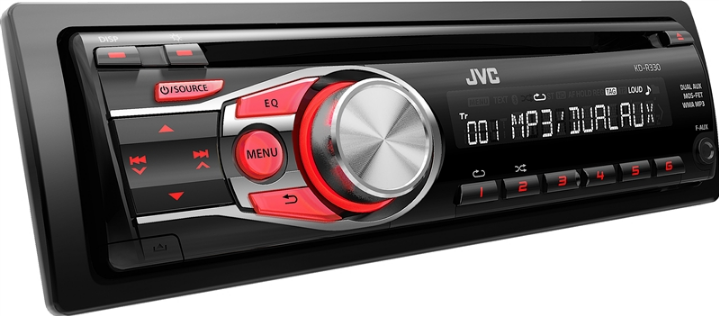
JVC KDR330 Car Receiver
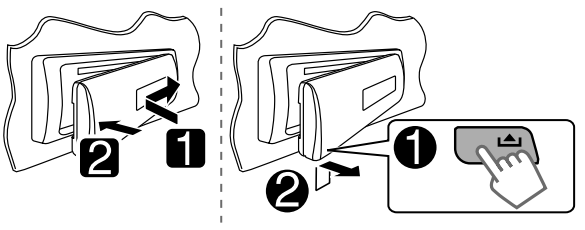
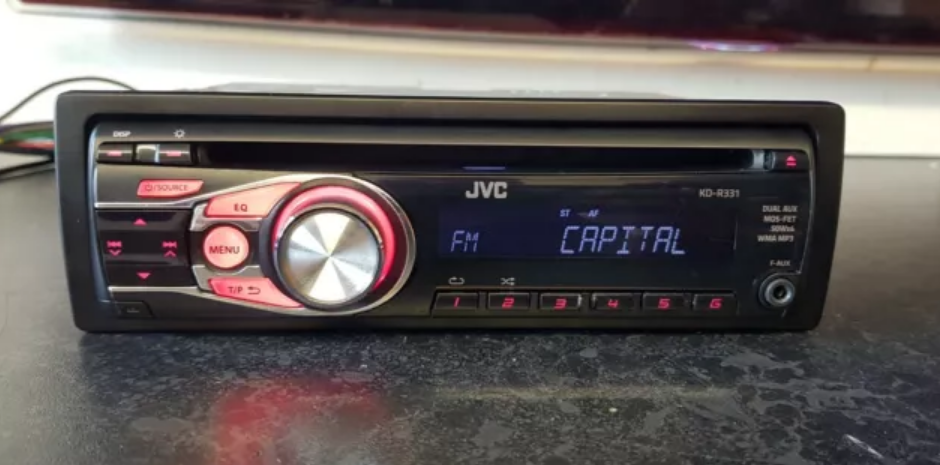
How to attach/detach the control panel
How to reset your unit
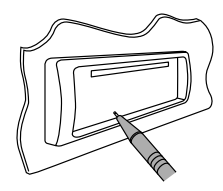
Your preset adjustments will also be erased.
How to forcibly eject a disc
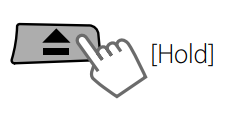
- Be careful not to drop the disc when it ejects.
- If this does not work, reset your unit.
Maintenance
Cleaning the unit: Wipe the dirt off the panel with a dry, soft cloth or silicone. Failure to observe this precaution may result in damage to the monitor or unit.
Cleaning the connector: Wipe off dirt on the connector of the unit and the panel. Use a cotton swab or cloth.
Canceling the display demonstration
- Turn on the power.


- Select DEMO off


- Finish the procedure

Setting the clock
- Turn on the power


- Set Clock

- Select Clock Set

- Adjust the hour

- Adjust the minute

- Finish the procedure

Preparing the remote controller
When you use the remote controller for the first time, pull out the insulation sheet.
Warning (to prevent accidents and damage):
- Do not install any battery other than CR2025 or its equivalent.
- Do not leave the remote controller in a place (such as a dashboard) exposed to direct sunlight for an extended period.
- Store the battery in a place where children cannot reach it.
- Do not recharge, short, disassemble, heat the battery, or dispose of it in a fire.
- Do not leave the battery with other metallic materials.
- Do not poke the battery with tweezers or similar tools.
- Wrap the battery with tape and insulate it when throwing away or saving it.
About discs
This unit can only play the CDs with:

Discs that cannot be used:
- Discs that are not round.
- Discs with coloring on the recording surface or discs that are dirty.
- You cannot play a Recordable/ReWritable disc that has not been finalized. (For the finalization process, refer to your disc writing software and your disc recorder instruction manual.)A
- 3-inch CD cannot be used. Attempting to insert using an adapter can cause a malfunction.
Handling discs:
- Do not touch the recording surface of the disc.
- Do not stick tape, etc., on the disc, or use a disc with tape stuck on it.
- Do not use any accessories for the disc.
- Clean from the center of the disc and move outward.
- Clean the disc with a dry silicon or soft cloth. Do not use any solvents.
- When removing discs from this unit, pull them out horizontally.
- Remove the rims from the center hole and disc edge before inserting a disc.
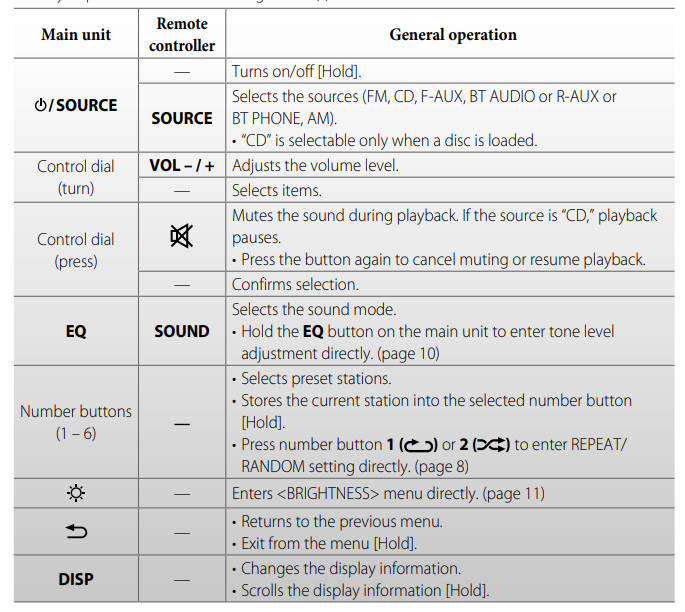
Basic operations
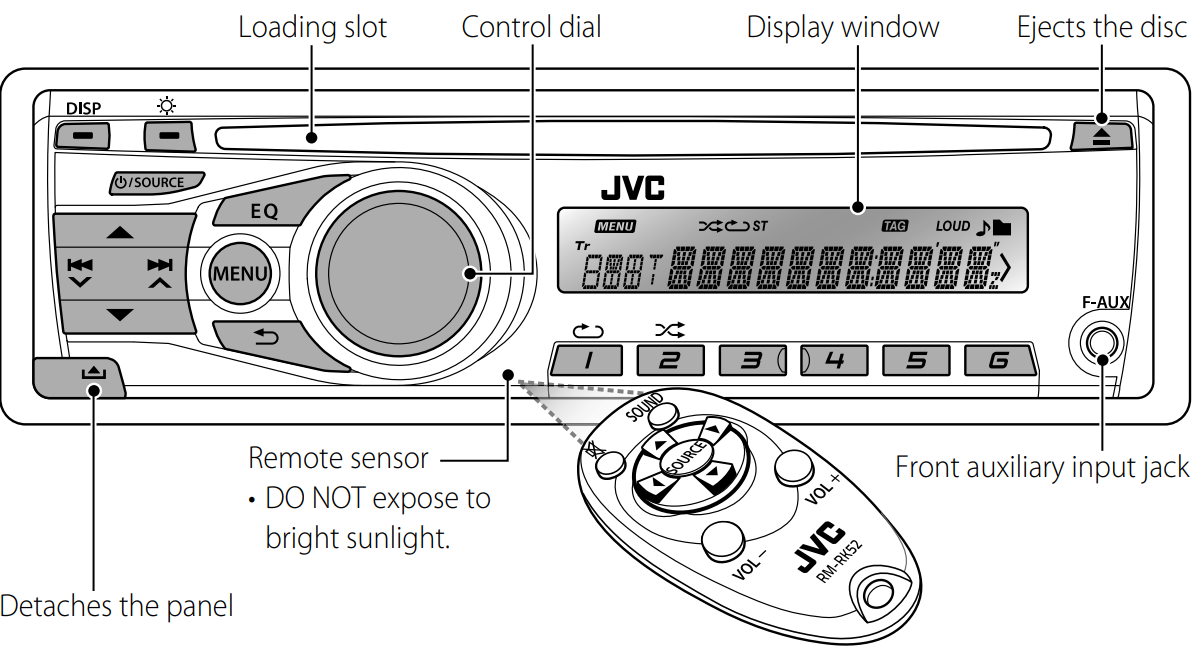
When you press or hold the following button(s)…
Listening to the radio

- [Press] Searches for stations automatically.
- [Hold] Searches for stations manually. “M” flashes, then press the button repeatedly.
Improving the FM reception
Reception improves, but the stereo effect will be lost.
To restore the stereo effect, repeat the same procedure to select.
Automatic presetting (FM)—SSM (Strong-station Sequential Memory)
You can preset up to 18 stations for FM. While listening to a station.
“SSM” flashes and local stations with the strongest signal are searched and stored automatically
To preset another 6 stations, repeat the above procedure by selecting one of the other SSM setting ranges.
Changing the display information
Manual presetting (FM/AM)
You can preset up to 18 stations for FM and 6 stations for AM.
 Tune in to a station you want to preset
 “PRESET MODE” flashes
 SSelectpreset number. Preset number flashes and “MEMORY”
appears
Selecting a preset station
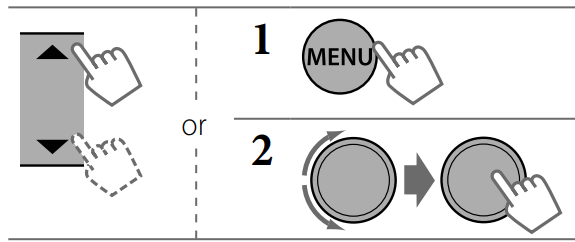
- Pressing the number buttons (1 – 6) can also select the preset stations (1 – 6).
Listening to a disc

Stopping playback and ejecting the disc
If the ejected disc is not removed within 15 seconds, it is automatically inserted into the loading slot.
Selecting a track/folder
 Select the older of the MP3/WMA
 [Press] Selects track. [Hold] Fast-forwards or reverses the track.
Selecting a track/folder from the list

- If the MP3/WMA disc contains many tracks, you can fast search (±10, ±100) through the disc by turning the control dial quickly.
- To return to the previous menu, press
Connecting the other external components
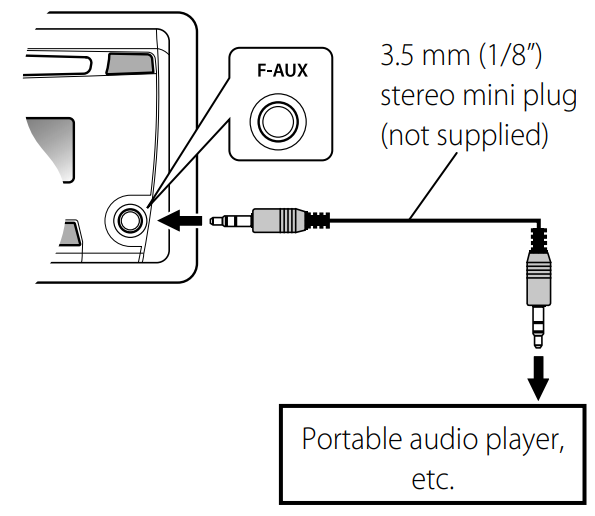
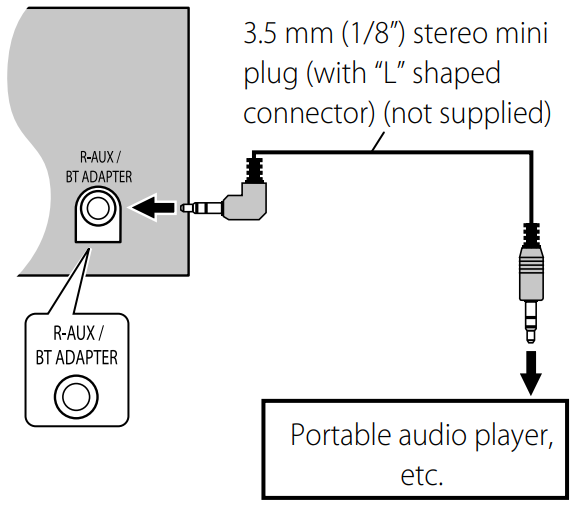
You can connect an external component to the auxiliary input jack on the control panel (F-AUX) and/or on the rear side of the unit (R-AUX). Summary of using the external components through the auxiliary input jacks:

On the control panel (F-AUX):
On the rear panel (R-AUX)
Selecting a preset sound mode
You can select a preset sound mode suitable for the music genre.
FLAT = NATURAL = DYNAMIC = VOCAL BOOST = BASS BOOST = USER = (back to the beginning) While listening, you can adjust the subwoofer and tone level of the selected sound mode
Adjust the level: SUB.W *: 00 to 08
BASS/ MID/ TRE: –06 to +06
The sound mode is automatically stored and changed to “USER.”
* Subwoofer level is adjustable only when <L/O MODE> is set to <SUB.W>. (page 11)
Storing your mode
You can store your adjustments in memory


 Adjust the sound elements of the selected tone.
- BASS [Initial: 80 Hz, 00, Q1.0]
- Frequency: 60/ 80/ 100/ 200 Hz
- Level: –06 to +06
- Q: Q1.0/ 1.25/ 1.5/ 2.0
- MIDDLE [Initial: 1.0 kHz, 00, Q1.25]
- Frequency: 0.5/ 1.0/ 1.5/ 2.5 kHz
- Level: –06 to +06
- Q: Q0.75/ 1.0/ 1.25
- TREBLE [Initial: 10.0 kHz, 00, Q FIX]
- Frequency: 10.0/ 12.5/ 15.0/ 17.5 kHz
- Level: –06 to +06
- Q: Q FIX
- Repeat steps 2 and 3 to adjust other tones. The adjustments made are automatically stored and changed to “USER.”
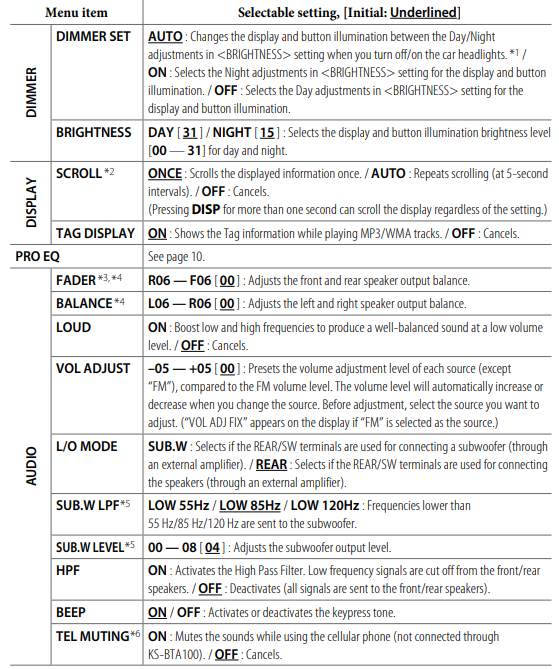
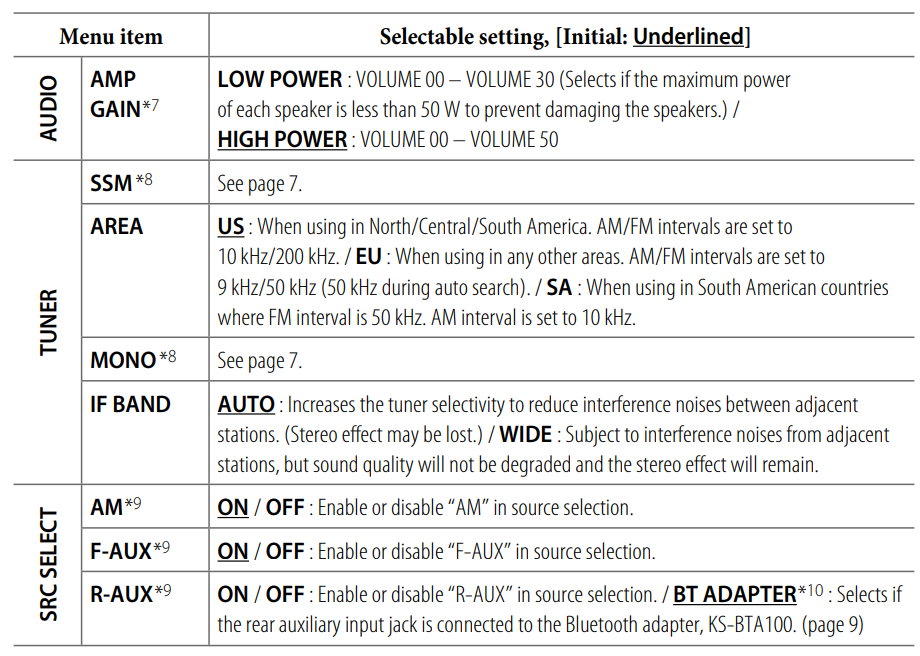
Menu operations

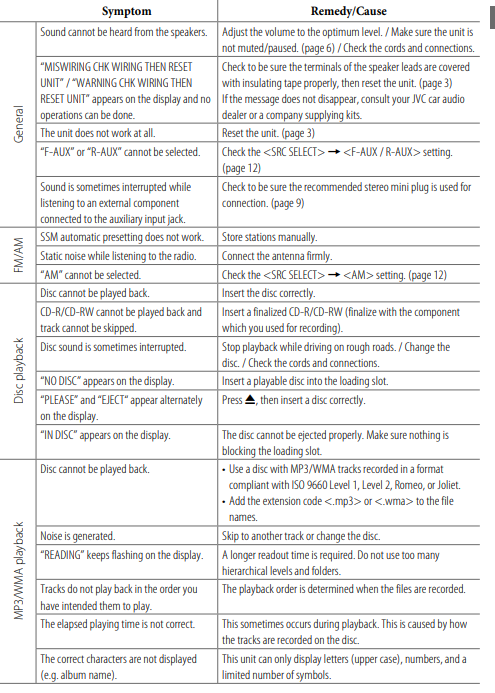
Troubleshooting
FOR MORE MANUALS BY JVC, VISIT MANUALSLIBRARYY
JVC KDR330 Car Receiver-FAQs
Does the JVC KDR330 have Bluetooth?
Yes! The JVC KDR330 supports Bluetooth for wireless music streaming and hands-free calling. It also has an AUX input for wired connections.
How do I connect my phone to the JVC KDR330 via Bluetooth?
Turn on the car stereo and enable Bluetooth mode.
On your phone, go to Bluetooth settings and search for “JVC KDR330”.
Select it and enter the PIN “0000” (if prompted).
Once paired, you can stream music and take calls.
How do I adjust the sound settings on the JVC KDR330?
Use the EQ (Equalizer) settings in the menu to customize bass, treble, balance, and fader for optimal sound.
How do I save radio stations as presets?
Tune to your desired station using TUNER/BAND (switch between FM/AM).
Press and hold a preset button (1-6) to save the station.
How do I turn off demo mode?
Press and hold SEL (Select) for 2+ seconds.
Navigate to “DEMO” using the controls.
Select “DEMO OFF” and confirm.
How do I reset the JVC KDR330 to factory settings?
Press and hold both SEL (Select) and the power button for several seconds.
Note: This will erase all saved presets and settings.
How do I delete a paired Bluetooth device?
Enter Bluetooth mode and go to Settings > Pairing > Device Delete.
Select the device and confirm deletion.
Can I use an FM transmitter with the JVC KDR330?
Yes! Set the FM transmitter to an unused frequency (e.g., 87.5–108.0 FM) and match it on the car stereo.
How do I improve Bluetooth audio quality?
Keep your phone close to the stereo.
Reduce interference by turning off other wireless devices.
Re-pair the device if audio cuts out.
Does the JVC KDR330 support USB/AUX input?
Yes! You can connect:
USB drives for MP3/WMA playback.
AUX cable (3.5mm) for external devices.






 Tune in to a station you want to preset
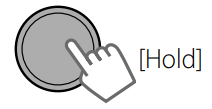 “PRESET MODE” flashes
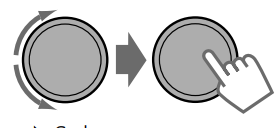 SSelectpreset number. Preset number flashes and “MEMORY”
